
Universal Quick-Release
Obliczymy ostateczną cenę na podstawie wybranego pliku. Sprawdzisz ją i zaakceptujesz przed płatnością.
Wstępna wycena dla PETG
0,95 € – 1,17 € netto (bez VAT)
Dla pliku: example_quickrelease_0.2mm_PETG_MINI_1h15m.gcode
To wstępna wycena jednego pliku. Dokładną cenę poznasz przed zamówieniem.
Plik i założenia wyceny
Plik użyty do wyceny
Średnia wycena orientacyjna: 1,06 € netto (środek widełek).
- Masa podana przez autora
- 10 g
- Czas druku podany przez autora
- 1,25 godz.
- Materiał u źródła
- PET
- Materiał wyceny
- PETG
- Drukarka wyceny
- Bambu Lab P1S - 0.4 nozzle
- Proces wyceny
- 0.20mm Standard
Orientacyjna wycena wyłącznie wybranego pliku, oparta na masie i czasie druku podanych przez autora. Warianty plików nie są sumowane. Ostateczna cena zostanie obliczona po analizie pliku.
Zapisane na tym urządzeniu.

A set of quick-release models to add to an existing project.
- Ocena
- 5 / 5
- Polubienia
- 93
- Pobrania
- 231
- Wydruki
- 2
- Wyświetlenia
- 1783
- Oceny
- 2
Aktualizacja u źródła:
Informacje o modelu
- Źródło
- Printables
- Kategoria
- Mechanical Parts
- Licencja
- Creative Commons — Attribution
Add a quick release to ANYTHING!
- Add quick release to any existing project! Just import the STLs into your slicer, align the mounts and BAM! Quick released!
- (Coming Soon) Print-ready models for mounting a thing to a thing with a quick release
- Handlebars
- Zip Ties/Velcro straps
Includes 3 parts
- Outside - attach to the permanent thing
- Inside - attach to the object needing to be released
- Quick Release Bar - the magic
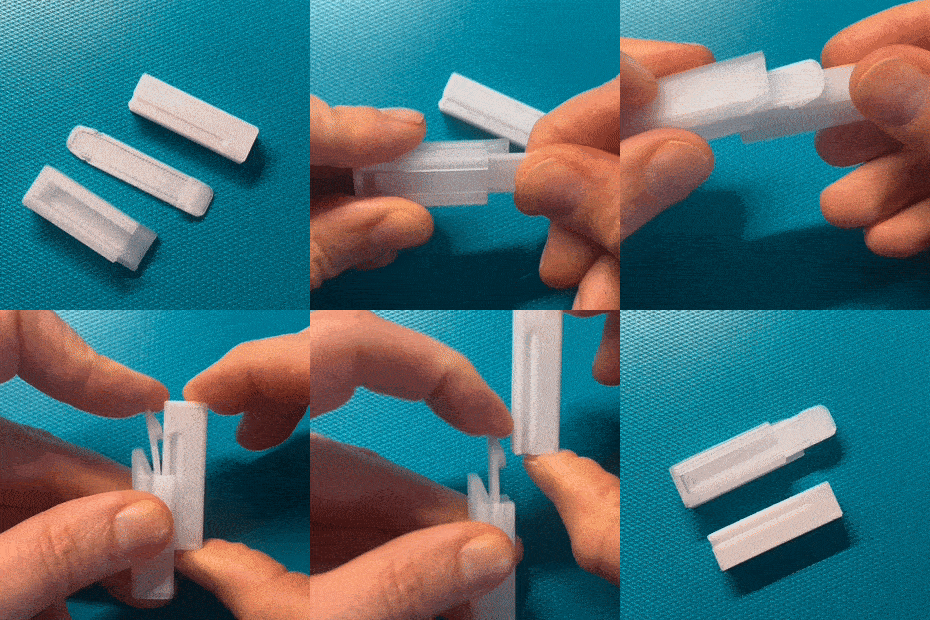
Background
I recently wanted to make a quick release mount for a bike light (here), but couldn't find any good reference models. I ended up taking inspiration from some other models and really felt like it took way too long to dial in the design for my needs. I wanted to share a simplified version for anyone to use in a project, even if it is just for future me. I also wanted to update it to be more universal and accessible to anyone to add to their model right in their slicer.
Instructions
Add the “Outside” to your stationary mount
- import the stationary part of your model (handlebar mount, wall mount, ect.) into your slicer of choice
- import Outside file into slicer
- align Outside so that model intersects with your part. Should print as 1 part.
- NOTE: be aware of clearance for the quick release bar to bend
- confirm orientation of Outside is acceptable (see instructions below)
(GIF to come)
Adding the “Inside” to your releasable object
- import the removable part of your model (flashlight mount) into your slicer of choice
- import Inside file into slicer
- align Inside so that model intersects with your part. Should print as 1 part.
- NOTE: be aware of clearance to access the quick release button
(GIF to come)
Note: Quick Release Bar can be printed entirely separately
Assembly (see gif)
- Push Quick Release Bar into the Outside and listen for snap!
- NOTE: Orientation of the bar is important! Refer to images as reference. If you install it upside-down, take some pliers and pull it out and try again.
Print Recommendations
Outside
- Material: Any should work
- Orientation: see gcode file orientation for strength
- Layer Height: .2
- Infill: 15%
- Perimeters/Walls: 2 (~.8mm in total width)
- Brim: not required
- Supports: None for recommended orientation
Inside
- Material: Any should work
- Orientation: see gcode file orientation for minimal bridging
- Layer Height: .2
- Infill: 15%
- Perimeters/Walls: 2 (~.8mm in total width)
- Brim: not required
- Supports: None for recommended orientation
Quick Release Bar
- Material: PETG required for flex
- Orientation: see gcode file orientation for strength
- Layer Height: .2
- Infill: 15%
- Perimeters/Walls: 4-5 (~1.75mm in total wall width)
- Brim: not required
- Supports: None for recommended orientation