
Universal Quick-Release
We calculate the final price from your selected file. You review and accept it before payment.
Preliminary estimate for PETG
€0.95 – €1.17 net (excluding VAT)
For file: example_quickrelease_0.2mm_PETG_MINI_1h15m.gcode
This is an estimate for one file. You’ll confirm the exact price before ordering.
File and estimate settings
File used for this estimate
Average indicative estimate: €1.06 excluding VAT (range midpoint).
- Weight reported by the author
- 10 g
- Print time reported by the author
- 1.25 hr
- Source material
- PET
- Estimate material
- PETG
- Estimate printer
- Bambu Lab P1S - 0.4 nozzle
- Estimate process
- 0.20mm Standard
Indicative estimate for the selected file only, based on the author’s weight and print time. File variants are not added together. The final price is calculated after file analysis.
Saved on this device.

A set of quick-release models to add to an existing project.
- Rating
- 5 / 5
- Likes
- 93
- Downloads
- 231
- Makes
- 2
- Views
- 1,783
- Reviews
- 2
Updated at source:
Model information
- Source
- Printables
- Category
- Mechanical Parts
- License
- Creative Commons — Attribution
Add a quick release to ANYTHING!
- Add quick release to any existing project! Just import the STLs into your slicer, align the mounts and BAM! Quick released!
- (Coming Soon) Print-ready models for mounting a thing to a thing with a quick release
- Handlebars
- Zip Ties/Velcro straps
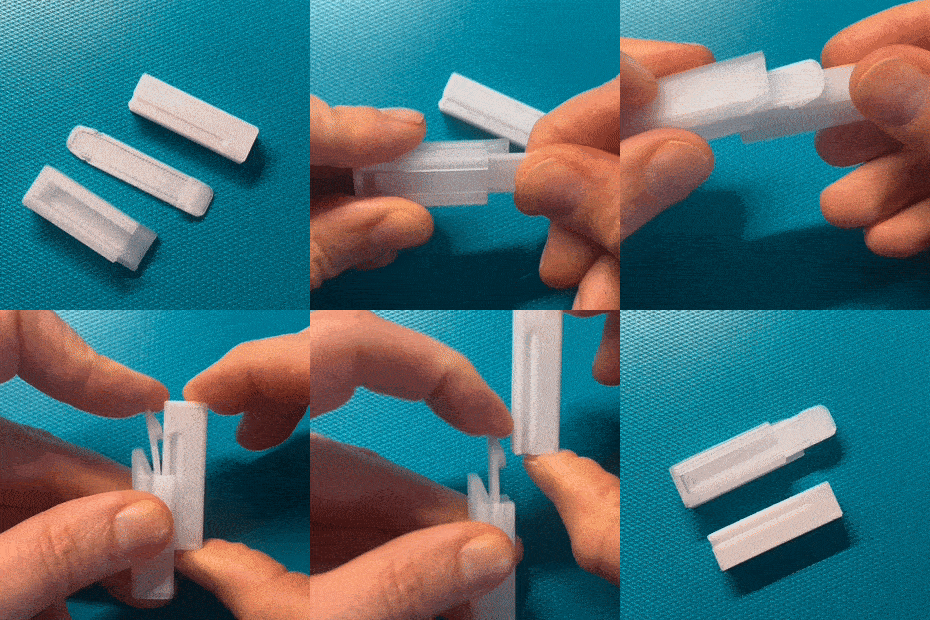
Includes 3 parts
- Outside - attach to the permanent thing
- Inside - attach to the object needing to be released
- Quick Release Bar - the magic
Background
I recently wanted to make a quick release mount for a bike light (here), but couldn't find any good reference models. I ended up taking inspiration from some other models and really felt like it took way too long to dial in the design for my needs. I wanted to share a simplified version for anyone to use in a project, even if it is just for future me. I also wanted to update it to be more universal and accessible to anyone to add to their model right in their slicer.
Instructions
Add the “Outside” to your stationary mount
- import the stationary part of your model (handlebar mount, wall mount, ect.) into your slicer of choice
- import Outside file into slicer
- align Outside so that model intersects with your part. Should print as 1 part.
- NOTE: be aware of clearance for the quick release bar to bend
- confirm orientation of Outside is acceptable (see instructions below)
(GIF to come)
Adding the “Inside” to your releasable object
- import the removable part of your model (flashlight mount) into your slicer of choice
- import Inside file into slicer
- align Inside so that model intersects with your part. Should print as 1 part.
- NOTE: be aware of clearance to access the quick release button
(GIF to come)
Note: Quick Release Bar can be printed entirely separately
Assembly (see gif)
- Push Quick Release Bar into the Outside and listen for snap!
- NOTE: Orientation of the bar is important! Refer to images as reference. If you install it upside-down, take some pliers and pull it out and try again.
Print Recommendations
Outside
- Material: Any should work
- Orientation: see gcode file orientation for strength
- Layer Height: .2
- Infill: 15%
- Perimeters/Walls: 2 (~.8mm in total width)
- Brim: not required
- Supports: None for recommended orientation
Inside
- Material: Any should work
- Orientation: see gcode file orientation for minimal bridging
- Layer Height: .2
- Infill: 15%
- Perimeters/Walls: 2 (~.8mm in total width)
- Brim: not required
- Supports: None for recommended orientation
Quick Release Bar
- Material: PETG required for flex
- Orientation: see gcode file orientation for strength
- Layer Height: .2
- Infill: 15%
- Perimeters/Walls: 4-5 (~1.75mm in total wall width)
- Brim: not required
- Supports: None for recommended orientation