
Customizable Bowtie Dogtag (For dogs with style!)
Obliczymy ostateczną cenę na podstawie wybranego pliku. Sprawdzisz ją i zaakceptujesz przed płatnością.
Zapisane na tym urządzeniu.

Classy accessory for your dog - including space for name and contact info on the back. Easy to print.
- Ocena
- 5 / 5
- Polubienia
- 76
- Pobrania
- 294
- Wydruki
- 3
- Wyświetlenia
- 1306
- Oceny
- 3
Aktualizacja u źródła:
Informacje o modelu
- Źródło
- Printables
- Kategoria
- Pets
- Licencja
- Creative Commons — Attribution — Noncommercial — NoDerivatives
| Welcome to GlennovitS3D. Join the Club on Printables.com to support creation of new models, get access to exclusive models, and get commercial rights, to sell prints. Join today - GlennovitS3D - or check out my model collection or my popular models |
Your dogs new favorite accessory is here! Classy and good looking bowtie for your dog - of course with possibility to add name and contact information on the back. Easily customizable in Prusaslicer 2.6
Overview
There are 2 versions for now - a smooth version and a version with hexagons. These can both be printet in a single color, or in multiple colors with simple filament change at the wanted layer height. Looking forward to see your versions!
You can scale it up/down in slicer to fit the size of your best friend.
(Our golden retriever ‘Dirch’ enjoys his new classy look! :-) He chose the hexagon version)
Add name in Prusaslicer
In Prusaslicer 2.6 you can add text to this model before printing. It's easy to do. Just follow these steps, and your dog is one step closer to a classy dogtag

Add the bowtie to the printbed as usual.
- Orbit around the model so that you see the model from below (the side that is facing the bed)
- Rightclick the bowtie and press 'Add negative volume' -> 'Text'
- Enter the name
- Enter the size and depth of the text
- Height: fx. 10 mm
- Depth: 0.4 mm
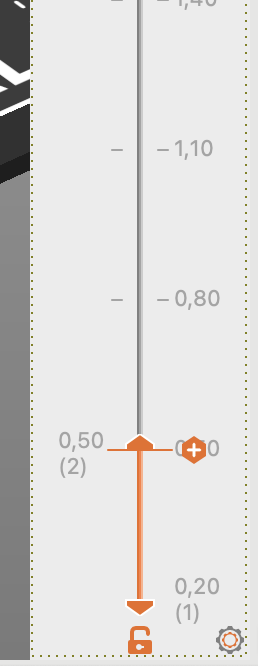
- Adjust the placement of the text on the bowtie
- Slice and print! ⚡
(If you want the name to be extra visible, print the first layer in different color, to make the text stand out more. Just slide the layer indicator on the right, down to layer 2 and press the small + sign. This add a filament change command to the printer. )
Print instructions
This should be fairly easy to print - but this might help
- Speed on first layer: 50% (or less) (if adding text to the backside, there will be very small perimeters - to ensure good bed adhesion take your time here!)
- Placement: Flat on bed
- Nozzle: I have printed with 0.6 mm - smaller should work just as well
I hope you'll enjoy this model and share your finished prints as makes!
Happy printing!