
Birb - the birdie Shaped Air Quality Sensor
Obliczymy ostateczną cenę na podstawie wybranego pliku. Sprawdzisz ją i zaakceptujesz przed płatnością.
Zapisane na tym urządzeniu.

An open source 3d printable take on the Canairi / Birdie Co2 sensor
- Ocena
- 5 / 5
- Polubienia
- 41
- Pobrania
- 278
- Wydruki
- 4
- Wyświetlenia
- 2290
- Oceny
- 2
Aktualizacja u źródła:
Informacje o modelu
- Źródło
- Printables
- Kategoria
- Electronics
- Licencja
- Creative Commons — Attribution — Share Alike
The Birb is the Word!
A couple of years back I discovered the “Canairi” Air Quality sensor on Kickstarter. I loved the cool design but felt that it was lacking in functionality (and using sensors that weren't really very valuable for my needs. So I set about designing a 3d printable enclosure that uses standard off the shelf parts and can share sensor data over MQTT.
More detailed build instructions can be found on my blog here!
To build the Birb you will need:
- All the 3d printed parts (you can choose which backplate you want, either with or without the stand)
- Feather format microcontroller (ideally with wifi. I use the Unexpected Maker Feather ESP32-S2). If you want to use my code, you'll need to set it up with CircuitPython.
- SG90 Micro Servo
- Adafruit SGP40 Mox Gas Sensor (you can use an SGP30 but you'll need to adjust code)
- Adafruit AHT20 Temp/Humidity Sensor (or a BME680)
- 2 short QT/ST connector cables
- 3 x M3 nuts and machine screws
- Adafruit USB-C breakout board
- Some silicon wire. Soldering iron, solder etc
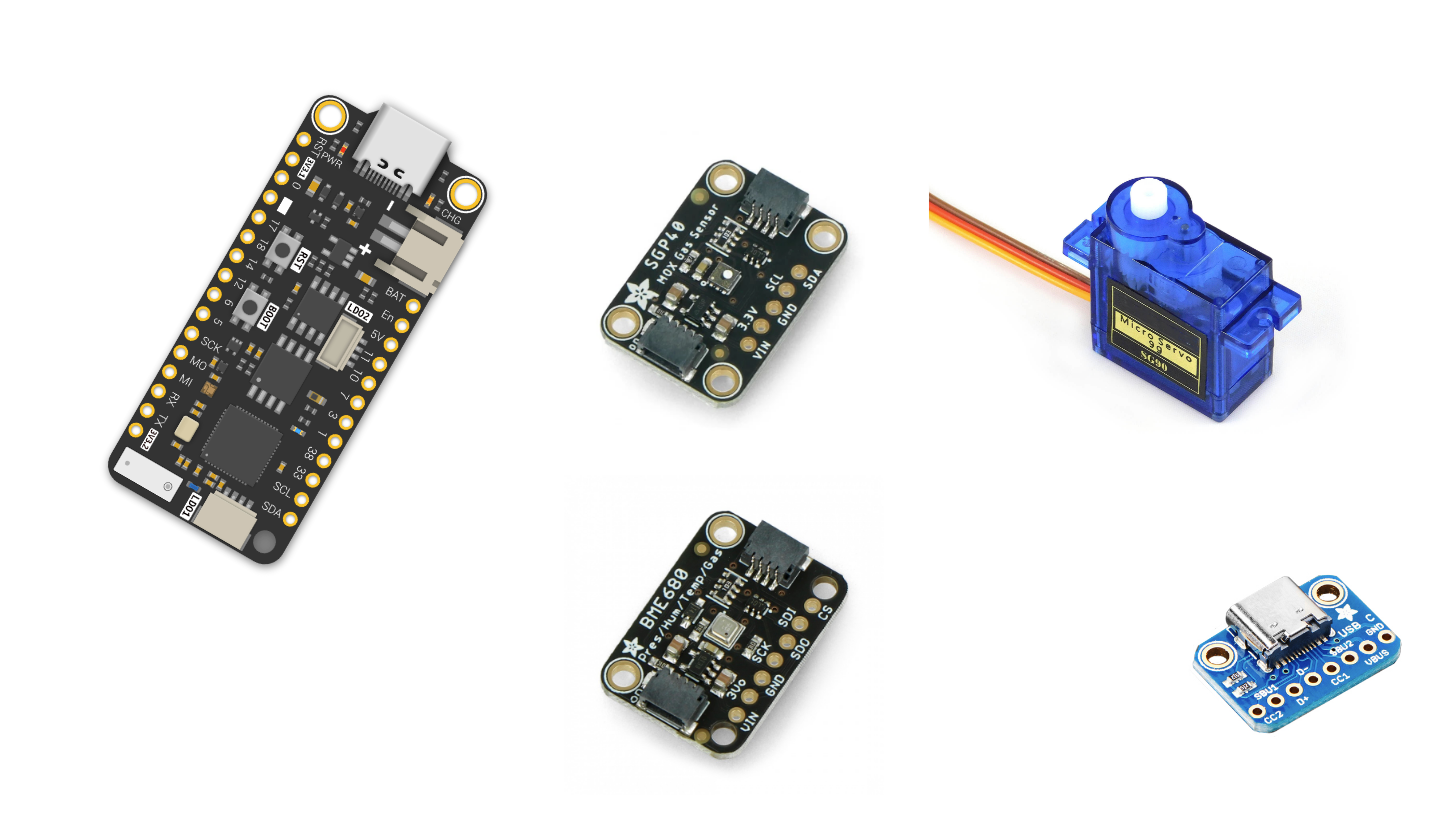

Build notes:
You can get the CircuitPython code from my Github (link coming soon)
Don't forget to add your network details etc to the secrets.py file
You can't program the board using the USB-C breakout, this port only provides power, not data. Feel free to substitute for Micro-USB if thats your thing.
I printed dozens of iterations getting the push-fit for the boards perfect however there is some variance in the boards so you may want to use a little sticky-tac to hold them in place.
To publish the data I send it over MQTT to my HomeAssistant server running Mosquito MQTT, however you can utilise any MQTT server you like (such as Adafruit.io). Data is currently published in 10 second intervals but that is easy to change in code.
Aside from the back cover, most of the parts are held in place with a little dab of superglue for extra security.
Feel free to swap out the sensors to suit your own needs!
Unlike the original Canairi, the Birb isn't designed to run on batteries, however the Feather boards DO have a JST connector and battery charging circuitry, so you could bodge a Lipo battery into the enclosure and it should charge via the bottom USB port.
See the photo below for how to wire it up:
