
Rewind Dry Box using DAISO 5.5 liter canister
Obliczymy ostateczną cenę na podstawie wybranego pliku. Sprawdzisz ją i zaakceptujesz przed płatnością.
Zapisane na tym urządzeniu.

Dry box having filament rewind function using DAISO airtight containers.
- Ocena
- 0 / 5
- Polubienia
- 7
- Pobrania
- 23
- Wydruki
- 0
- Wyświetlenia
- 610
- Oceny
- 0
Aktualizacja u źródła:
Informacje o modelu
- Źródło
- Printables
- Kategoria
- Accessories
- Licencja
- Creative Commons — Attribution
Motivation for Creation 作成した動機
FLSUN's V400 3D printer draws nearly one meter of filament when in use due to its construction.
FLSUN社のV400という3Dプリンターは、その構造上使用時に1メートル近い長さのフィラメントを引き出します。
This makes it difficult to put the filament back into the dry box and cap the PTFE tube when it is removed from the 3D printer. This is because the filament is too long to put back in and will become slack inside, causing it to come off the spool.
そのためにドライボックスに入れた途中まで使ったフィラメントを3Dプリンターから取り外すと、引き出されたフィラメントをドライボックスの中に戻してPTFEチューブにキャップを被せることが困難になります。フィラメントを戻す長さが長すぎて中で弛んでしまい、スプールから外れてしまうからです。
So I made a dry box with a rewind function; it is not an automatic rewind due to the high friction of the PTFE tubing. You have to manually push the filament in. This is not necessarily a disadvantage, as it also prevents it from being pulled in too far.
そこで巻き取り機能付きのドライボックスを作りました。PTFEチューブの摩擦が大きいので自動巻き取りにはなっていません。手動でフィラメントを押し込んでやる必要があります。これは引き込みすぎを防ぐ意味もあるので、必ずしもデメリットではありません。
Printed parts and purchased parts
印刷部品と購入部品
Please print the following parts.
以下の部品を印刷してください。
- axle
- axle holder
- bottom plate
- hub female
- One of the following
- hub male
- hub male 608Z
- hub male LM8UU
- meter holder
- One of the following
- slip hub 250
- slip hub 300
- slip hub 350
- spring guard
- spring
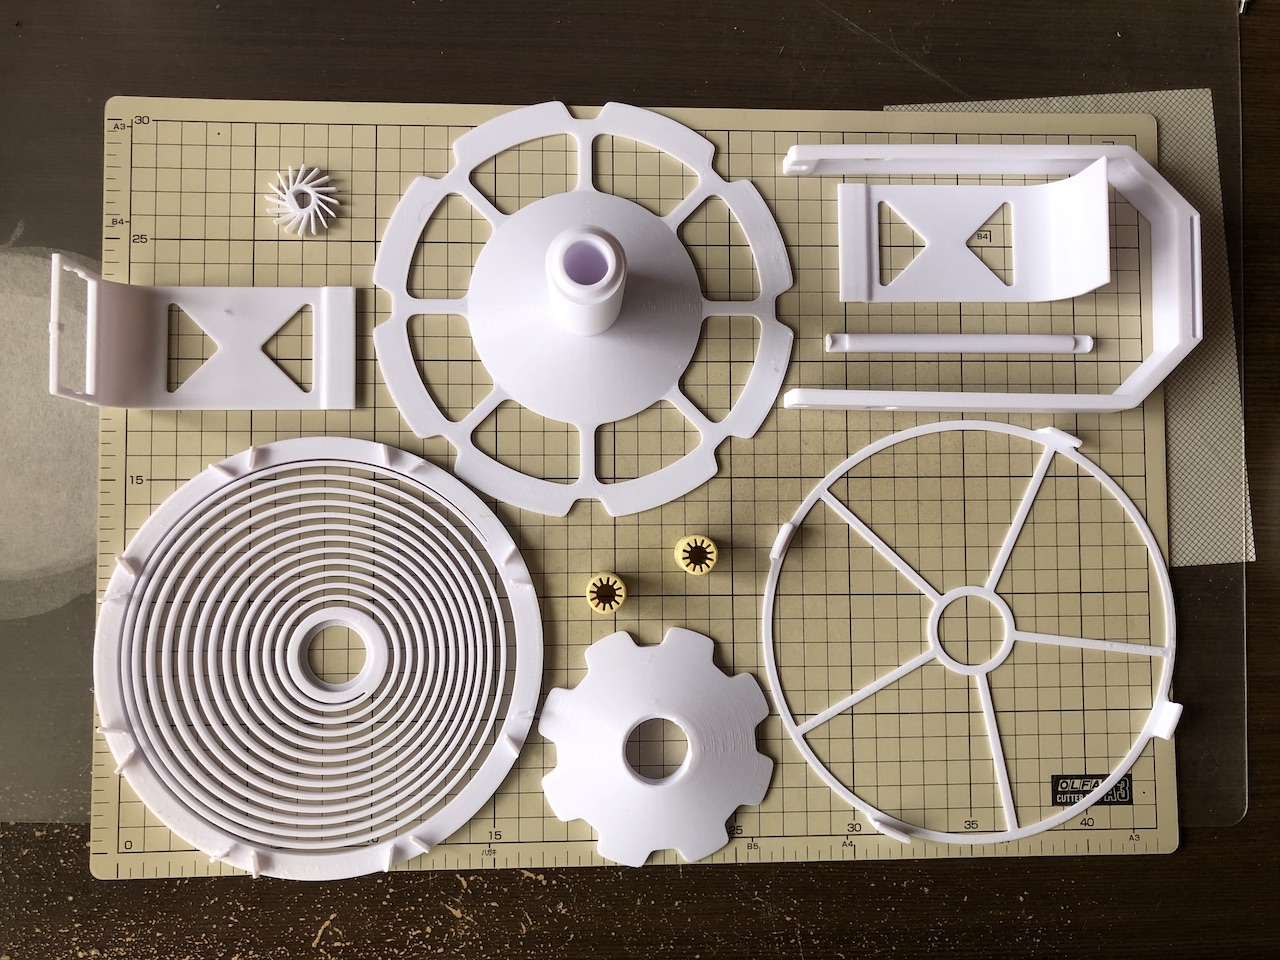
See original model information for purchased parts.
購入部品はオリジナルモデルの情報を参照してください。
About hub male
I first made a "hub male 608Z" because I saw the precedent and thought bearings were a must. The bearing contains grease with a hardness appropriate for the intended use, but if the grease is too hard to turn the spool, it is necessary to degrease the bearing using parts cleaner, which is time-consuming.
先例を見てベアリングが必須なのかと思ったので、最初は「hub male 608Z」を作りました。ベアリングには想定している用途に合わせた固さのグリスが入っているのですが、これがスプールを回すには硬すぎる場合、パーツクリーナーなどを使って脱脂する必要があるため手間がかかります。
So next, I made "hub male LM8UU". This is intended for use with solid polymer bearings like the one pictured above. This eliminates the need for degreasing.
そこで次に「hub male LM8UU」を作りました。これは上の写真のような固体ポリマーのベアリングを使うことを想定しています。これなら脱脂の手間は不要です。
However, I found that the rewinding function works well even if I use the "hub male 608Z" without two bearings. So I made a "hub male" with the bearing hole plugged.
しかし私は「hub male 608Z」にベアリングを入れないで使っても巻き戻し機能が十分に機能することに気づいてしまいました。そこでベアリングの穴を塞いだ「hub male」を作成しました。
So, please use the "hub male" for the first try. If you are not satisfied with it, try "hub male LM8UU" or "hub male 608Z".
そういったわけですので最初に試すのは「hub male」にしてください。これに不満を感じる場合に「hub male LM8UU」や「hub male 608Z」を試すと良いでしょう。
How to assemble 組み立て方
Step 1: hub male
When using "hub male 608Z", press-fit two 608 bearings.
「hub male 608Z」を使う場合は608ベアリングを二つ圧入します。


When using "hub male LM8UU", press-fit two bearings. I used the following.
「hub male LM8UU」を使う場合もベアリングを二つ圧入します。私は以下のものを使いました。


The "hub male" can be used as is.
「hub male」はそのまま使えます。
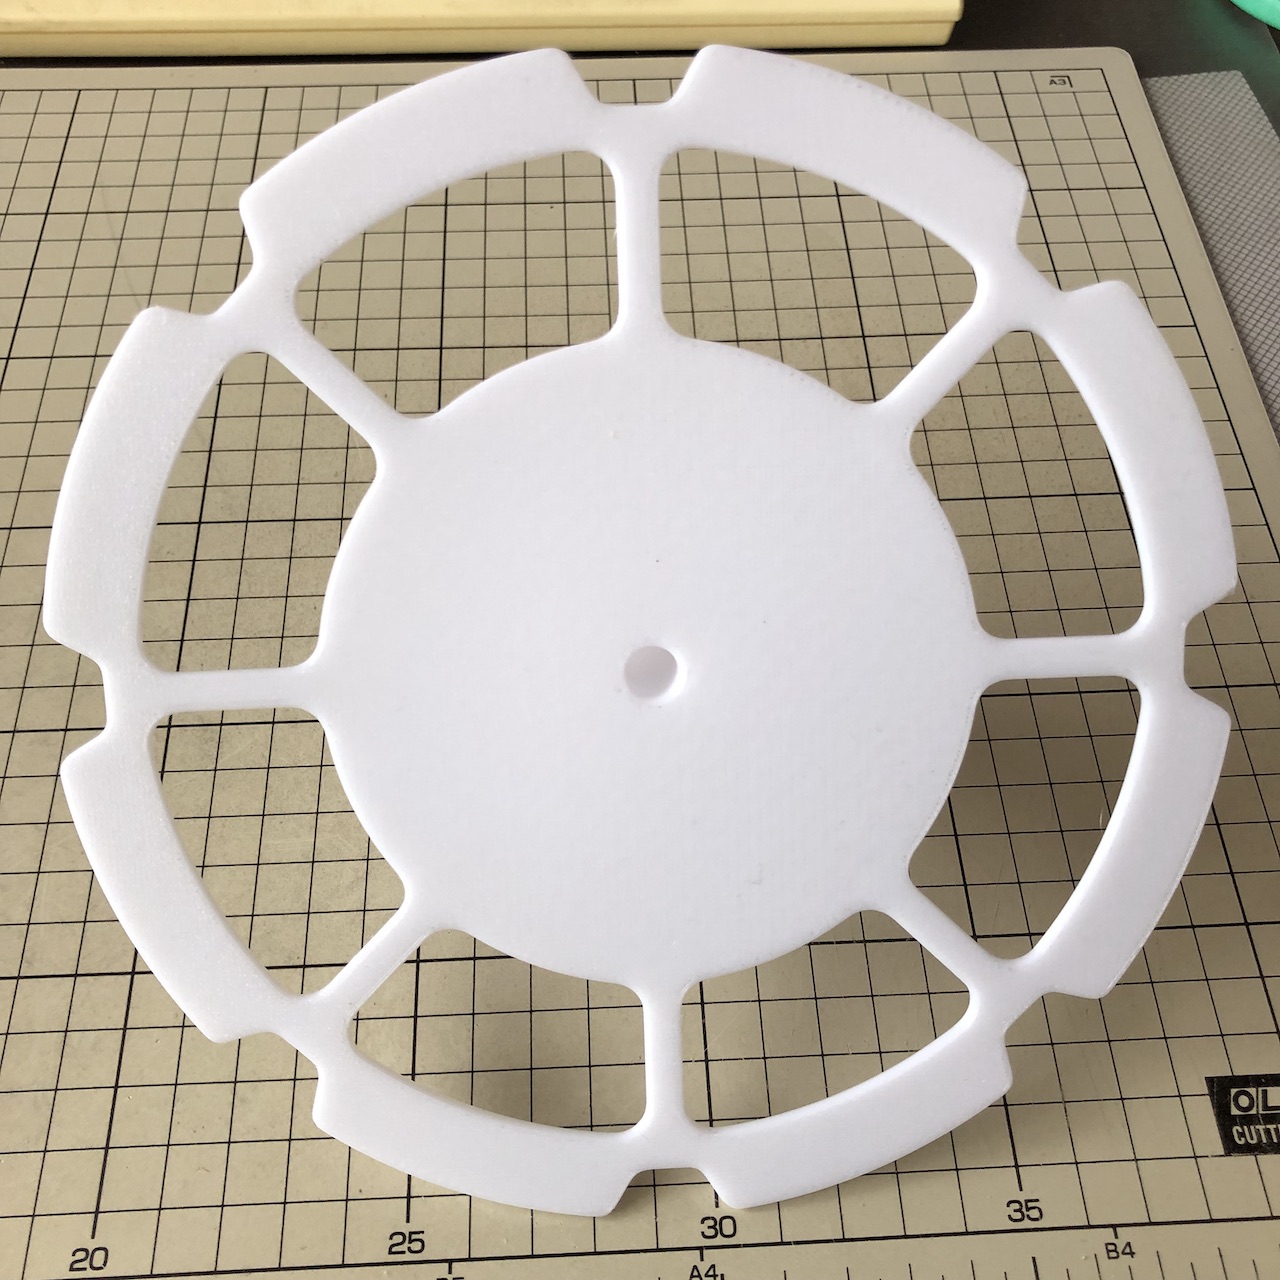

Step 2: slip hub
Next, fit the "slip hub" into the center of the "spring". The "slip hub" has a stepped side and a flat side. Insert the "slip hub" so that the stepped side is on the outside.
次に「spring」の中心に「slip hub」をはめ込みます。「slip hub」には段差がある面と平らな面があります。段差がある面が外側になるようにはめ込んでください。
The photo on the left shows the inside and the photo on the right shows the outside.
左側の写真が内側、右側の写真が外側です。
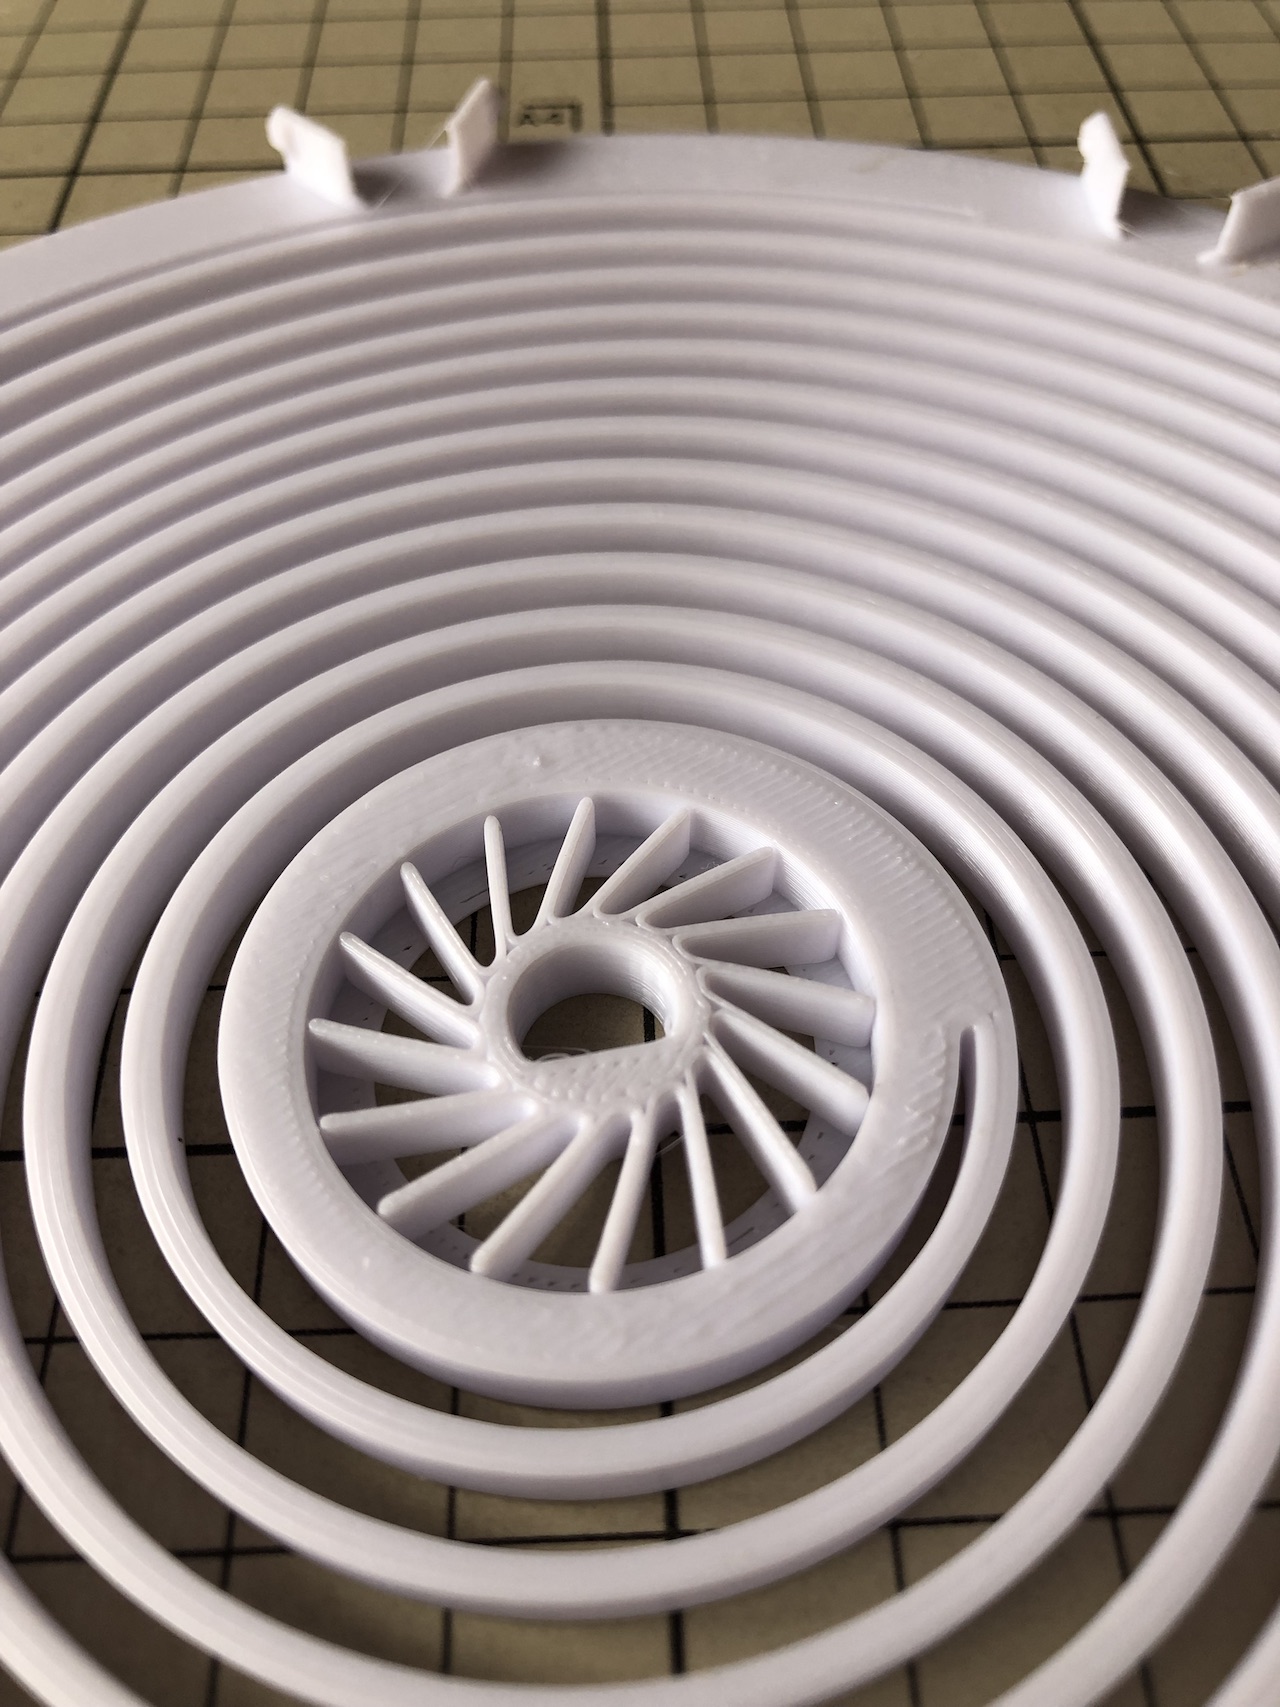

The "slip hub" is made slightly larger than the hole. The number after "slip hub" indicates the length that extends beyond the hole. The larger the number, the stiffer and stronger the spring will hold. I use "slip hub 300".
「slip hub」は穴よりも若干大きめに作っています。「slip hub」の後の数値は穴からはみ出す長さを表します。数値が大きいとより固くなり、スプリングを保持する力が強くなります。私は「slip hub 300」を使っています。
Step 3: spring
Insert "spring" into "hub male".
「hub male」に「spring」をはめ込んでください。
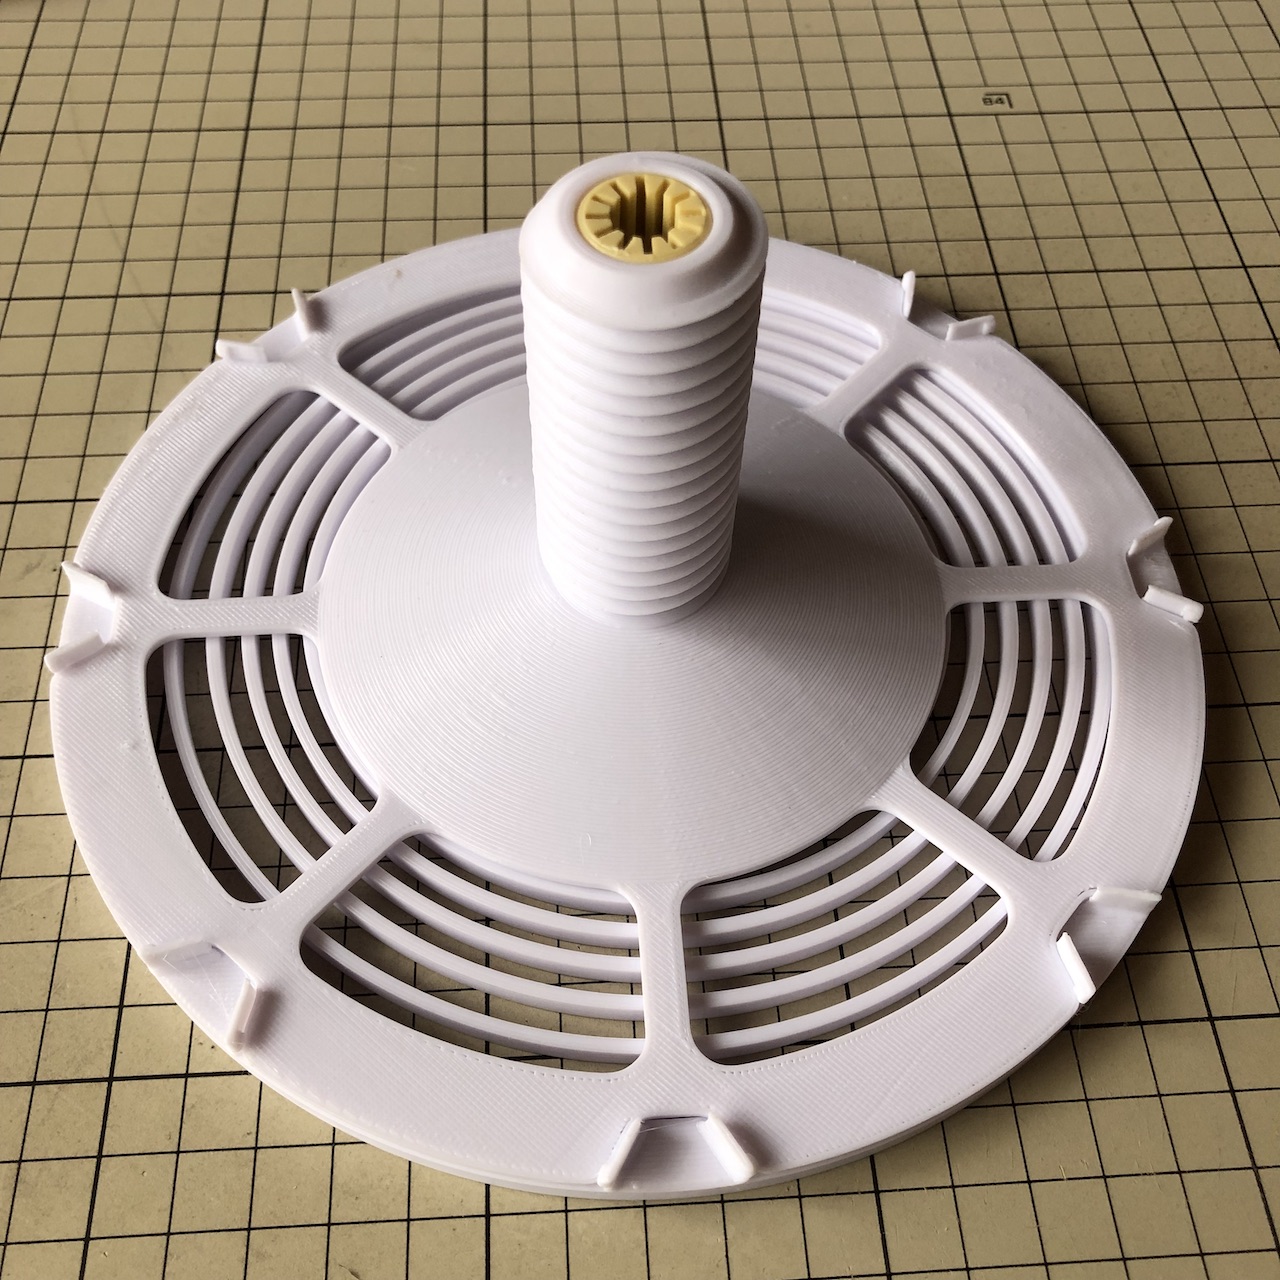
Step 4: spring guard
Install a "spring guard" to prevent the spring from popping out.
バネが飛び出さないように「spring guard」を取り付けます。
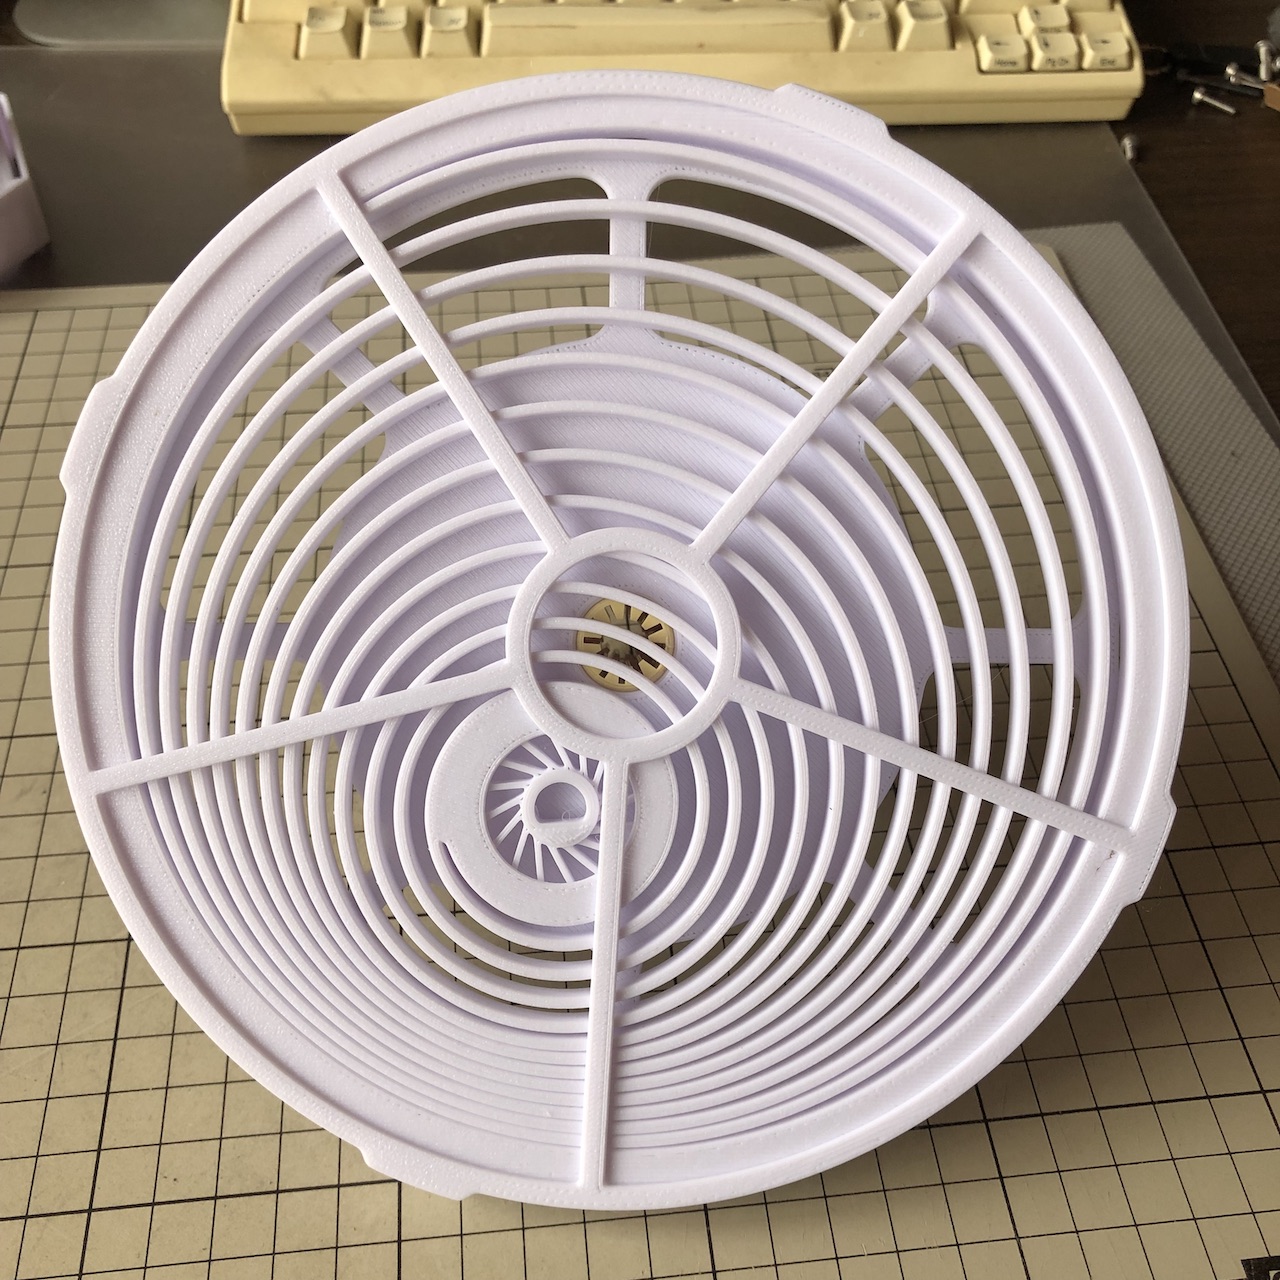
Step 5: "hub male" and "hub female" to sandwich the spools
Place the spool on top of what you have assembled so far and secure the spool using the "hub female".
これまで組み立てたものの上にスプールを乗せて「hub female」を使ってスプールを固定します。

Note that it must be fixed in the correct orientation here.
ここで正しい向きで固定する必要がある点に注意してください。
As filament is drawn from the spool, the spring winds up and eventually reaches its limit, causing the "spring" to slide around the "slip hub". The "slip hub" is tilted so that it can turn in some directions easily and in some directions not so easily. The direction of rotation must be easy for the filament to turn when it is pulled out.
スプールからフィラメントが引き出されるにつれてスプリングが巻かれていき、やがて限界に達すると「slip hub」の周りを「spring」が滑るようになります。「slip hub」の羽は傾いているので、回りやすい向きと回りにくい向きがあります。フィラメントが引き出される時に回りやすい向きになっている必要があるのです。

In this picture, the "slip hub" is set in the correct direction because the spool rotates in the direction indicated by the round arrow when the filament is pulled out in the direction indicated by the arrow on the straight line.
この写真では直線上の矢印で示す方向にフィラメントが引き出されると、スプールは丸い矢印で示す方向に回転するので「slip hub」は正しい方向にセットされています。
If you have reversed the direction, replace the "hub male" and "hub female" and then re-fix the spool.
逆向きにしてしまった場合は「hub male」と「hub female」を入れ替えてからスプールを再度固定してください。
Step 6: axle holder
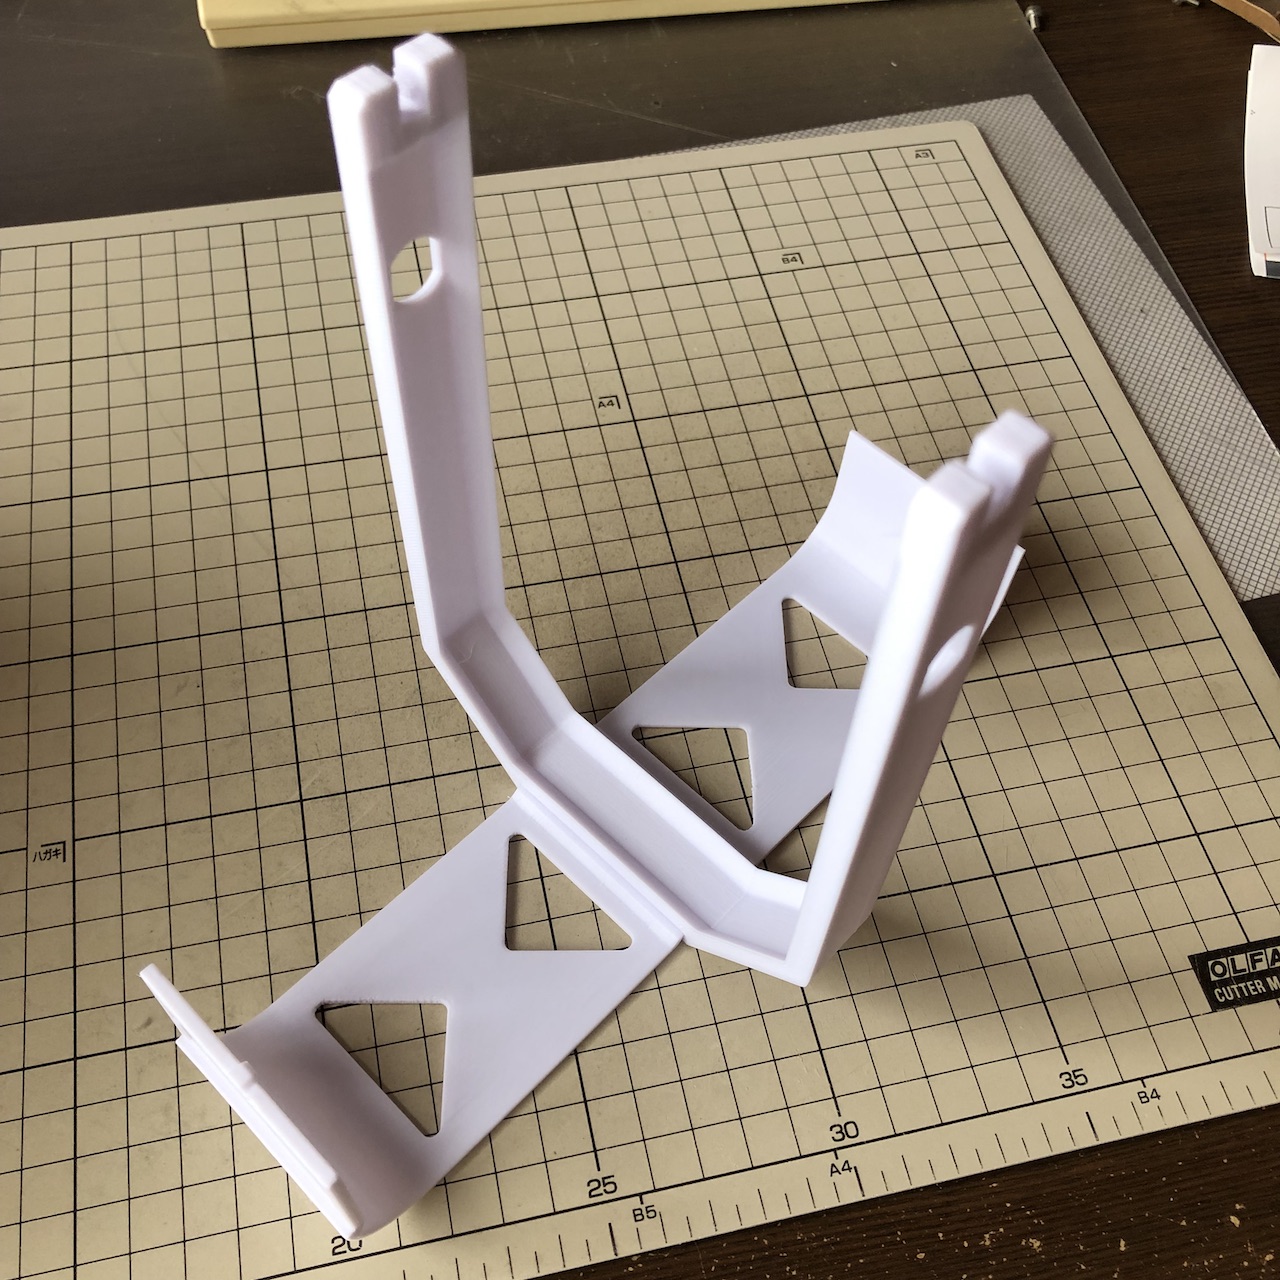
Insert the "meter holder" and "bottom plate" into the "axle holder.
The "meter holder" and "bottom plate" have triangular holes to prevent warping.
When I used smooth PEI sheet on Prusa i3 MK3S+, I did not need to prevent warping, so I did not have these holes on the original model. However, when I printed with V400, it warped, so I added the holes as a countermeasure.
「axle holder」に「meter holder」と「bottom plate」を差し込んでください。
「meter holder」と「bottom plate」には反りを防止するために三角形の穴を開けてあります。Prusa i3 MK3S+でスムースPEIシートを使っていたときはソリ防止は不要だったのでオリジナルモデルではこの穴はありませんでした。しかしV400で印刷したら反ってしまったので、対策として穴を追加しました。
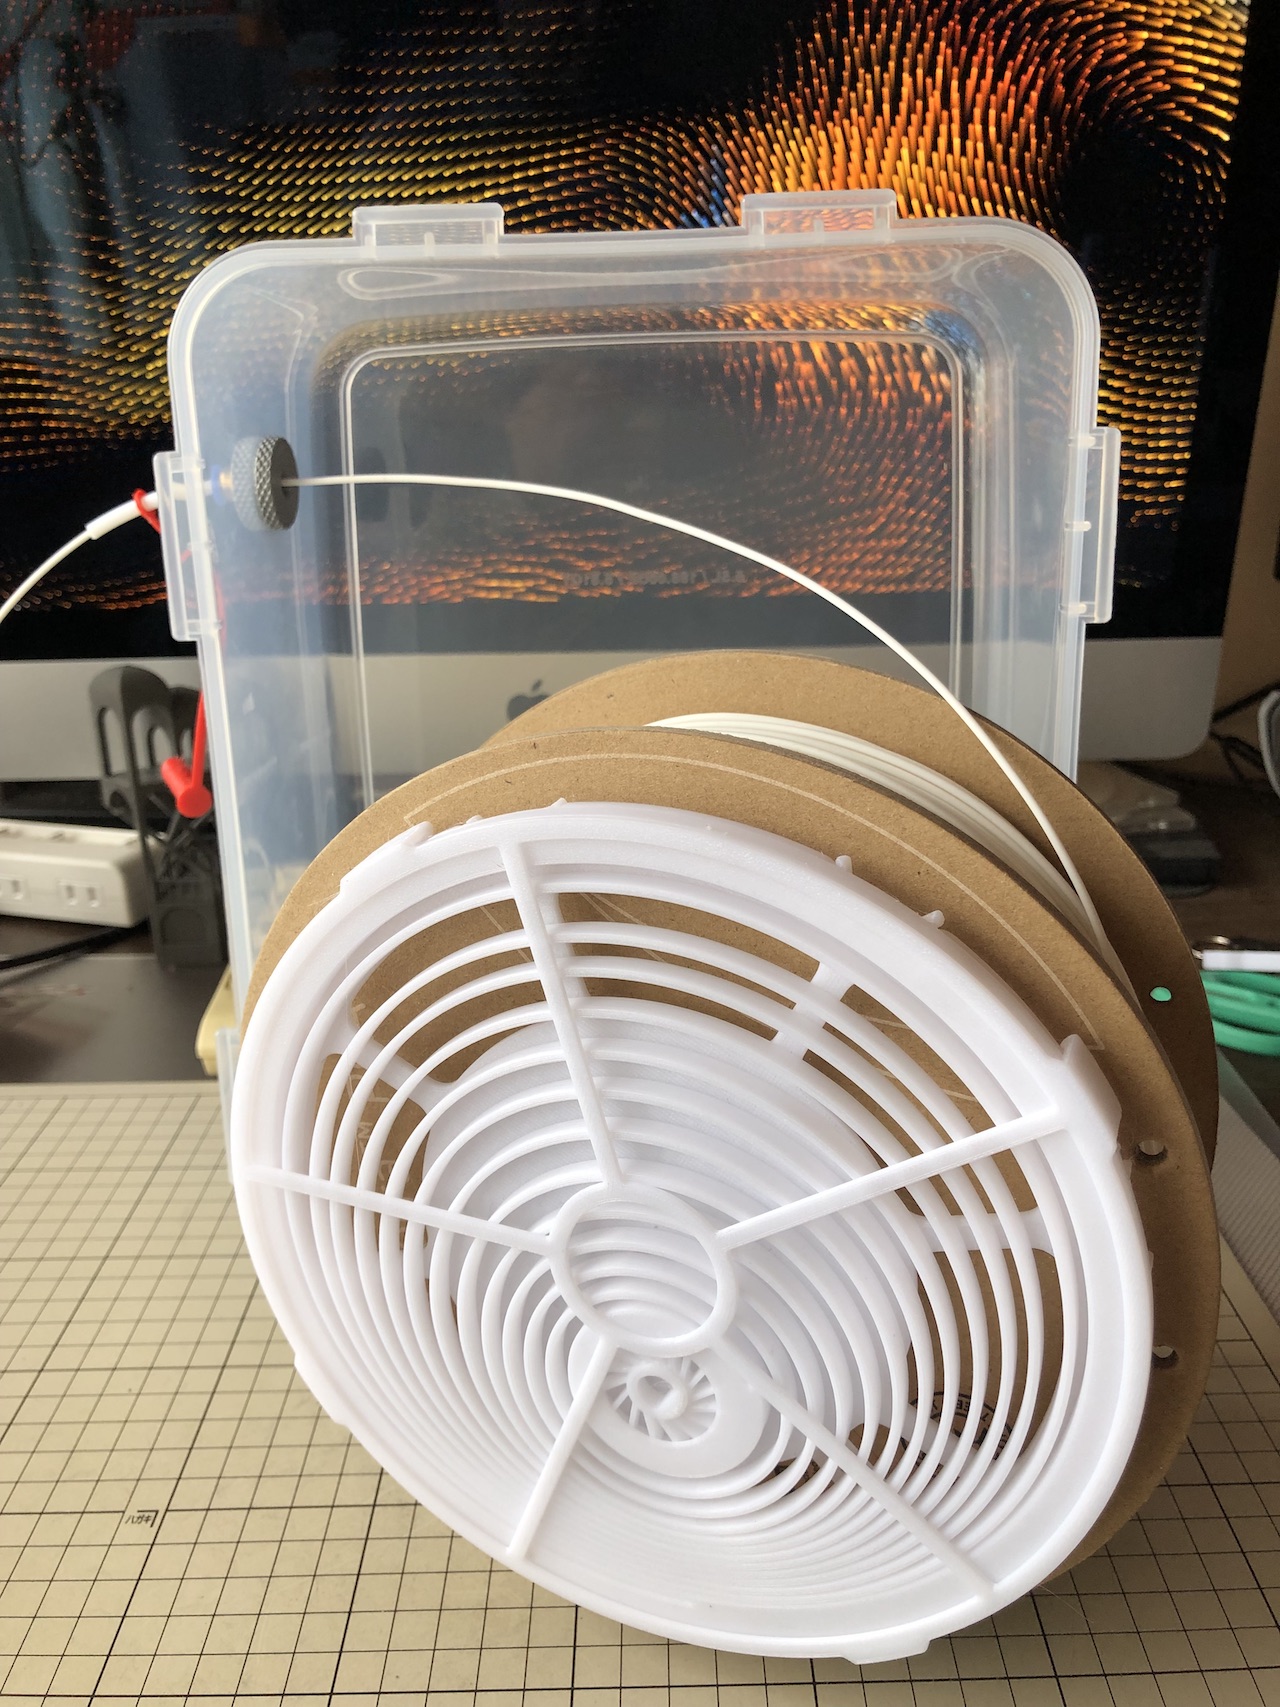
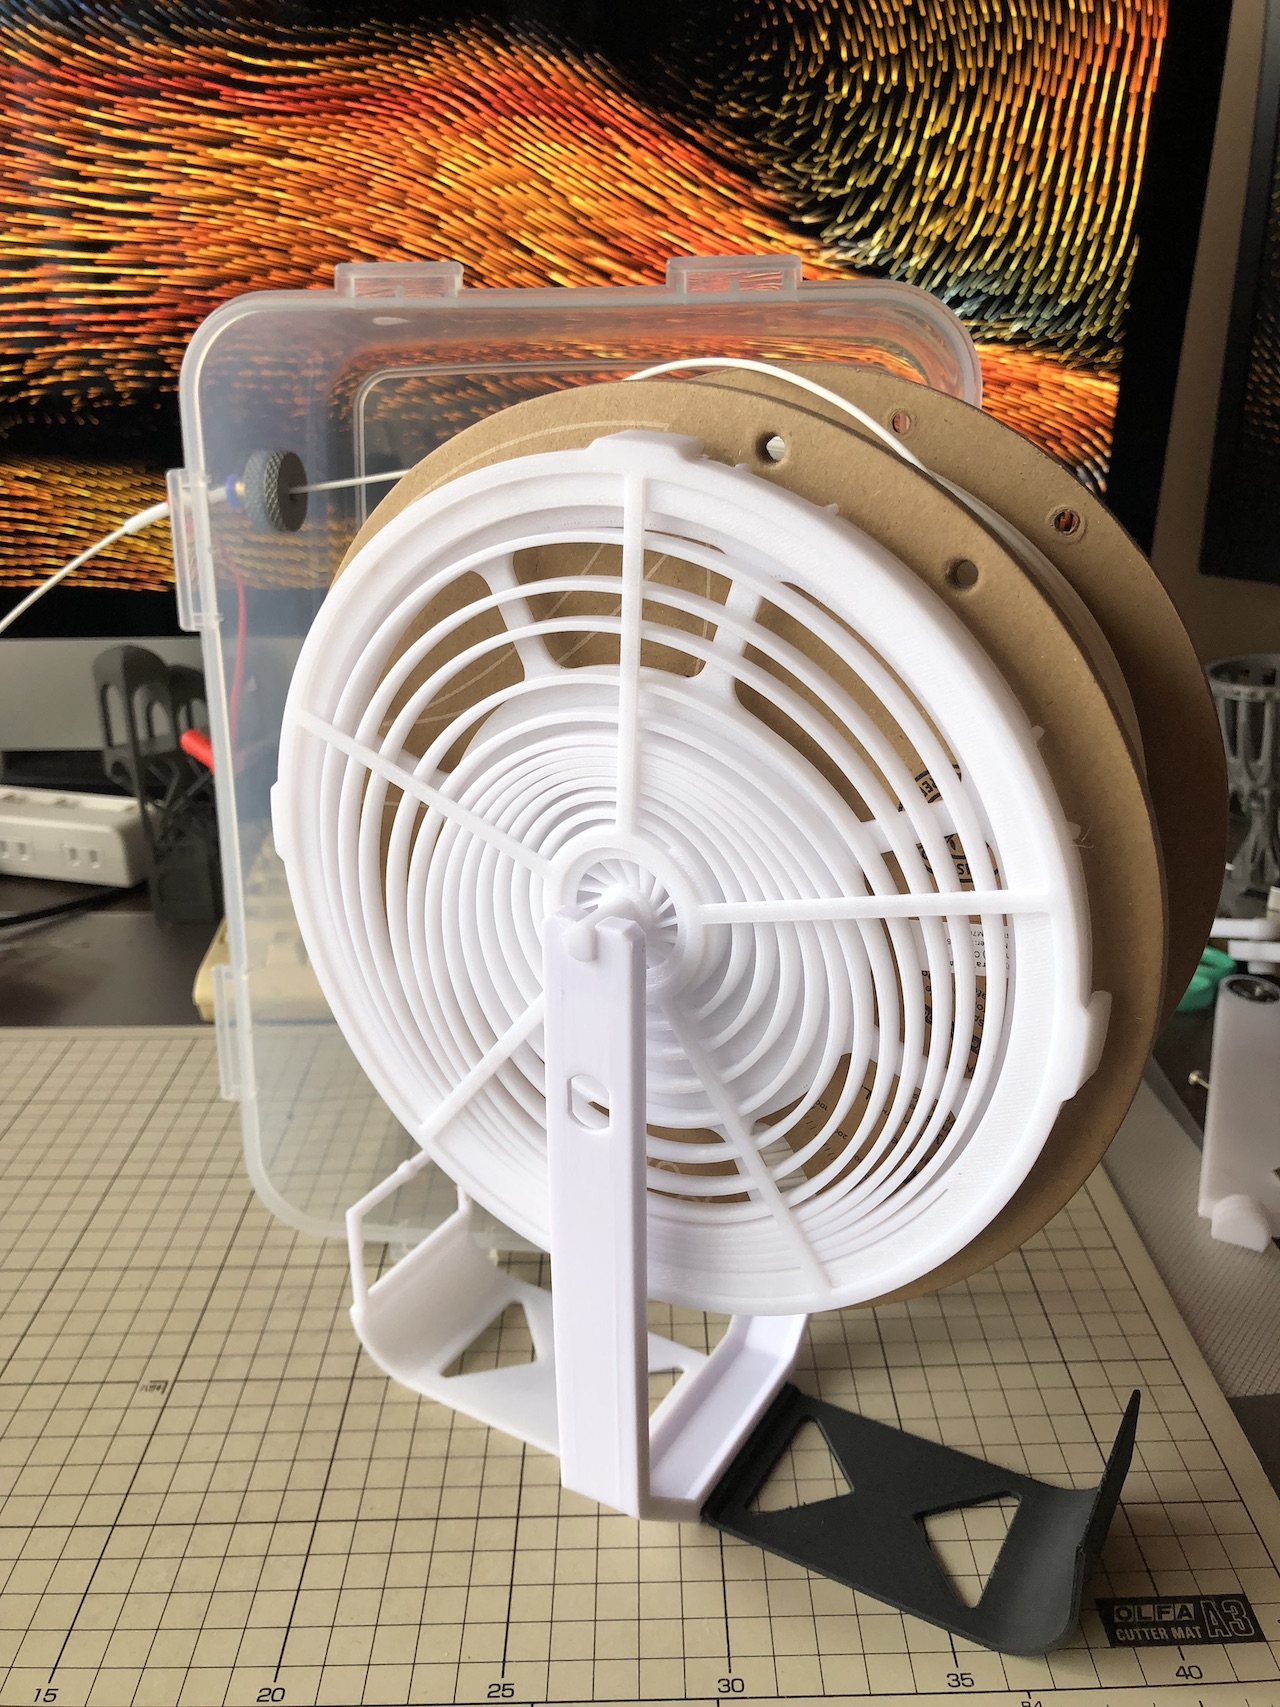
Step 7: set into the box
Pass the filament through the hole in the box. Then, pass the "axle" through the "slip hub" and then place it on the "axle holder". Place the whole thing inside the box, close the lid, and you are done.
フィラメントを箱の穴に通します。そして「slip hub」に「axle」を通してから「axle holder」の上に載せます。全体を箱の中に入れて蓋を閉めれば完成です。
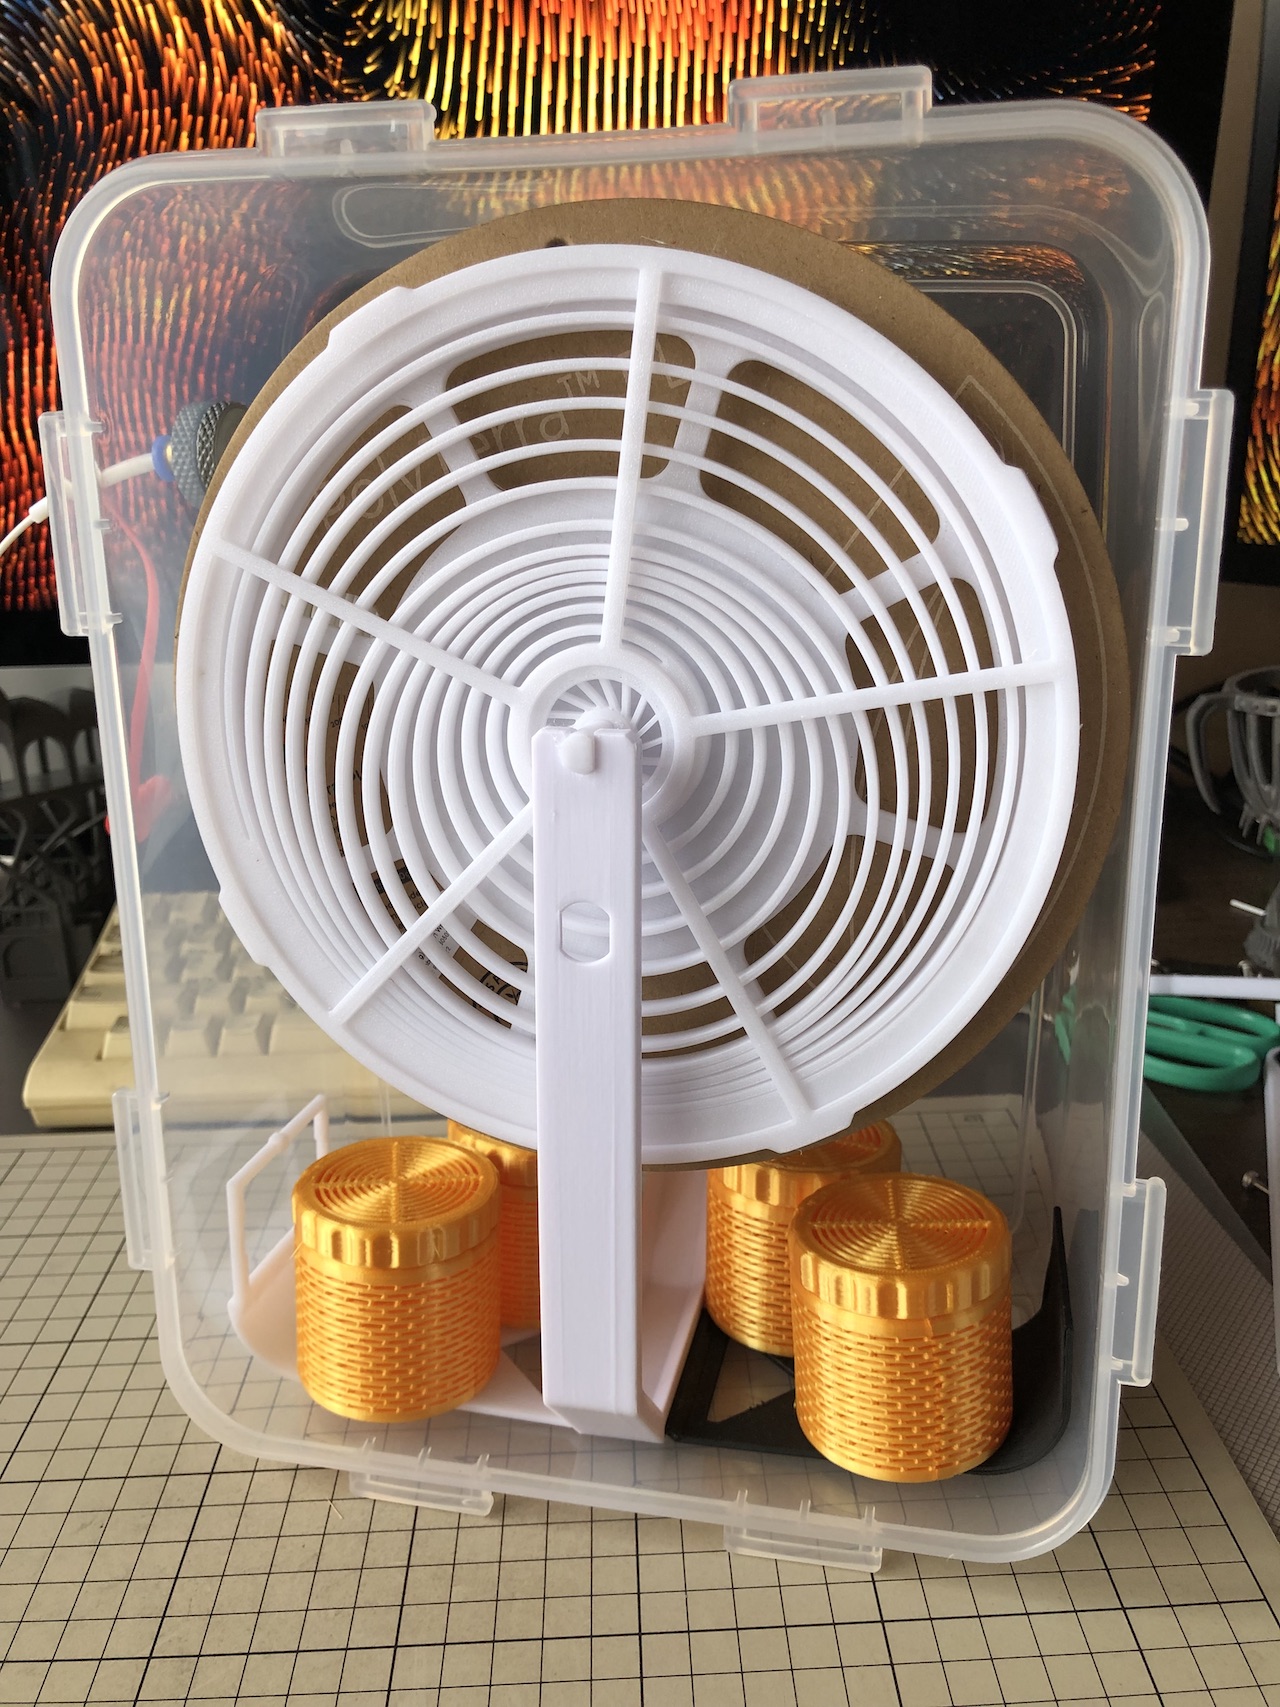

The following model is used for silica gel containers.
シリカゲルの入れ物には以下のモデルを使っています。
About the 3mf file
The attached PrusaSlicer project file is set up for high speed printing on a V400, so please modify the settings to match your printer. Note that even if you are a V400 user, it may not work well due to macros.
添付したPrusaSlicerのプロジェクトファイルはV400で高速印刷する設定なので、自分のプリンターに合わせた設定に修正してください。あなたがV400ユーザーでもマクロの関係でうまく動かないかもしれないので注意してください。