
1 / 9
Weather station 16x16 matrix
Zamów wydruk tego modelu
Obliczymy ostateczną cenę na podstawie wybranego pliku. Sprawdzisz ją i zaakceptujesz przed płatnością.
Zapisane na tym urządzeniu.
Weather station 16x16 matrix / Text scrolling 16x16 matrix project
- Ocena
- 0 / 5
- Polubienia
- 7
- Pobrania
- 57
- Wydruki
- 0
- Wyświetlenia
- 841
- Oceny
- 0
Aktualizacja u źródła:
Informacje o modelu
- Źródło
- Printables
- Kategoria
- Electronics
- Licencja
- Creative Commons — Attribution — Noncommercial
SzczegółyPliki (10)Wydruki i komentarze (Wydruki: 0) (Komentarze: 0)Remiksy (0)Kolekcje (18)Powiązane
Weather station 16x16 matrix showing the current time, date and weather as a permanently scrolling text.
Functions:
- Shows time + date + weather for your location as a permanently scrolling text.
- The weather data is updated every 5 minutes.
- You can choose in the settings if you want to have the temperature as Celsius or Fahrenheit value.
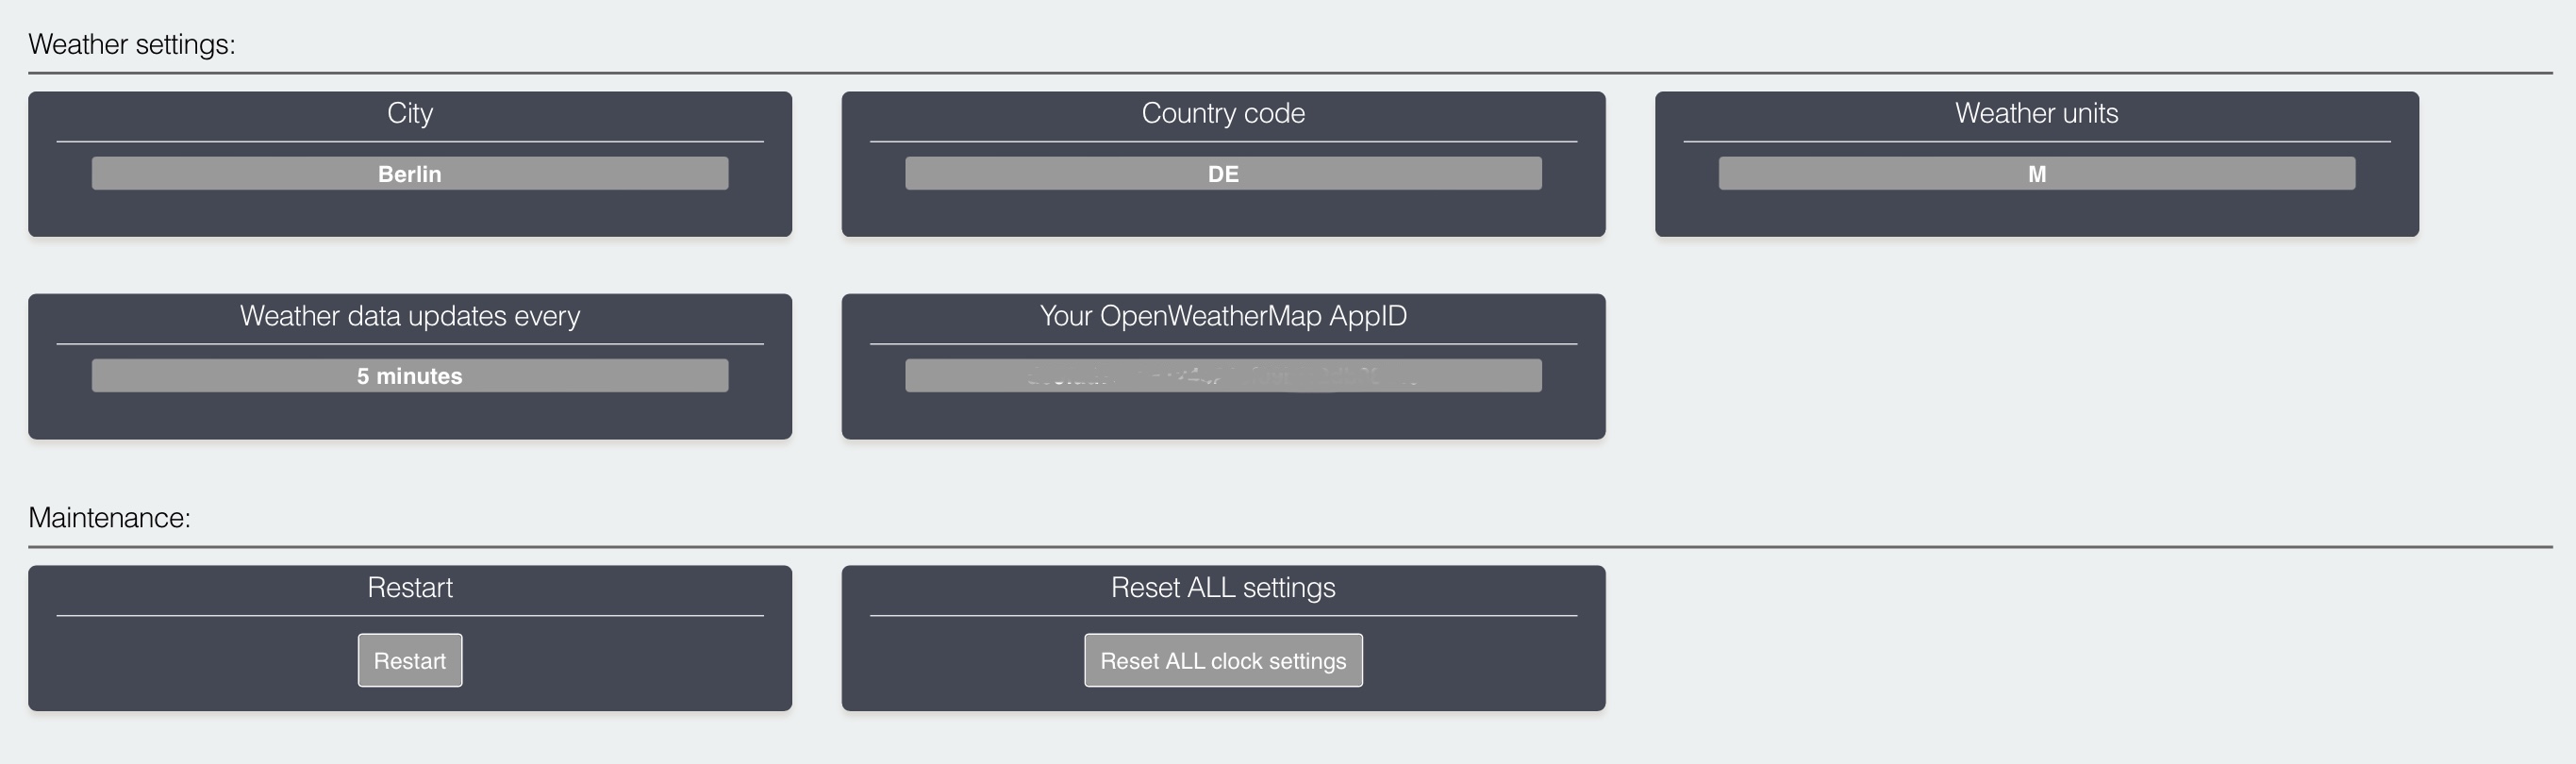
- All settings can be configured in the internal web portal.
- You will need to add the settings for your WiFi and optional for weather API key you can get free from: https://openweathermap.org/api → https://home.openweathermap.org/users/sign_up and your city you can look up for at: https://www.openweathermap.org
- You also need to setup the time server and time zone that will fit your needs → https://github.com/nayarsystems/posix_tz_db/blob/master/zones.csv
- You can add all of these values within the initial setup. The device will open an internal web server and temporary WiFi hotspot to be able to enter the values.
- After the initial setup is done and the device is hooked up to you local WiFi you can configure even more options like the text color in the internal web portal.
- The device will write you hints on the display to help you with the setup.
Video:
Pictures:


Code:
- Download the code from my GitHub repository
Web interface:

Parts needed:
- 1x 16x16 LED matrix (Use this one. The parts are made to fit to it only.)
- 1x ESP32 micro controller board (No ESP8266 use possible because of its low specs.)
- 1x USB power supply 5V / 3A (Do not use 5V/2A or even 5V/1A ones to avoid damage!)
- 1x Micro USB cable 3m
Printing instructions:
- No supports or brim needed for all parts.
- 0.3 draft profile used.
- Textured sheet used. If you use a textured sheet too, let it cool down completely after the print and wait for the part gets loose by itself. Do not pull on it to avoid ripping off the letters! In my case it takes 45-60 minutes after the print has ended and the part just lays loose on the print bed…
- The option “Avoid crossing perimeters” was set active for the front parts in Prusa Slicer.
- The option “Fuzzy skin” was set active for the “Front“ part in Prusa Slicer.
- Using a brim was not needed in my tests, because I cleaned my textured sheet with dishwashing liquid carefully with a new sponge and then with isopropanol alcohol again on the printer to make the parts stick really good. If you face problems with adhesion feel free to add a 5mm brim to the front and lid part…
- IMPORTANT:
- Print the ”Front” and “Lid“ part in white color.
- Print the “Matrix“ part in black color to avoid the light from shining through.
- The “WallDistanceFoots” and the “MatrixHolder” part can be printed in a color of your choice.
Wiring:
- Connecting the parts for this device is as easy as possible.
- You may need to solder 3 connections to the ESP32 only.
- The 2 small holes in the lid can be used for a small cable tie to secure the power cable.
- Have a look into the pictures how to arrange the LED matrix in the front part to ensure that the direction of the LEDs is correct. Upload the code, test it and then close the case!
- Please check the table which pins are connected for the project as well as the pictures:
| ESP32: | LED matrix: | Wire color: |
| VCC | 5V | Red |
| GND | GND | White |
| IO32 | DIN | Green |
Happy printing :)