
Node Robot Platform - SMARS inspired using ESP8266
Obliczymy ostateczną cenę na podstawie wybranego pliku. Sprawdzisz ją i zaakceptujesz przed płatnością.
Zapisane na tym urządzeniu.

Node Robot Platform using ESP8266 for robotic development
- Ocena
- 5 / 5
- Polubienia
- 165
- Pobrania
- 587
- Wydruki
- 3
- Wyświetlenia
- 4481
- Oceny
- 4
Aktualizacja u źródła:
Informacje o modelu
- Źródło
- Printables
- Kategoria
- RC & Robotics
- Licencja
- Creative Commons — Attribution — Noncommercial
Node Robot Platform using ESP8266 for robotic development. This project is inspired by the SMARS robot but use ESP8266 as it heart for out of the box remote control.
Hardware
Needed hardware (all the link is for reference):
- 1x ESP8266 NodeMCU (link)
- 1x NodeMCU Motor Board (link)
- 4x N20 motor (9-10mm shaft) (link)
- 1x MH-CD42 (link)
- 1x LiPO battery, maximum dimentions: 35x55x15mm
- 1x USB-C Female header (link)
- 10x M3 Brass Heatset Inserts - Short M3x5x4
- 10x M3x6 Screws
- 4x 6x3 Magnet (for main platform handle)
Hardware for Camera Arm (Optional):
- 1x ESP32 Cam (link)
- 2x MG90S servo (link)
- 2x M2.5 Brass Heatset Inserts - Short M2.5x3x4
- 4x M2.5x6 Screws
Hardware for Sona (Optional):
- 1x Ultrasonic hc-sr04 (link)
Assemble
Overview Main Platform:

Overview Camera Arm:
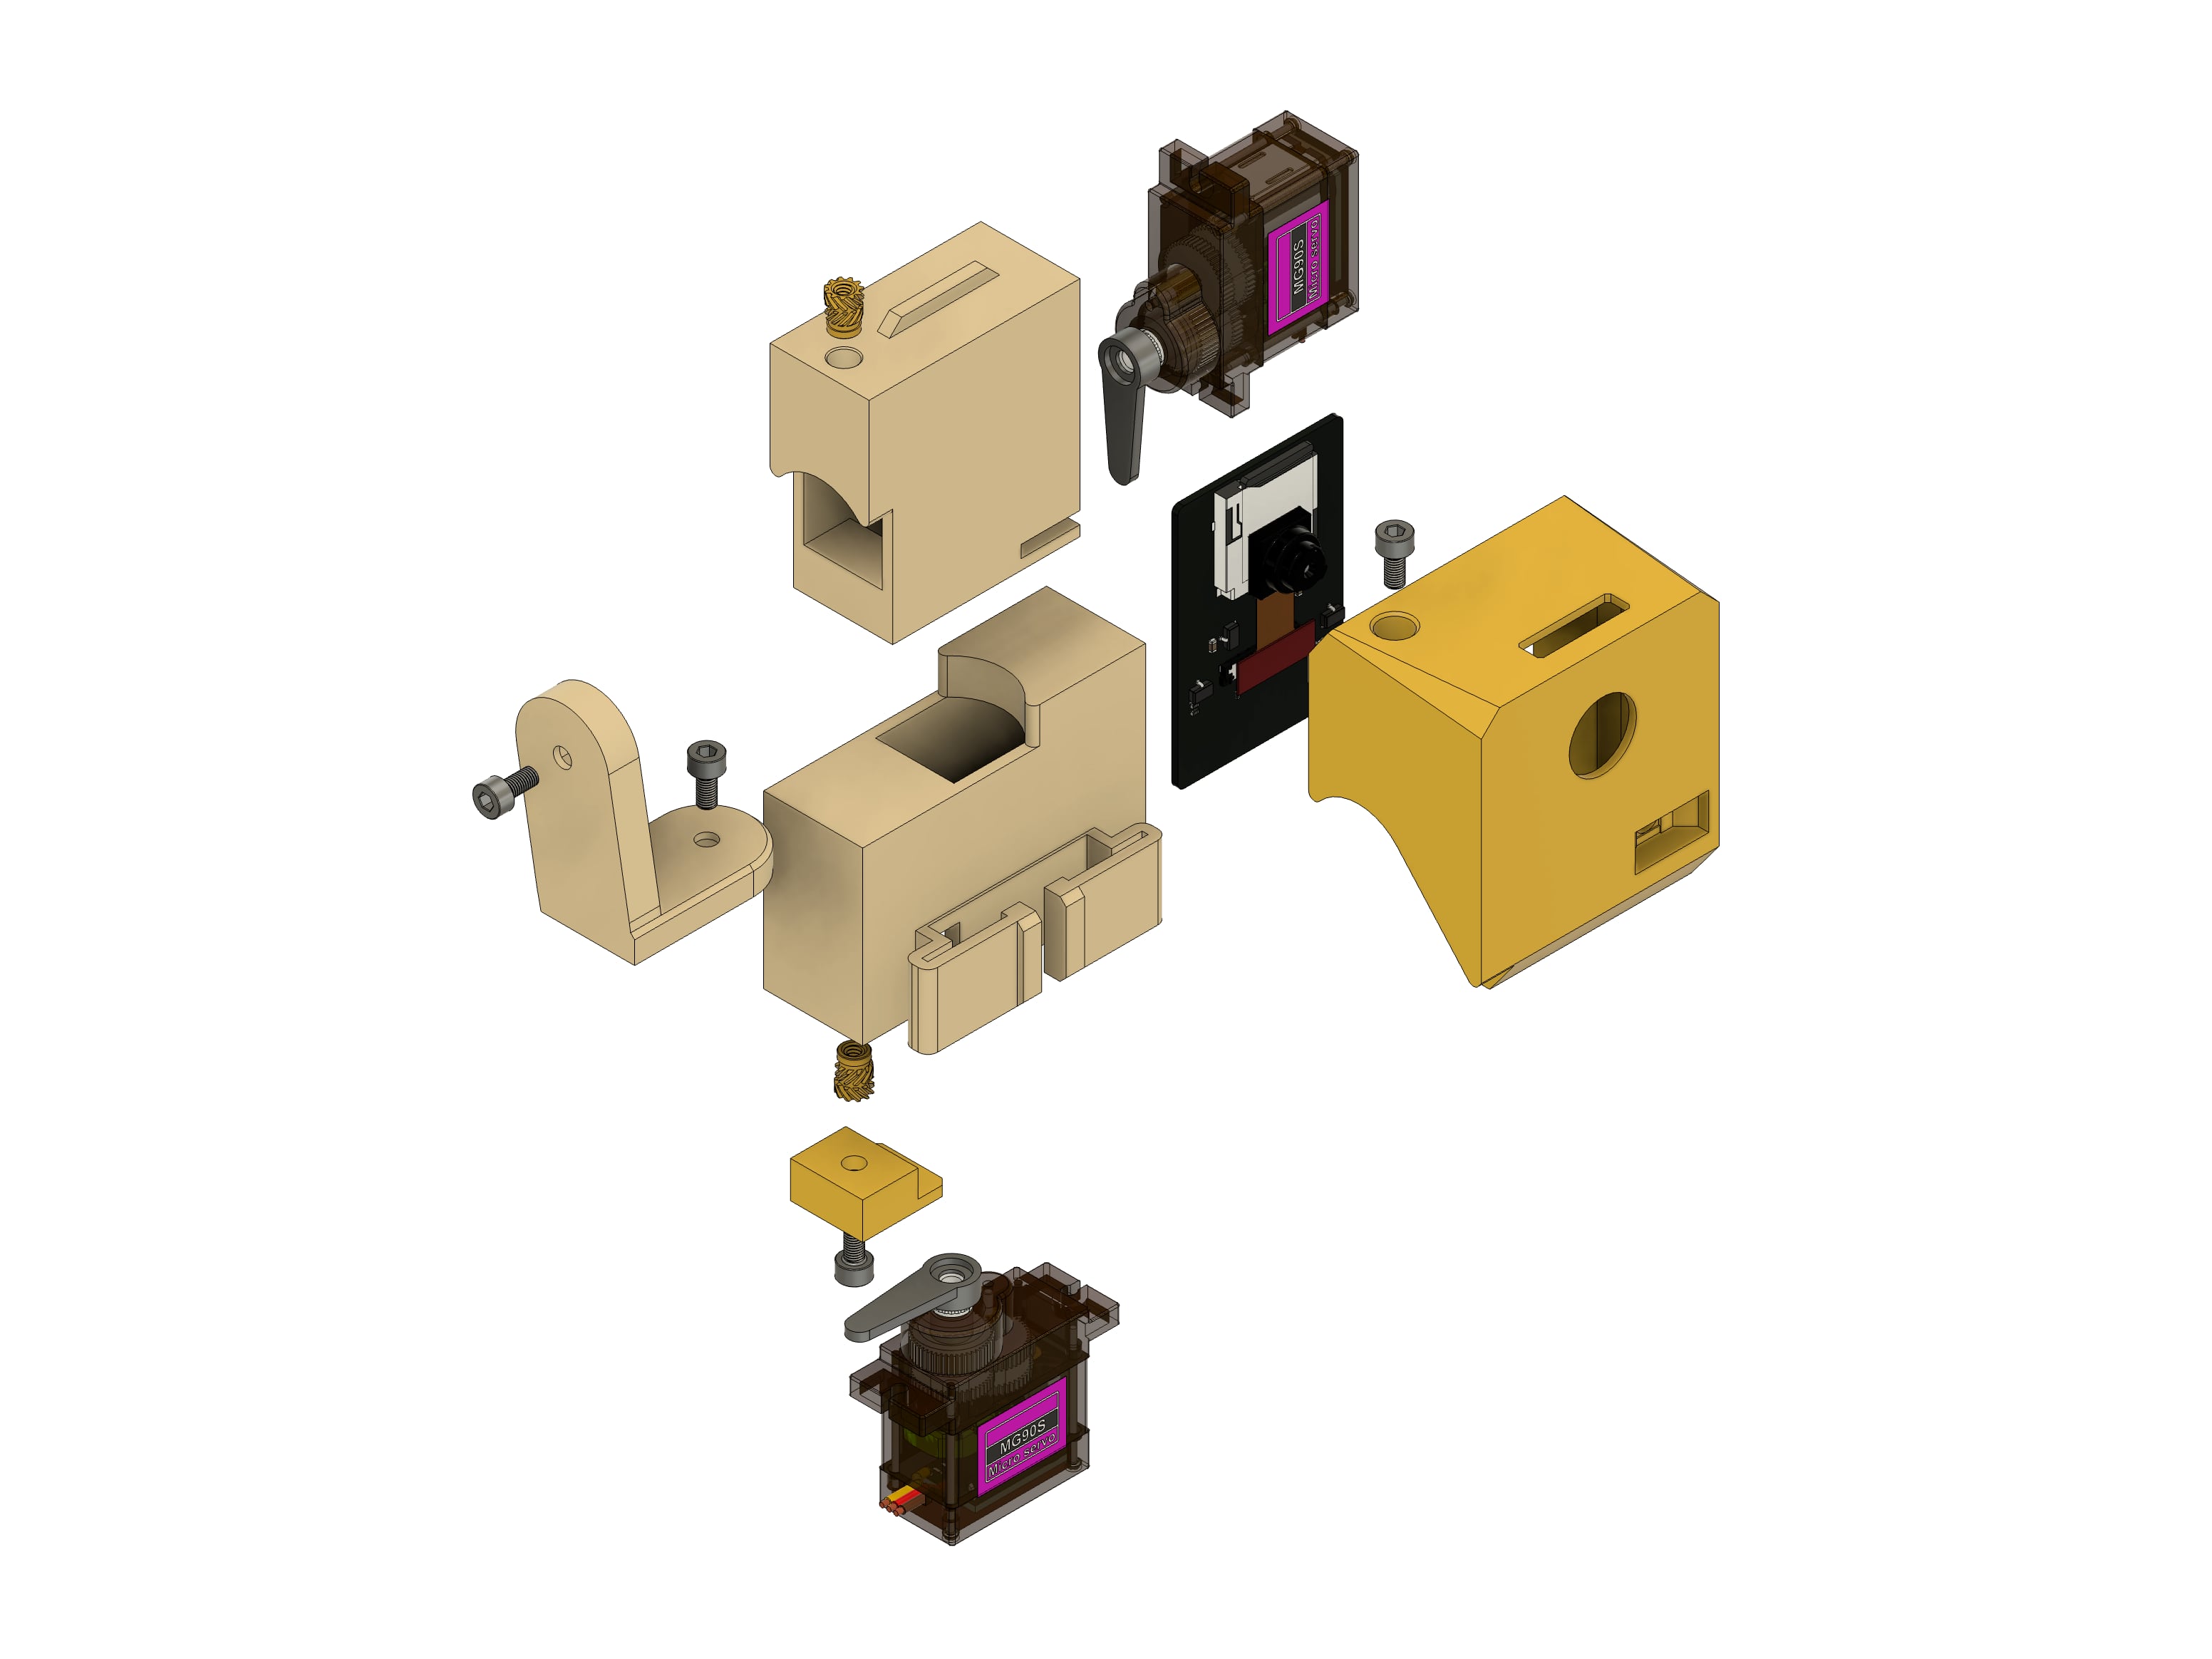
Note: remove ESP32 Cam header before installation.
Electric Schema
Electric Schema (Main Platform):
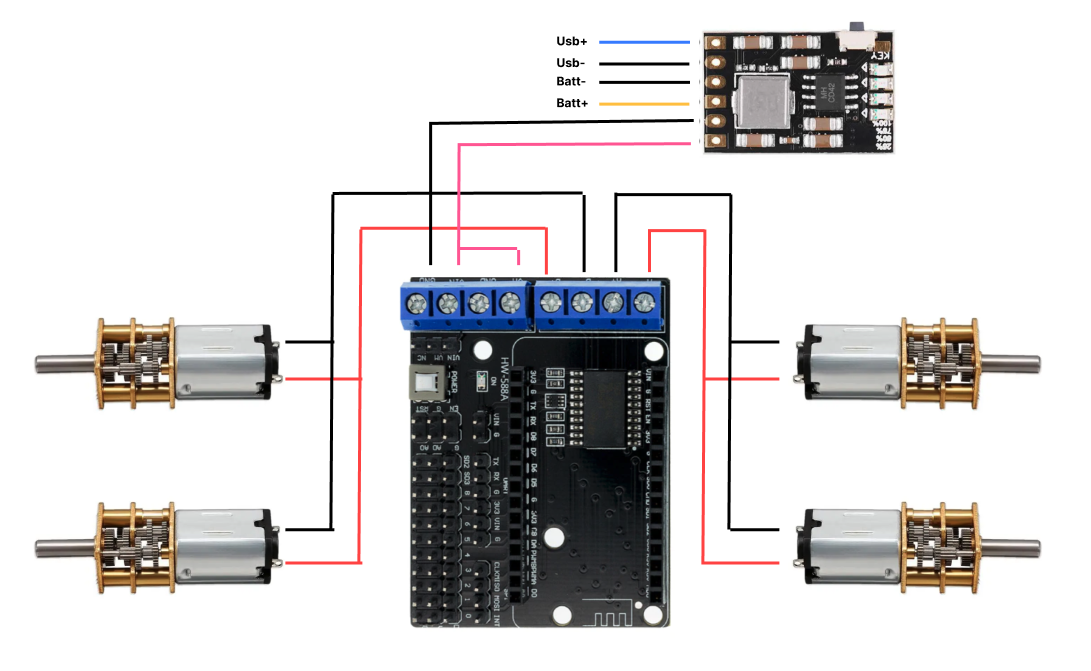
Electric Schema (Camera Arm):

Source code
Source Code for ESP8266:
https://github.com/RyanDam/NodeRover.git
Source Code for Camera (live stream and face detection):
https://github.com/RyanDam/NodeRoverSmartFPVModule.git
Note: after flashing code using PlatformIO, you need to connect to ESP8266 (or ESP32) wifi to setup wifi. After that go to the IP of the device in your browser to control the robot.