
Universal V-Slot Attachment Rail for Original Prusa Enclosure OPE
Obliczymy ostateczną cenę na podstawie wybranego pliku. Sprawdzisz ją i zaakceptujesz przed płatnością.
Zapisane na tym urządzeniu.

A V-Slot rail to easily attach accessories in the corners or the Original Prusa Enclosure
- Ocena
- 4,667 / 5
- Polubienia
- 45
- Pobrania
- 64
- Wydruki
- 3
- Wyświetlenia
- 794
- Oceny
- 3
Aktualizacja u źródła:
Informacje o modelu
- Źródło
- Printables
- Kategoria
- Prusa Parts & Upgrades
- Licencja
- Creative Commons — Attribution
This is a universal attachment rail to attach accessories such as webcams, lights, sensors, etc. in the front corners of the Original Prusa Enclosure. It's an OpenBuilds V-Slot profile so it's compatible with many existing accessories and works with regular drop-in T-nuts for 2020 profiles.
| Note: I don't own a Prusa Enclosure and haven't been able to test a real-world installation myself. However, I've tested the fit of the T-nuts and other people have installed it (see Makes) and it seems to work and fit well in the enclosure. |
Attaching Accessories
Use Drop-In T-Nuts for 2020 profiles. They should be relatively easy to source and you can find printable ones such as these, these or these and more. I have only tested metal T-Nuts.
 |  |
Compatibility with Corner CapsIf you use the popular Inside Corner Caps by @BuildX, there are alternative A and C sections that have been shortened to accommodate the corner caps. You will lose ~31mm of total rail length (15.4mm per section). The parts are labeled accordingly in the Files tab. | 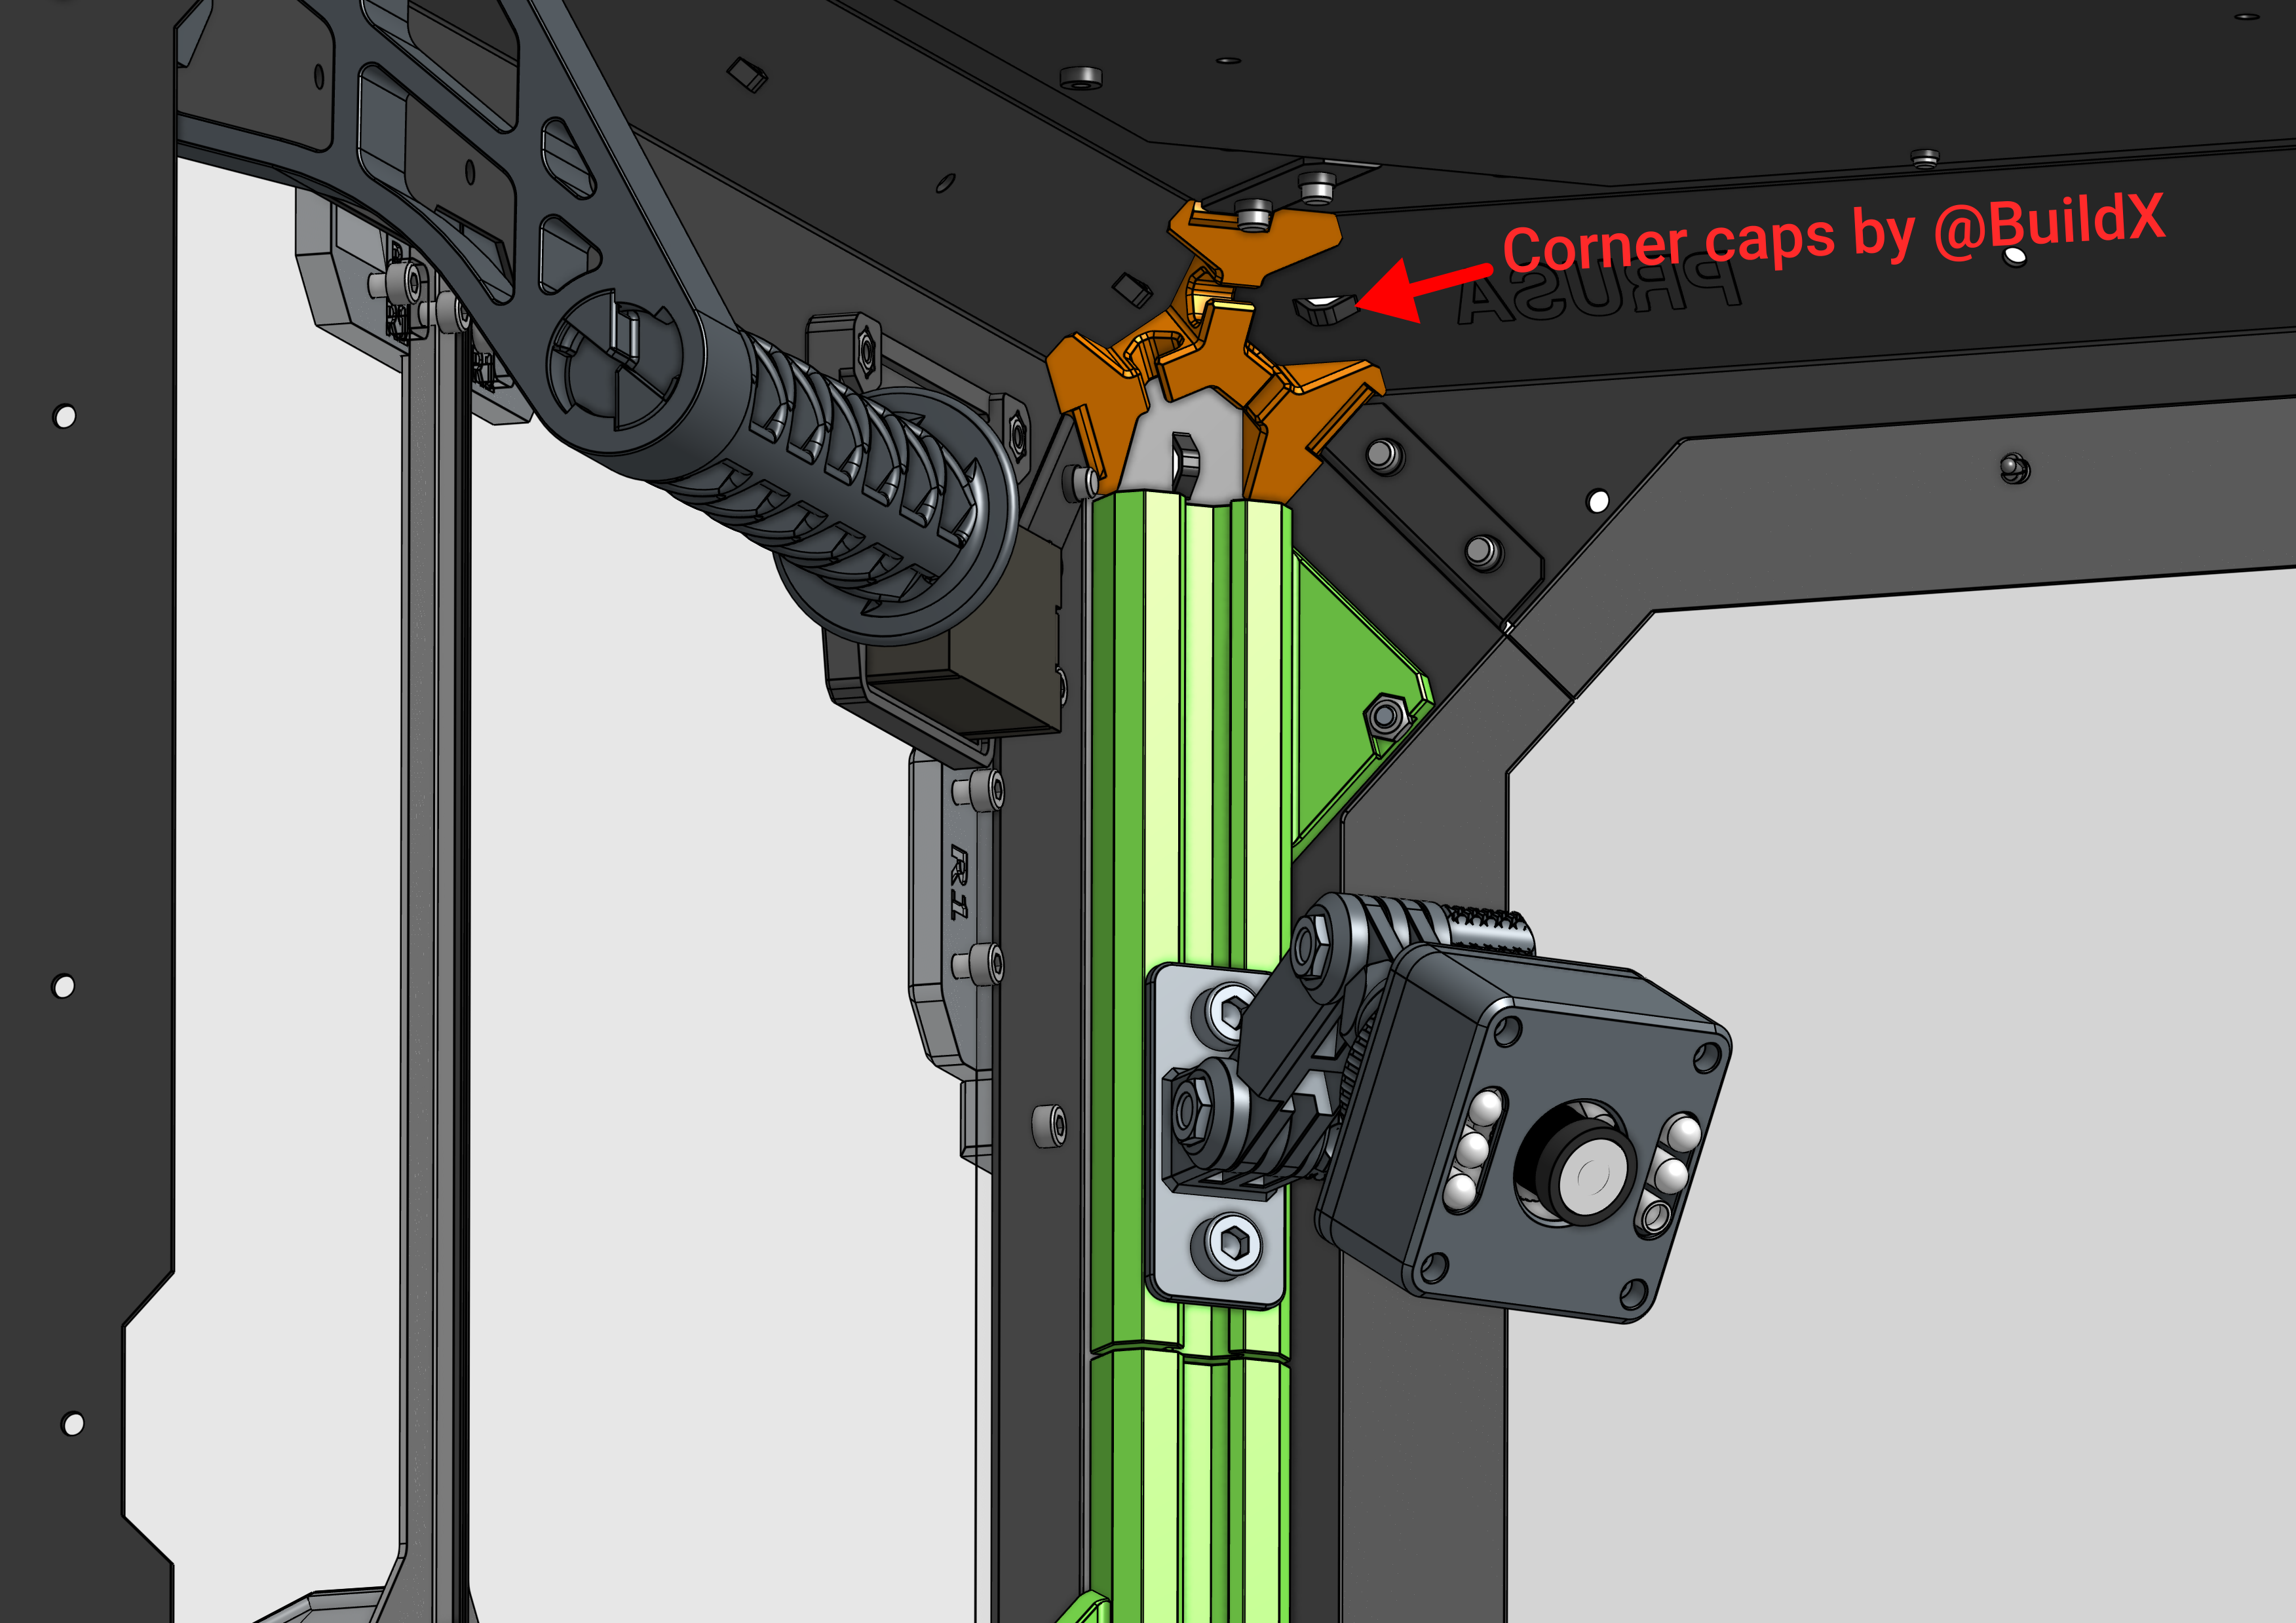 |
Required Hardware
| Qty | Part | Sourcing |
|---|---|---|
| 6 | M3x6mm Socket Head or Button Head Cap Screw | Aliexpress |
| 6 | M3 DIN934 Hex Nut | Aliexpress |
Quantities are per side. If you want to install it on both sides double the quantities. It requires two screws and two nuts per section.
Printed Parts
Part list per corner.
| Qty | Part |
|---|---|
| 1 | PE V-Slot Rail Section A |
| 1 | PE V-Slot Rail Section B |
| 1 | PE V-Slot Rail Section C |
Printing
Print the parts upright in the original orientation. All STL files are pre-rotated for printing. These are tall skinny parts. I'd recommend printing with a wide brim, a raft, or using organic supports for stability.
- Material: ASA, ABS, PETG (should withstand temps inside enclosure)
- Perimeters: 4
- Infill: 15%
- Layer height: 0.2mm
- Extrusion width: 0.45
- Supports: No
- Brim: Big brim recommended
Parts tested with Prusament ASA Jet Black on Prusa Mini with default profiles.
Assembly
Each side is made of 3 individual sections: A, B, and C. In the front left corer the order is A, B, C from top to bottom. In the front right corner the order is reversed.
Note: If you use the original spool holder in the right corner of the enclosure it will conflict with Section C. You can just use only sections B and A in that corner if you wish to keep the spool holder.
Note 2: If you use the LED add-on you can only use rails on the right side as the left side is occupied by the LED panel. Section B on the right side is the ideal height for a webcam facing the build plate.
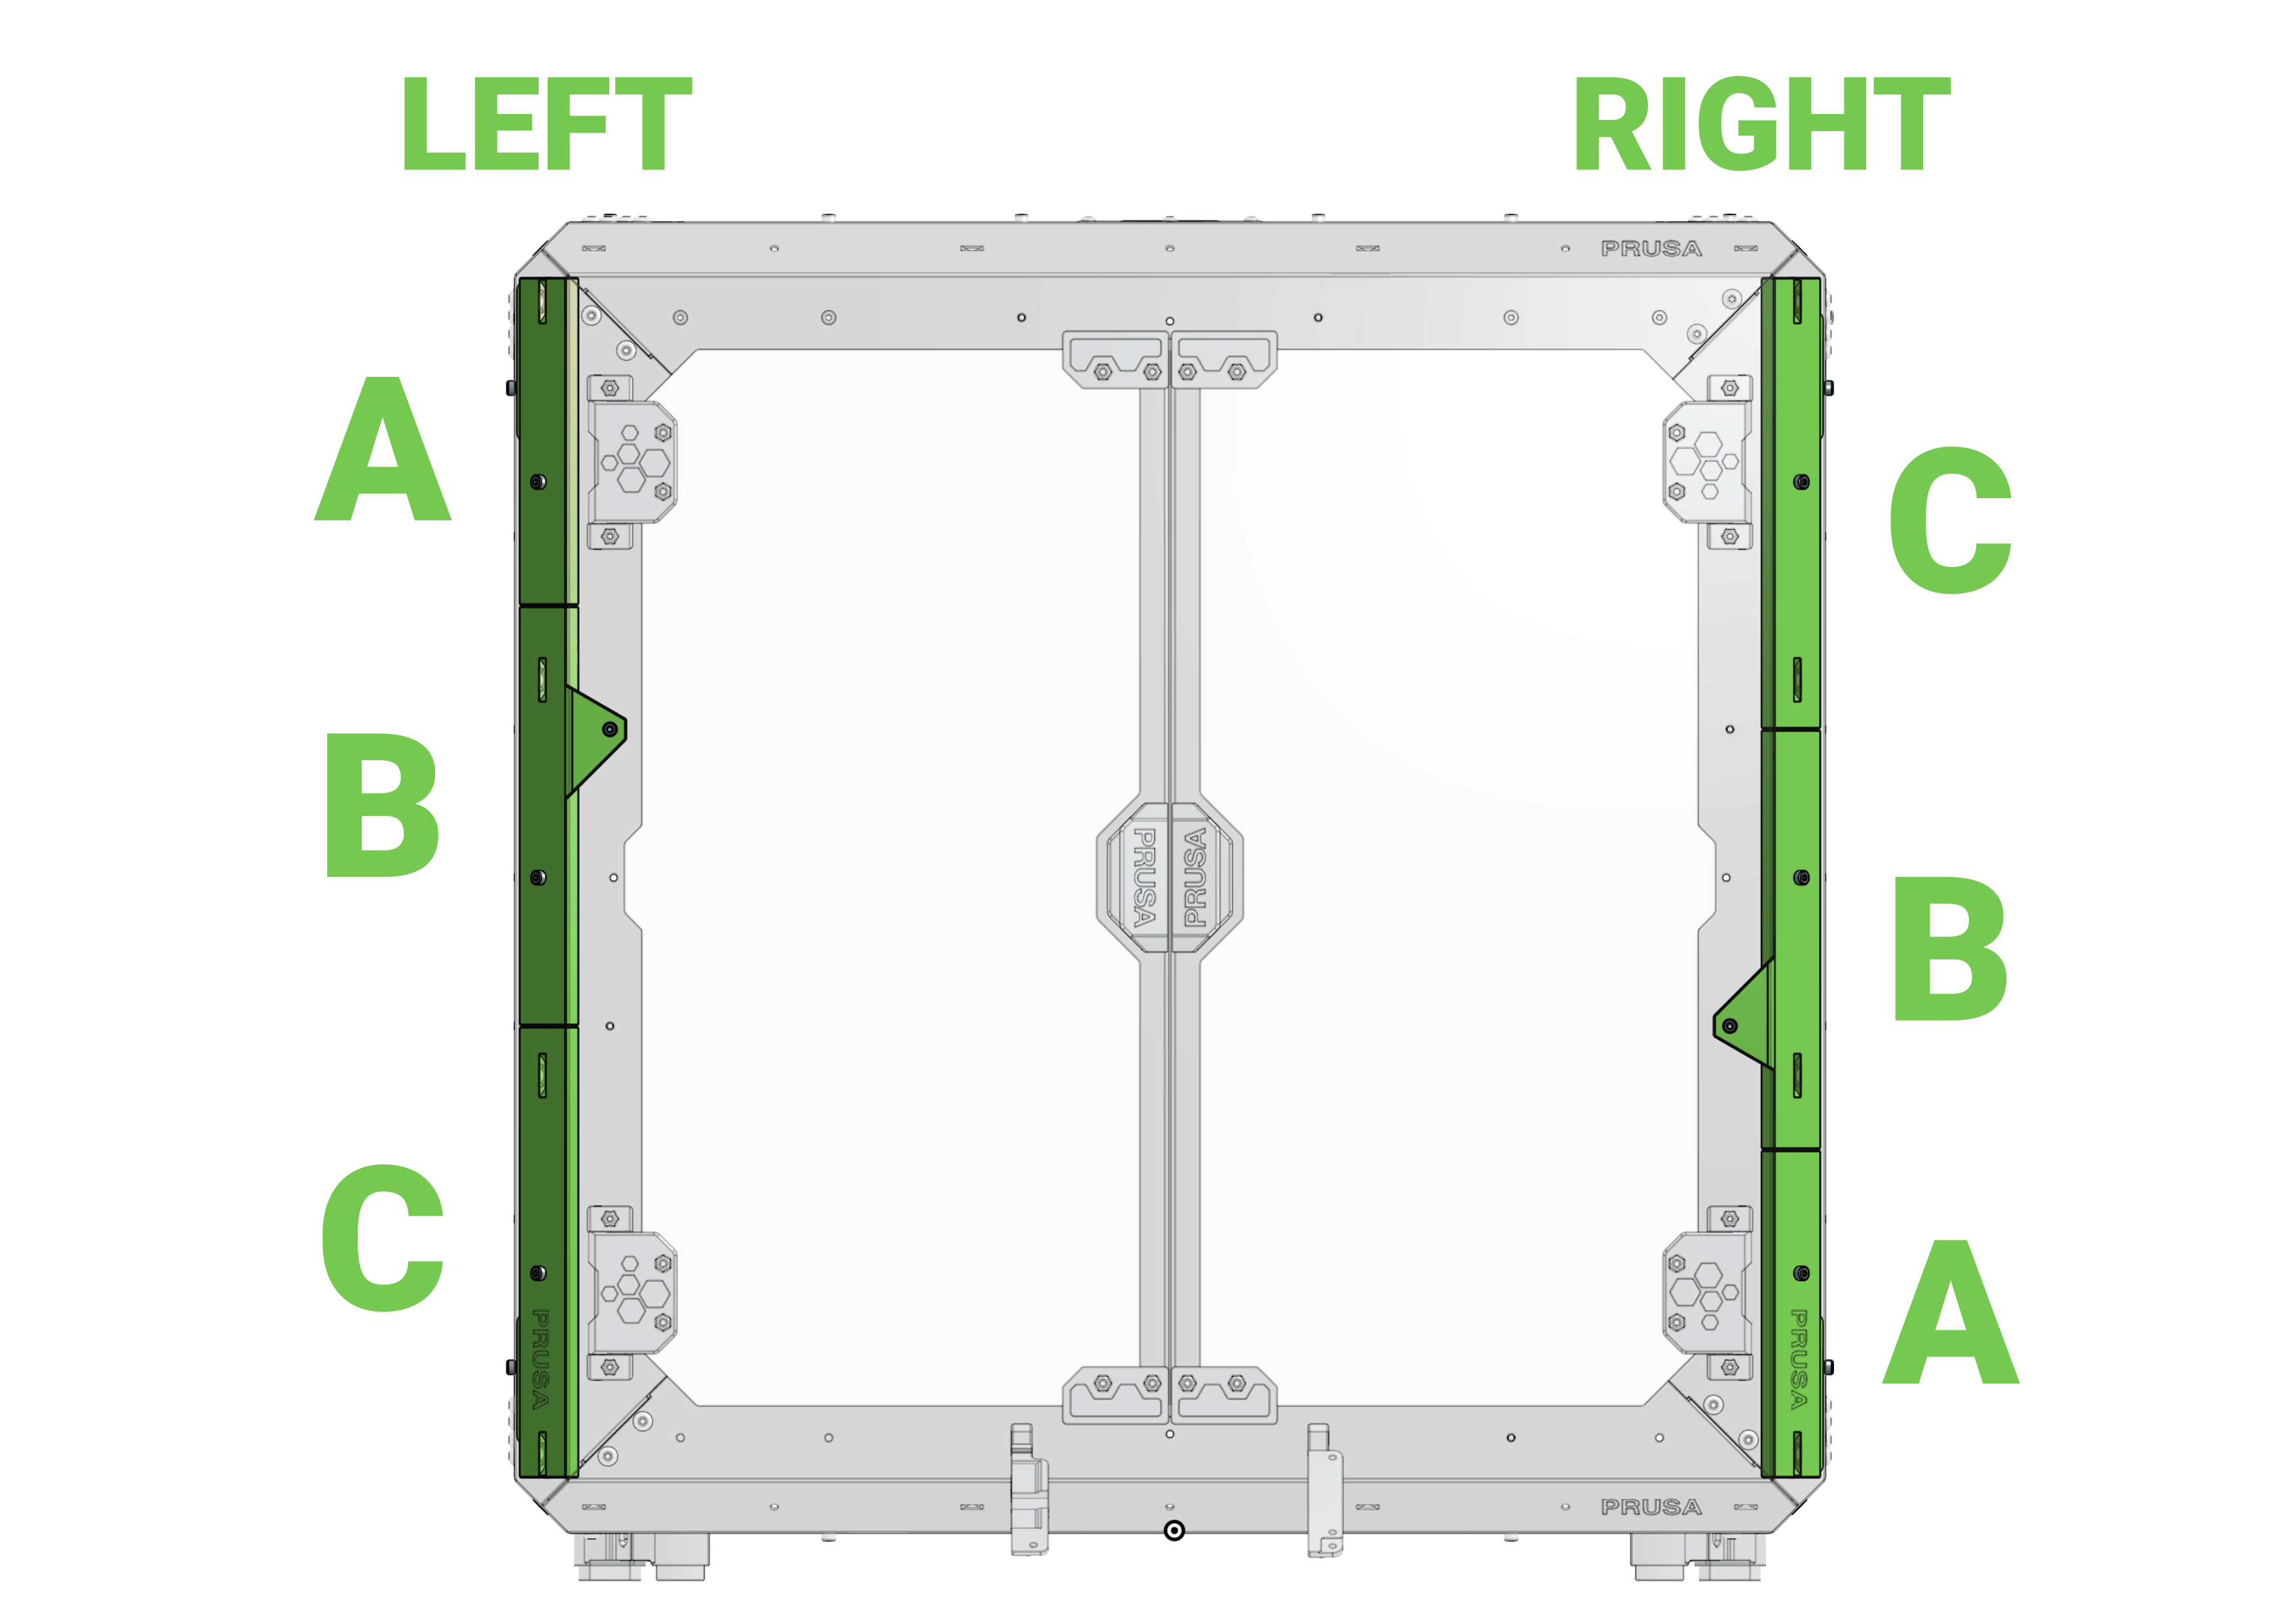
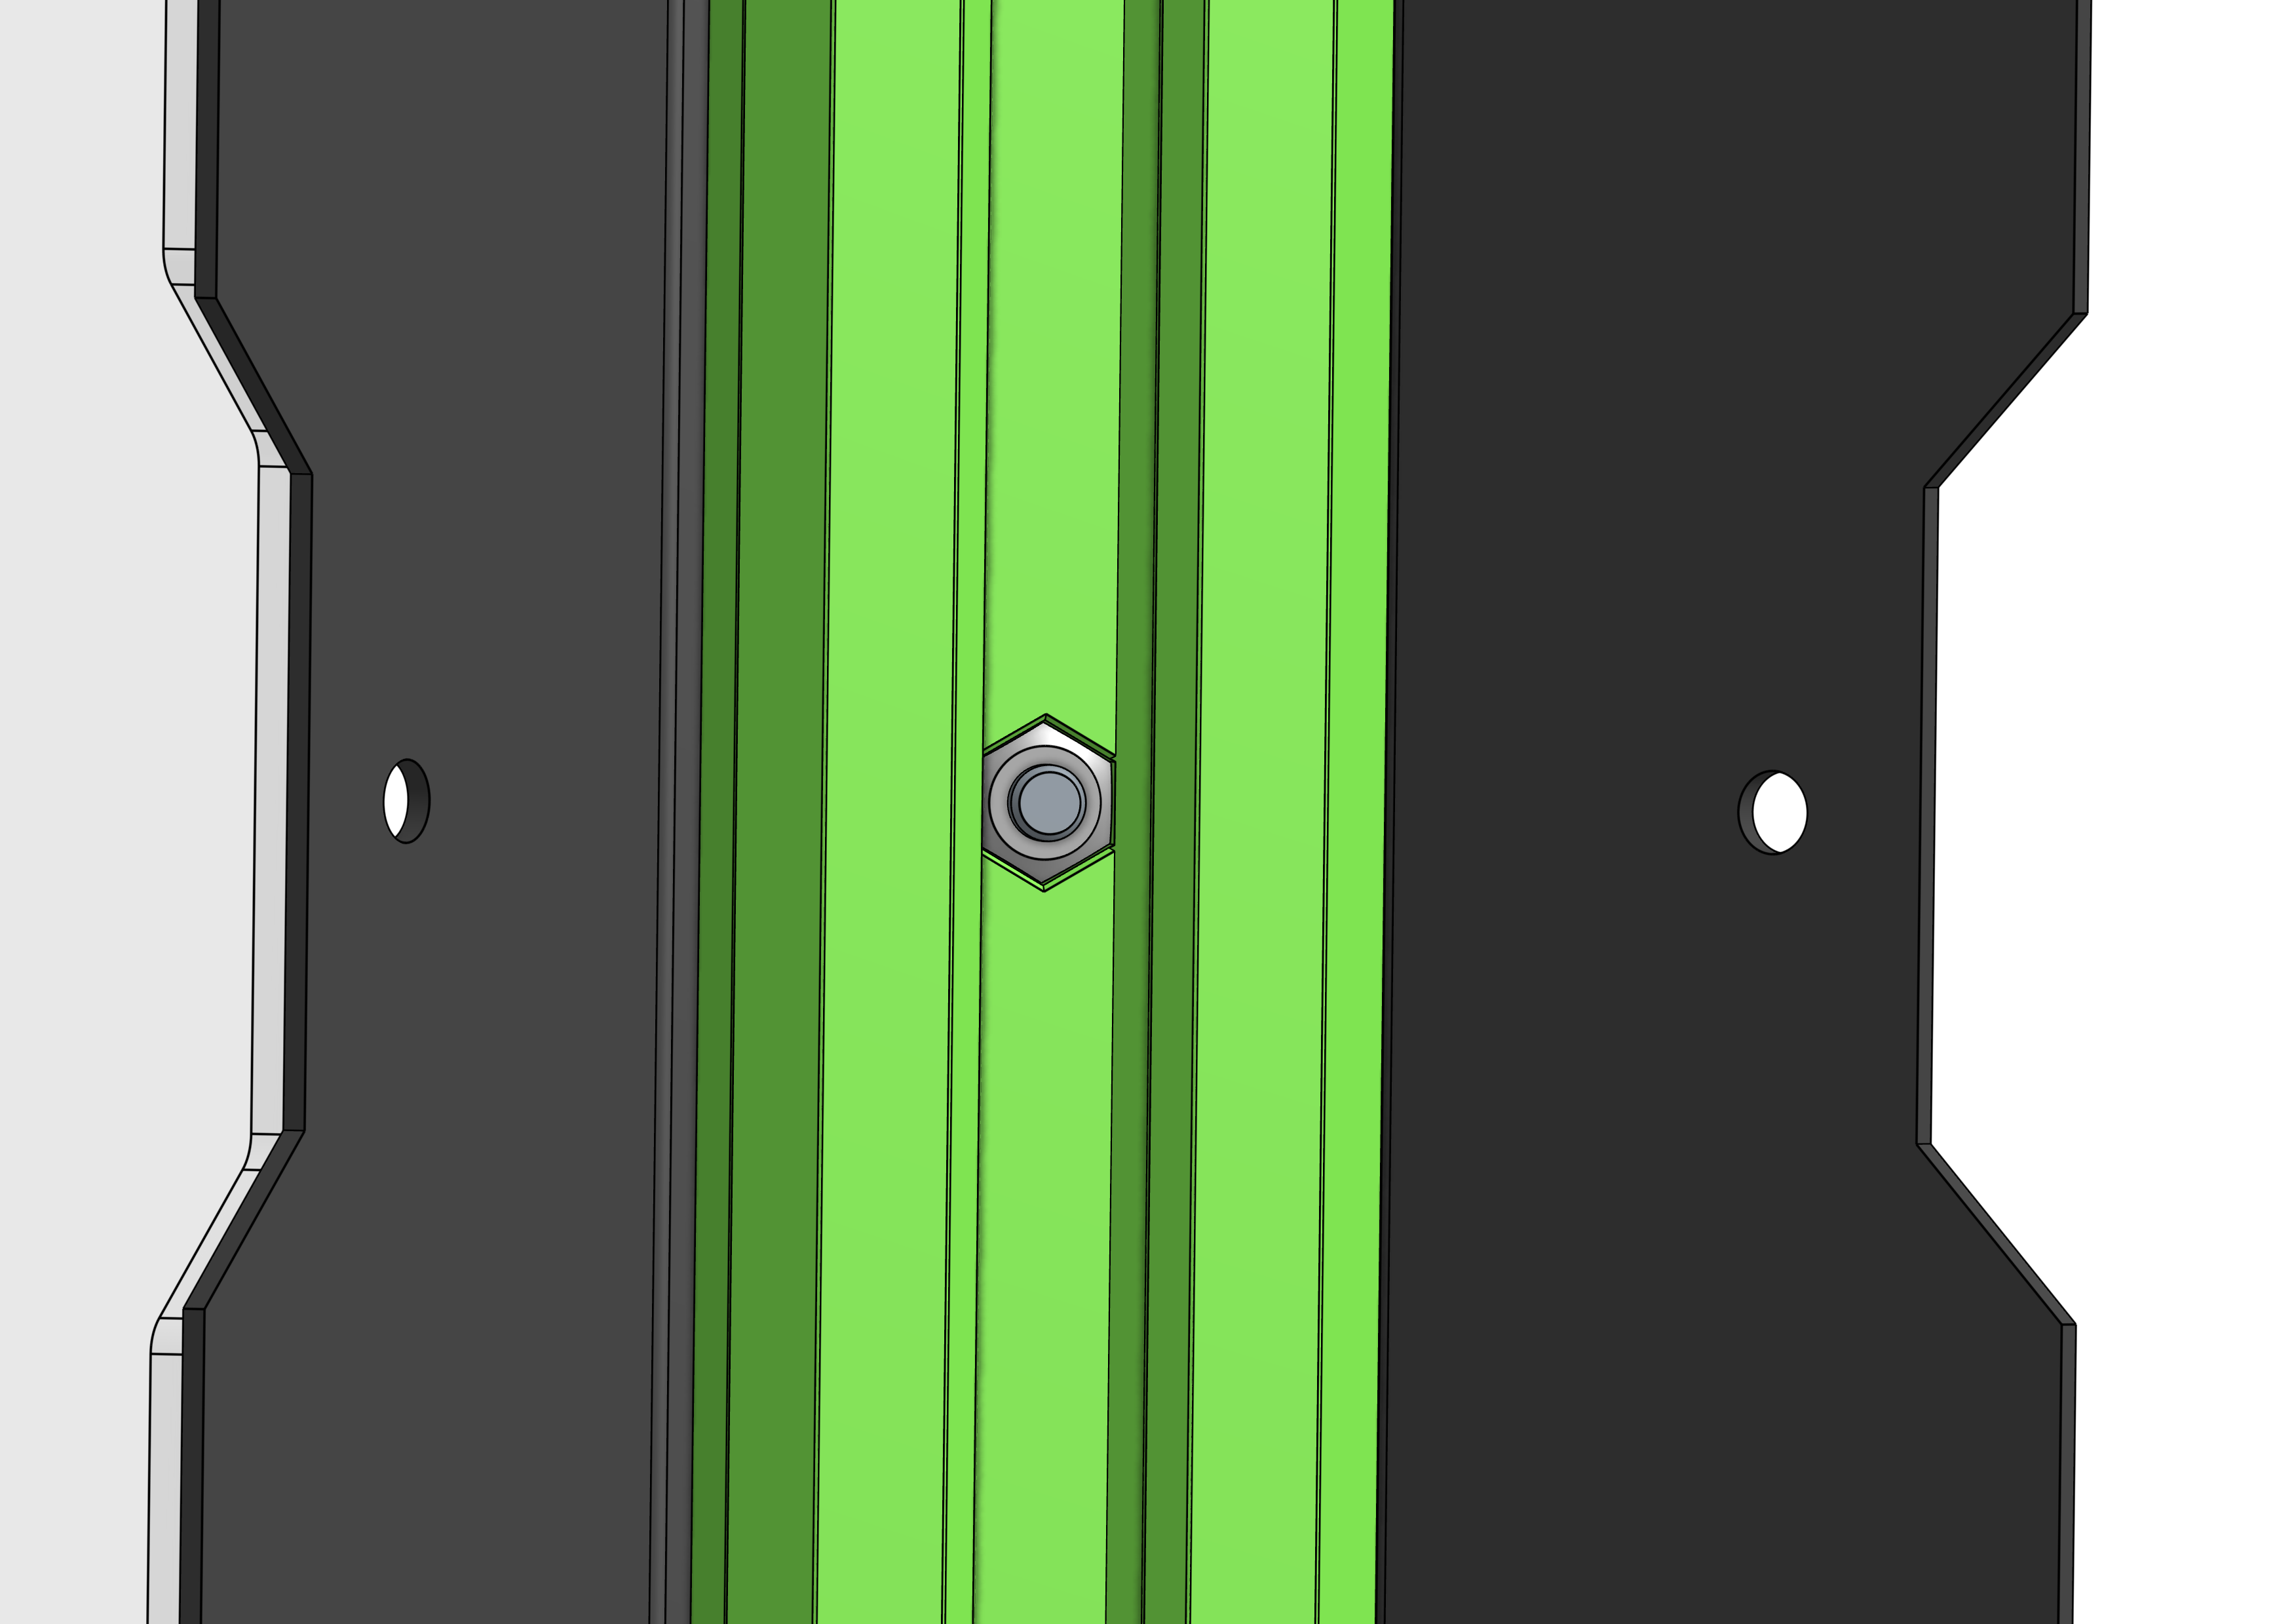
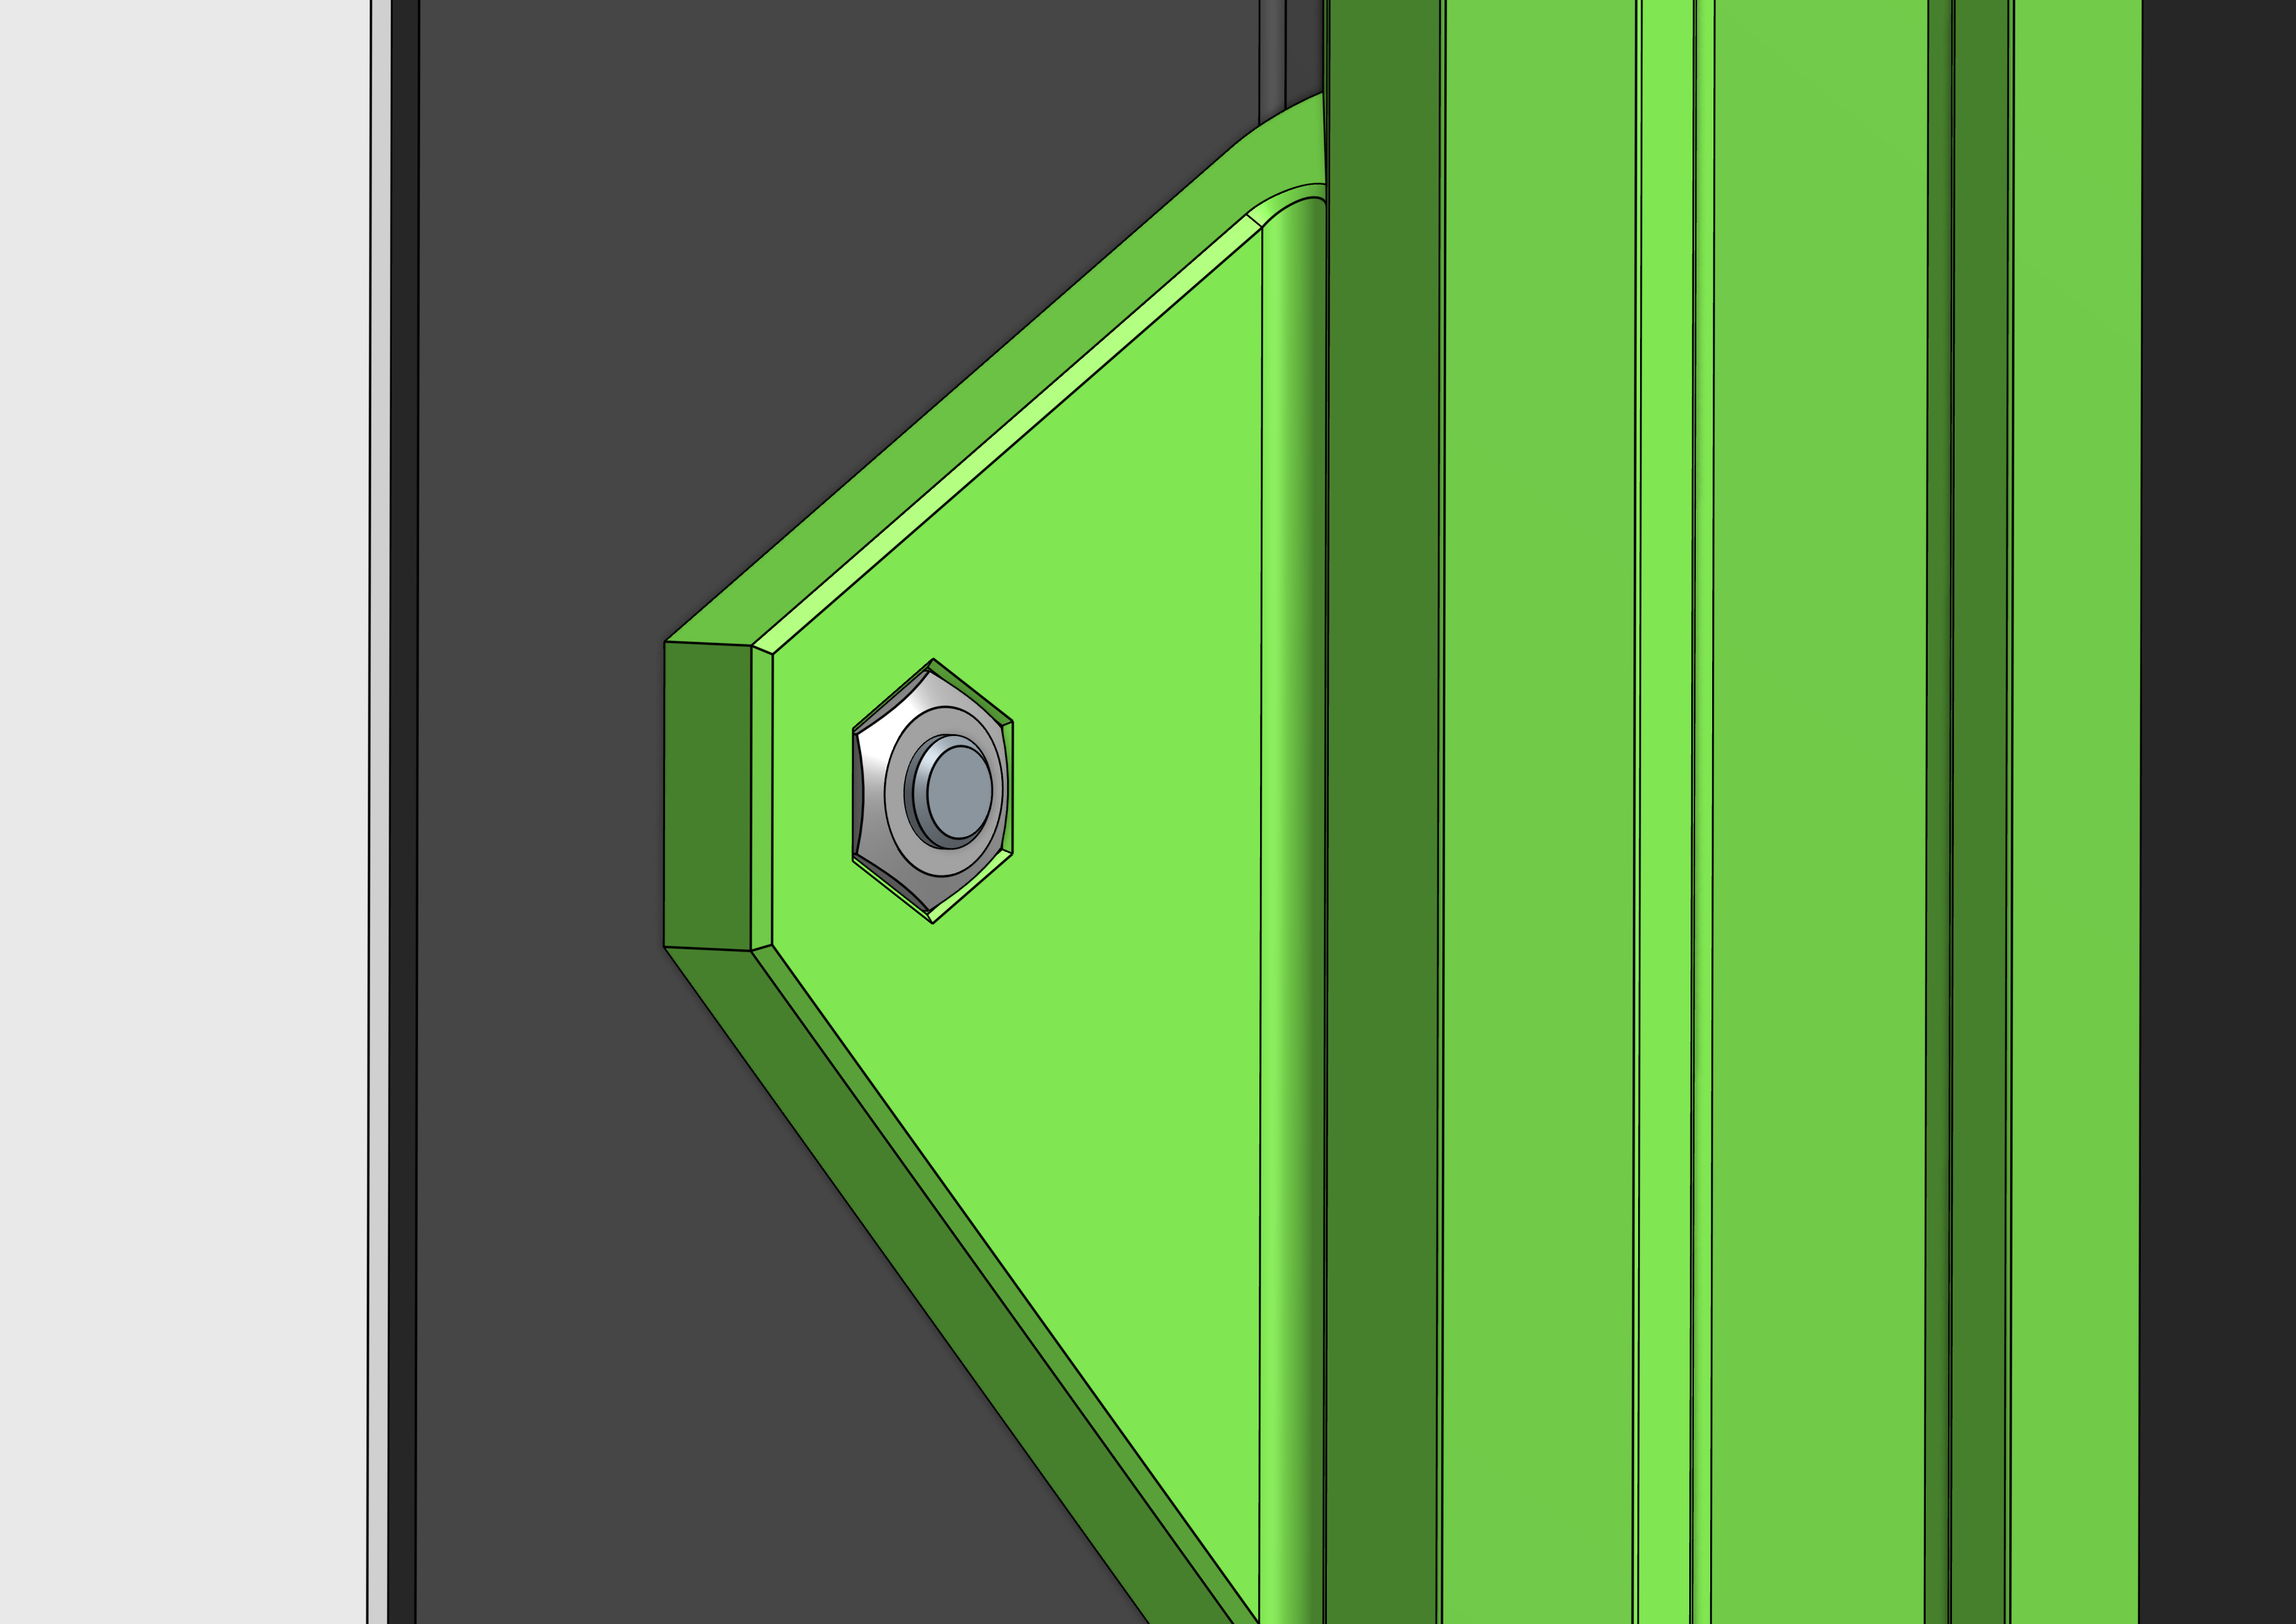
Install each section separately. Insert the hex nuts into the rail slot and the wing. Then attach it to the frame from the inside and fasten it with an M3x6mm screw from the outside.
For sections A and C you may have to hold the hex nut in place with one hand while installing it.
 |  |

Additional Credits / Info
- The enclosure shown in the illustrations is the Original Prusa Enclosure by Prusa Research.
- The 2020 Drop-in T-Nut shown in the illustrations is by Claudinei dos Santos Ribeiro on GrabCAD.
- The corner caps used in the illustrations are the Corner Caps by @BuildX.
- The webcam case shown in the illustrations is the Arducam B0205 case.
- The arms and knobs show in the illustrations are the Modular Mounting System Arms.