
Voron Trident Auxiliary Fan
Obliczymy ostateczną cenę na podstawie wybranego pliku. Sprawdzisz ją i zaakceptujesz przed płatnością.
Zapisane na tym urządzeniu.

Adds a 120mm auxiliary part cooling fan to the Voron Trident, inspired by the VzBot RSCS
- Ocena
- 4,9 / 5
- Polubienia
- 325
- Pobrania
- 1228
- Wydruki
- 9
- Wyświetlenia
- 10 019
- Oceny
- 10
Aktualizacja u źródła:
Informacje o modelu
- Źródło
- Printables
- Kategoria
- Voron Parts & Upgrades
- Licencja
- GNU General Public License v3.0
About
This adds a 120mm auxiliary cooling fan to Voron Trident 3D printers. This is heavily inspired by the VzBots RSCS cooling fans.
The cooling is mainly targeted at the center of the bed (around 150-200mm wide air stream). No CFD-Simulation done, just a little bit of testing in my Trident.
This duct collides with the XY-Endstop Pod on the right XY-Joint! In this case you can only install the duct on the left side of the printer or remove the endstop pod and move the limit switches to the toolhead and the rear of the gantry.
If you choose to install the duct on the left side of a 250mm³ Trident the outlet will be misaligned with the middle of the bed a bit by ~12mm, because it would collide with the motor mount of the left lead screw.
For people using a LDO-300 CUBE kit (which has 300mm z-height instead of the spec 250mm) there is a 50mm longer “lower” part which you will have to print instead of the “spec” one.
For firmware configuration you can use the same config I created for my V0 Auxiliary Fans over on github.
2023-09-11:
I uploaded alternative versions of the top piece that allow you to secure the top to the front idlers to make it more secure. These are currently completely untested, so there might be some interference or installation issues. Additionally you will need to replace one of the front idler screws with a M5x16.
BOM
| Part | Qty |
|---|---|
| M3x5x4 Heatsets | 10 |
| M3x6 BHCS or SHCS | 6 |
| M3x8 BHCS | 1 |
| M3x12 BHCS | 3 |
| M5x6 BHCS or SHCS | 2 |
| M5 T-Nut | 2 |
| 12032 Blower Fan | 1 |
Print Instructions
All STLs are correctly oriented for printing.
I'd highly recommend printing the taller ducting parts with a brim as there is very little contact area with the buildplate.
Print with at least 3 Perimeters. Infill ~25%.
Assembly
Insert Heatsets

Insert the fan and secure down with screws. Route the wires through either the cutout on the left or the hole on the right.

Assemble the duct


Install in the printer
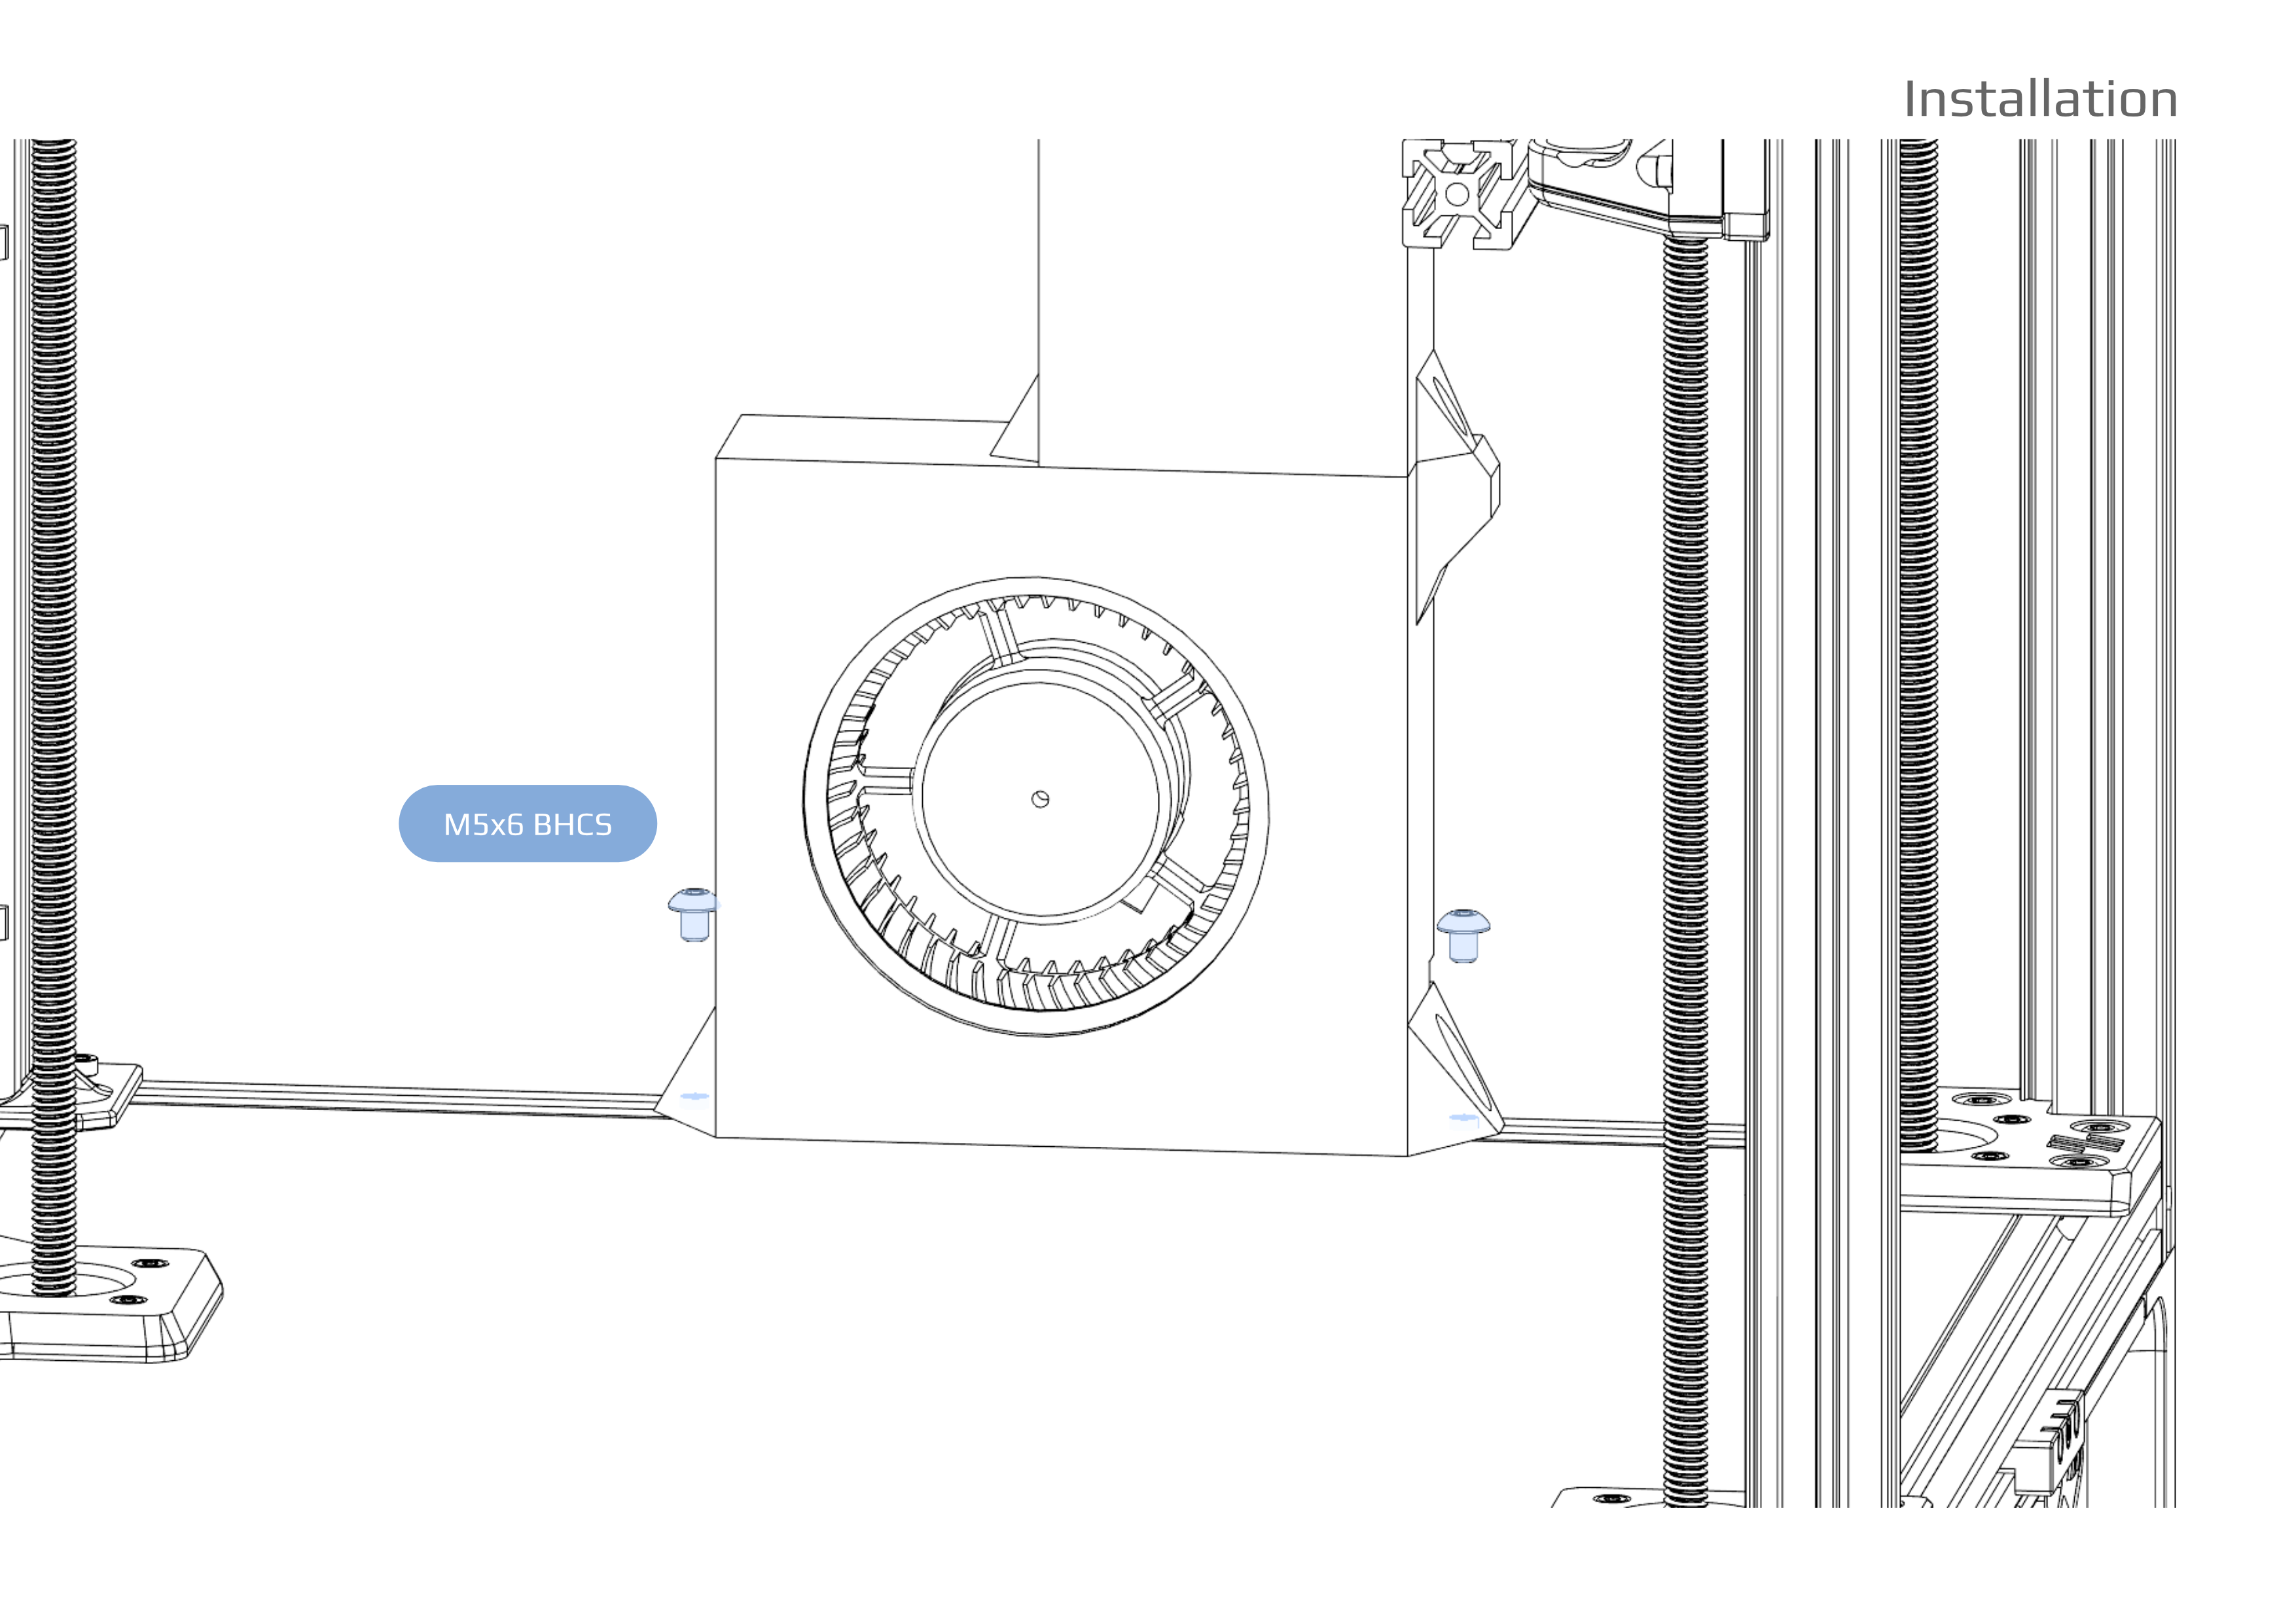
You may want to add some foam or VHB-Tape to the rear of the duct, if you encounter vibrations between the side panel and the duct.