
Minimal IKEA Tradfri Shortcut Button Holder
Obliczymy ostateczną cenę na podstawie wybranego pliku. Sprawdzisz ją i zaakceptujesz przed płatnością.
Zapisane na tym urządzeniu.

Mount IKEA Tradfri Shortcut Button securely on a wall while being able to easily remove it to change battery
- Ocena
- 0 / 5
- Polubienia
- 6
- Pobrania
- 37
- Wydruki
- 1
- Wyświetlenia
- 416
- Oceny
- 0
Aktualizacja u źródła:
Informacje o modelu
- Źródło
- Printables
- Kategoria
- Other House Equipment
- Licencja
- Creative Commons — Public Domain
It's not easy to securely mount the IKEA Tradfri Shortcut Button to a wall. You can use the provided metal plate, but the magnet isn't strong enough and the button gets easily knocked down.
You could attach it with double-sided tape, but that's inconvenient for changing the battery and pairing - you'd have to peel the button off, remove tape residue and apply new tape.
This print replaces the metal backing plate and adds a matching plate you tape to back of the button.
There are two wall-side plate variants - for screws (the holes match the original metal plate), and double-sided tape.
PETG, 0.2mm layers, no supports
F3D file is included.
Instructions:
- Print the button-side plate, one of the wall-side plate variants, and the alignment jig.
- Apply two 1cm wide strips of double-sided tape to slots on the button-side plate. (I used Tesa Powerbond Indoor.) Peel off the protective foil.

- Put the button-side plate into the alignment jig with the tape facing up. Insert the button in the jig. Make sure the back screw aligns with the hole on the plate. Press firmly.

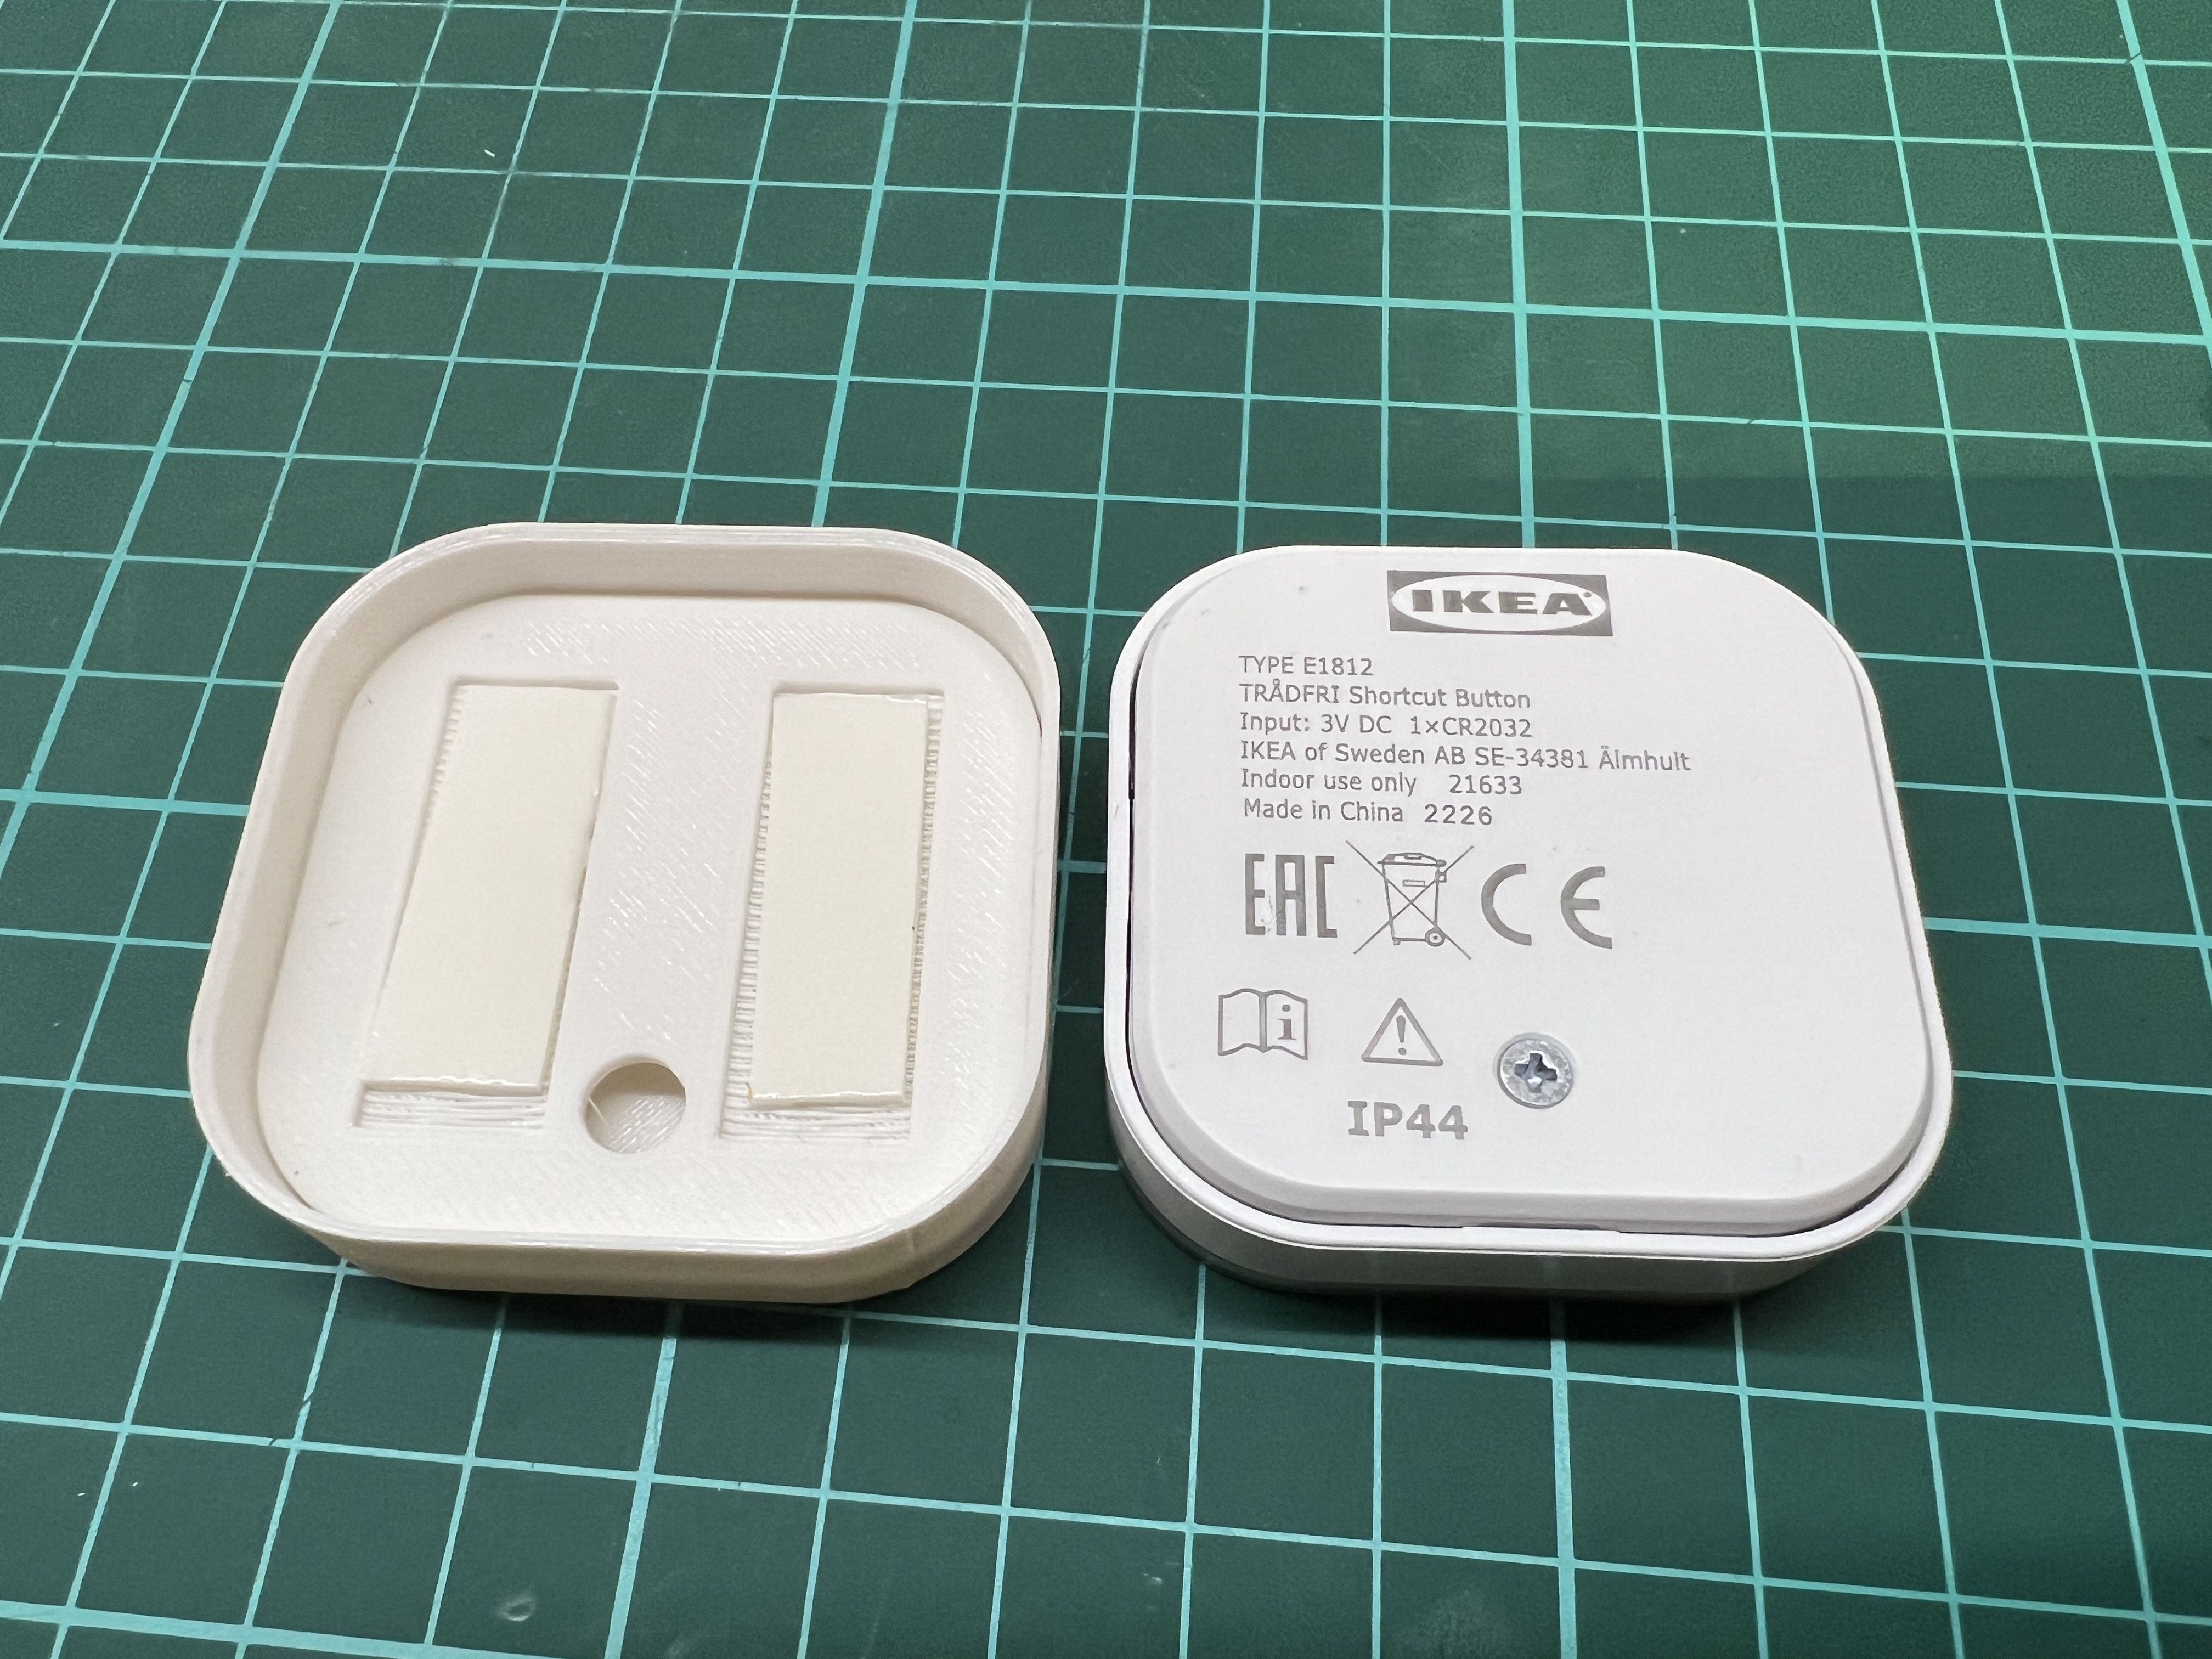

- Attach the wall-side plate to the wall, either with screws, or using 2 more strips of double sided tape (depending on the wall-side plate you printed). The slot openings should be on top.
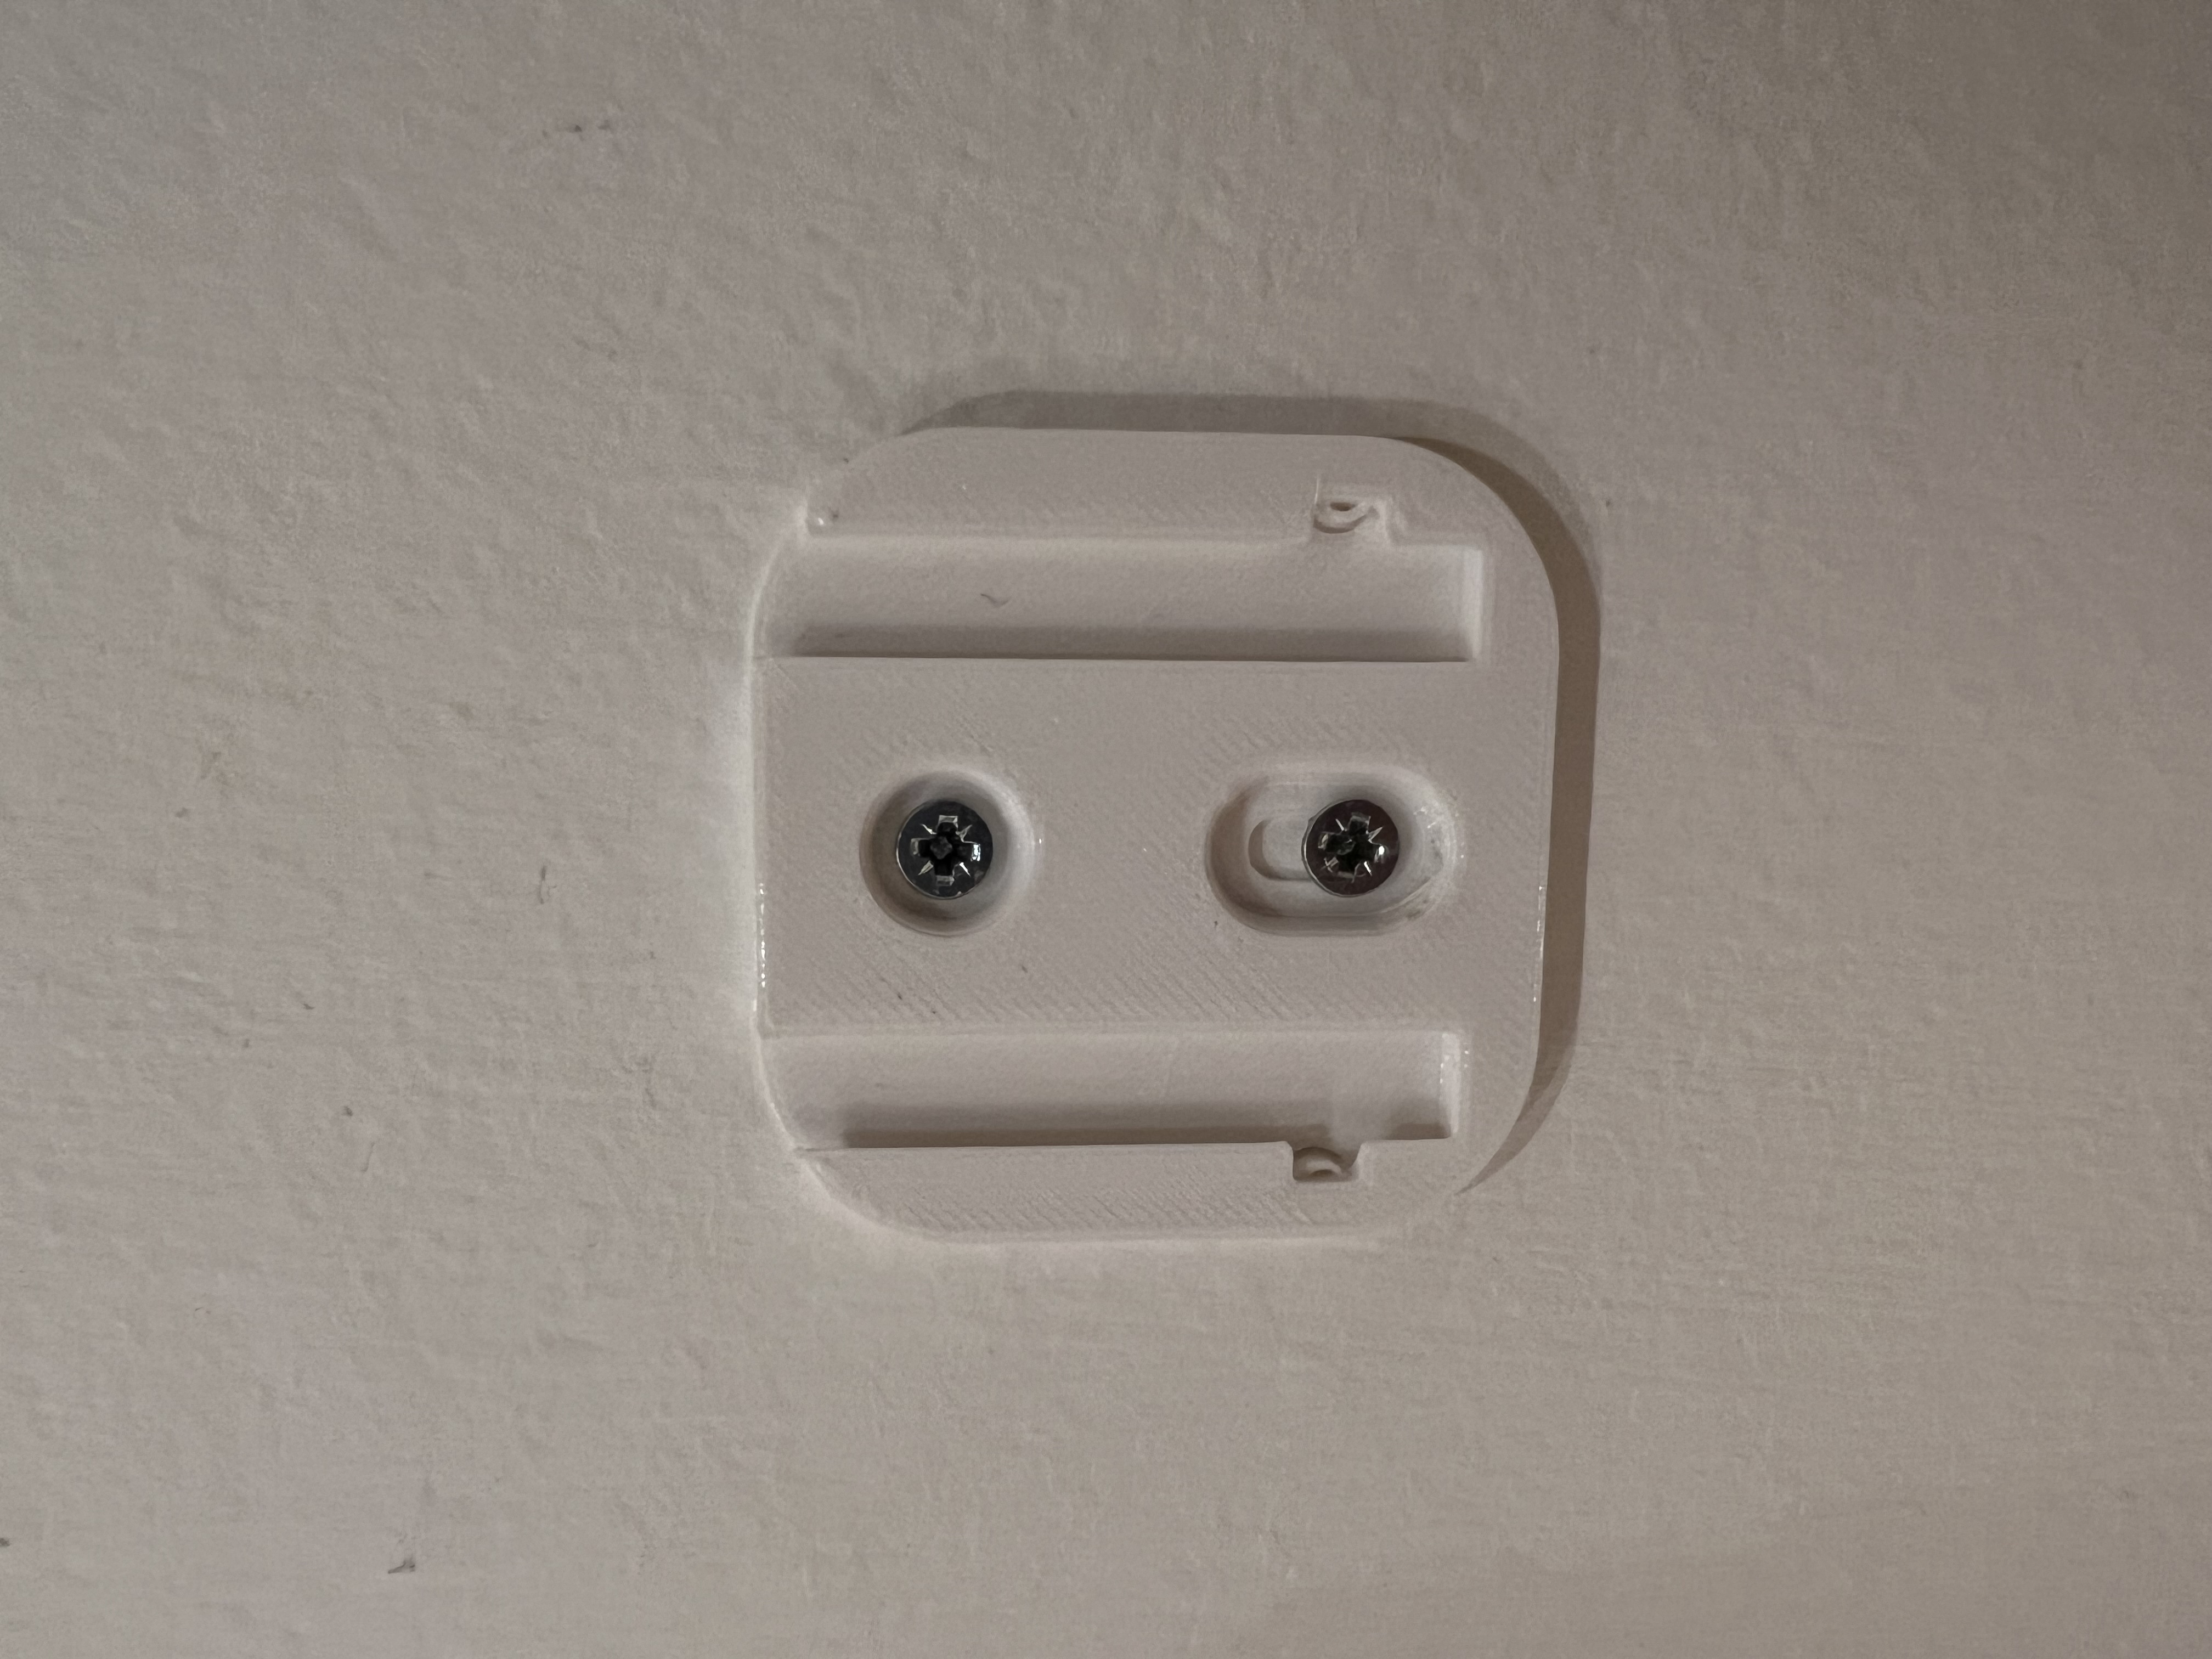
- Slide the button in from the top until it snaps.
