
Plate for 1990 Cherry G80-3000 HAO (WKL) keyboard
Obliczymy ostateczną cenę na podstawie wybranego pliku. Sprawdzisz ją i zaakceptujesz przed płatnością.
Zapisane na tym urządzeniu.

I modified my old keyboard from 1990 into a sleeper enthusiast keyboard. The original had no plate, so I designed one.
- Ocena
- 0 / 5
- Polubienia
- 4
- Pobrania
- 83
- Wydruki
- 0
- Wyświetlenia
- 1683
- Oceny
- 0
Aktualizacja u źródła:
Informacje o modelu
- Źródło
- Printables
- Kategoria
- Computers
- Licencja
- Creative Commons — Attribution — Share Alike

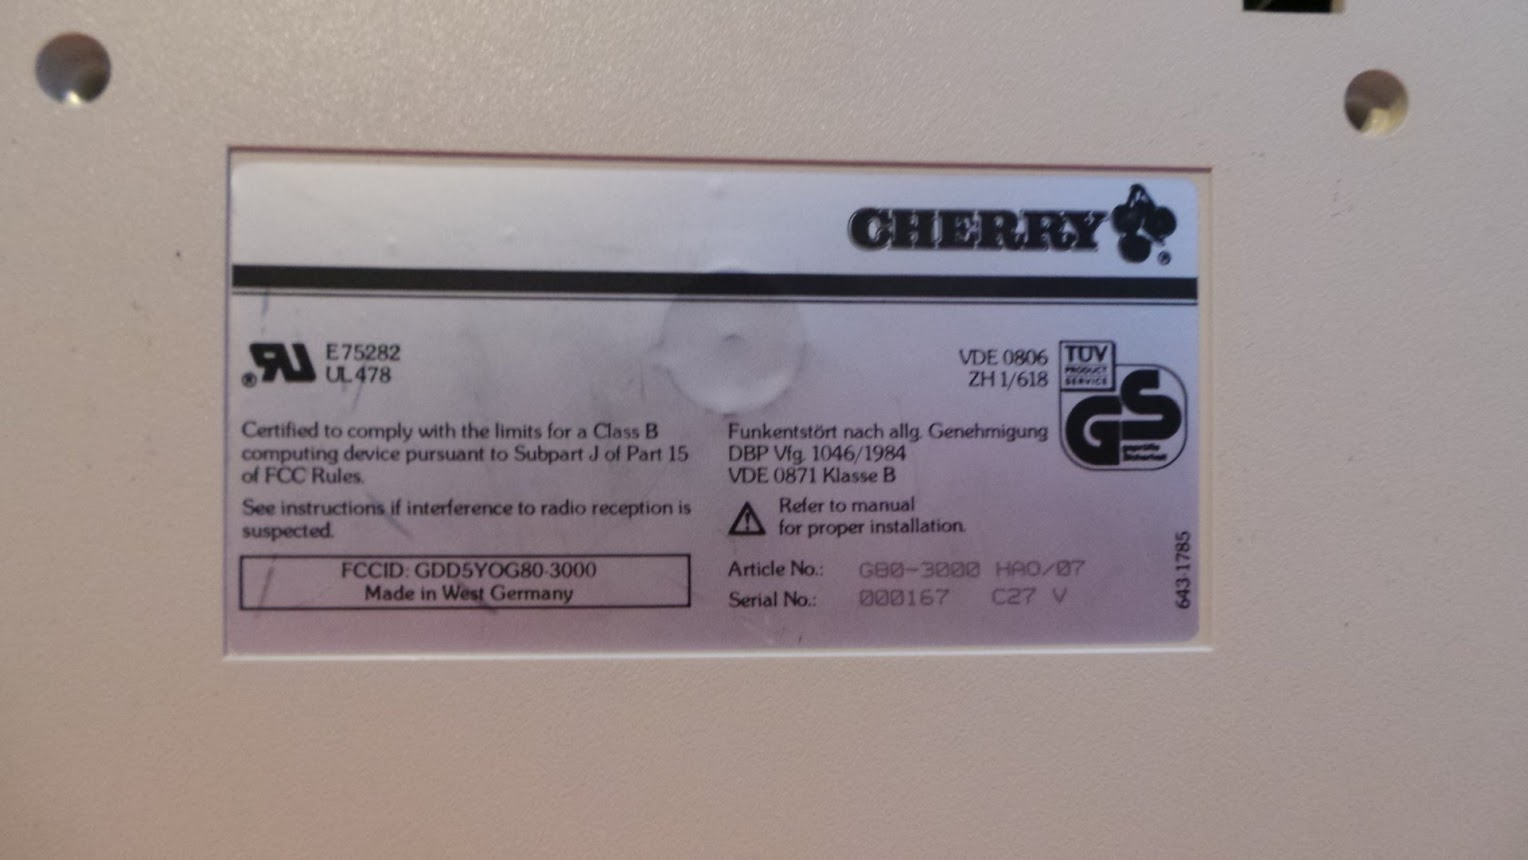
This is one among a series of modifications I made a couple of years ago for my old childhood keyboard, a Cherry G80-3000 HAO (WKL). The date code on the back indicates it was made in week 27 of 1990 (and “Made in West Germany” :D).
The rabbit hole started by me deciding to change out the switches: It came with OEM Cherry MX black switches, and although the vintage ones do have a bit of a following among keyboard nerd, I never really liked them and am squarely in the tactile camp. For the hell of it, I figured “why not take the opportunity to solder in some hot-swap sockets?”, in case I wanted to change to a different set of switches in the future.
Having done this, since there were no longer any solid solder joints pinning the switches down, I noticed that they tended to wobble in the y-direction and were prone to falling out when moving it about if I wasn't careful. This particular model of the G80-3000 did not have a plate, which conventional wisdom tells you is more or less mandatory for hot-swap keyboards.
This would not do, and thus I made life really hard for myself by deciding to design and laser cut my own custom keyboard plate.
Design considerations
My design goals were simple, but took a lot of thinking to achieve. I wanted the plate to appear as if it could have been part of the original design, back in 1990. Thus:
- The plate must fit within the dimensions of the original case. There is only little over a millimeter of clearance in some places, so this was not guaranteed to be possible.
- I wanted to keep the number of non-reversible modifications to the PCB or case to an absolute minimum.
Point 2 was the one that proved the hardest, since the top half of the case has ridges in between the groups of keys (separating the qwerty half, the function keys, the edit keys, the arrows and the numpad into their own individual compartments). When assembled, these ridges reach all the way down to the PCB, which meant that they would interfere with the plate.
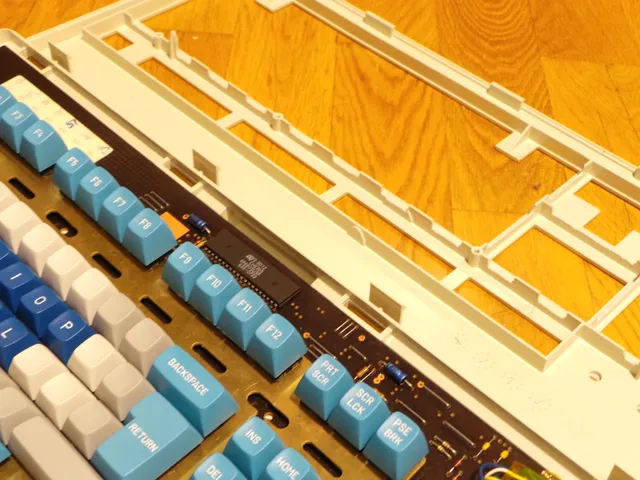
My options were to either design five isolated plates that fit within each of those compartments (with point 1 becoming even more of a pain, because of the even tighter clearance next to the ridges) or to allow myself to strategically cut away parts of the ridges. I went with the latter option (see the image on the right). Since the ridges do prevent the plastic in between the key groups from flexing down awkwardly, I left certain parts of it and instead designed the plate with matching cutouts where these parts could poke through.
This, along with widening the hole where the old cable went into the case to allow for a USB-C port were the only non-reversible modifications I did to the case.

One final non-reversible change was done to the PCB: The G80-3000 had a stepped CapsLock key. Not my cup of tea, since I always map CapsLock to Ctrl and use it extensively and stepped caps tends to wobble a bit. Keycap sets with a row-3 Ctrl key tend to assume a full-width key, with the location of the switch offset half a unit to the right (since the stem is located squarely in the middle of the keycap in this case). I modified the PCB by drilling holes and adding the hot-swap sockets so that I could place a switch as required for the full-width variant. The only caveat was that the switch had to be rotated into the north-facing orientation (which did not cause any trouble with my model of keycaps).
The plate thus has a wider cutout for the CapsLock switch, to accommodate for either the stepped or full width variant.
Files
This project contains:
- The final plate design in DXF, STL and STEP format
- An STL of the plate divided in two halves, to fit on a standard 3d printer. I used this to verify that the location of the cutouts and clearances were correct before ordering the full-size plate from the laser cutter.
- A set of 3d-printable jigs for accurately lining up and marking out the sections of the ridges to cut away from the top half of the case, in STL format.
- The source file for the keyboard layout, created in http://www.keyboard-layout-editor.com/ (also available at https://gist.github.com/jmickelin/90e5c48df0368a143cbda5471e313d80).
- A DXF of the plate generated from the above layout specification using http://builder.swillkb.com/ (only for the location of the holes, since this tool has no concept of what the case looks like). See the note below regarding this file.
- The FreeCAD project for this entire thing.
More information
In addition to this plate, I did several other modifications to turn this into a “sleeper" keyboard, including:
- Added hot-swap sockets (Mill-Max 3305 (2.67mm), S/N:
3305-0-15-80-47-27-10-0). - Soldered on a DIN-to-USB converter board (with my own modified TMK firmware: https://github.com/jmickelin/tmk_keyboard). The board is the IBMPC[PS/2] model by Hasu, based on the ATMega32u2.
- Made the cable detachable, with a USB-C port on the back.
- Changed the stabilizers (Durock v2). The old ones were really rattly and awful.
- Modified the PCB to fit a full-width CapsLock key (in the north-facing orientation).
- Changed out the switches (SP-Star Dark Magical Girl).
- Changed out the keycaps. I am using two sets of MT3 keycaps: MT3 Dasher for the majority of the keys and MT3 /dev/tty Bleached for the Swedish keys. This was an (expensive) compromise made because finding non-US keycap sets in stock is really hard. It seems that they have since actually done more print runs of international addon sets of keycaps of the /dev/tty model. But I have grown to like the splotches of blank keys on mine quite a bit. The only gripe is that the Dasher keycaps are ABS, while the /dev/tty ones are PBT, so they feel and sound ever so slightly different. It's not something you really think about when using the board for work, though.
- I made the numpad (which I never use) into a silly little experimental emoji-pad. For this I used cheap relabelable keycaps from Aliexpress and some printed legends. I need to fix up the legends at some point, since it looks kind of terrible. Or perhaps I can CNC and color in my own legends on some of the remaining blank keycaps? The future will tell.
Since this upload is only intended to be about the actual CAD models for the plate, I shouldn't litter it with extensive details of the other modifications. However, a while back I made an image album documenting most of them here (with details in the image descriptions). It is somewhat outdated - e.g. I use different switches now - but otherwise exhaustive.
Ordering a laser cut
I ended up paying a laser cutting service (laserboost.com) to cut the plate out for me out of 1.5mm brass. In the end I feel like the cost was worth it and the keyboard now has a very hefty weight to it and sounds amazing to type on. Other laser cutting services are available (and probably way cheaper, depending on your location). With a well-calibrated 3d printer, one could also simply use the two-halves prototype version as-is and save a ton of money.
Note!
In between me generating the initial holes for the switches using the Swillkb tool and me sending off my design files for laser cutting, somehow the dimensions of the holes ended up undersized by about 0.2mm. I do not know what caused this, but the error was present within my FreeCAD project and not something that could be chalked up to manufacturing error. I have since corrected this error and the files uploaded here should be the correct dimension. The only exception, possibly, is the DXF as produced by Swillkb.
(This was a major source of pain for me, having just spent a bunch of money on my fancy brass plate, since the switches took too much force to press in place. This is the reason I didn't upload this project to Printables previously. Luckily, I now have access to an excellent Makerspace with a CNC machine which I recently used to trim off tenths of millimeters around the edges of the holes until I got a good fit.)
Why did you do all this when you could just have bought a proper mechanical keyboard?
Dunno. I had an itch to scratch. Covid did weird things to a lot of us.