
Foaming Soap Countertop Adapter
Obliczymy ostateczną cenę na podstawie wybranego pliku. Sprawdzisz ją i zaakceptujesz przed płatnością.
Zapisane na tym urządzeniu.

Allows replacing standard countertop soap dispenser with a foaming soap pump. Works on countertop, sink, and jar lid.
- Ocena
- 5 / 5
- Polubienia
- 17
- Pobrania
- 93
- Wydruki
- 1
- Wyświetlenia
- 1513
- Oceny
- 1
Aktualizacja u źródła:
Informacje o modelu
- Źródło
- Printables
- Kategoria
- Kitchen
- Licencja
- Creative Commons — Attribution — Noncommercial
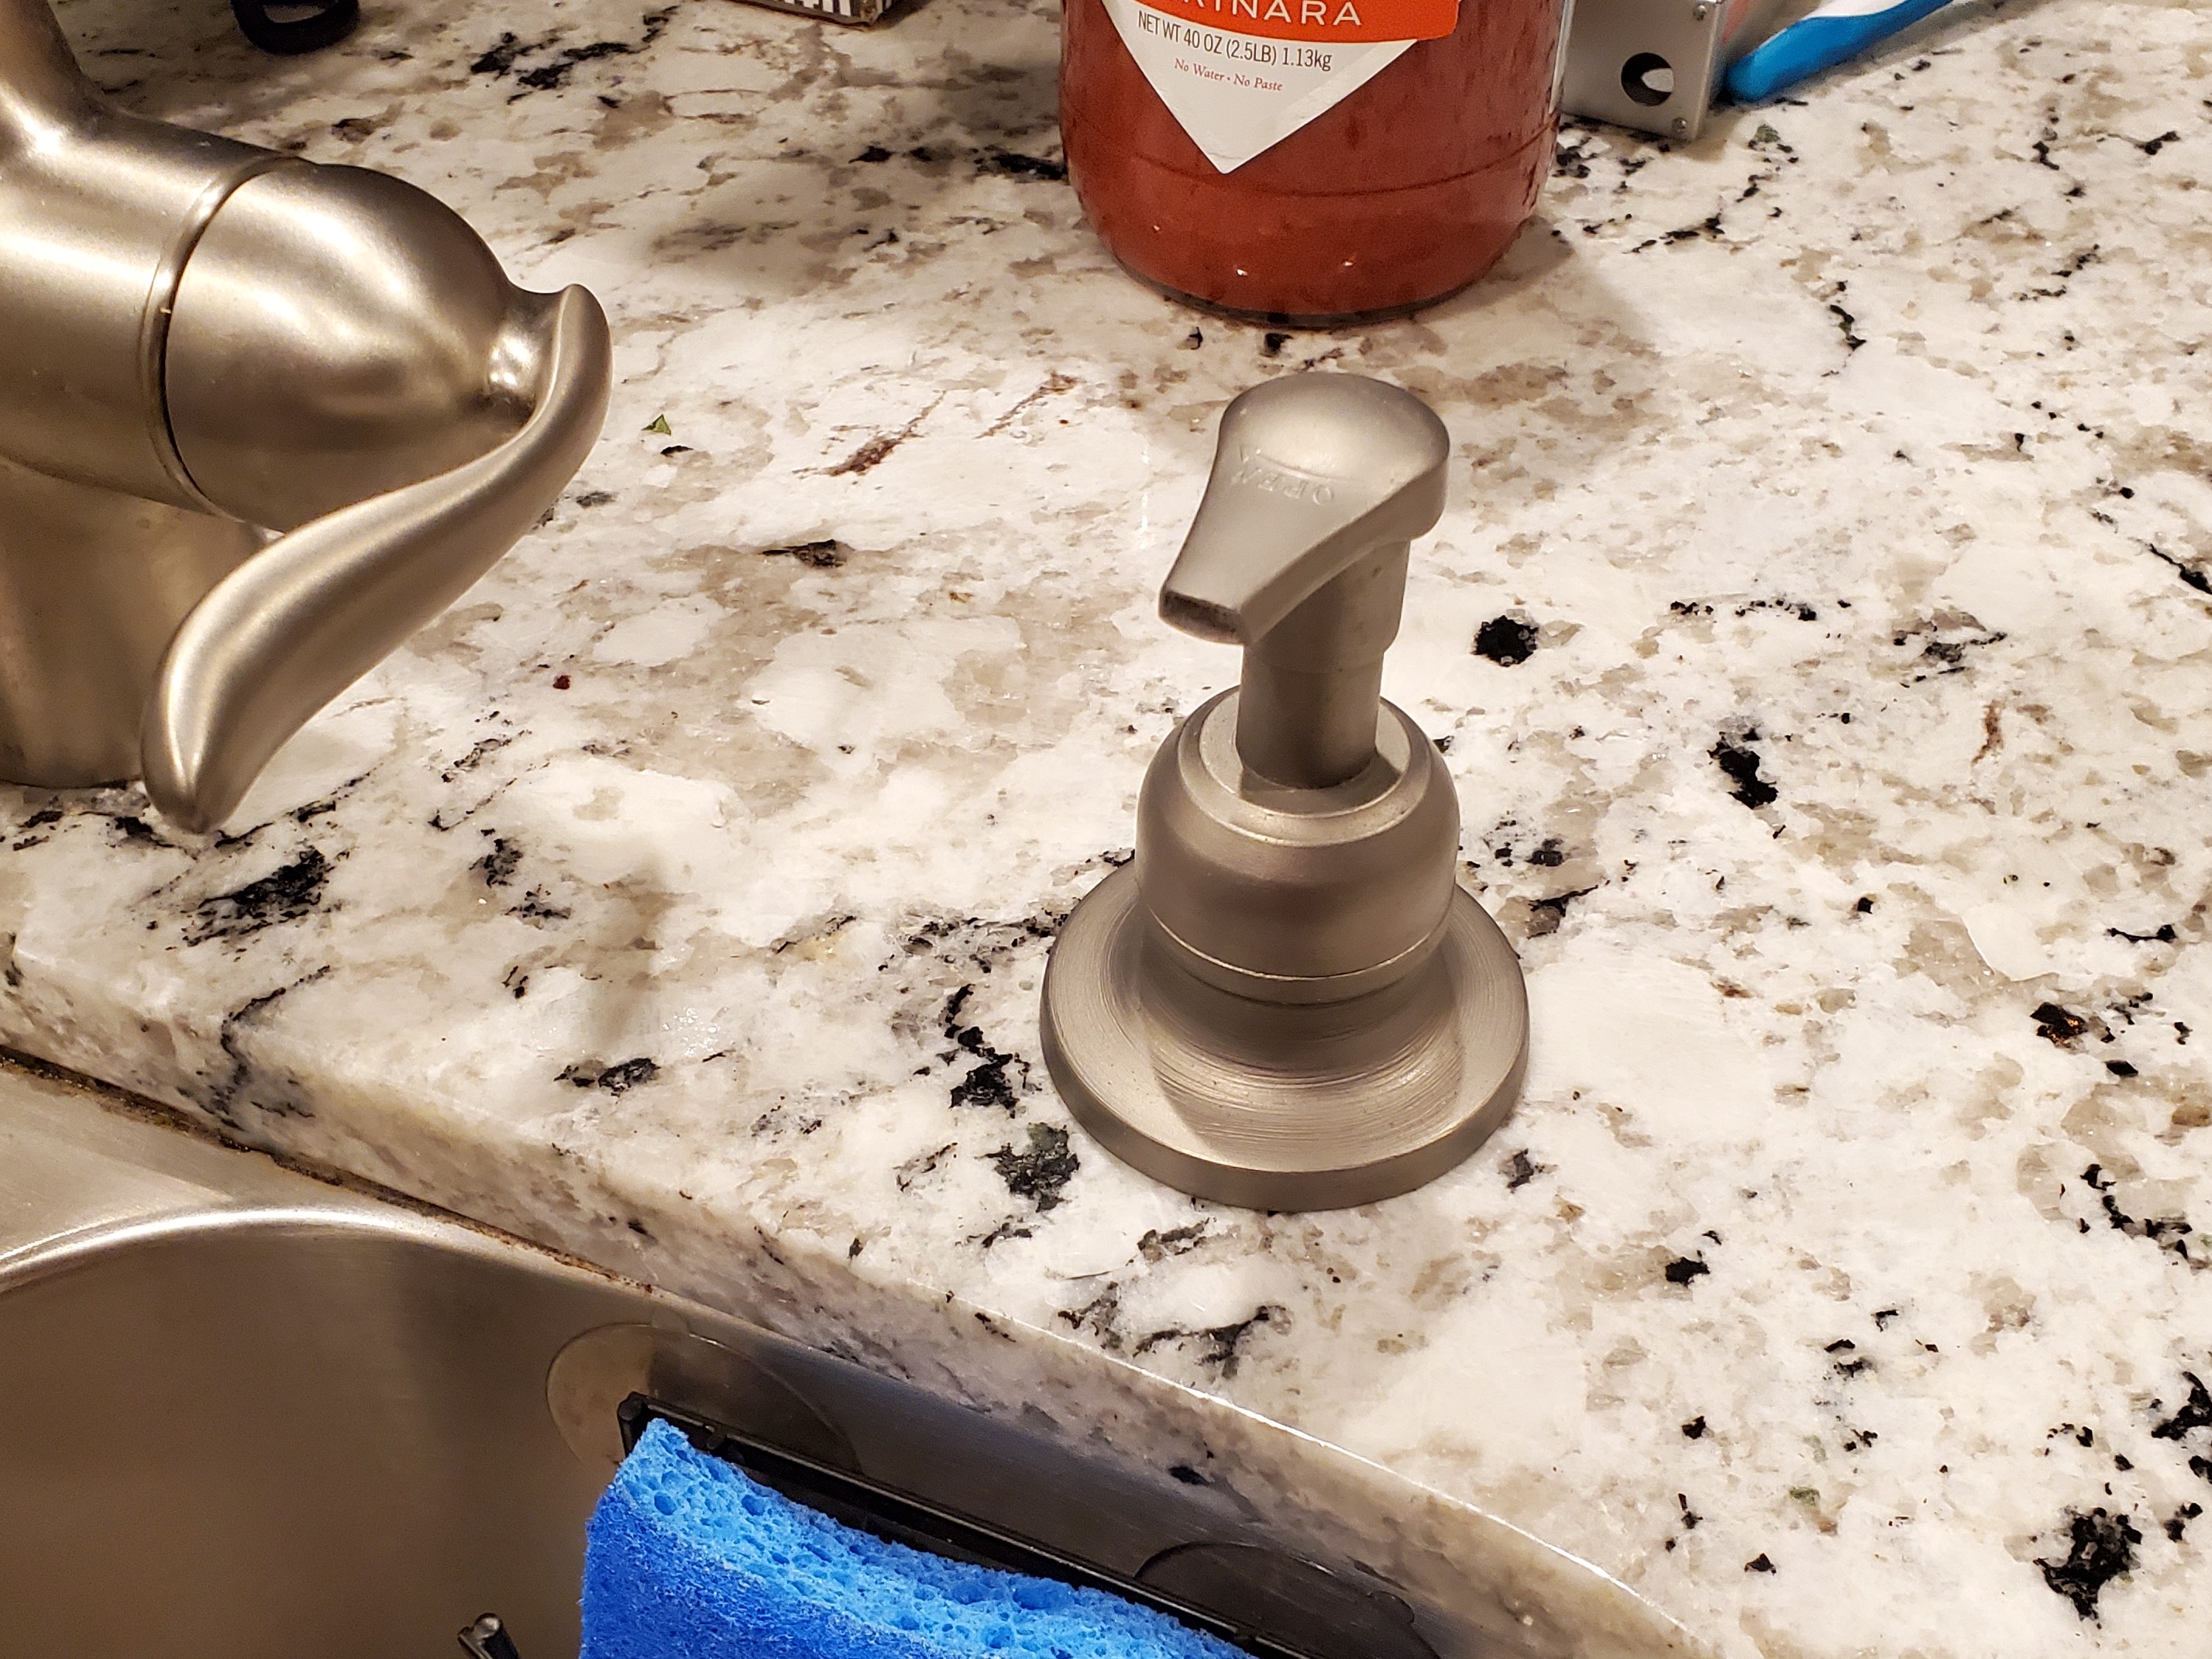
Summary:
This project allows one to replace existing countertop soap dispenser with a regular foaming soap pump, or any regular soap pump with the proper thread. The adapter can be installed on countertop, metal sink, jar lid, or any container with flat lid really.
With the foaming pump, I can have total control over how much soap to use. Most of the time, I pump once for washing hands, or lightly oiled dishes/pans/pots. Really greasy pans will need 2-pump worth of soap. Rarely do I need to pump thrice.
With the pump sipping from a 1-gallon jug of foaming soap liquid, it ran for just under a year before needing a refill. For reference, I used the same pump for both washing hands and cleaning cooking wares daily in the kitchen.
Motivation:
The regular soap pump just spills way too much soap each press, which often leads to wasting soap and water, and makes rinsing take more time than necessary.
On the other hand, bottled foaming soap works great, but the bottle comes with the foaming soap don't last very long before they need to be refilled as well.
I want a foaming soap pump that can replace the original soap dispenser, but I didn't find any readily available product that satisfies my need. That's where this project came to be.
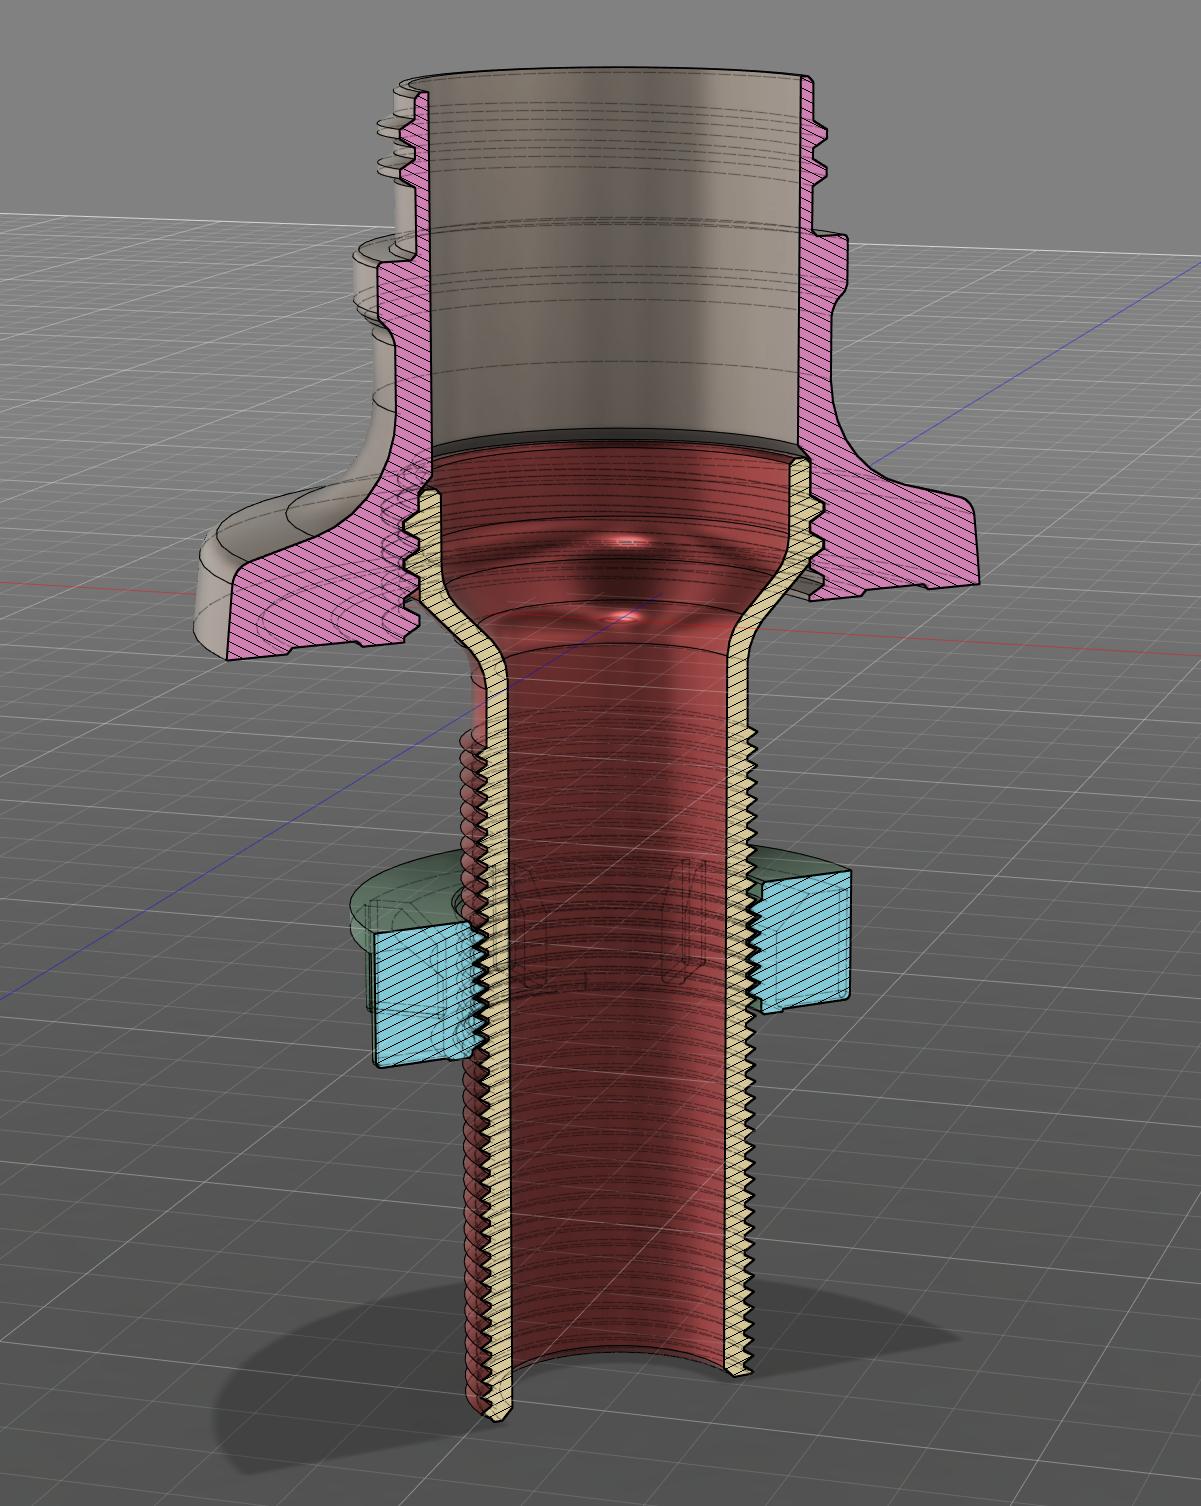
Sectional view:
- Wide neck version with countertop connector
- Narrow neck version with jar lid connector
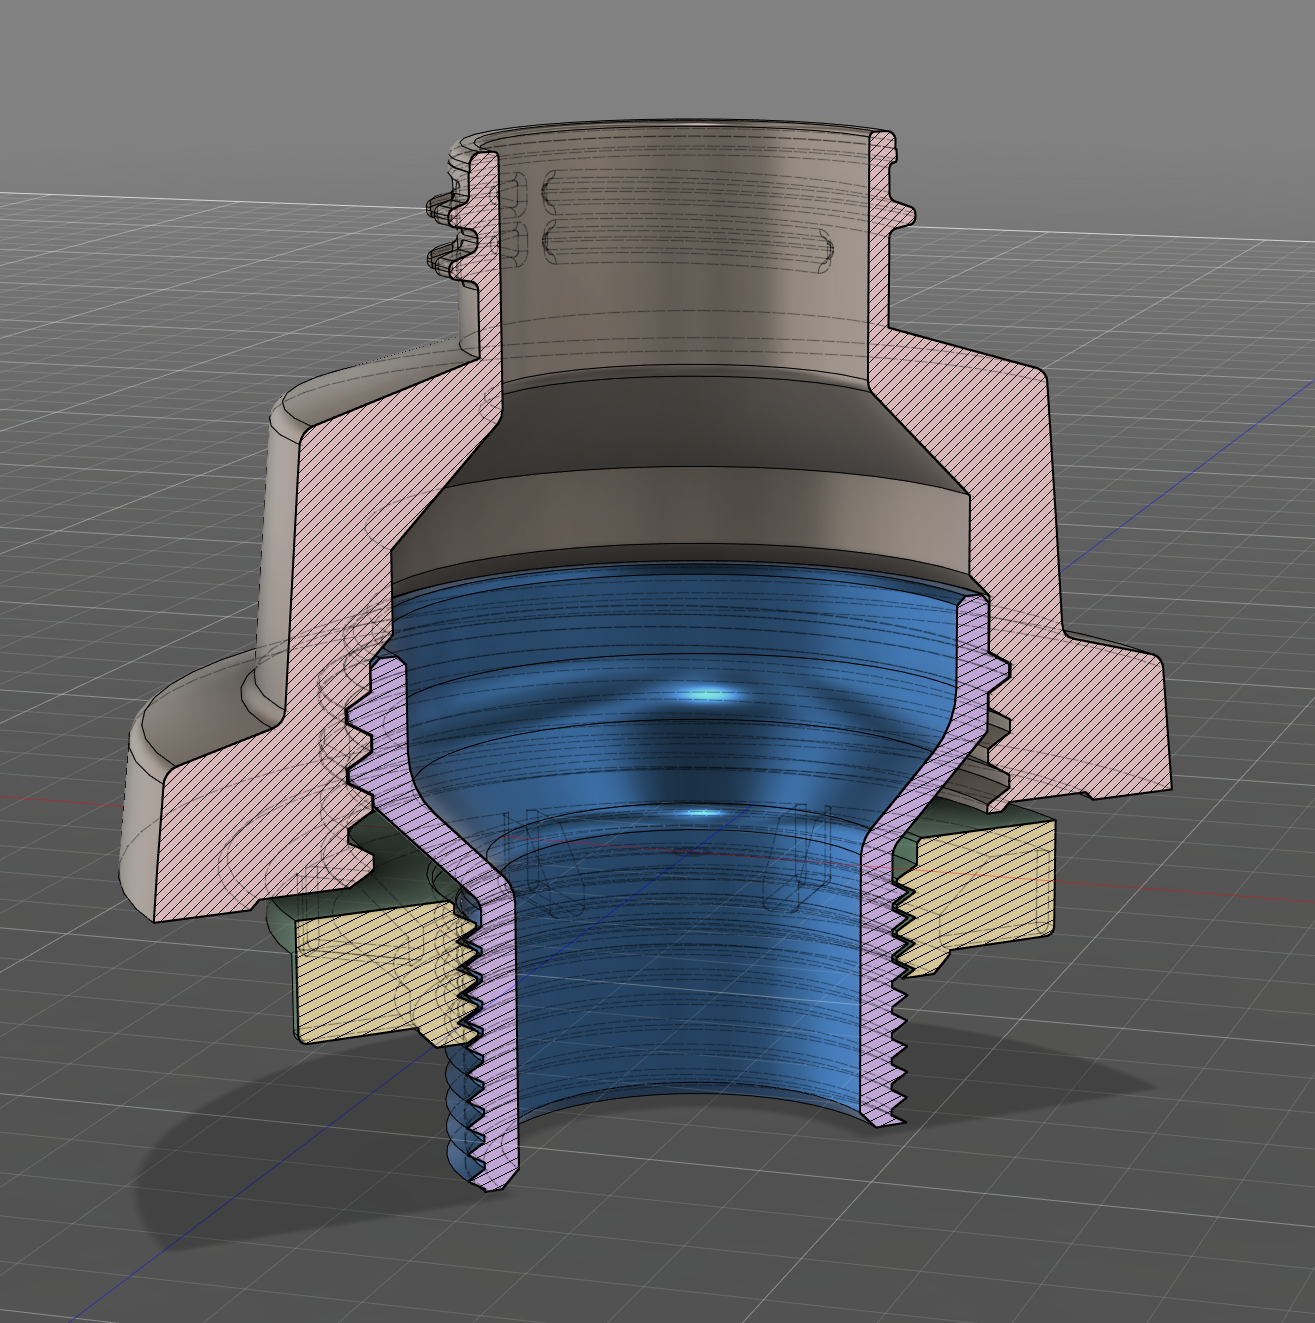
- Both have the same thread at the bottom, and are compatible with both long & short connector tube. This means both necks can be installed either in countertops or in metal sinks.
Part list:
- 1 foaming soap pump
- 1 container for holding the soap mixture (I generally use a 1:10 dishsoap/handsoap to water ratio when mixing my DIY foaming soap liquid)
- 1 long PTFE tube, often used for 3d printing (2mm ID, 4mm OD)
- Print parts:
- Pump neck
- 37mm for regular foaming soap pump, which can be sourced from most US grocery stores. It's the round/dome shaped ones.

- 25mm for pumps that fits over regular soda/water bottle. Not often seen in grocery stores, but may be able to find in home furnishing stores like HomeGoods
- 37mm for regular foaming soap pump, which can be sourced from most US grocery stores. It's the round/dome shaped ones.
- Connector tube
- Long one for installing on countertop
- Short one for installing on jar cap
- Connector nut
- Thick one for countertop
- Think one for jar cap
- Pump neck
Print instruction:
Print the neck with maybe 4 or 5 parameters for strength. I printed with 4. Also maybe print with a 0.1mm or lower layer height. It produces cleaner threads, and reduces prep work for painting.
For connector tube and nut, I'd suggest printing both solid with 4-5 parameters, and set layer height to 0.15mm for cleaner threads
The connector tubes can be printed upside down with no support, but the longer version will need a brim for stability.
Installation on countertop:
* Steps below shows the narrow neck version per my friend's request, as she only plans to use the small pump with hand soap. A wide neck version can be installed in the same way.
- Screw the printed tube onto the printed neck
- (Optional) Sand, prime, and paint the foaming soap pump & printed neck to match color of your faucet.

- Remove the existing soap pump
- Pull out the pump from the top
- Go under the sink, and unscrew the existing soap bottle
- Unscrew the nut holding the soap pump neck in place
- Remove the pump neck from countertop
- Clean the area where the original pump used to be. There generally will be water stains & gunk around where the old pump was

- (optional) put on some kind of countertop sealant around the hole
- Caulk the new neck in the caulk groove (the groove may not be necessary in hindsight, but maybe it helps)

- Drop the new neck in
- Screw the connector nut onto the connector tube, but not too tight yet
- (Optional) Adjust the neck's position to hide print seam on the neck if present
- Put the PTFE tube into the new pump head
- Drop the pump into the neck, with the other end of the PTFE tube going in first

- Tighten the pump onto the neck
- Tighten the connector nut. Make sure the pump is facing the right direction. (May need a 2nd pair of hands)
- Clean up the caulk squeeze out
- Drop the PTFE tube into a bottle of foaming soap
- I drilled a hole for the PTFE tube on a 1 gal water bottle cap to help it stay in place

- I drilled a hole for the PTFE tube on a 1 gal water bottle cap to help it stay in place
- Enjoy

Jar version:
Using the neck on a jar follows similar steps, just with shorter connector tube & nut, and cut a hole in the lid. It doesn't do much other than allowing the use of a bigger container.
I used a peanut butter jar (I printed a lid with a hole in it, which is not necessary and isn't water tight. I only did so to practice modeling threads). 