
9 in 1 Temperature First Layer Calibration Matrix - 3x Bed and 3x Nozzle temperatures in one print
Obliczymy ostateczną cenę na podstawie wybranego pliku. Sprawdzisz ją i zaakceptujesz przed płatnością.
Zapisane na tym urządzeniu.
One print, but 3 different bed and 3 different nozzle temperatures in order to help you find that perfect first layer.
- Ocena
- 5 / 5
- Polubienia
- 75
- Pobrania
- 300
- Wydruki
- 1
- Wyświetlenia
- 3222
- Oceny
- 1
Aktualizacja u źródła:
Informacje o modelu
- Źródło
- Printables
- Kategoria
- Accessories
- Licencja
- Creative Commons — Attribution — Noncommercial — NoDerivatives
What it does:
Prints 9 tiles, each with a different bed and different nozzle temperature. I basically vary these two temperature settings:
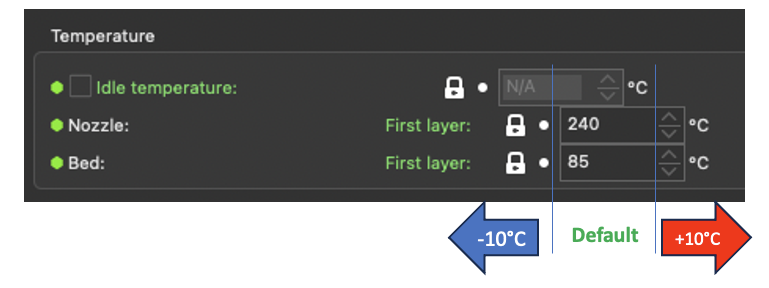
Note: PrusaSlicer v2.6.0-alpha6 or higher is required!
Not tested on Orca or Bambu slicers
I was struggling to get that perfect first layer using a new type of filament. After countless calibrations I still was not happy. In the end, my issue was a combination of temperature, layer height and extrusion multiplier.
During this process I developed this custom G-Code macro to test 9 different temperature combinations in one print. For those of you who have never heard of this, the macros are essentially code which can adjust your G-code during slicing.
PrusaSlicer Macro Reference: https://help.prusa3d.com/article/macros_1775
How to Use This Macro:
There are two customer G-Code entries in this file
Printer Settings → Custom G-code → Between objects G-code:
{local SJB_BedTempStepSize = 10 }. ; Step size to change the bed temperature (+ / - )
{local SJB_NozzleTempStepSize = 8 }. ; Step size to change the nozzle temperature (+ / - )
These are the two variables you need to adjust.
SJB_BedTempStepSize = 10
This is the temperature step size to vary your bed temperature from the default value. For example, if your first layer bed temperature is 85°C, and SJB_BedTempStepSize = 10 is set to 10, then the three resulting bed temperatures will be 75°C, 85°C, and 95°C.
SJB_NozzleTempStepSize = 8
This is the temperature step size to vary your nozzle temperature from the default value. For example, if your first layer nozzle temperature is 240°C, and SJB_NozzleTempStepSize = 8 is set to 8, then the three resulting nozzle temperatures will be 232°C, 240°C, and 248°C.
Printer Settings → Custom G-code → End G-Code: (optional)
This is just some optional G-code to produce lines on top of the tiles. This keeps them together when you take them off the bed.
Tips:
Raise your Z-offset up around 0.1-0.2mm. When you have a perfect first layer already, the difference between the tiles is very difficult to see. The differences are more evident when the first layer is a little higher than it should be. This also makes the rip-test easier, where you can try to rip the tiles in half along the seam lines.
How it works:
This slicer model uses the new custom variables which were released in PrusaSlicer v2.6.0-alpha6. (Link: https://github.com/prusa3d/PrusaSlicer/wiki/PrusaSlicer-Macro-Language)
and
sequential object printing. So after every object (tile), the g-code is changed and the temperatures are modified.
Happy Printing!