
9 in 1 Temperature First Layer Calibration Matrix - 3x Bed and 3x Nozzle temperatures in one print
We calculate the final price from your selected file. You review and accept it before payment.
Saved on this device.
One print, but 3 different bed and 3 different nozzle temperatures in order to help you find that perfect first layer.
- Rating
- 5 / 5
- Likes
- 75
- Downloads
- 300
- Makes
- 1
- Views
- 3,222
- Reviews
- 1
Updated at source:
Model information
- Source
- Printables
- Category
- Accessories
- License
- Creative Commons — Attribution — Noncommercial — NoDerivatives
What it does:
Prints 9 tiles, each with a different bed and different nozzle temperature. I basically vary these two temperature settings:
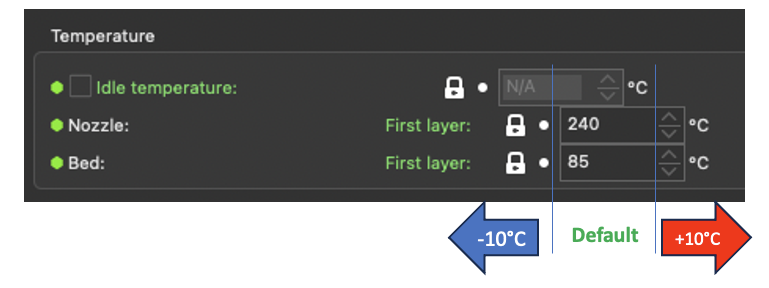
Note: PrusaSlicer v2.6.0-alpha6 or higher is required!
Not tested on Orca or Bambu slicers
I was struggling to get that perfect first layer using a new type of filament. After countless calibrations I still was not happy. In the end, my issue was a combination of temperature, layer height and extrusion multiplier.
During this process I developed this custom G-Code macro to test 9 different temperature combinations in one print. For those of you who have never heard of this, the macros are essentially code which can adjust your G-code during slicing.
PrusaSlicer Macro Reference: https://help.prusa3d.com/article/macros_1775
How to Use This Macro:
There are two customer G-Code entries in this file
Printer Settings → Custom G-code → Between objects G-code:
{local SJB_BedTempStepSize = 10 }. ; Step size to change the bed temperature (+ / - )
{local SJB_NozzleTempStepSize = 8 }. ; Step size to change the nozzle temperature (+ / - )
These are the two variables you need to adjust.
SJB_BedTempStepSize = 10
This is the temperature step size to vary your bed temperature from the default value. For example, if your first layer bed temperature is 85°C, and SJB_BedTempStepSize = 10 is set to 10, then the three resulting bed temperatures will be 75°C, 85°C, and 95°C.
SJB_NozzleTempStepSize = 8
This is the temperature step size to vary your nozzle temperature from the default value. For example, if your first layer nozzle temperature is 240°C, and SJB_NozzleTempStepSize = 8 is set to 8, then the three resulting nozzle temperatures will be 232°C, 240°C, and 248°C.
Printer Settings → Custom G-code → End G-Code: (optional)
This is just some optional G-code to produce lines on top of the tiles. This keeps them together when you take them off the bed.
Tips:
Raise your Z-offset up around 0.1-0.2mm. When you have a perfect first layer already, the difference between the tiles is very difficult to see. The differences are more evident when the first layer is a little higher than it should be. This also makes the rip-test easier, where you can try to rip the tiles in half along the seam lines.
How it works:
This slicer model uses the new custom variables which were released in PrusaSlicer v2.6.0-alpha6. (Link: https://github.com/prusa3d/PrusaSlicer/wiki/PrusaSlicer-Macro-Language)
and
sequential object printing. So after every object (tile), the g-code is changed and the temperatures are modified.
Happy Printing!