
Mcwomfa, the Airtight Magnetic PTFE Coupler System
Obliczymy ostateczną cenę na podstawie wybranego pliku. Sprawdzisz ją i zaakceptujesz przed płatnością.
Zapisane na tym urządzeniu.

Magnetic PTFE Coupler System! 2 magnets for full reversibility, o-ring to improve air seal, loads of variants!
- Ocena
- 5 / 5
- Polubienia
- 8
- Pobrania
- 21
- Wydruki
- 1
- Wyświetlenia
- 354
- Oceny
- 1
Aktualizacja u źródła:
Informacje o modelu
- Źródło
- Printables
- Kategoria
- Other Printer Parts & Upgrades
- Licencja
- Creative Commons — Attribution — Noncommercial — Share Alike
Introducing Mcwomfa, the Magnetically Connected Way Of Moving Filament Around!
I've been working on tidying up and organising my nerd cave, and wanted a way to better handle moving filament between spool and printer particularly for technical materials that need to be printed directly from a dry box. I don’t like using PC4 pneumatic connectors, and wanted something magnetic but most available options use an odd number of magnets. Since magnets have two polarities, this means each coupler would need to be either an A or a B coupler, and USB-C has spoiled me too much to want to go back to that. So, why not start from scratch?

This version uses two 15x2mm disc magnets per coupler, though with the design you could use thicker magnets if you prefer. The magnet pockets are accessed from the rear, not the front. This helps provide a larger surface area for bed adhesion, needs no bridging or supports, and comes with the minor side benefit of a small cushion to stop the magnets crashing into each other or pulling themselves out. Each magnet pocket has small dimples along the outer edge, this should allow for a friction fit without any adhesive needed (though that's always an option if it's loose!). If printing multiple items at once I would suggest using print by object and not by layer.

The other thing this version uses is a single 2.5mm thickness Cherry MX o-ring. I had some of these spare along with the magnets, and realised the inner diameter is a near-perfect fit for the outer diameter of a typical PTFE tube used for 1.75mm filament. The design has these protrude slightly from the face surface so the pressure applied when joining one coupler to another is primarily applied to the o-rings, which allows for an air tight seal between the connectors. I used 4mm inner diameter, 2.5mm thick, silicone o-rings. I bought them from here but eBay links expire so note the specs above! These were £3 for a pack of 110: [110Pcs O-Rings Keyboard Switch Dampeners 2.5mm Clear for Cherry MX Keycaps](https://www.ebay.co.uk/itm/203302490494?itmmeta=01HWB9ZVX3ERWS3S3K4Z53BSS9&hash=item2f55c5d17e:g:KCAAAOSwww5gN5kk&itmprp=enc%3AAQAJAAAA4LkZrcA8X5ufdta4CmNqLQV6xCr%2BjueuQ5hUsGmCIzCfbWqgAshRlH88CKg36JMKknBO5vS%2F6K5QPtZr8m65cZU3ulxywc3tNsBDh0WMom1mRlzUrGOaeYkrUGPNnUP2jJvaxGqazpsg%2F29NzLQSOYMsQ45E%2FFMwtQPdgEfTOWD29Txsra3%2FOOlkNSKL4otTGa1mwS9OaoIUnBnRa8zX1V7F048%2BwMGuu3jYW7ZxWTihI%2BmTegGv1%2FHpF%2FP1EXJUX%2FNjQpleHUJiqlwQ9yBjNYQ%2BU3ea4xUziwxkUnckvwO7%7Ctkp%3ABFBM0r7_6eJj)

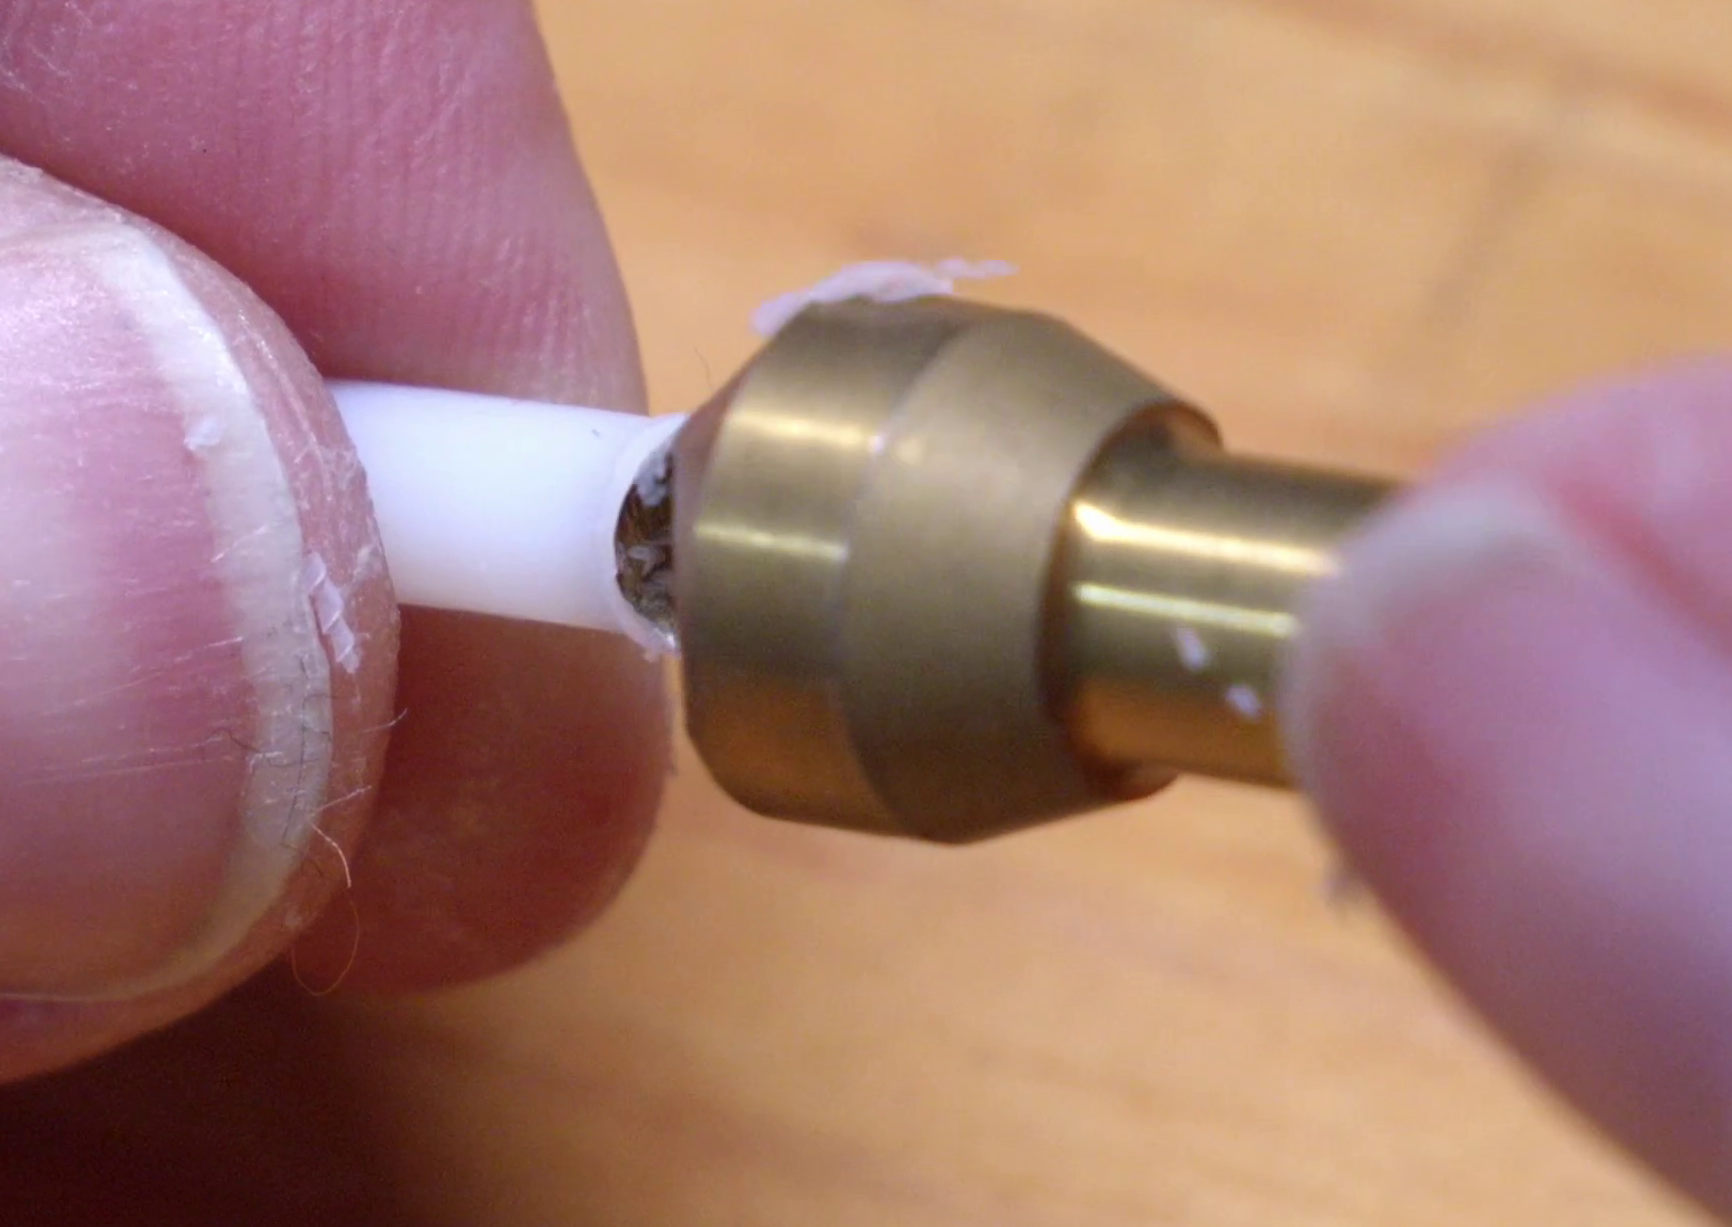
One more thing you'll want for a perfect implementation is a 2-5mm zero flute countersink drill bit. These are great for both wood and metal, but in this context the larger non-cutting surface helps in a different way. By using this on the end of a PTFE tube, it will cut an internal chamfer until the material gets too thin, then the large non-cutting surface helps push the material outwards to expand and flare it out, creating a funnel to help guide filament between couplers without catching. Do this by hand! One of PTFE's desirable properties is its low coefficient of friction. Without proper care, while holding the tube to drill it, the tube could easily slip through your hand as you push the drill into it. Gripping it too hard (such as with pliers) may cause the tube to compress and no longer provide a smooth route for filament.
And lastly, you'll want some adhesive. I'd recommend gel/high viscosity super glue. Compared to more liquidy super glue it will fill small gaps and has a longer curing time, giving you more time to position stuff correctly.
So, Print Instructions and Bill of Materials for a single coupler:
- I’d suggest PETG or ABS, as PLA may be too brittle over the long term and/or when press-fitting magnets. Still, it will probably work well enough if it’s all you have access to! 0.2-0.25mm layer height is ideal, and try printing by object and not by layer if you want the best quality possible.
- 2x 15mm diameter, 2mm thick disc magnets.
- 2.5mm thick Cherry MX key dampening o-ring.
- High viscosity super glue (CA glue).
- 4mm outer diameter PTFE tube, cut to length.
- Tool: 2-5mm zero flute countersink drill bit.

To assemble:
- Insert one magnet into one pocket. Doesn't matter which way around.
- Snap the second magnet onto the outer face of the coupler to find the correct polarity, then insert this second magnet into the other pocket. The face of this magnet that was attracted to the first magnet, should be the face that rests in the bottom of the magnet and is the attracting surface to other couplers.
- Insert the PTFE tube through so that it sticks out a bit from the coupler's facing surface.
- Put the o-ring on over the PTFE tube so it sits in the recess.
- By hand! Use the zero flute countersink drill bit on the end of the PTFE tube to chamfer and then flare out the PTFE tube end.
- Test that filament can smoothly travel through the tube before glue happens.
- With high viscosity (aka gel) super glue, glue the o-ring within the printed coupler's recess, put some glue on the outer diameter of the chamfered PTFE tube, then slowly slide the tube so that the outer lip of the funnel of the PTFE tube is being glued to the inner part of the o-ring.
- Wipe any excess super glue off the o-ring, as any residue may impede a good seal.
- Test that filament will smoothly slide through, and do an air-tight test if desired. Since high viscosity super glue has a longer curing time you have an opportunity to make any adjustments if needed.
- You're done!
For attaching as an outlet from a dry box, there is an M10 variant (standard coarse 1.5mm pitch) and for those without easy access to metric hardware a straight 10mm shank variant - but, just as Mcwomfa is printable, you should be able to find printable M10 nuts instead. These have pockets for putting an o-ring of outer diameter 13mm in that will then compress against the wall of the dry box, but since I don't have any I've been using cheap bathroom silicone sealant instead since that's what I had available.

I would suggest using a small length of PTFE tube even with these. Not only will it help maintain a good air tight seal, it will help guide the filament smoothly between couplers.
- Drill a 10mm (roughly 0.4") hole in the box.
- Put the assembled coupler through the hole with either an o-ring or a glob of sealant.
- Use an M10 nut on the inside to keep it in place (both while the sealant cures if being used and as reinforcement when it has cured, or to maintain pressure on the o-ring).
If you want to have your dry box coupler at an angle, good news! I have also made variants for 15, 30, 45 and 60 degrees. Each one has a corresponding pressure plate for the internal side; this is so an M10 nut can still be used comfortably.

Finally, you will probably want to have a cap to put on a coupler to seal up boxes when that filament is not in use. The pickup cap with zip tie loop is your friend here. Assembly is even easier, just glue in the o-ring and coat the inner surface of the cap with extra glue. The angled sides make this really easy to pick up, and it has a hole for putting a zip-tie through should you want to make sure the cap doesn't go walkies from the box your very hygroscopic filament lives in. Originally I made separate models for a cap and a zip-tie cap, but both of these were really difficult to actually take off a coupler. Still, I've included them in the files for legacy reasons.
STEP files are included for each part too, so please go ahead and remix things! Want some ideas? How about a coupler where you can screw in a common PC4-M6 or PC4-BSP 1/8 PTFE tube connector? Or even a coupler with an external thread to match so you can screw a coupler directly into an existing hole. Consider a remix of part of your extruder's housing to incorporate this coupler directly into it, making extruder maintenance quick and easy. Or maybe a variant for your favourite magnet size? Top tip, if you use a small magnet such as the common 6x3mm disc magnet, have two of these instead of a single 15mm diameter magnet (so 4 magnets total), keep the polarity the same for each magnet, and now your coupler should still work with any coupler with a 15mm diameter magnet. Great for sharing with others!