
Sidecar Velorex 560 - PART No.3 - The sidecar body and fender
Obliczymy ostateczną cenę na podstawie wybranego pliku. Sprawdzisz ją i zaakceptujesz przed płatnością.
Zapisane na tym urządzeniu.

The 3rd part of the sidecar
- Ocena
- 5 / 5
- Polubienia
- 41
- Pobrania
- 264
- Wydruki
- 0
- Wyświetlenia
- 981
- Oceny
- 1
Aktualizacja u źródła:
Informacje o modelu
- Źródło
- Printables
- Kategoria
- Vehicles
- Licencja
- Creative Commons — Attribution — Noncommercial — Share Alike
Hope the 2nd part was fun for you :)
https://www.printables.com/model/862690-sidecar-velorex-560-part-no2-connecting-rods
As usual the model part consist a big parts but the very small also so pay attention to the description and attached pictures. As usual be extremely careful during the assembly itself and work slowly and cautiously.
If you manage to damage or break some part despite being extra careful you should "weld" it with a soldering gun rather than gluing it with super glue.
For today I prepared to you all connection rods for connection of the sidecar frame to the motorcycle.
If you will need more pictures for better understanding, you can see here:
https://www.rajce.idnes.cz/jawarmaniak/album/jawa-tisk
at first we started with the main body of the sidecar - the biggest part of the sidecar
Printing instruction:
The main body is divided into 3 parts fits on the steel plate of Prusa Mk3/4. If you have smaller plate there is attached the stl of the undivided body that you can cut it as you need
- body_part1 - 1 piece, red PLA, 30% infill, 0.15-0.2 layer.
- body_part2 - 1 piece, red PLA, 30% infill, 0.15-0.2 layer.
- body_part3 - 1 piece, red PLA, 30% infill, 0.15-0.2 layer.
or
- body_complete - 1 piece, red PLA, 30% infill, 0.15-0.2 layer.
- sidecar_handle - 1 piece, chrome PLA, 40% infill, 0.15-0.2 layer.
- handle_holder - 1 piece, chrome PLA, 30% infill, 0.15-0.2 layer.
- velorex_logo - 1 piece, grey/chrome PLA, 100% infill, 0.15-0.2 layer.
- decorative_molding_L - 1 piece, grey/chrome PLA, 100% infill, 0.15-0.2 layer.
- decorative_molding_R - 1 piece, grey/chrome PLA, 100% infill, 0.15-0.2 layer.
Both decorative moldings is necessary to divided into 2 pieces according the size of your printer and glued into one piece after print.
- trim_cover - 1 piece, grey/chrome PLA, 100% infill, 0.15-0.2 layer.
- velorex_logo2 - 1 piece, white PLA, 100% infill, 0.15-0.2 layer.
Assembly instruction:
- The body_part1, body_part2 and body_part3 glue together into one piece.
- Carefully bend the ends of the velorex_logo according to the shape of the body.
- Screw decorative_molding_L, decorative_molding_R and velorex_logo on the body assembly by M1.6-3 srews.
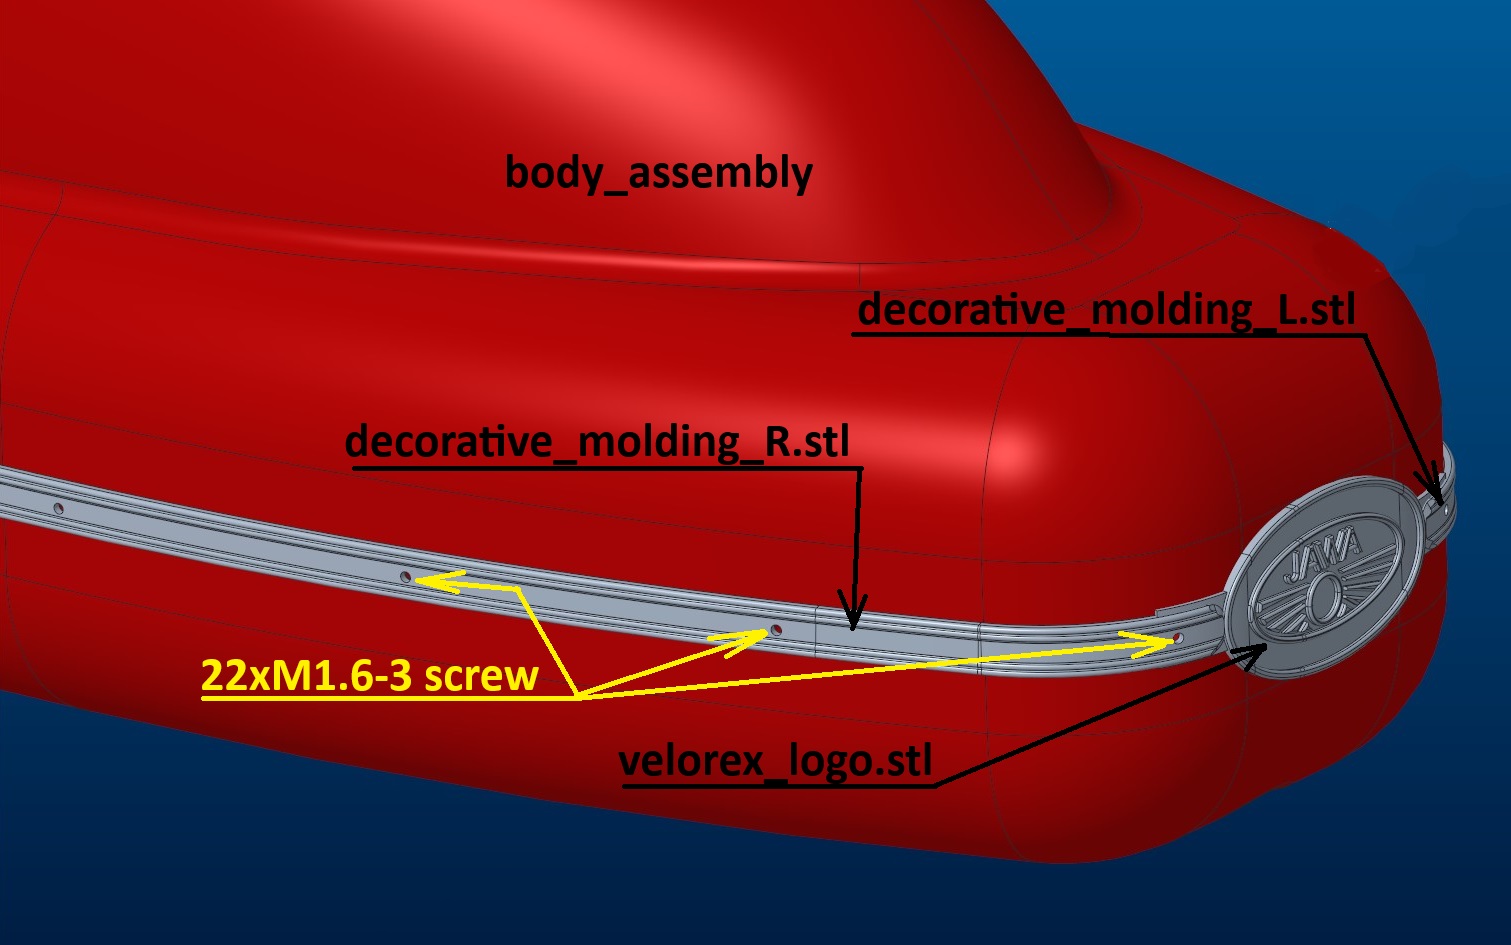
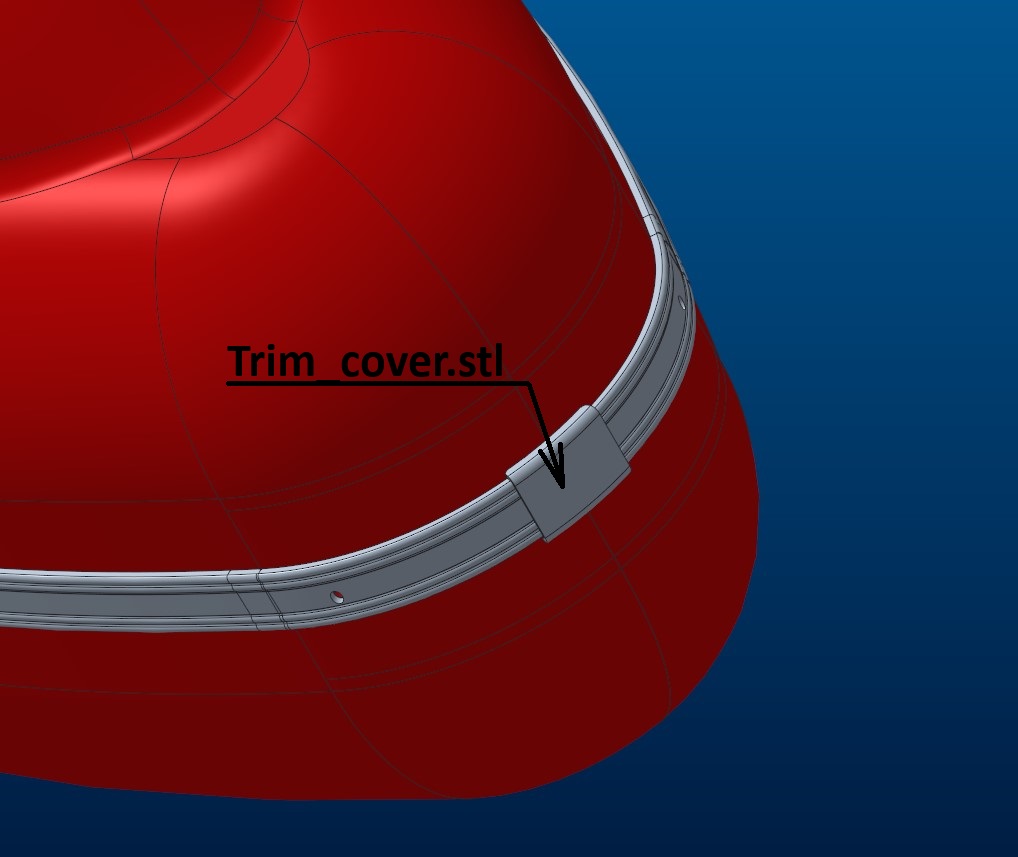
- At the rear end, glue the joint of decorative moldings with a cap.
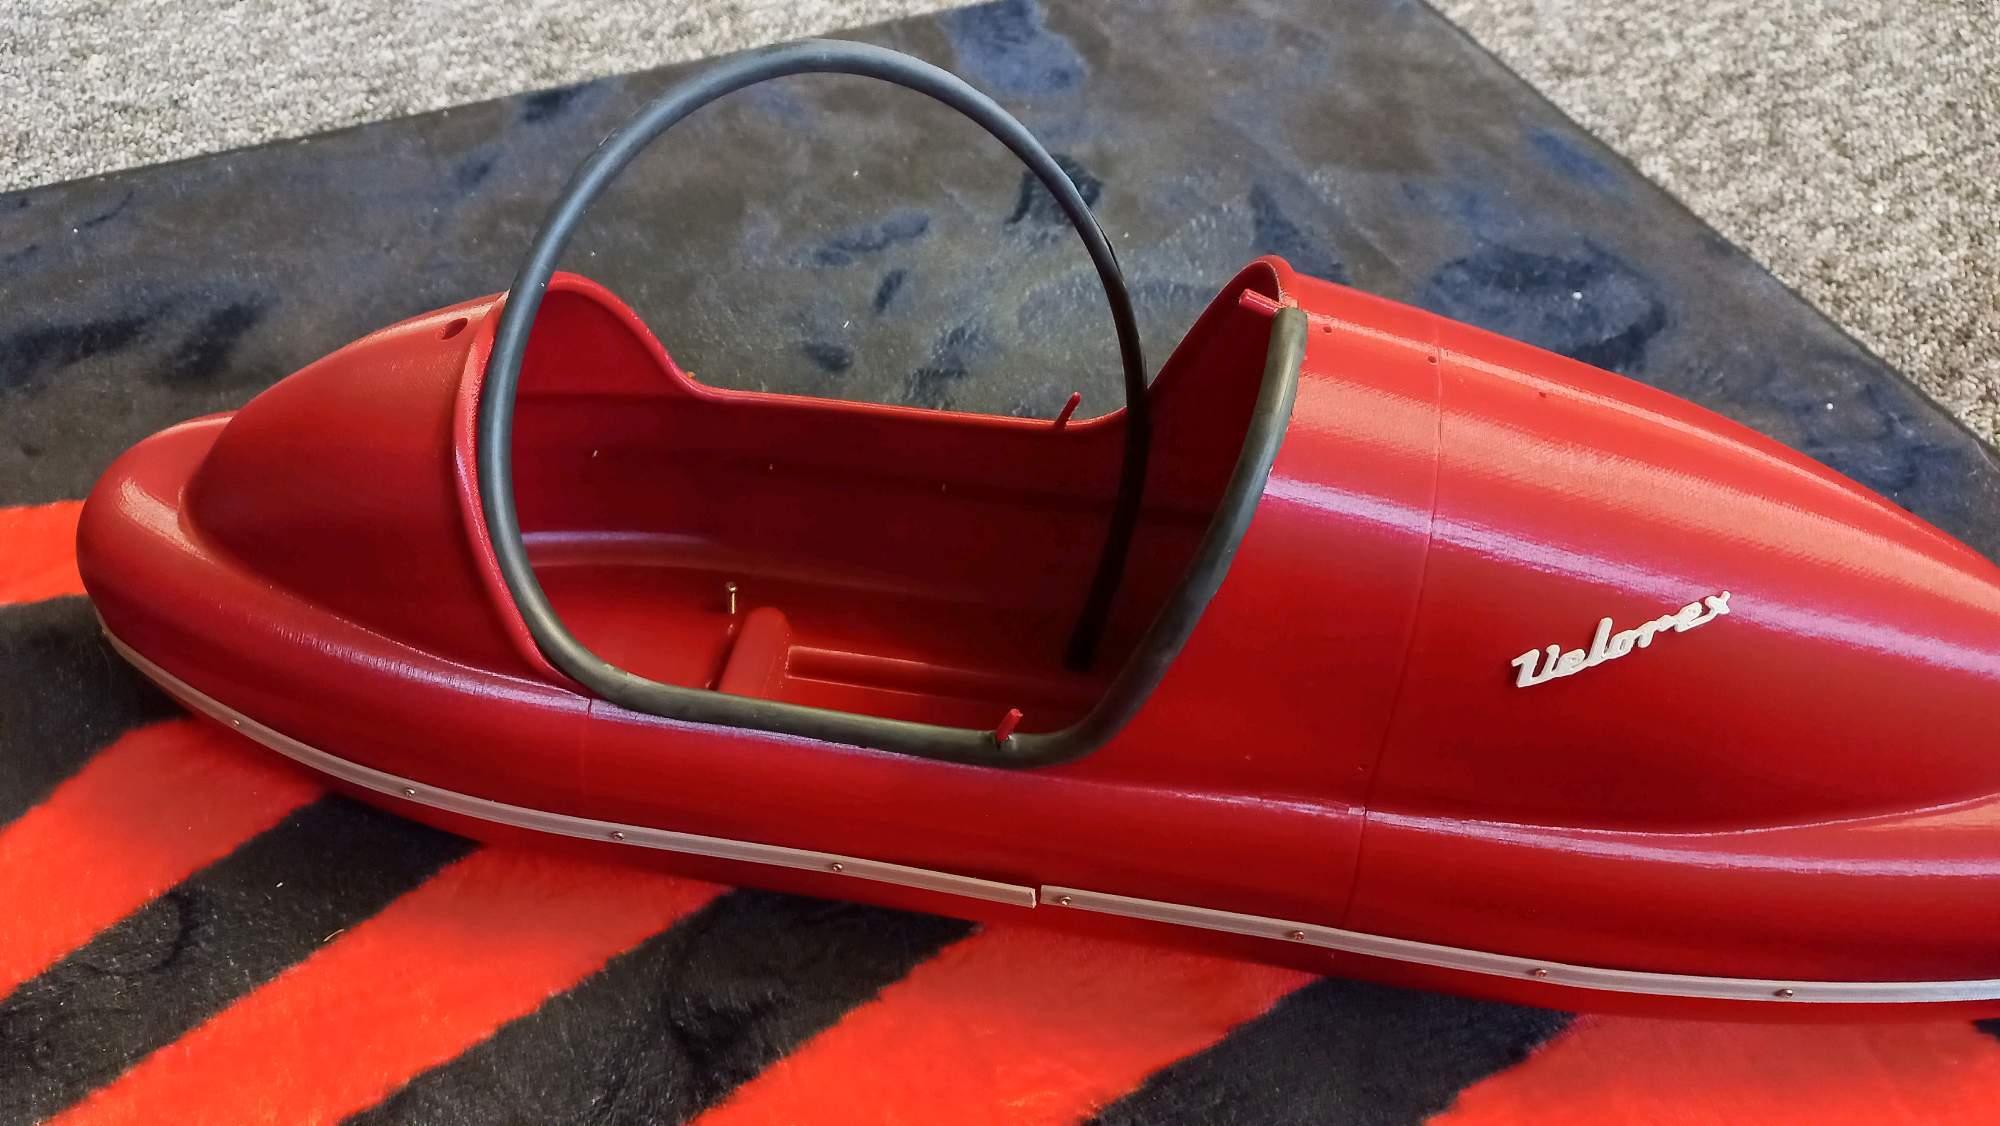
- Glue a rubber sleeve made from a cut rubber tube to the edge of the inlet opening. When gluing, stretch the rubber thoroughly so that it does not wrinkle. See picture.
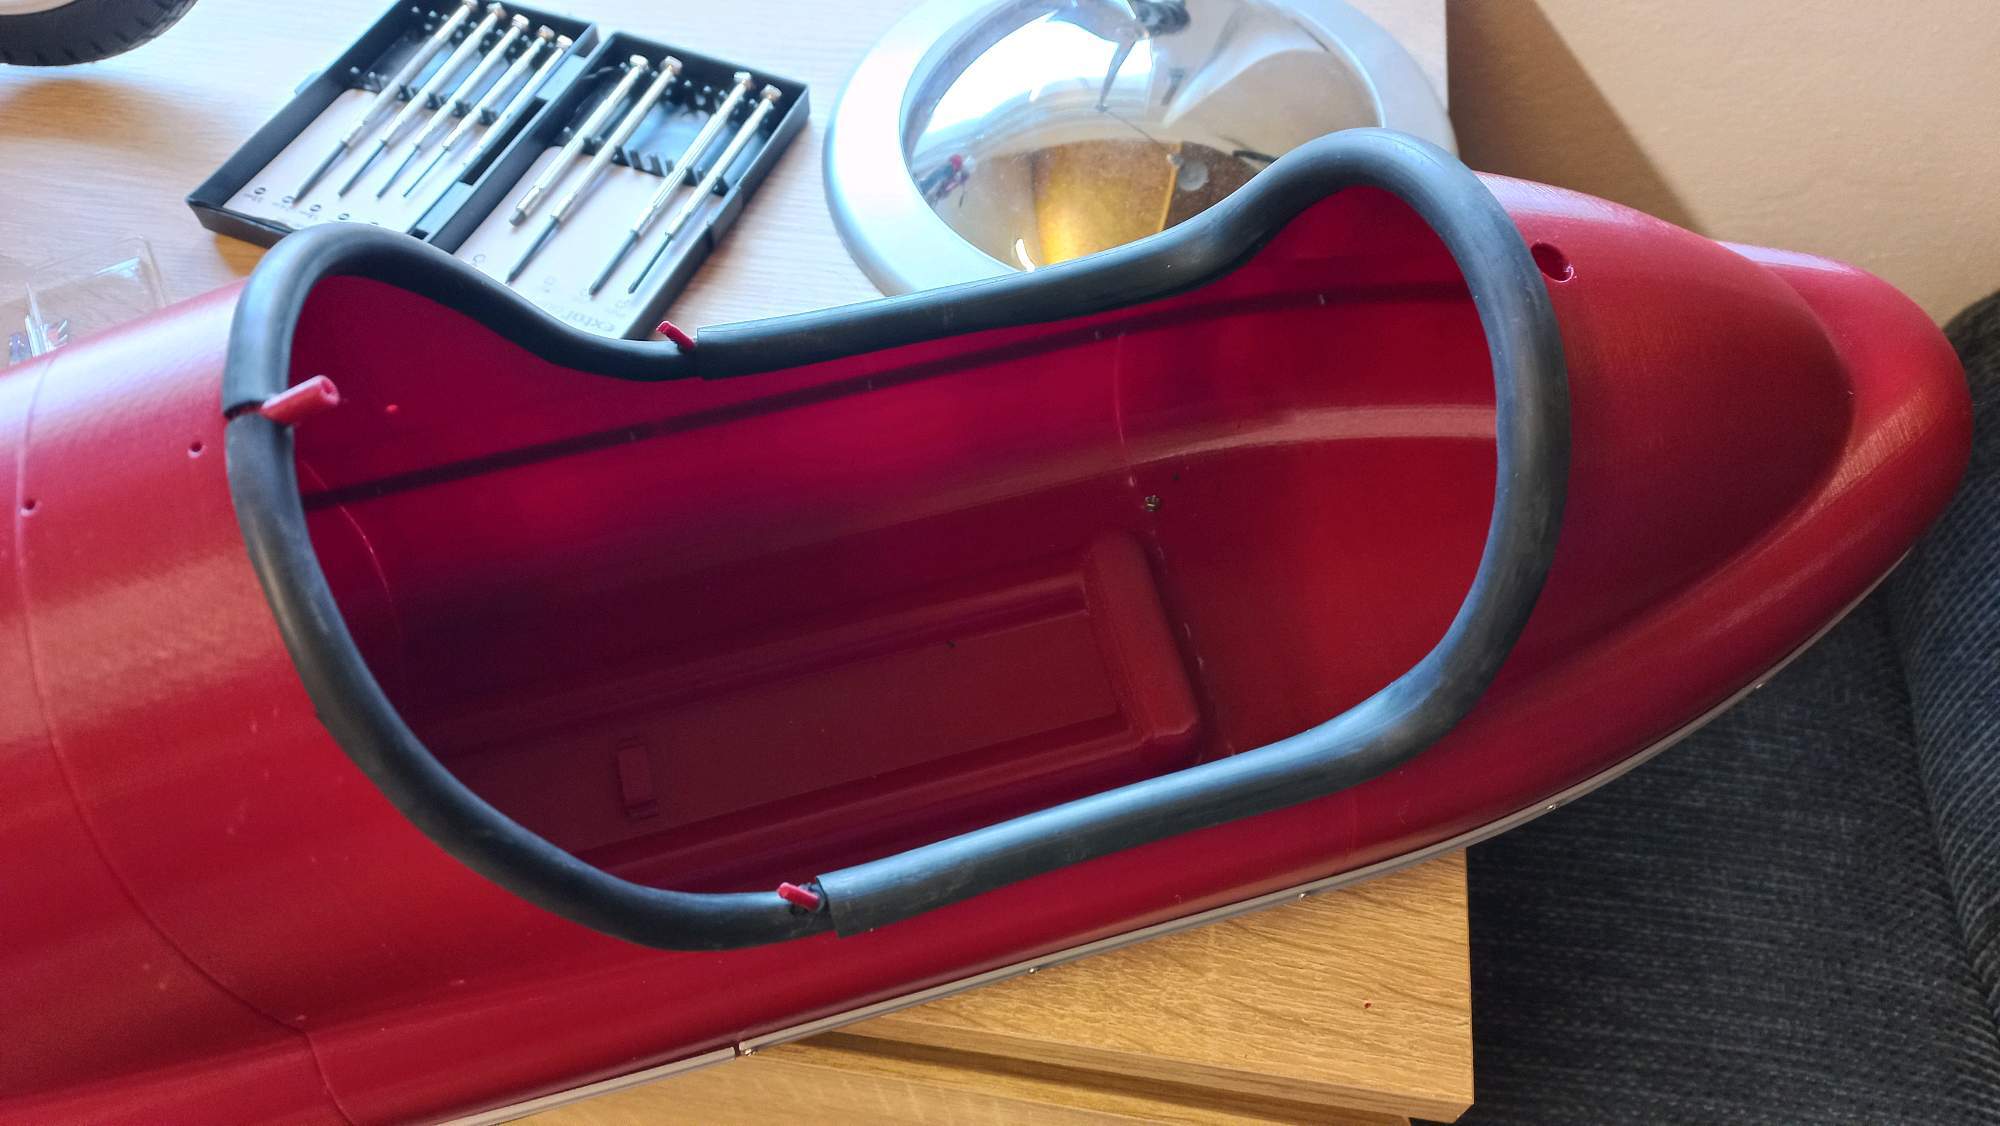
- Glue second rubber on the edge of the hole according the picture.
- Slide the handle_holder onto the front hinge and screw it up by M1.6-5 screw with nut.
- Slide the sidecar_handle onto the two rear hinges and screw it into the handle_holder by M1.6-12 screw.
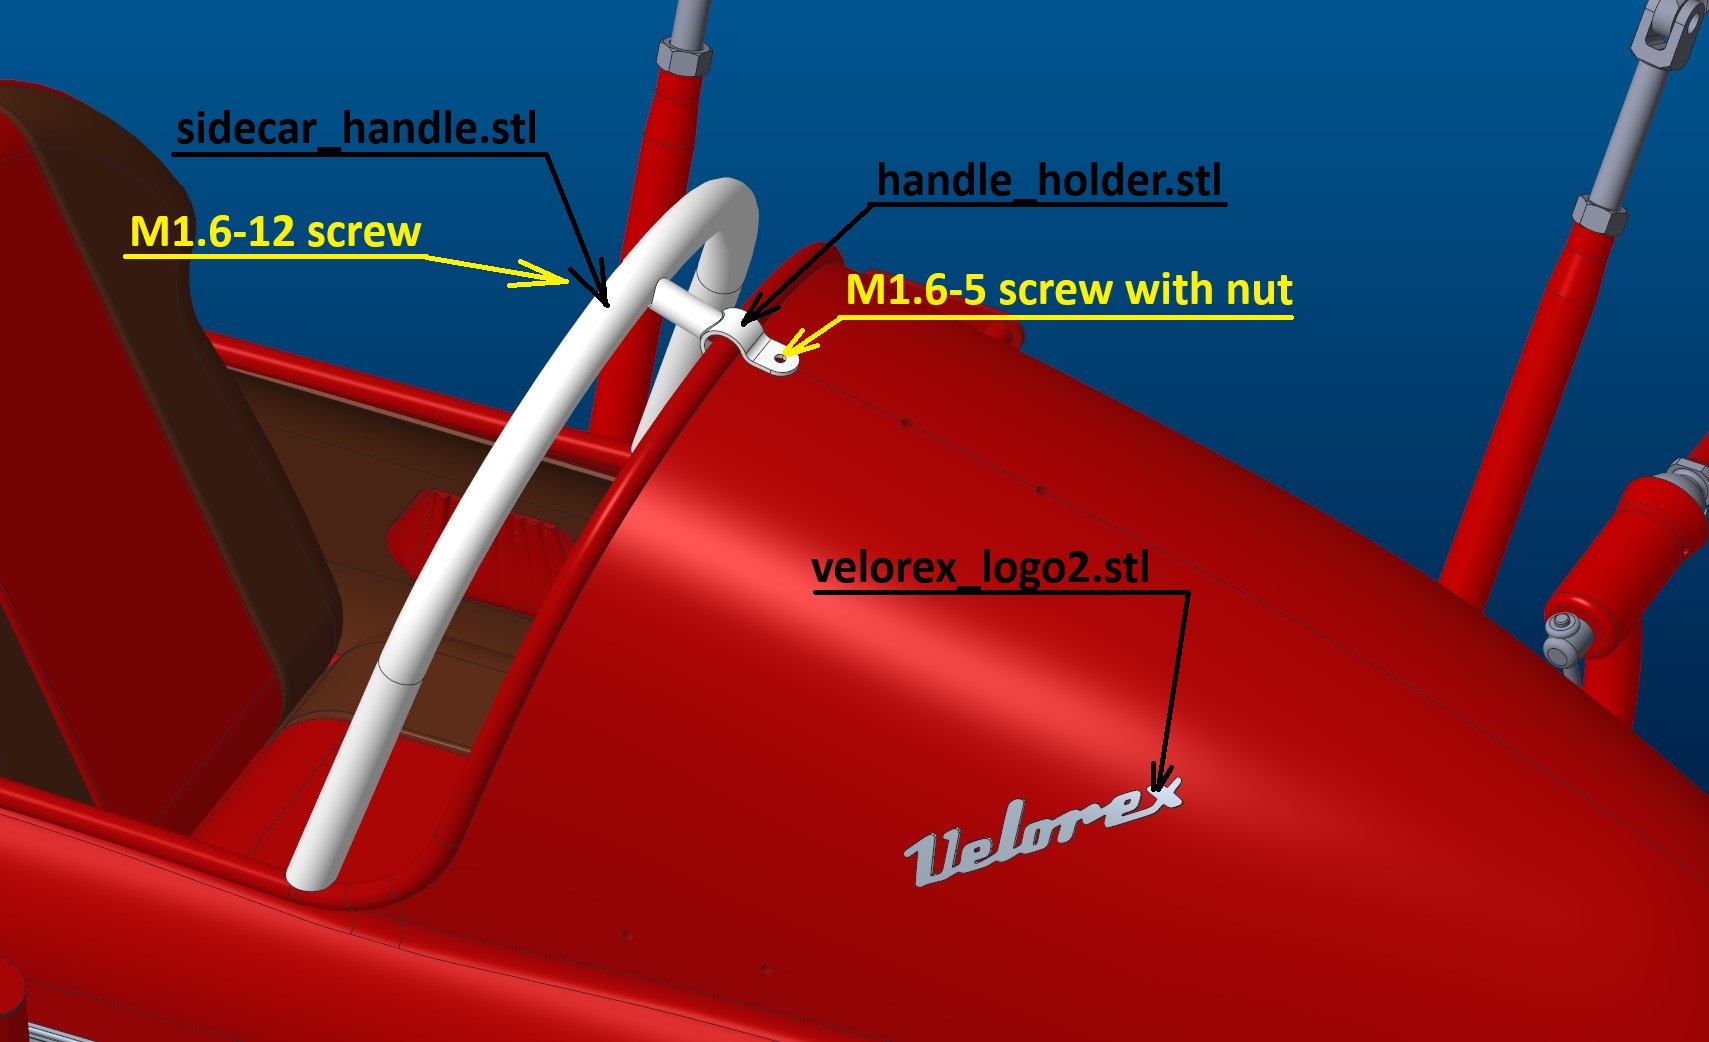
- Glue the velorex_logo2.stl on the main body assembly. Before it is necessary to bend it according shape of the body.

at second we can complete the fender
Printing instruction:
- sidecar_fender - 1 piece, red PLA, 50% infill, 0.15-0.2 layer.
- decorative_molding_long - 1 piece, grey/chrome PLA, 100% infill, 0.15-0.2 layer.
- decorative_molding_short - 1 piece, grey/chrome PLA, 100% infill, 0.15-0.2 layer.
- fender_front_cover - 1 piece, grey/chrome PLA, 100% infill, 0.15-0.2 layer.
- front_fender_holder - 1 piece, grey PLA, 100% infill, 0.15-0.2 layer.
Assembly instruction:
- Screw decorative_molding_long and decorative_molding_short on the sidecar_fender by M1.6-3 srews.
- Screw fender_front_cover and the front_fender_holder by M1.6-4 screws.

And.. that's all for now :)
Bill of material:
- 1x nutM1.6
- 32x screw M1.6-3 mm
- 3x screw M1.6-4 mm
- 1x screw M1.6-5 mm
- 1x screw M1.6-12 mm
- 1m of the rubber tube (inner diameter approx. 5mm), for example https://www.aditeg.cz/eshop-0104not.tpe65-p-profil.html
- 1m of the rubber tube (inner diameter approx. 6-7mm), for example 1753 Pryžový profil tvaru "P" s dutinkou, 29x8/1,5mm, EPDM 70ShA v Kompaktní profily na www.tbepox.cz
- superglue
I hope you had fun during building and everything went smoothly.
You can look forward to the next part. The 4th part is under progress right now ;)
4th part is available here: Sidecar Velorex 560 - PART No.4 - Wheel suspension + main body holders od autora jawarmaniak | Stáhněte si zdarma STL model | Printables.com