Vase Hack Lamp Shade Toolkit
Obliczymy ostateczną cenę na podstawie wybranego pliku. Sprawdzisz ją i zaakceptujesz przed płatnością.
Zapisane na tym urządzeniu.
Models and instruction how to remix existing a vase model to lamp shade compatible with pendant lamp adapter.
- Ocena
- 0 / 5
- Polubienia
- 1
- Pobrania
- 16
- Wydruki
- 0
- Wyświetlenia
- 133
- Oceny
- 0
Aktualizacja u źródła:
Informacje o modelu
- Źródło
- Printables
- Kategoria
- Other House Equipment
- Licencja
- Creative Commons — Attribution
In Slicer negative volume modifier do not work correctly in vase mode.
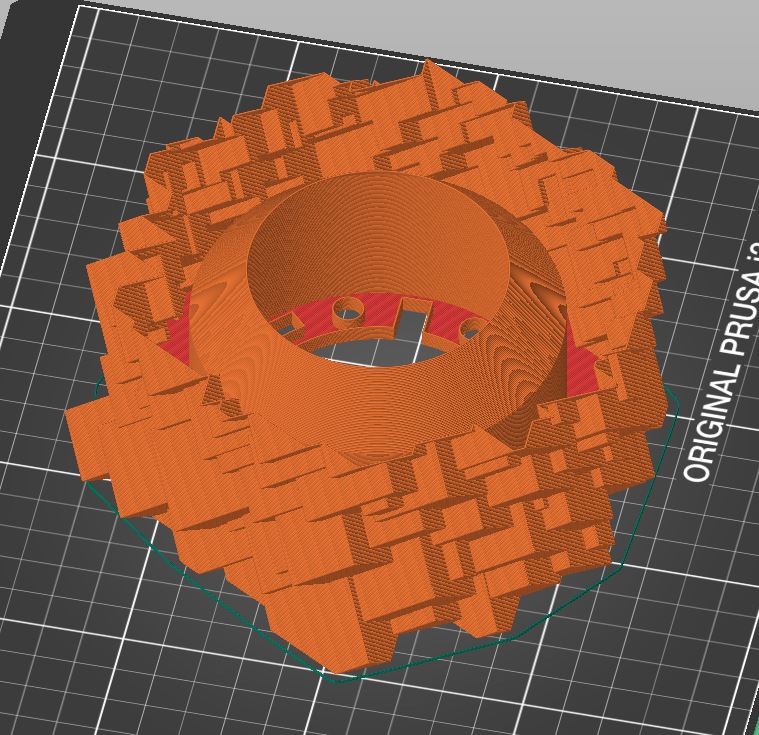
Here are tips how to use Blender to perform volume subtraction on vase mesh.
- Import STL Models to Blender:
- Resize and Position the Vase Model Over the Cut Volume
- Adjust the size and position of your vase model so that it fits properly over the cut volume. Make sure it aligns correctly.
- Check the Undercut Angle When Scaling Down the Vase in the Z-Axis
- Vase mode 3D printing doesn't tolerate high undercut angles.
- Keep the Base of the Cut Volume Slightly Outside of the Vase Base
- To avoid issues during printing, ensure that the base of the cut volume extends slightly beyond the vase base.
- Add a Modifier to the Vase Model for Boolean Operation with the Cut Volume
- Use a Boolean modifier to combine the vase model with the cut volume. This will create the desired shape for printing.
- Export the Lampshade STL from Blender.
- Once your model is ready, export it as an STL file.
- Import the STL File into Your Slicer Software
- Open your preferred slicer (such as Cura or PrusaSlicer) and import the exported STL file.
- Check the Print Preview and Set Up Vase Mode
- If needed, adjust the scale using only values like 1000% or 10%.
- Set up your printer for vase mode printing.

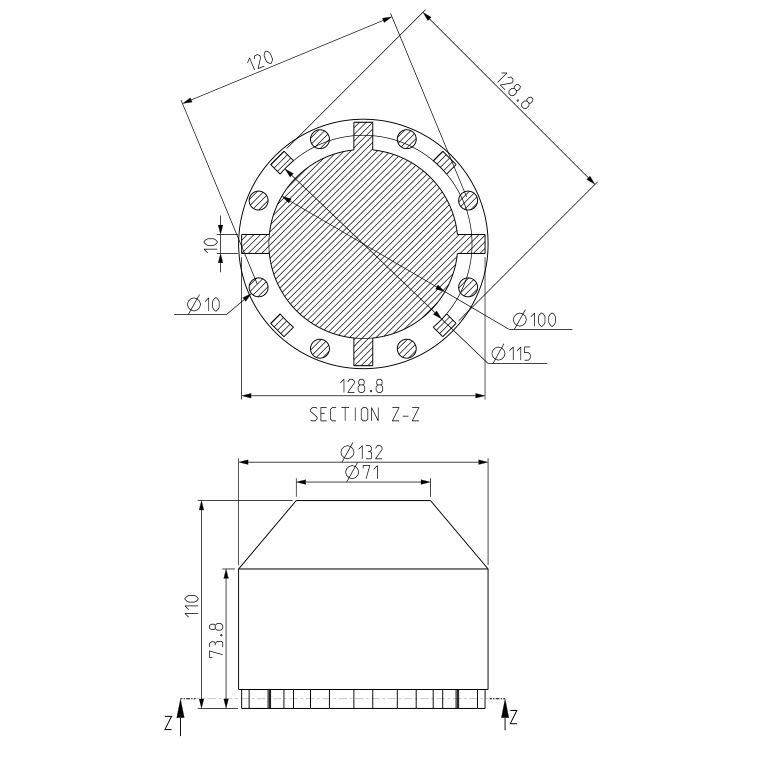
Dimensions for lamp shade base hole for CAD modeling