Vase Hack Lamp Shade Toolkit
We calculate the final price from your selected file. You review and accept it before payment.
Saved on this device.
Models and instruction how to remix existing a vase model to lamp shade compatible with pendant lamp adapter.
- Rating
- 0 / 5
- Likes
- 1
- Downloads
- 16
- Makes
- 0
- Views
- 133
- Reviews
- 0
Updated at source:
Model information
- Source
- Printables
- Category
- Other House Equipment
- License
- Creative Commons — Attribution
In Slicer negative volume modifier do not work correctly in vase mode.
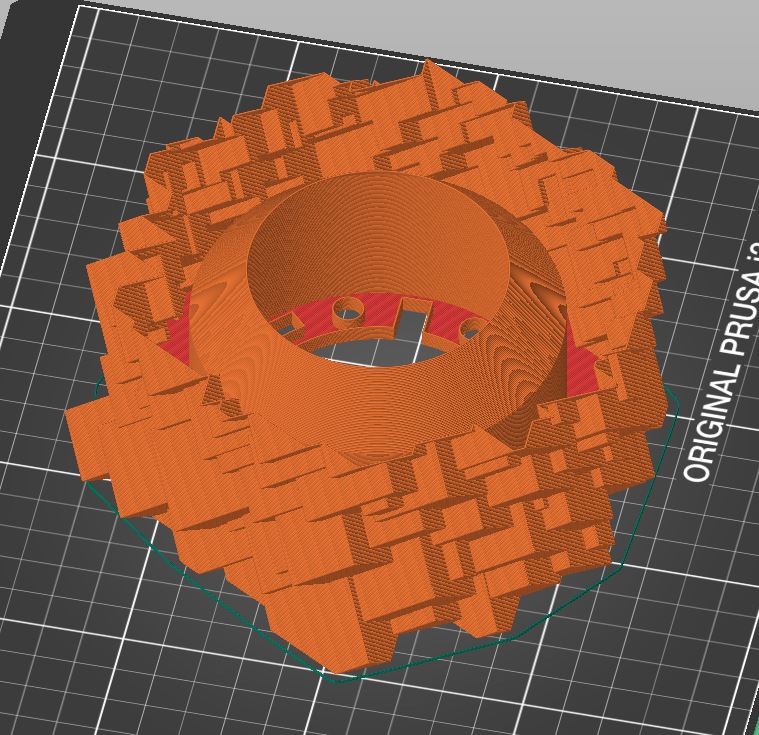
Here are tips how to use Blender to perform volume subtraction on vase mesh.
- Import STL Models to Blender:
- Resize and Position the Vase Model Over the Cut Volume
- Adjust the size and position of your vase model so that it fits properly over the cut volume. Make sure it aligns correctly.
- Check the Undercut Angle When Scaling Down the Vase in the Z-Axis
- Vase mode 3D printing doesn't tolerate high undercut angles.
- Keep the Base of the Cut Volume Slightly Outside of the Vase Base
- To avoid issues during printing, ensure that the base of the cut volume extends slightly beyond the vase base.
- Add a Modifier to the Vase Model for Boolean Operation with the Cut Volume
- Use a Boolean modifier to combine the vase model with the cut volume. This will create the desired shape for printing.
- Export the Lampshade STL from Blender.
- Once your model is ready, export it as an STL file.
- Import the STL File into Your Slicer Software
- Open your preferred slicer (such as Cura or PrusaSlicer) and import the exported STL file.
- Check the Print Preview and Set Up Vase Mode
- If needed, adjust the scale using only values like 1000% or 10%.
- Set up your printer for vase mode printing.

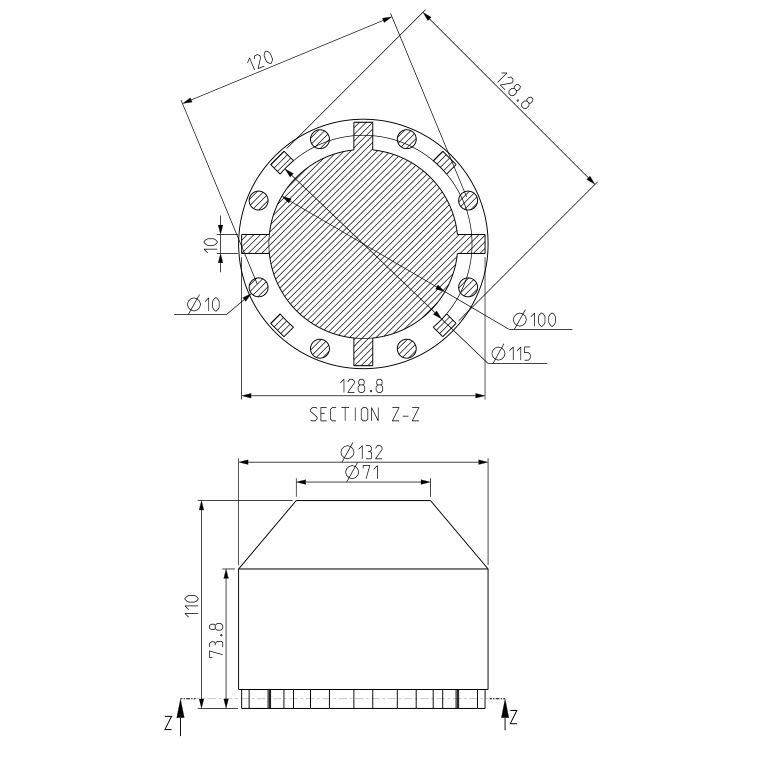
Dimensions for lamp shade base hole for CAD modeling