
XL Nextruder Super Constrained Main Plate/Idler Lever
Obliczymy ostateczną cenę na podstawie wybranego pliku. Sprawdzisz ją i zaakceptujesz przed płatnością.
Zapisane na tym urządzeniu.

Modified main plate and idler lever for printing with to 60A and 75A Shore hardness filaments.
- Ocena
- 5 / 5
- Polubienia
- 41
- Pobrania
- 287
- Wydruki
- 8
- Wyświetlenia
- 1538
- Oceny
- 6
Aktualizacja u źródła:
Informacje o modelu
- Źródło
- Printables
- Kategoria
- Prusa Parts & Upgrades
- Licencja
- GNU General Public License v2.0
This is a remix of Kaaaaaaaaaaaaal's remix to the XL's main plate and idler lever.
60A Shore hardness filament is basically like trying to push a rubber band through the print head, yuk. It will go into any open gap so this design is super constrained.
Based on my testing, the drive gear forces the filament down and to the left where it jams up behind the drive gear so this main plate is extremely close to the drive gear on the left side.
Recommend using ASA, it seems to have a smoother finish then PETG and friction is the enemy here.
Be sure to print all 3 pieces, the idler lever is matched to this main plate design.
PRINT SETTINGS:
0.4mm Nozzle
0.1mm layer height
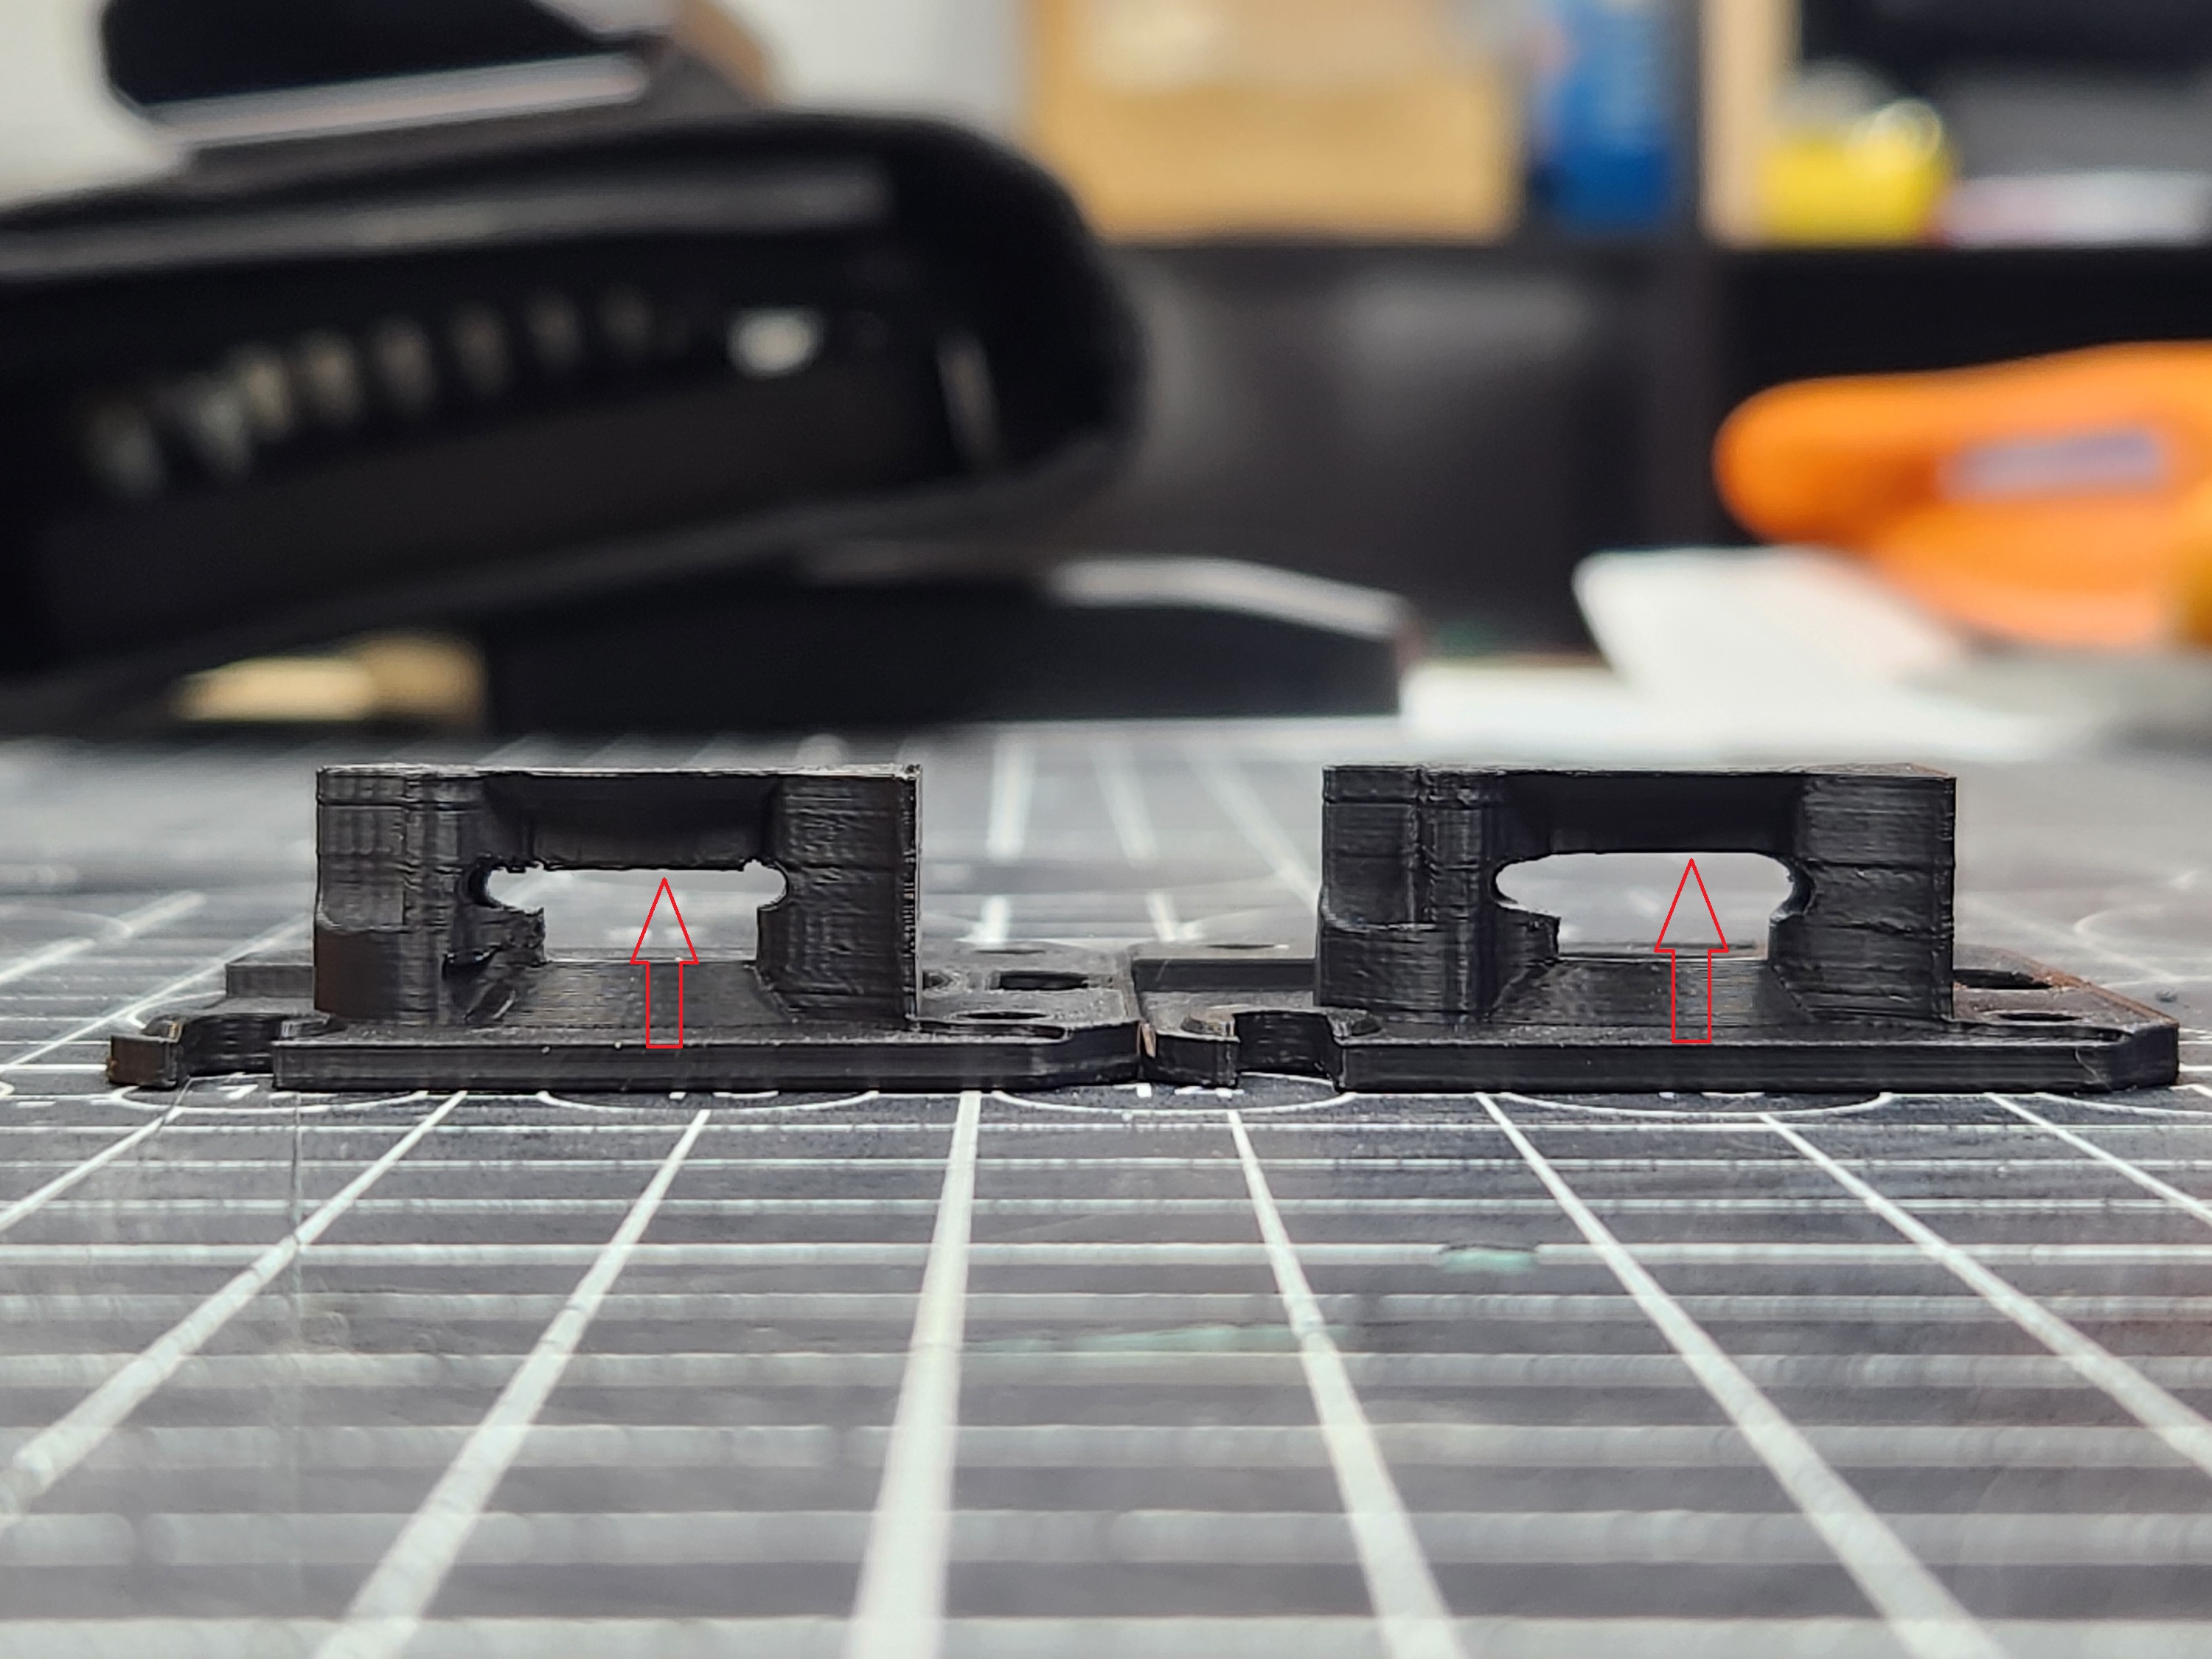
Organic supports on overhangs marked in the picture

POST PROCESSING:
After removing the supports, you'll need to carefully drill out the infeed and outfeed holes to make them the correct size and smooth those hole walls.
Infeed Hole Drill size - 2.5mm
Outfeed Hole Drill size - 2mm
Then using a scalpel or x-acto knife, shave where the overhang is to make it as straight and smooth as possible. Shown here, left is just supports removed, right is drilled and shaved. Doesn't have to be parallel to the other side (cause different sized holes), just smooth.
HOW TO PRINT WITH 60A TPU/TPE:
PRUSASLICER SETTING I've used for printing 60A-75A filament:
Using Prusaslicer's Sainsmart Flex profile as a starting point, under Advanced, change Max Volumetric Speed to 1 mm3/s for 60A. 2 mm3/s for 75A. It's slow but it works. The 75A TPE still managed to jam at 3 mm3/s.
Under Filament Overrides DISABLE all retractions. Retractions will pretty much guarantee a jam.
OTHER HARDWARE CHANGES:
FILAMENT ROUTING-
Because of how soft and grippy 60A is, it's impossible to push the filament through the default filament route of PTFE tubing so setting it up similar to what others have used for flex filament is a necessity.

FILAMENT SENSORS-
Disable and don't use the back filament sensor.
For the tool head sensor, the spring has too much force so even if you manage to get it through the sensor it puts too much friction against the soft filament. I've tried 2 options, both with success.
1 - Remove the ball, magnet, spring, and holder from the head and disable the sensor in the menu.
2 - Replace the spring with a second magnet oriented so that it pushes the other magnet and ball. Far less force is then applied to the filament and has worked pretty good so far.
IDLER SPRINGS-
Loosen the idler springs so the bolts sit about 1mm inside the holes. We want these nice and loose. The soft filament grips very well and the tighter the idler is, the more is smashes the filament into the gaps where we don't want it to go.
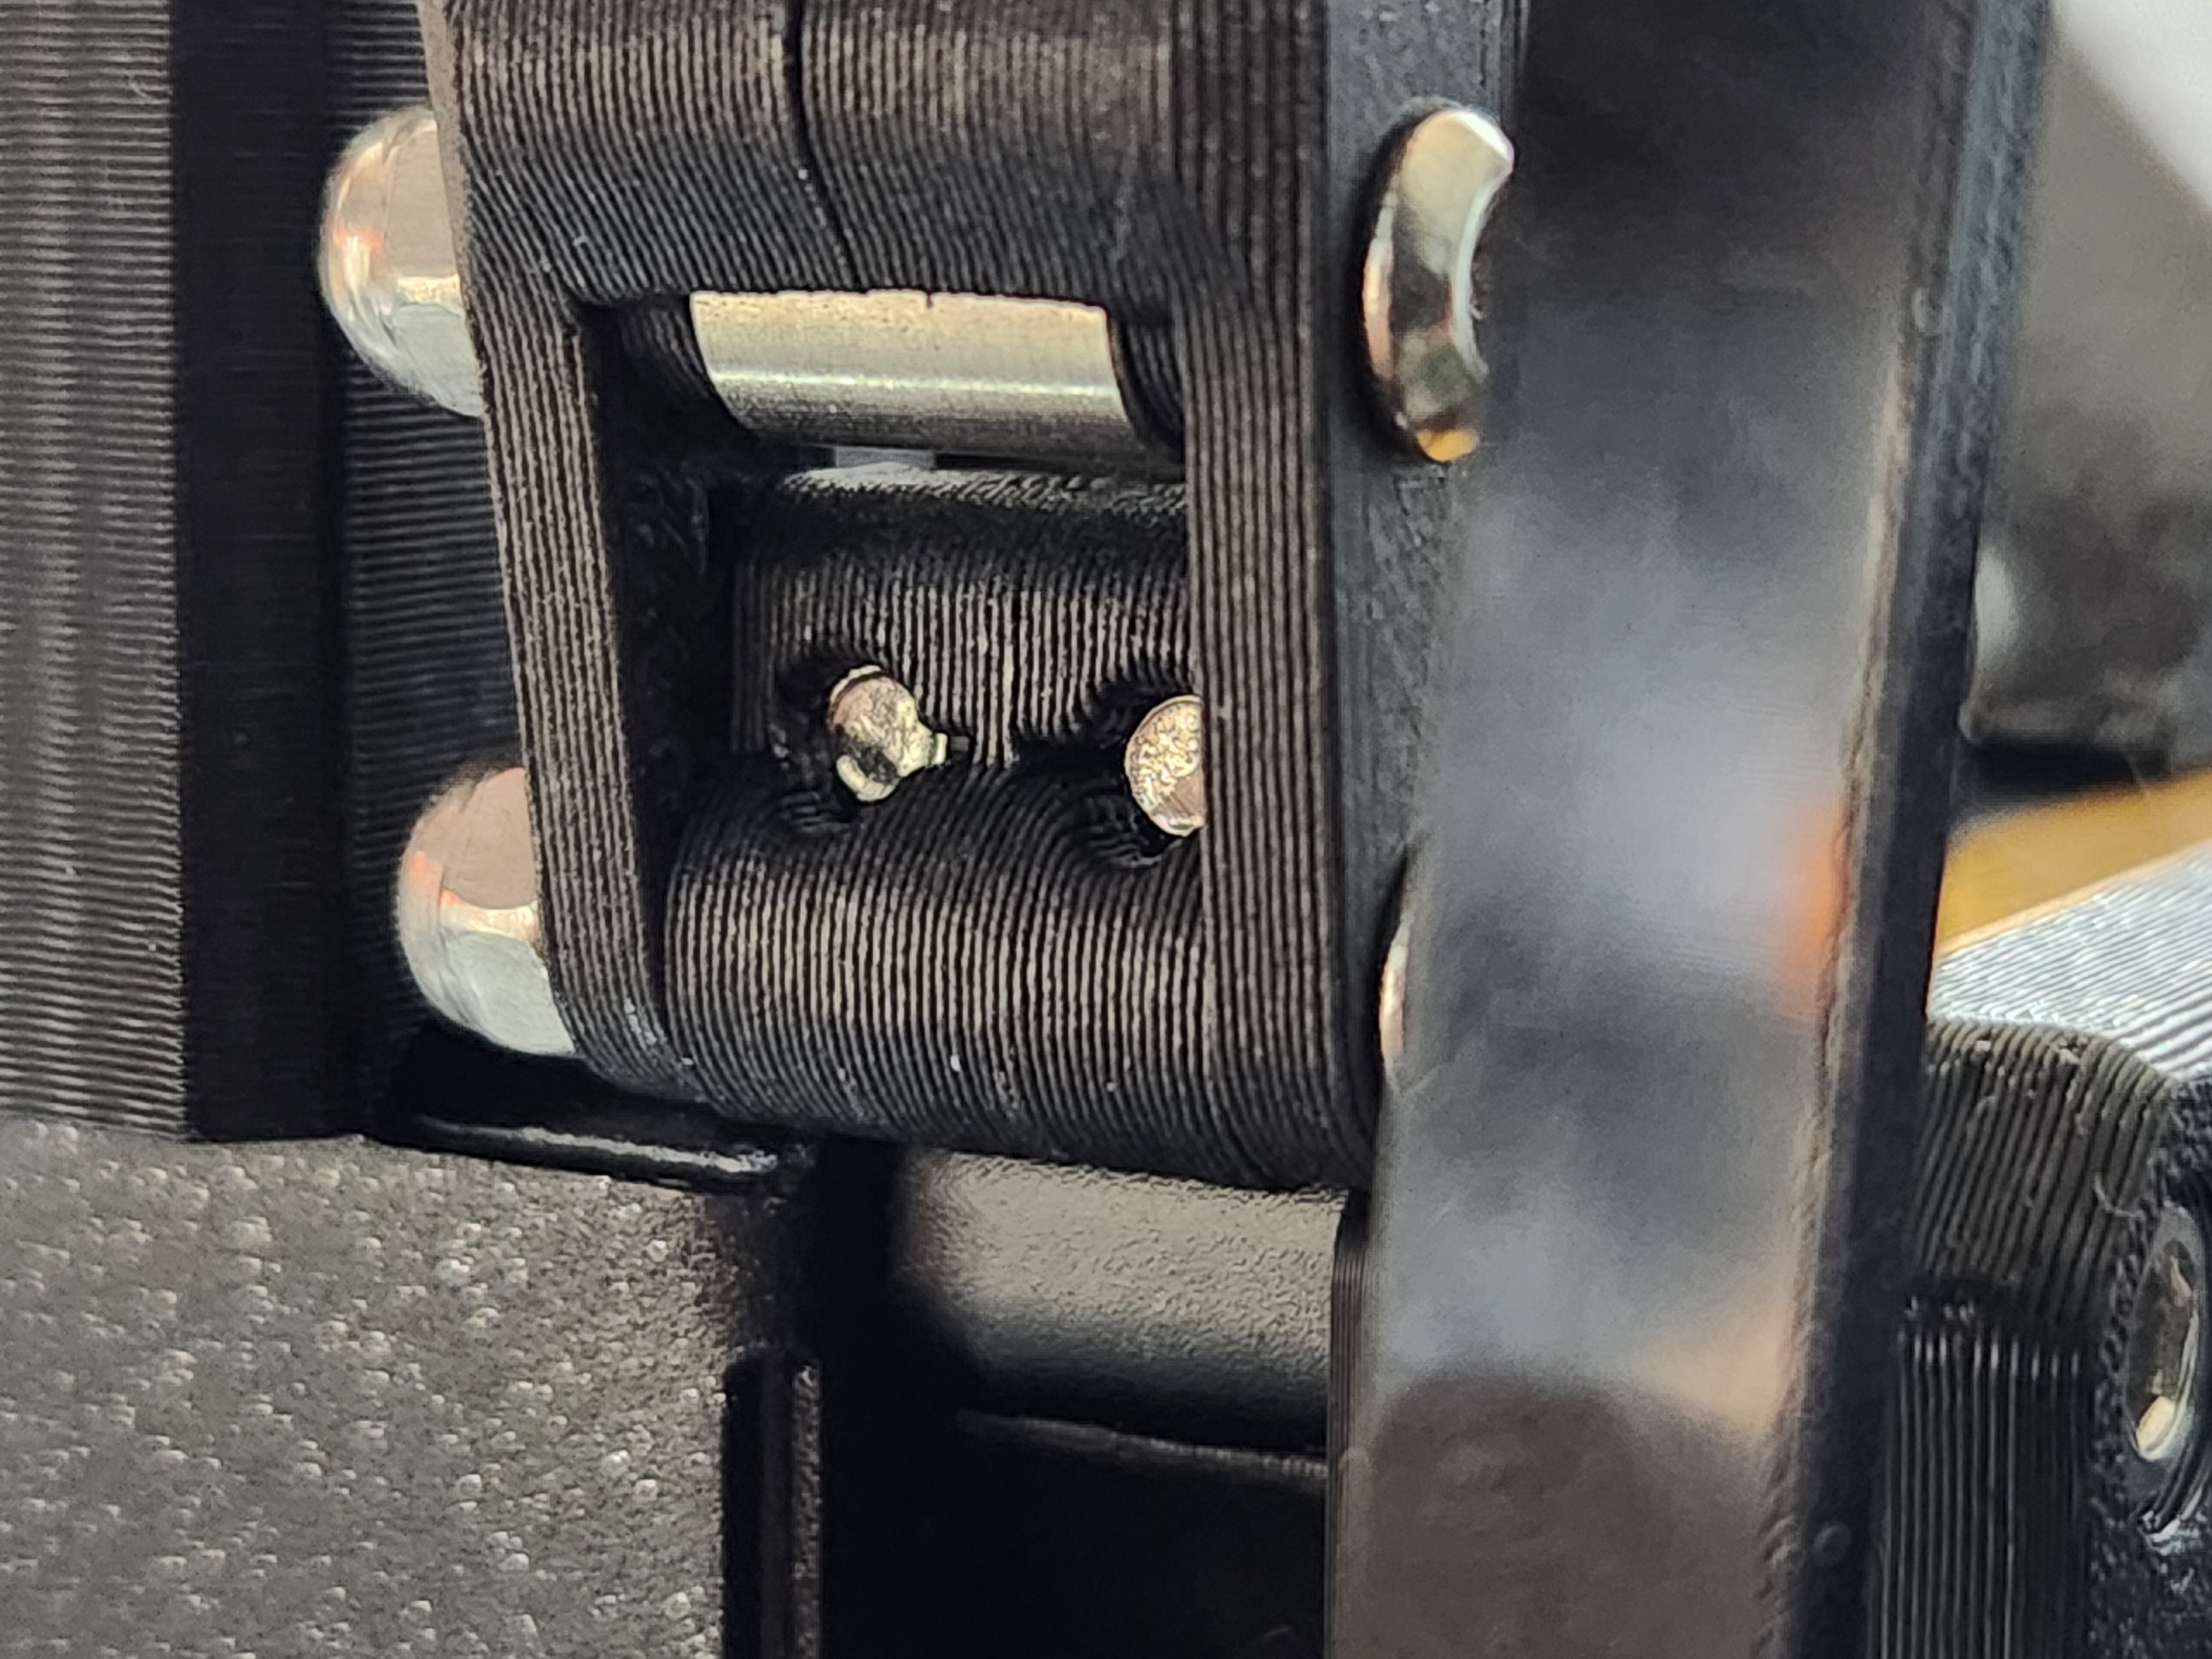
SUCCESS?? I think so, so far…
Using this plate, idler and settings, I have managed to reliably print some infill-only slippers with a toolchange! Using 60A Recreus Filaflex TPE for the first 2mm (great grip) and 75A Chinchilla TPE (pleasing feel) for the rest. 22 hour print time for each slipper, LONNNGGG! (Now to see if I can get the sizing right for my feet)

Hope this helps someone!