1 / 3
70cm Yagi Antenna with SDR
Order a print of this model
We calculate the final price from your selected file. You review and accept it before payment.
Saved on this device.

DIY 430MHz Yagi antenna made from a PVC pipe and welding electrodes. Complete with an RTL2832 SDR
- Rating
- 0 / 5
- Likes
- 50
- Downloads
- 172
- Makes
- 0
- Views
- 2,241
- Reviews
- 0
Updated at source:
Model information
- Source
- Printables
- Category
- Electronics
- License
- Creative Commons — Attribution — Noncommercial — Share Alike
Simple & lightweight Yagi antenna for the 70cm band. Developed in conjunction with the ‘Touch The Universe’ project.
Required hardware
- 3.2mm aluminium welding rods
- 4mm brass welding rod
- 25mm PVC pipe
- ~3mm self-tapping screws
- superglue / silicone / hot glue gun (optional)
- soldering iron & solder
- SMA edge connector (Aliexpress)
- SMA PCB adapter (can be ordered from JLCPCB for $2 - see provided gerber files)
- RTL SDR (Aliexpress)
- USB-A extension cord (~2m)
- cable ties
Printing instructions
Works best with PETG or similar. I recommend default [email protected] presets. Add more perimeters for extra strength (optional). No supports required.
Assembly instructions
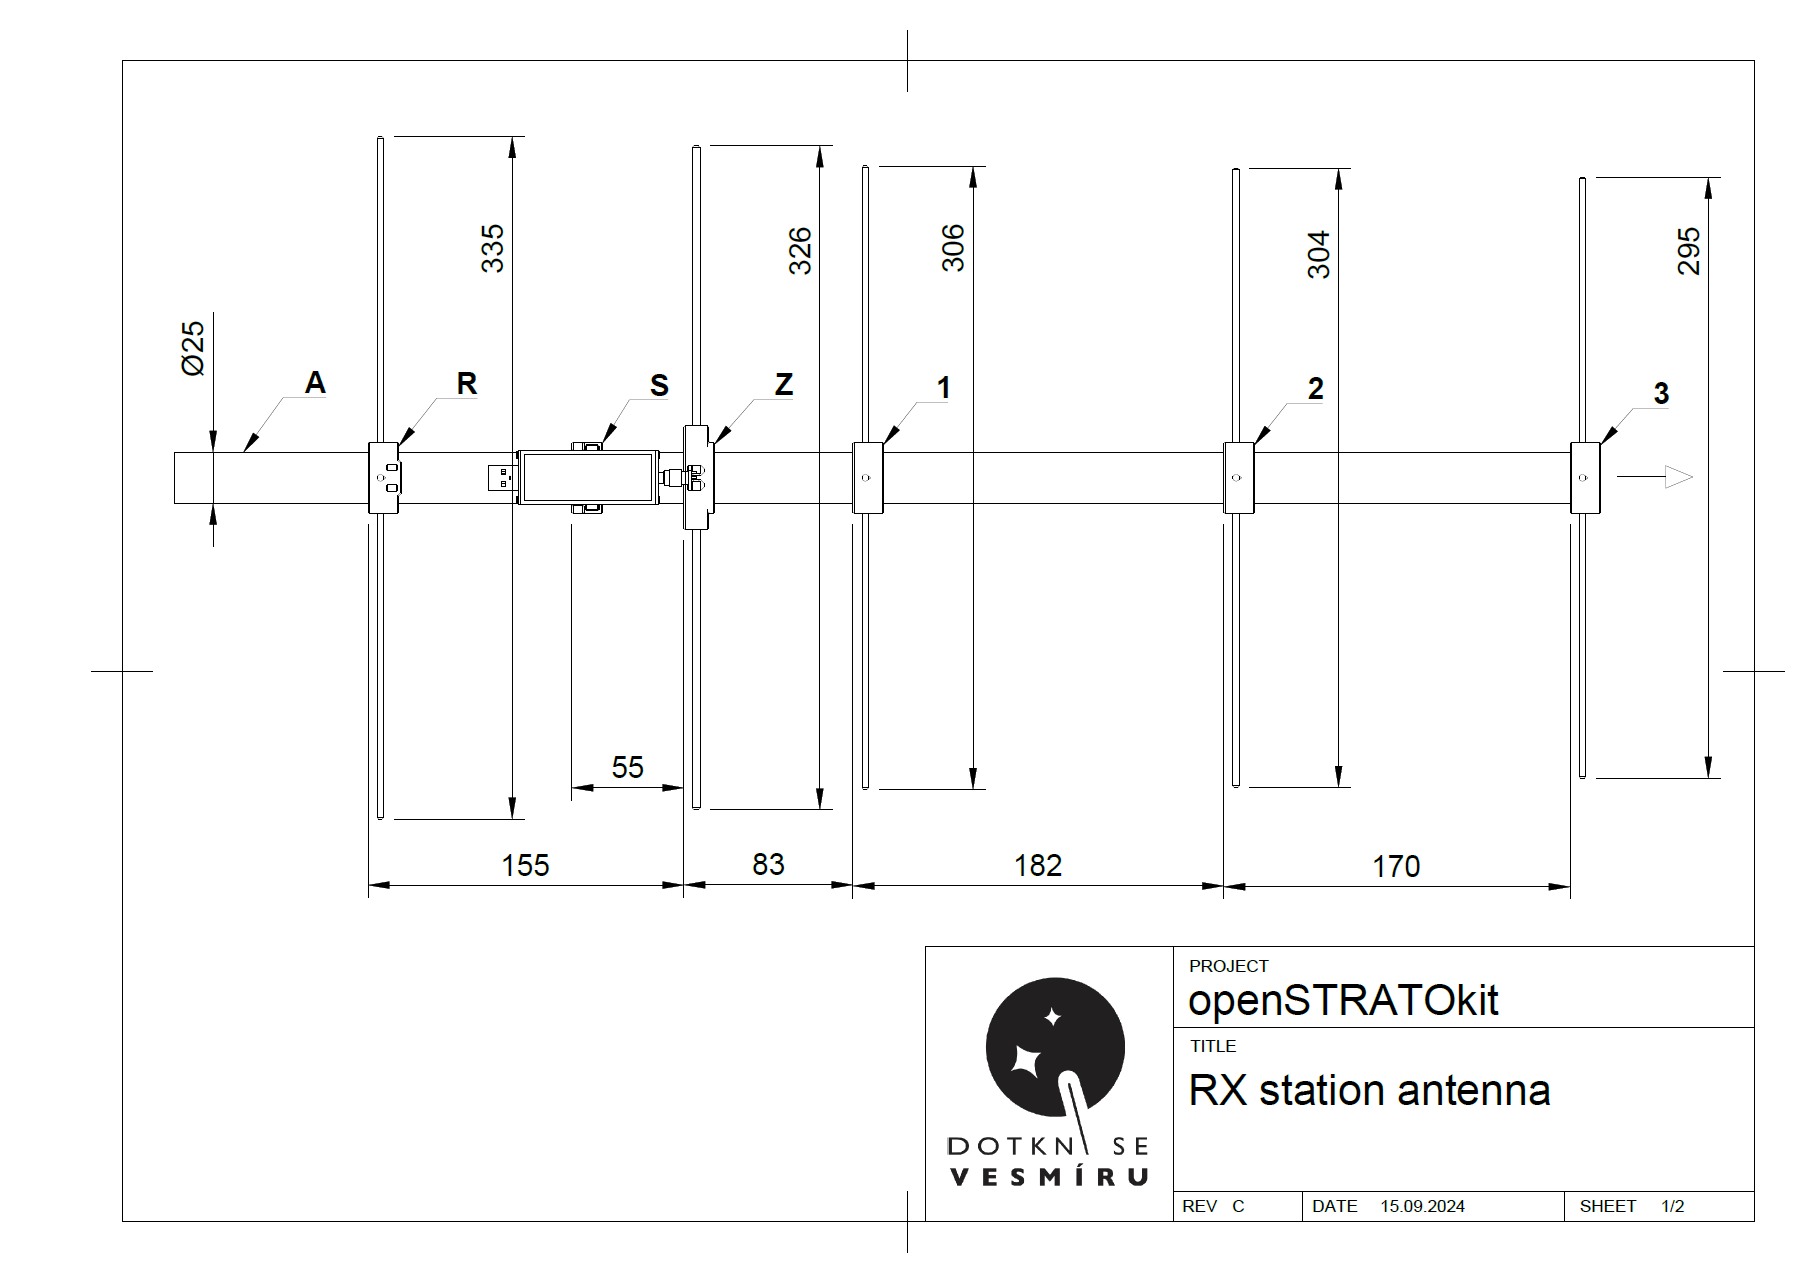
- cut the welding rods to size (see the provided drawing for dimensions)
- the 4mm brass rod needs to be cut 2mm shorter and split in half to account for the center gap
- roughen up the ends of the brass rod with a file or sandpaper for easier soldering later
- file / deburr all edges
- mark the centerpoint of each aluminium element and insert each one into the appropriate printed part
- use the top hole to align the center mark, then fill the hole with glue (optional)
- solder the SMA connector to the SMA PCB
- insert the brass elements into the 'Z' printed part and solder the PCB to them
- cut a ≥70cm section of PVC pipe and mark element locations (see the provided drawing for dimensions)
- attach the elements to the PVC pipe
- make sure the pointy holes on the sides of the printed parts are facing towards the business end of the antenna
- secure them by running a self-tapping screw through the hole on the bottom of each printed part
- attach the SDR using the SMA connector and secure it to the 'S' printed part using a cable tie
- connect the USB extension cord and secure it to the 'R' printed part using a cable tie