1 / 9
Ratcheting Toothpaste Winder (no support)
Order a print of this model
We calculate the final price from your selected file. You review and accept it before payment.
Saved on this device.

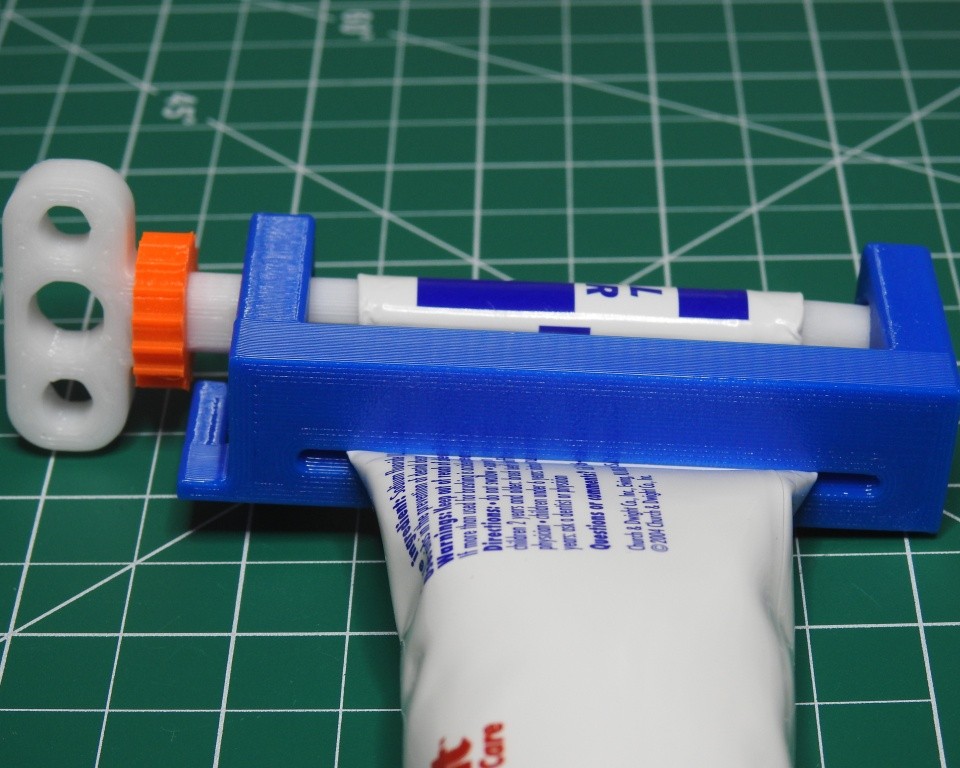
Yet another toothpaste squeezer/winder. Easy 3 pieces; no support.
- Rating
- 5 / 5
- Likes
- 17
- Downloads
- 151
- Makes
- 2
- Views
- 603
- Reviews
- 2
Updated at source:
Model information
- Source
- Printables
- Category
- Bathroom
- License
- Creative Commons — Attribution — Noncommercial — Share Alike
Features
- Quick, easy print
- No support required
- Parametric design
- Positive ratchet winding
Design
The Fusion 360 design (included) allows you to change the tube width and other variables. The included STL is set for a tube width of 58mm – this should handle most tubes.
Printing
It may be printed in any material. I used PETG for flexibility and strength of the ratchet.
- The key has no special requirements. I used a .6 nozzle with .32 layer height for speed.
- The gear should be printed at .20 or less to keep the teeth sharp.
- The frame may be printed either upright or laying sideways. {I have included an STL for each method.}
- Upright needs no support, but may have strength issues with the ratchet. Since the ratchet flexes, it should have maximum strength from long layers along the flex axis. Printing upright will have layers in the wrong direction and will fail if you don’t have good layer adhesion. For this reason, I used PETG at .32.

- Sideways will give much better ratchet strength. If you are using PLA, this is the direction I must recommend. The disadvantage of printing it sideways is the tube slot should be supported.

Assembly
- Insert the gear onto the key.
- The notch in the gear needs to be facing the key handle and aligned with the bump on the key.

- The tip of the key and the hole in the gear may be a tight fit. Try rocking it while pushing it on. You may lightly sand the tip if it is really stubborn.

- Once the gear in on the key shaft, push it all the way to the handle. There should only be about 1mm gap.

- Insert the key/gear into the frame (on the ratchet end). It should be snug and snap when it is completely through the hole.
- Finally, align the key upright with the frame (this helps ensure the gear teeth and the ratchet are set to mesh properly) and push the key through the far side frame hole. Again, it should be snug and snap when it is completely through the hole.

Usage
To use, pass the toothpaste tube through the frame slot and into the key slot and wind the key clockwise.
To unwind the tube for removal, push the key tip back into the frame hole. Push until you see the gear clear the ratchet. When the gear is clear, turn the key counterclockwise.