
Next Level Racing F-GT Cockpit DIY Simracing Windsim w/ Mount
We calculate the final price from your selected file. You review and accept it before payment.
Saved on this device.

Custom Simracing Windsim for F-GT Cockpit
- Rating
- 0 / 5
- Likes
- 27
- Downloads
- 56
- Makes
- 0
- Views
- 1,201
- Reviews
- 0
Updated at source:
Model information
- Source
- Printables
- Category
- Other Gadgets
- License
- Creative Commons — Public Domain
Hello! I always wanted to create a windsim for simracing games, but never wanted to pay a steep or expensive price. I recently got a 3D Printer so I designed a custom mount and created one.
Materials :
ALL THESE MATERIALS BELOW ARE REQUIRED.
1x 120mm Fan (HAS TO BE PWM WHICH IS 4 PINS) I had spare fans that came with my AIO which I didn't use, so I used one of those.
Arduino Leonardo (most people use arduino uno's but they both work the exact same, and I had this laying around)
Purchase Here : https://www.amazon.com/dp/B008A36R2Y
4 Pin Connector (This is where you plug your PWM cable into.)
Purchase Here : https://www.amazon.com/dp/B0BMDQLR4Q
12V 5A DC Connector
Purchase Here : https://www.amazon.com/gp/product/B0CR8TZ41W
12V 1.5A DC Power Supply (supplys power to the fans)
Purchase Here : https://www.amazon.com/MTYTOT-Adapter-100-240V-Transformers-Switching/dp/B09STC66J3'
Any Sort Of Wires, I used Solid Single Core Tinned Copper Wire from TUOFENG.
THIS IS OPTIONAL, IT SAVES YOU A LOT OF TIME IF YOU DON'T WANT TO DO SOLDERING.
Elegoo Breadboard wires, These have headers so they can just connect to the PWM connector. And if they dont fit in the case, I cut of the headers connecting into the arduino and stripped them. Then Put it into the ports on the arduino.
Purchase Here : https://www.amazon.com/dp/B01EV70C78
Wiring Diagram
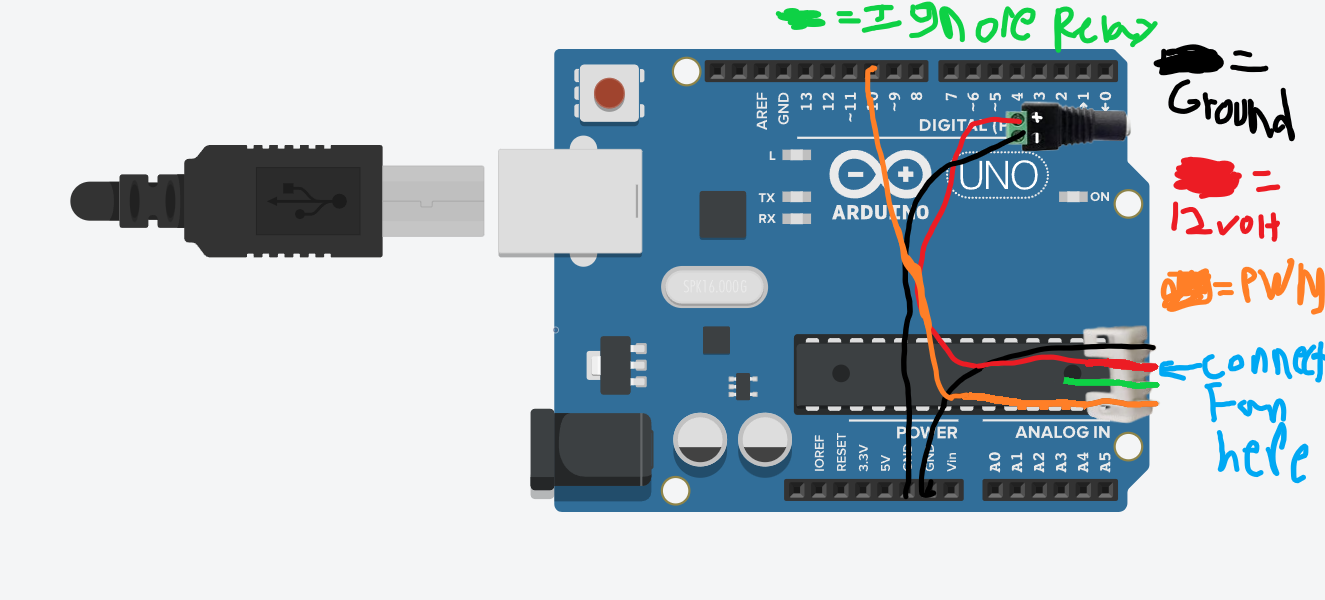
Simhub Setup :
Okay, So If you have just built it follow my steps. First plug the arduino, and all fans and power in. Once you have done that, the fan should start spinning at max power. That means its working. Now If you dont have simhub go and download it. I recommend purchasing it as it supports the creator. If you can't it is completly fine. Now Open Simhub, and go to the Arduino section. Go to My Hardware.
Next, click Open Arduino setup tool.

Now If you get a pop up of “It looks like you had work in progress, what do you want to do?” Press start from scratch. Then on Board at the top right, click Arduino Nano, And Change it to what ever model board your using, In my case, I am using a Leonardo.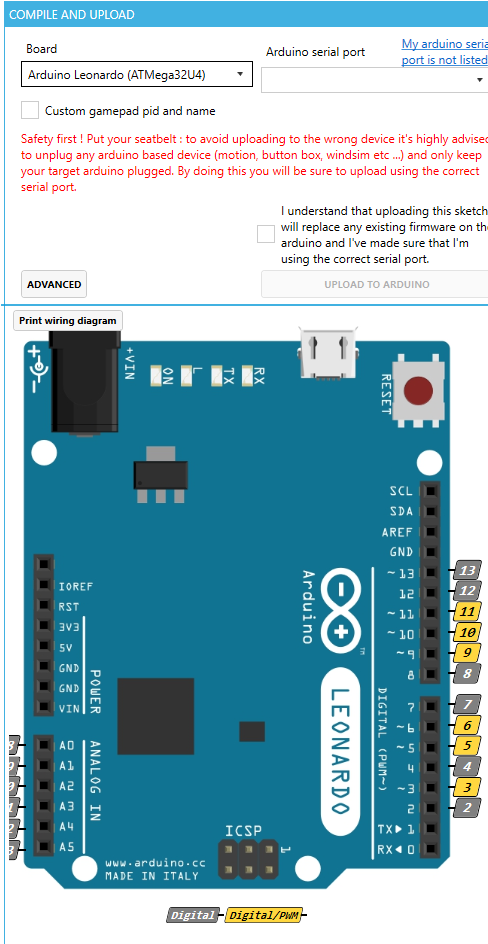
Now, On the Left side, you should see many options, now scroll down until you see a picture of a fan called SHAKEIT PWM FANS Outputs. Select the Plus Icon till it matches the amount of fans you have connected. 
On PWM Output 1 Pin, Select it to the PWM Pin, Which on the wiring diagram is 10.
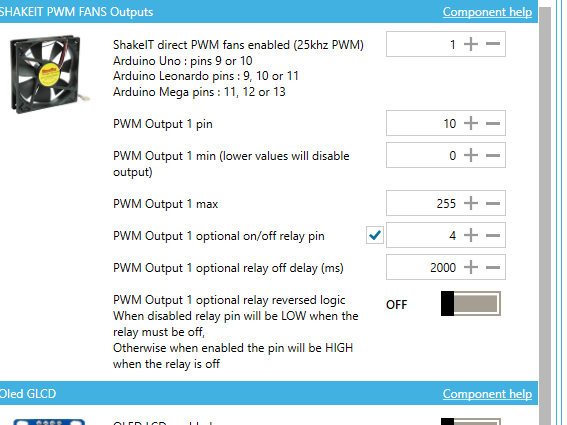
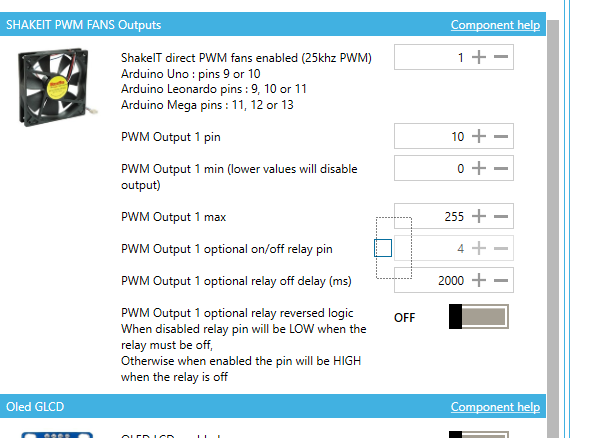
Now The checkmark next to the PWM Output 1 optional on/off relay pin turn it off/uncheck it.
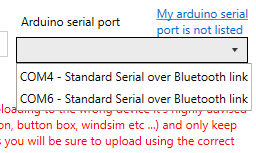
Now, Select the one that has the name of your board, Mine was not connected at the time but it should say COM(number) - Arduino (whatever you used).
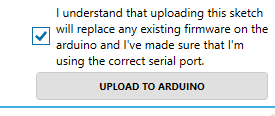
Now, checkmark the " I understand that uploading this sketch will replace any existing firmware on the arduino and I've made sure that I'm using the correct serial port. Then Press Upload to Arduino till the OK button is ungrayed and lets you click it.
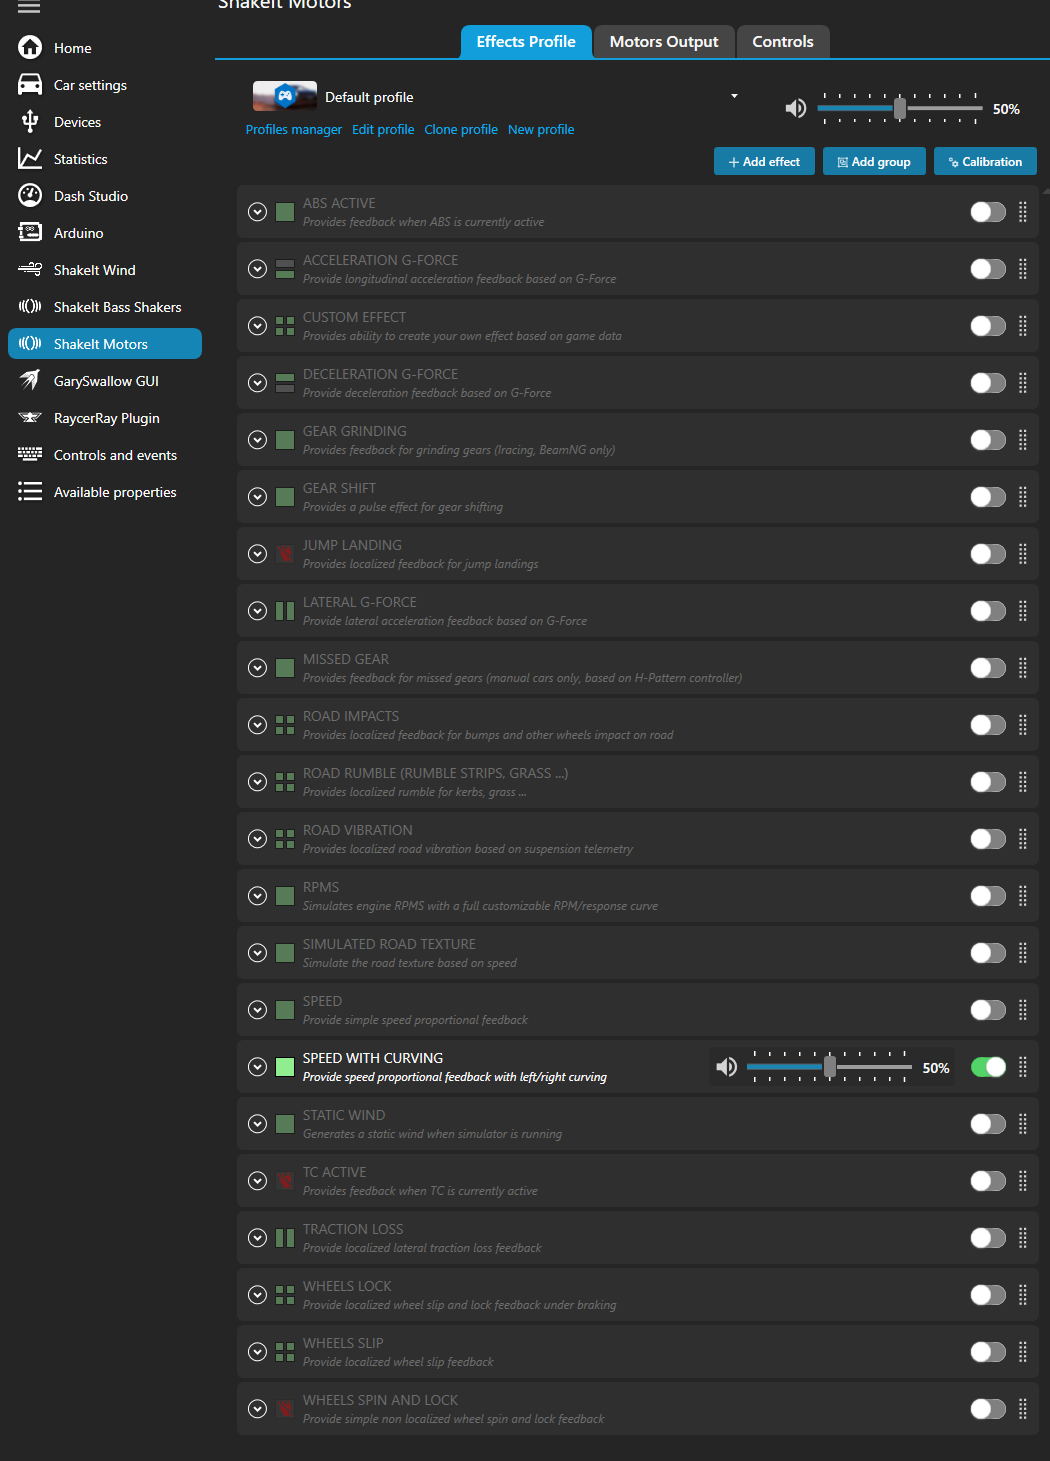
Now close the arduino setup app, and go back to the simhub page. Go to the section called ShakeIt Motors. Then On the Effects Profile Tab select Speed With Curving and turn it on.
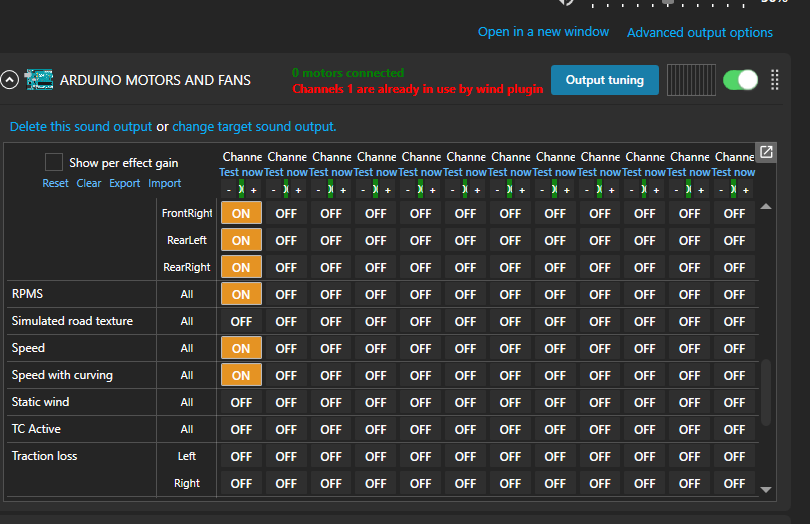
Now go to the Motors Output tab, and select arduino motors and fans and turn it on. Now on channel 1 turn on everything in the picture. and match it.
Now that parts done, go to ShakeIt Wind, and go to the Output configurations tab. Enable the arduino if it isn't already.
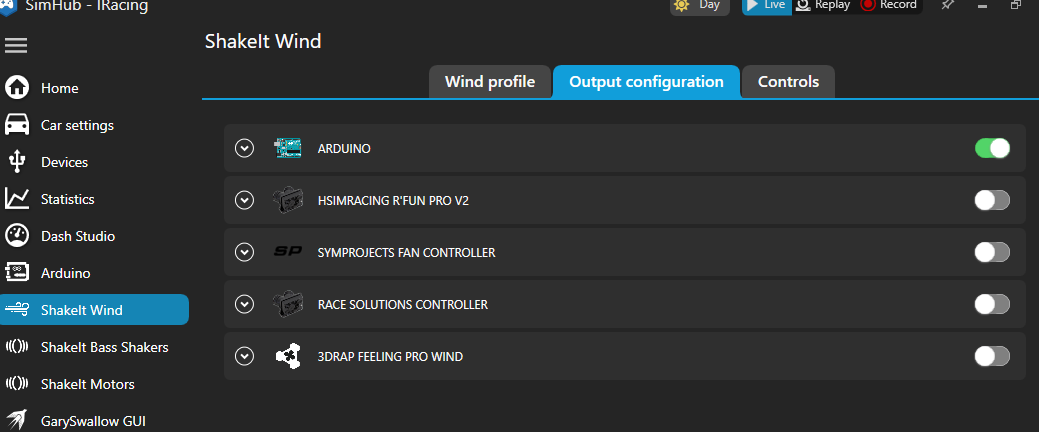
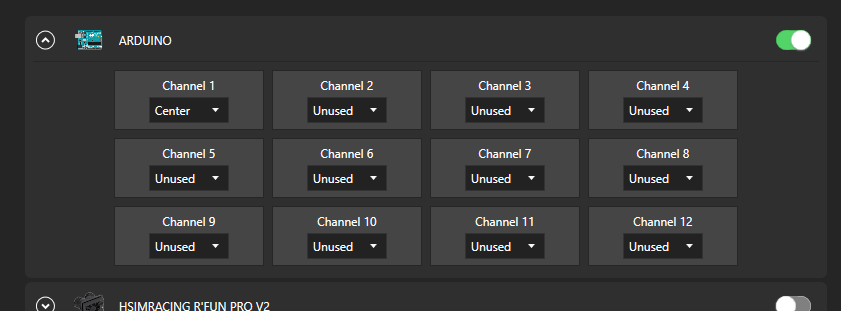
Now set Channel 1 to center, If you want it to be your left fan for only wind blowing from the left, set it to left.
Your Done! Go to home and select your sim of choice. And Enjoy!!