
smthng display housing 1 (press-fit, experimental) for GaggiMate
We calculate the final price from your selected file. You review and accept it before payment.
Saved on this device.

Minimalist housing with press fit design for the GaggiMate display (LILYGO T-RGB, 2.1 inch)
- Rating
- 5 / 5
- Likes
- 19
- Downloads
- 220
- Makes
- 2
- Views
- 1,645
- Reviews
- 2
Updated at source:
Model information
- Source
- Printables
- Category
- Kitchen
- License
- Creative Commons — Attribution — Noncommercial — Share Alike
Please note that this case does not have a frame around the glass and therefore offers less protection! Alternatively, I recommend version 2 of this case with a frame!
Before pushing the display into the housing, please make sure that the flat cable is centered over the cut-out and do not press on the sides of the display with force.
All smthng display housings for GaggiMate: https://www.printables.com/@dubios42/collections/2861668
Housing 2 is the housing I personally recommend most for the LILYGO T-RGB, 2.1 inch, as it is the easiest to install, protects the display with its frame and I offer holder widths from 1.4 mm to 2.4 mm for it.
smthng display housing 1 (press fit):
How to install (gluing optional)

Preparation:
The display itself is only clipped together between the reflective layers and the display. This can lead to them coming apart. This is not a problem, as they can simply be put back together again. However, you can prevent (or fix) this by attaching a few strips of adhesive tape to the side as shown in the following picture. These should start at the bottom of the display as shown in the picture and then go up the sides to the PCB board, but not over the connectors. In addition, the adhesive strips should not be attached to the places where the three holders of the housing will later be.
(If you want to bond the layers with superglue, you should make sure that the glue is only applied to the edges, as if the glue touches the reflective layer it will create darker spots in these areas later - for this reason I recommend the method with the adhesive tape)
.


Lead the power cable with the plug from behind into the housing and connect it to the display.
Place the display in the center of the housing and align the ribbon cable centrally over the recess of the housing
Now lift the display slightly and hold it as straight (horizontal) as possible. Then press it into the housing.
Attention! Do not apply pressure to the edges of the display and make sure that the plug is centered in the notch.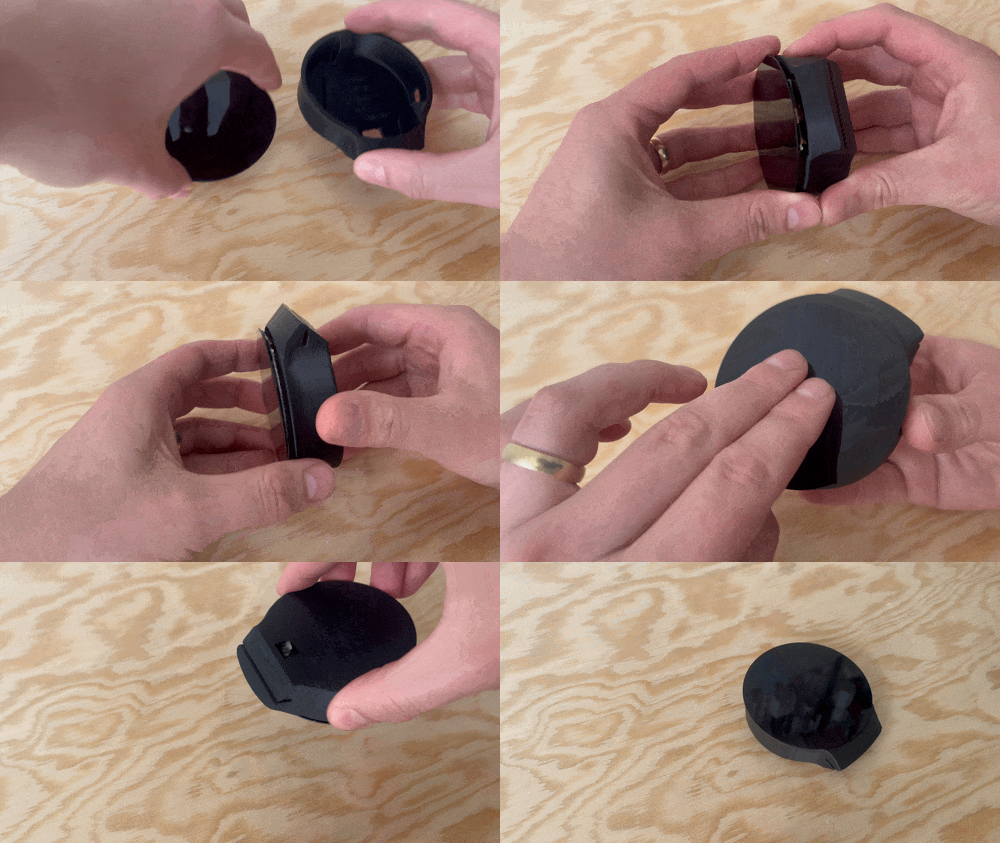
Optional, if the dispaly is too loose in the housing:
Either you can gradually thicken the holders with some adhesive tape or you can attach double-sided adhesive tape to the three small areas on the top as shown in the following picture. (These are intentionally small so that you can still remove the display easily enough)
How to print
It is best to print at a 45 degree angle without supports (Warnings due to floating regions can be ignored).
Or: If there are adhesion problems, the housing can also be printed flat on the back, but then supports should be activated.