
Desk PC Fan
We calculate the final price from your selected file. You review and accept it before payment.
Saved on this device.
Mounting for USB-C 120mm PC fan
- Rating
- 0 / 5
- Likes
- 9
- Downloads
- 34
- Makes
- 0
- Views
- 292
- Reviews
- 0
Updated at source:
Model information
- Source
- Printables
- Category
- Office
- License
- Creative Commons — Attribution — Share Alike
Description
An easy to assemble usb-c pc fan conversion inspired by the Noctua NV-FS1. I had some leftover pc fans from my build that wanted to repurpose. This design uses no additional hardware apart from some magnets and cable binders. No supports or such are required, though there are some thin parts in the base that require either very good adhesion, or some brims.
Optionally, a Noctua Fan Grill and/or Noctua Airflow Amplifier can be used in the build.
My Print Settings
- material: PLA matte
- layer height: 0.2mm
- infill: 15% 3d honeycomb
- walls: 3
- supports: none
Bill of Materials
These are the materials I used for the build
- 4x magnets 6mm x 3mm (alternatively some 6mm x 6mm dowels could probably be printed using cylinderes directly in the slicer)
- some cables to connect the components
- 1x usb-c decoy
- 1x step down buck converter
- 1x pwm pc fan controller
- 1x 120mm 12v fan
- 4x cable binders or long enough screws (probably around m3x30 or m4x30, but since they are a nightmare to source around here, I didn't bother checking out the option)
Assembly Instruction
For the electronics, I followed this excellent model's guidance https://makerworld.com/en/models/1019135-soldering-fume-extractor-usb-c-open-source.
- press fit magnets in all insets, use some glue if they don't fit snugly
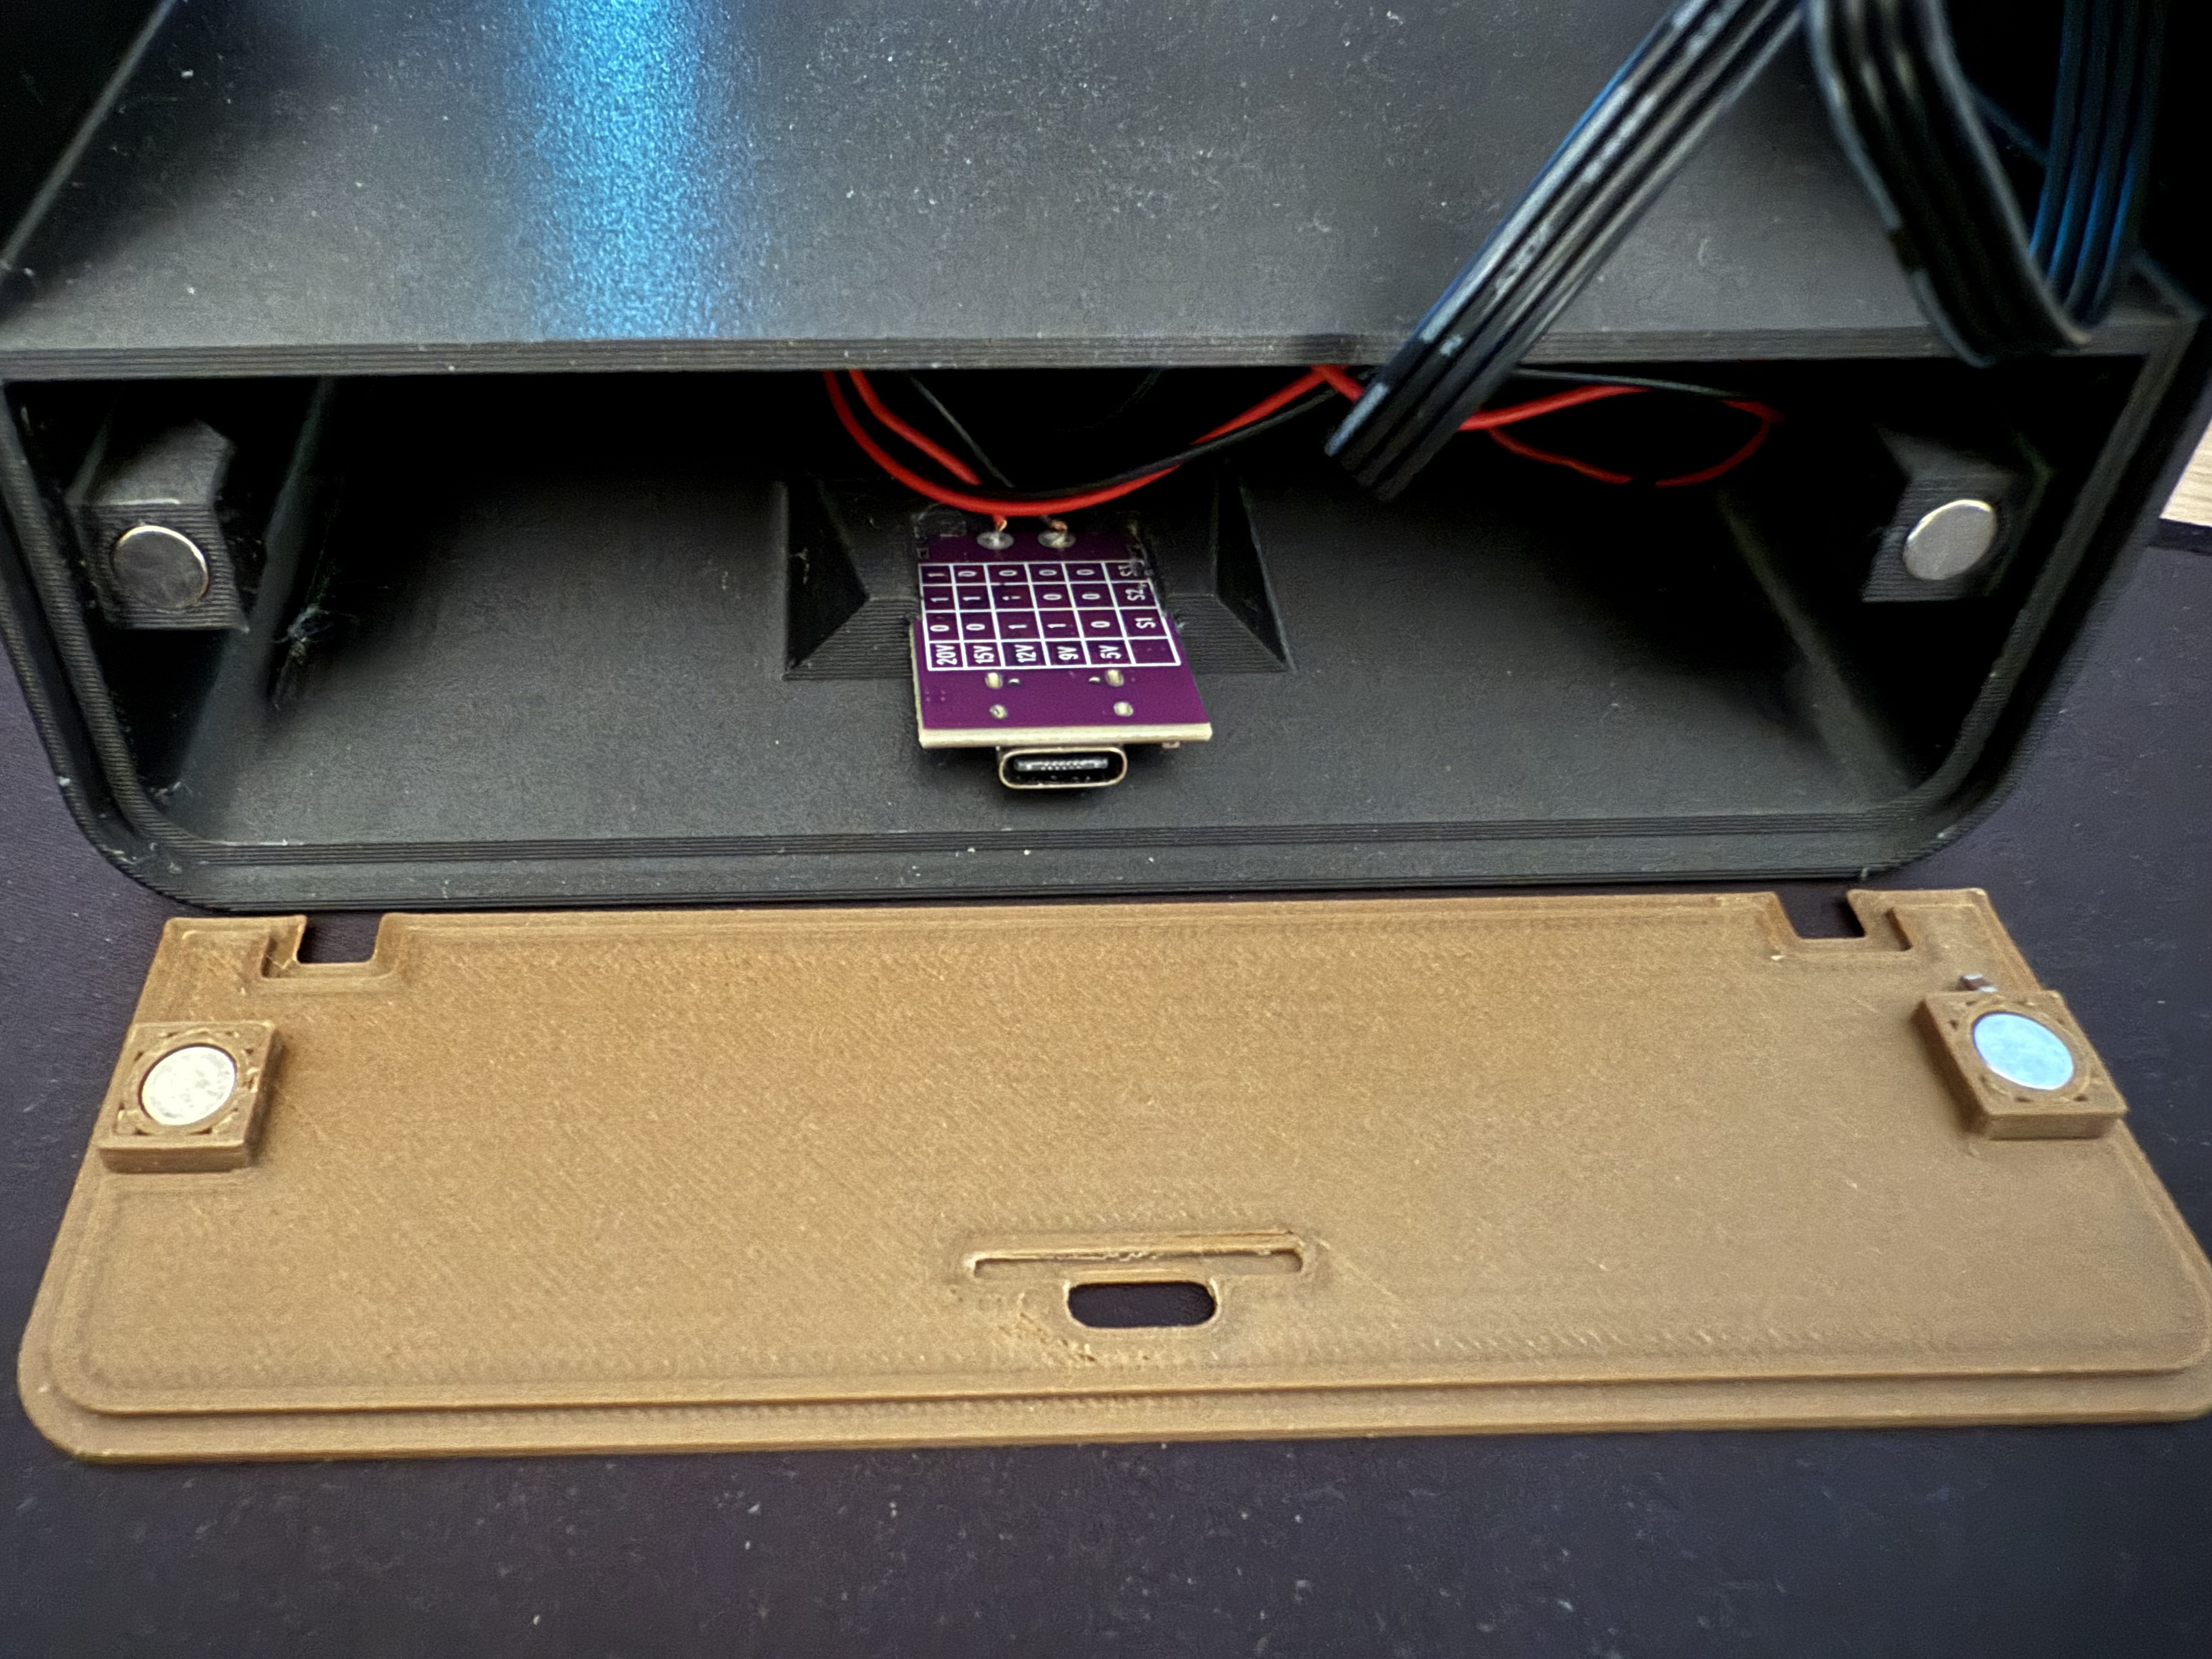
- set the decoy to 15v if it adjustable. This is due to 15v being apparently more broadly supported by power supplies. If the charger does not support the requested voltage, it will just default to 5v and not be able to spin the fan
- solder the usb c decoy to the buck converter input. Also set the buck converter to output 12v if it is adjustable
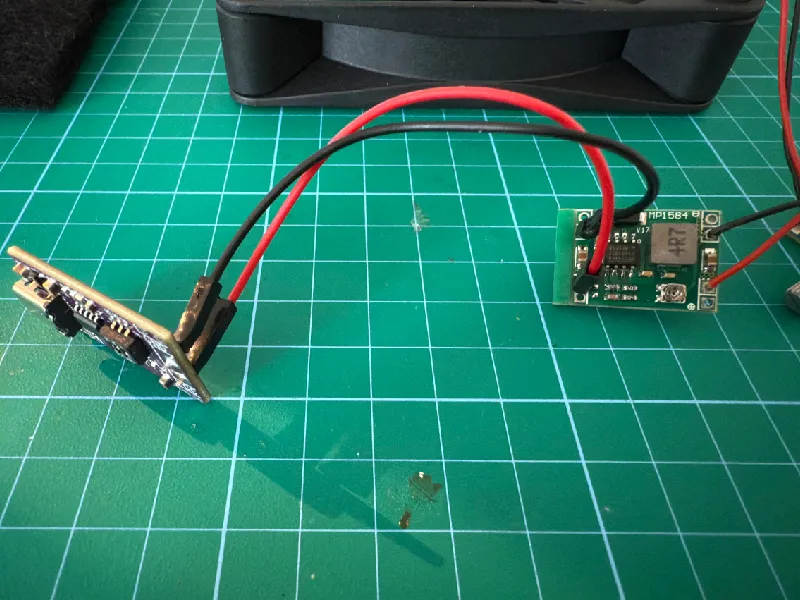
- solder the buck converter output to the pwm controller input
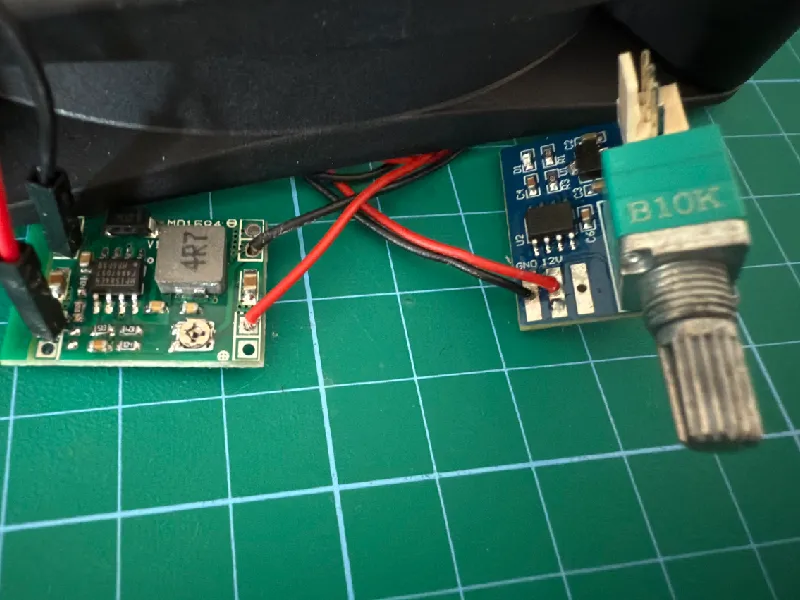
- connect the fan to the pwm controller
- insert the pwm controller in the hole of the electronics box and secure with the provided nut
- place the usb c decoy in the tray within the base ensuring the USB port is on the bottom side of the board
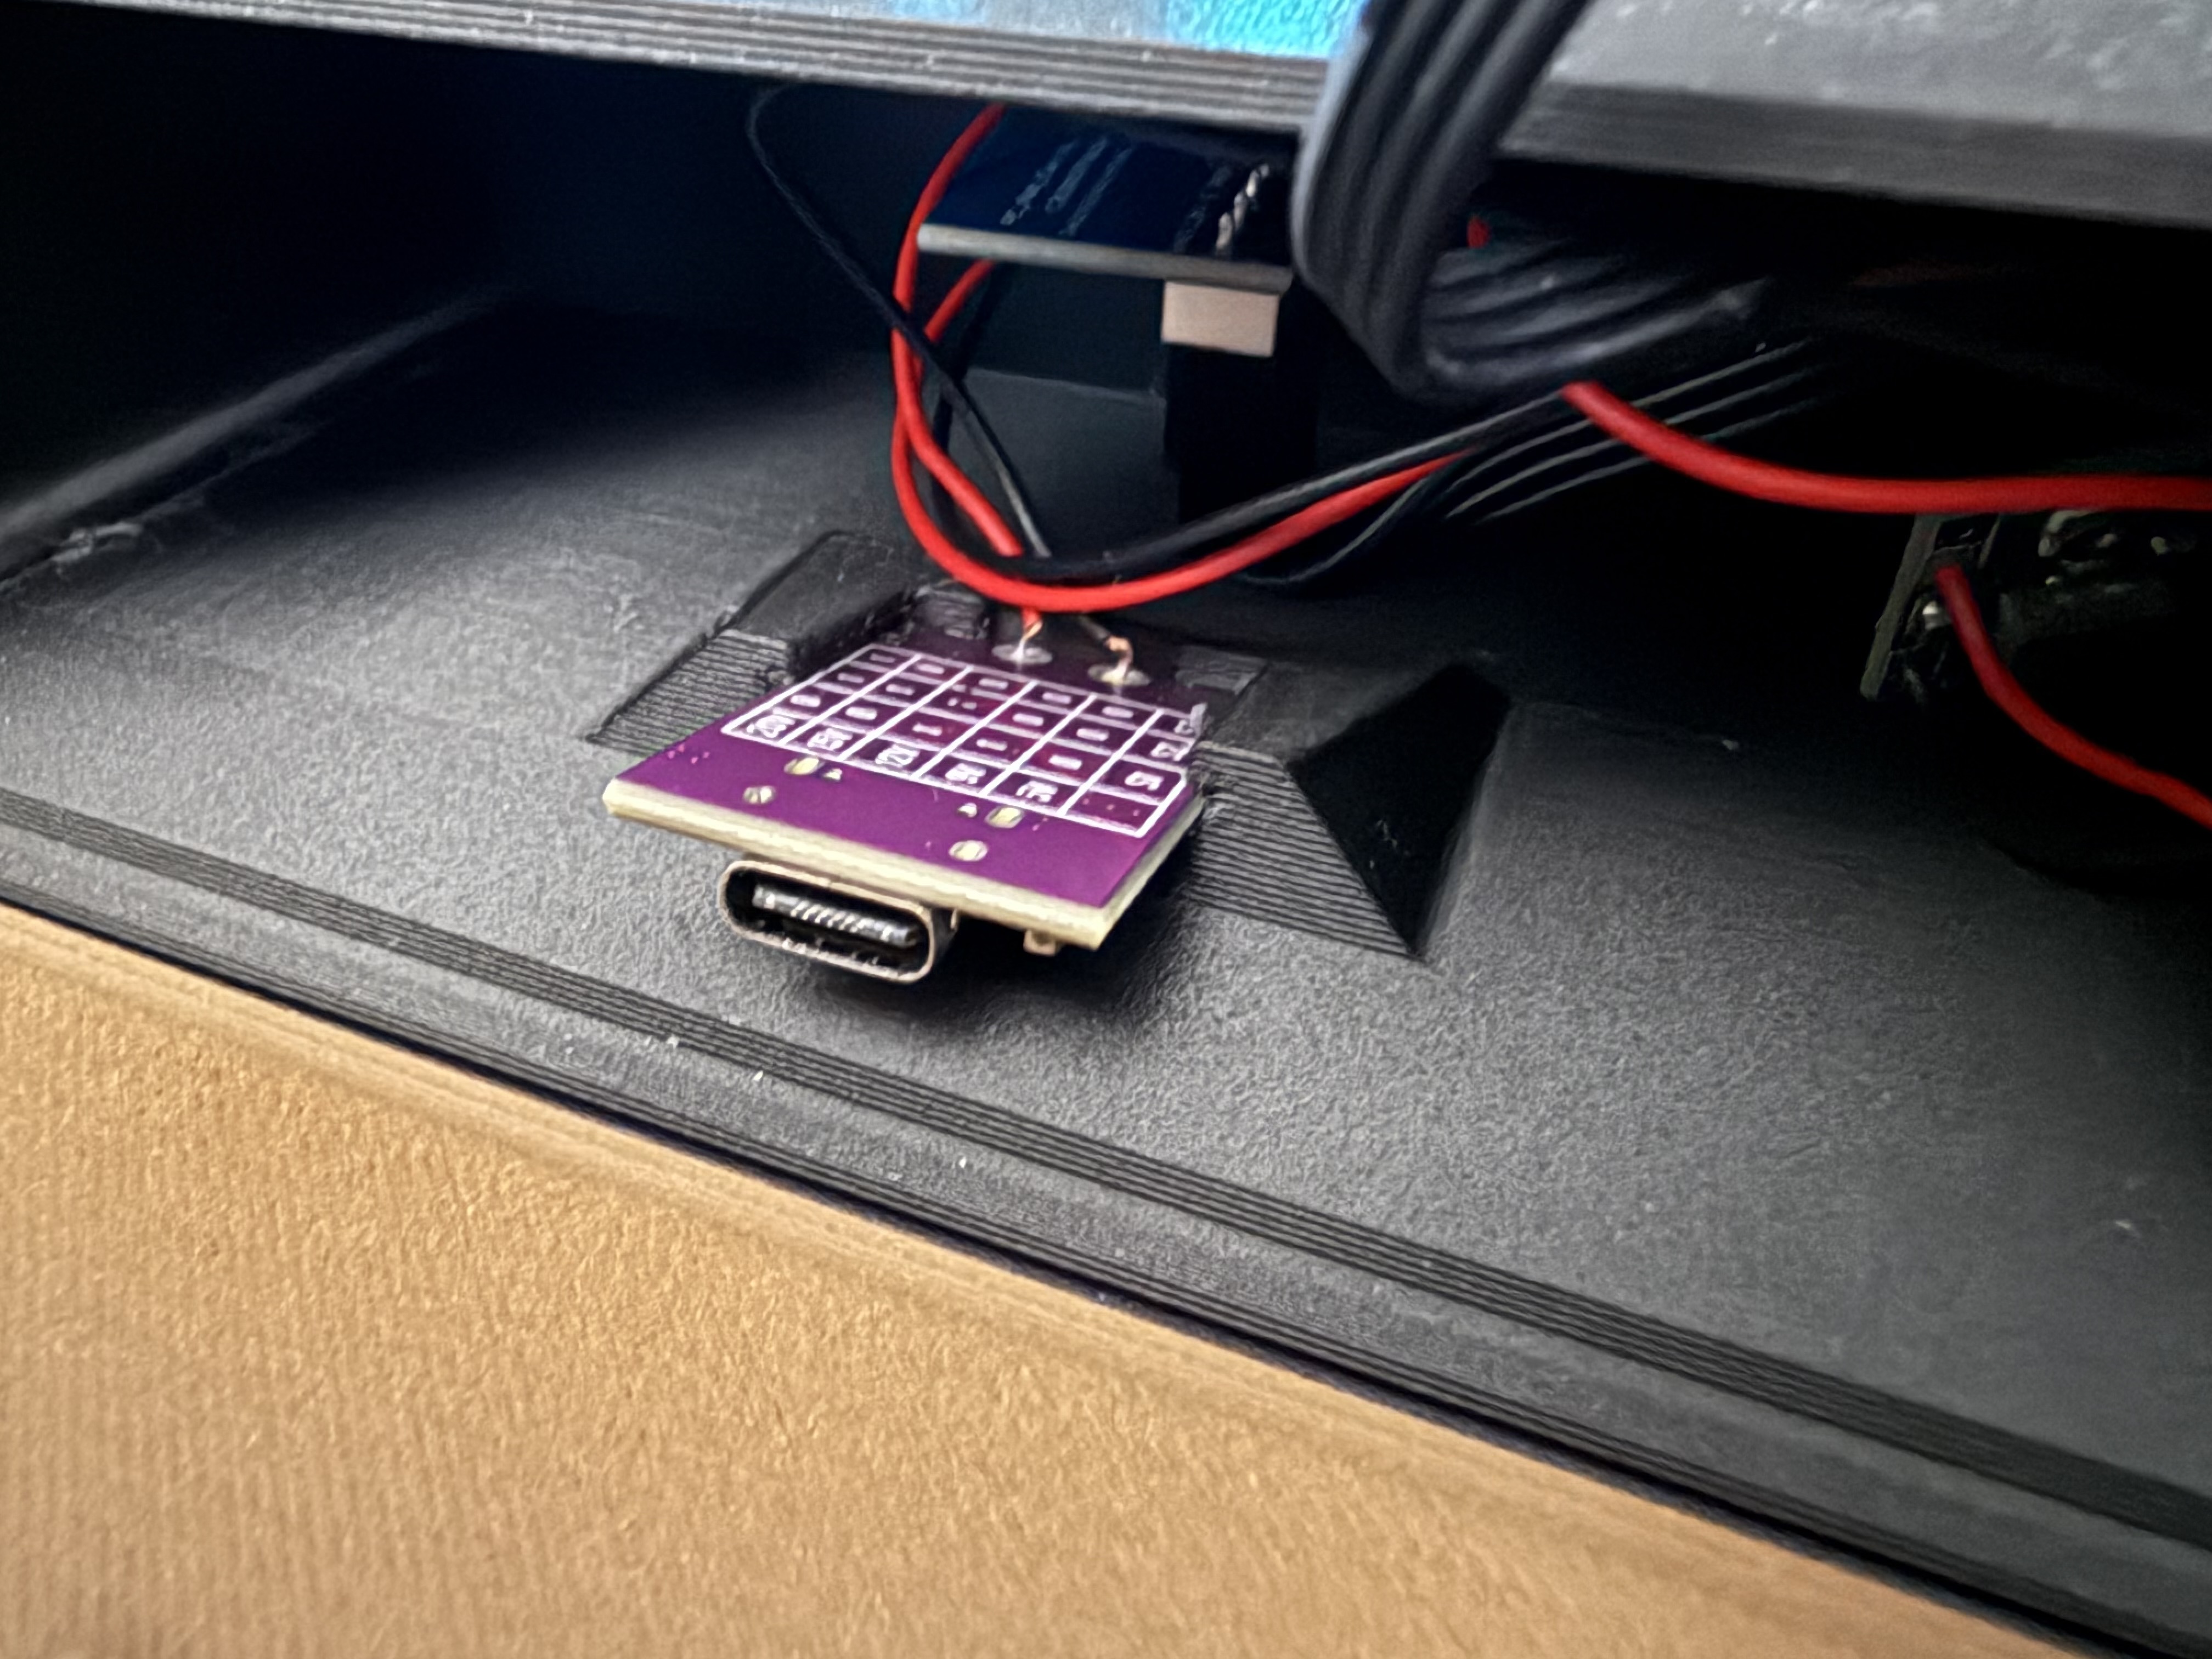
- place all the cables and the buck converter in the box
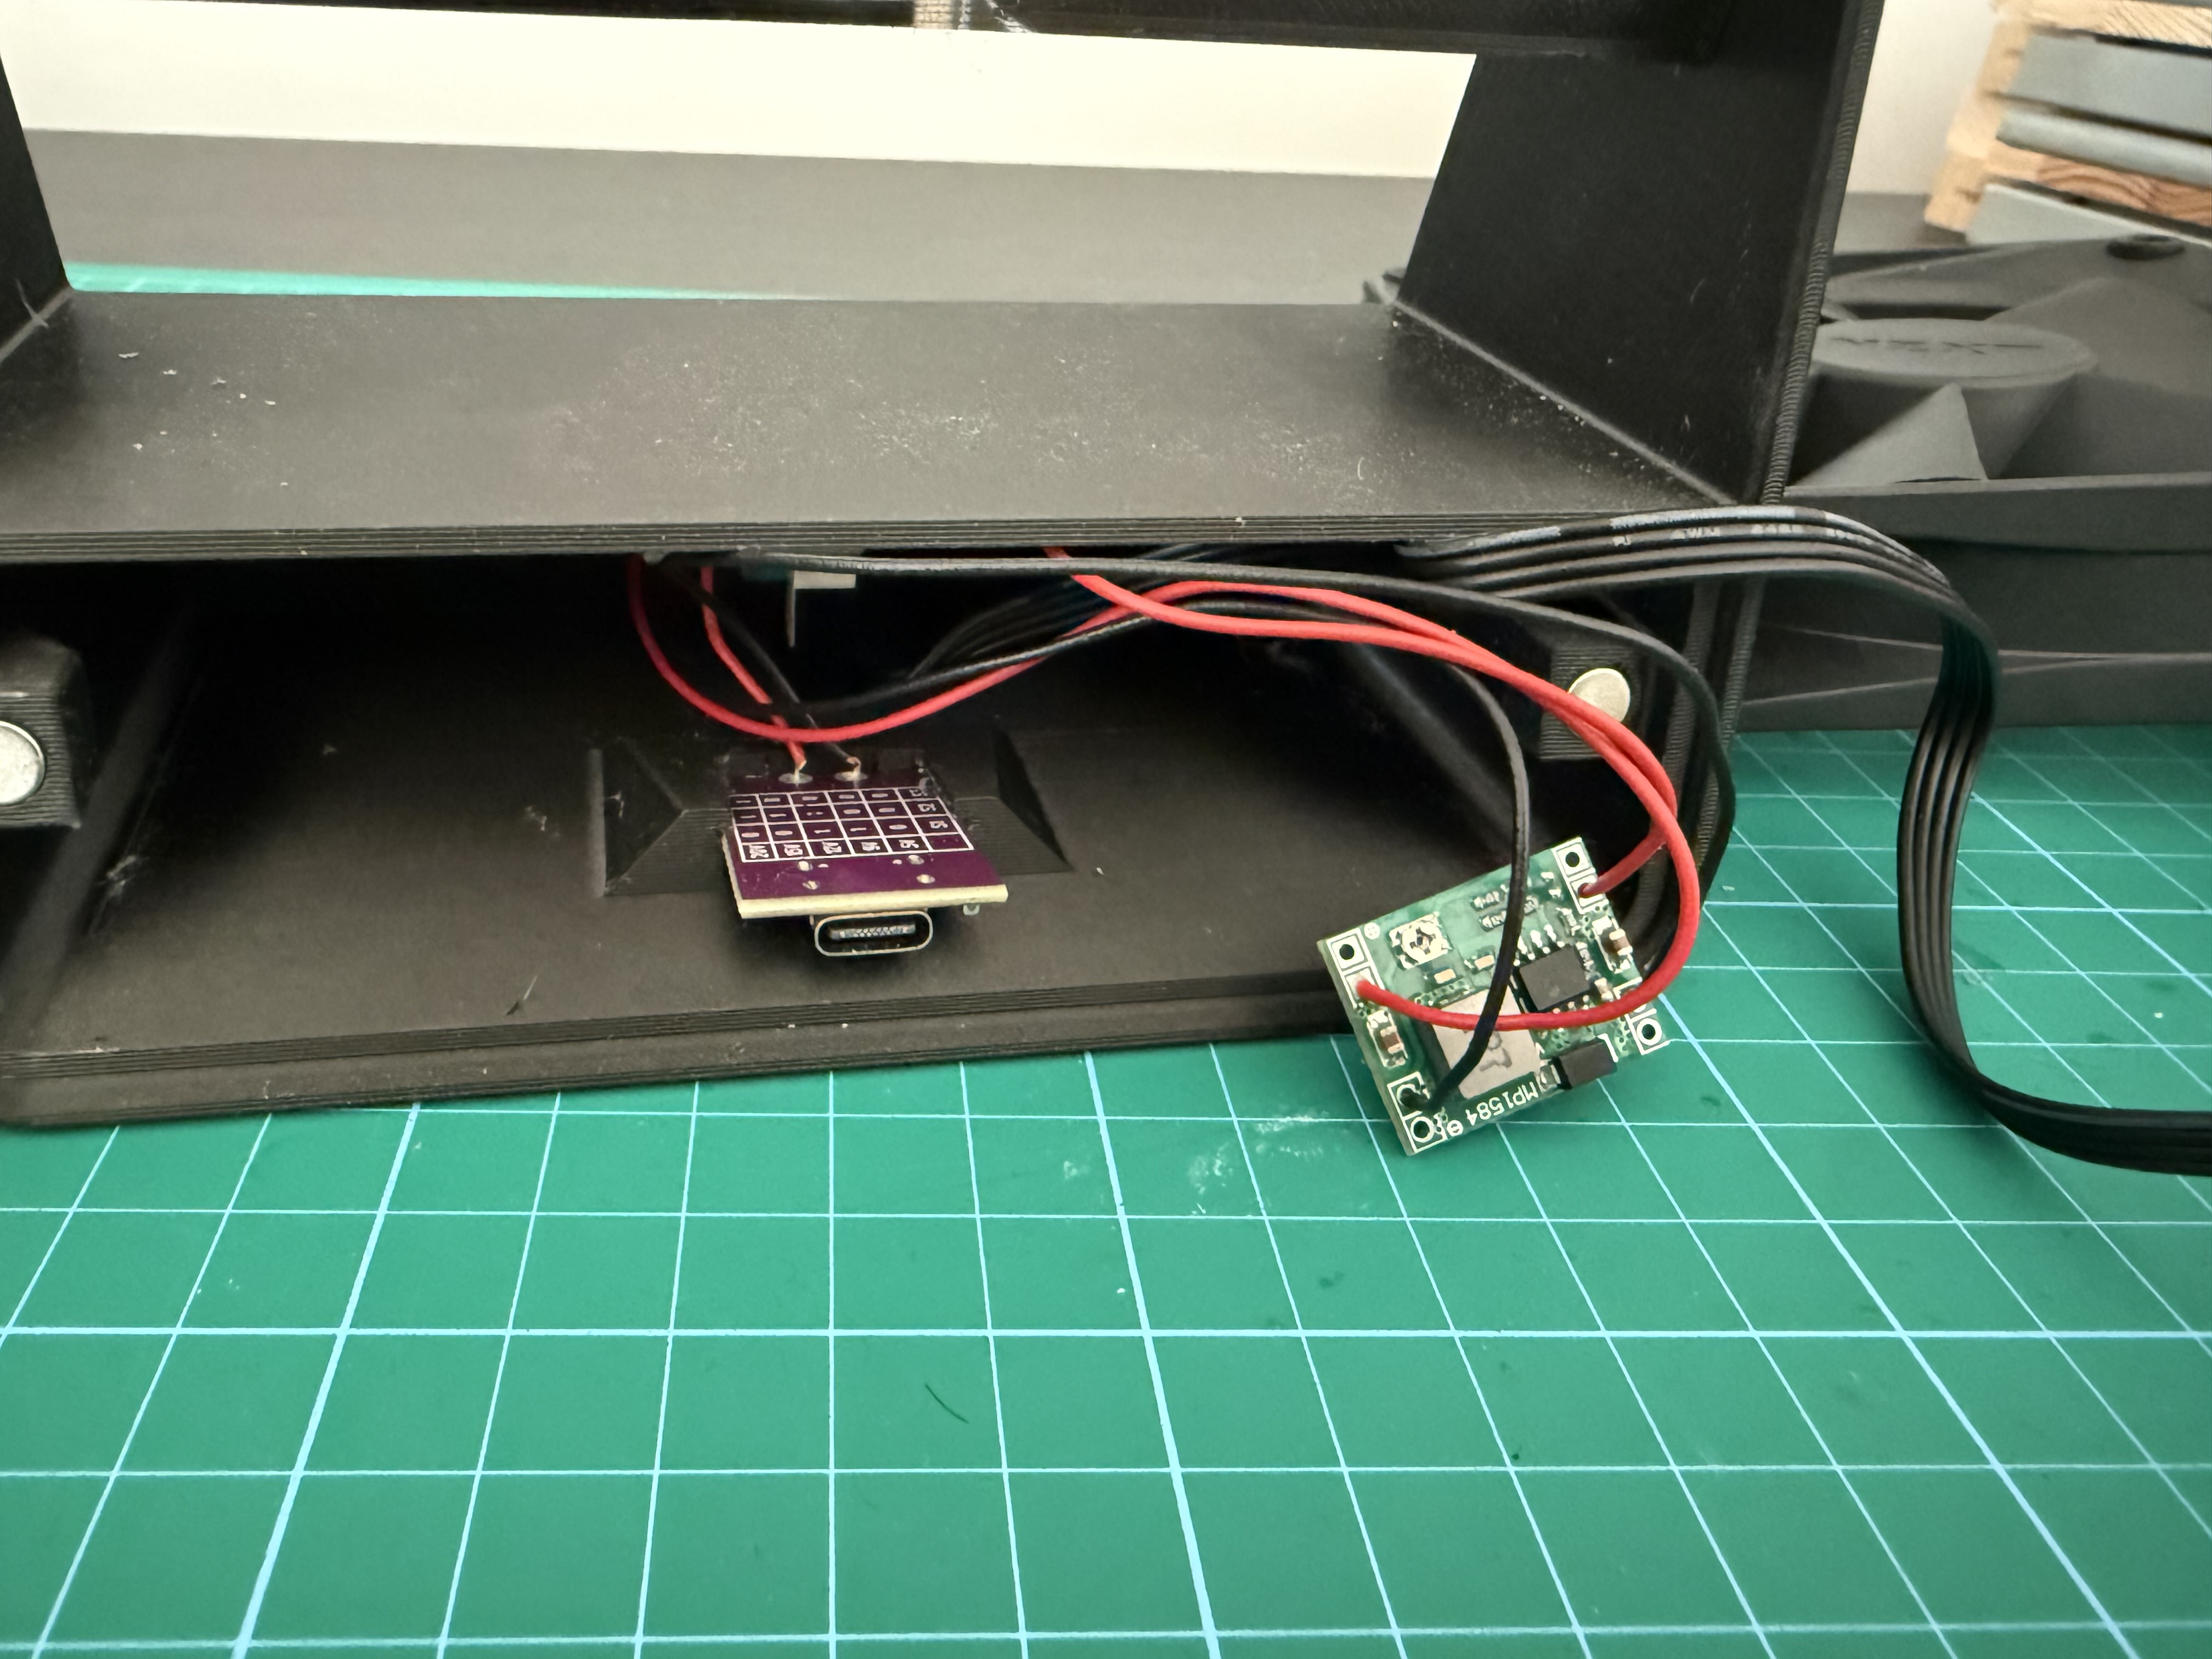
- insert the fan in the fan case, optionally sandwitch the fan grill and booster, secure either with cable binders or some machine screws
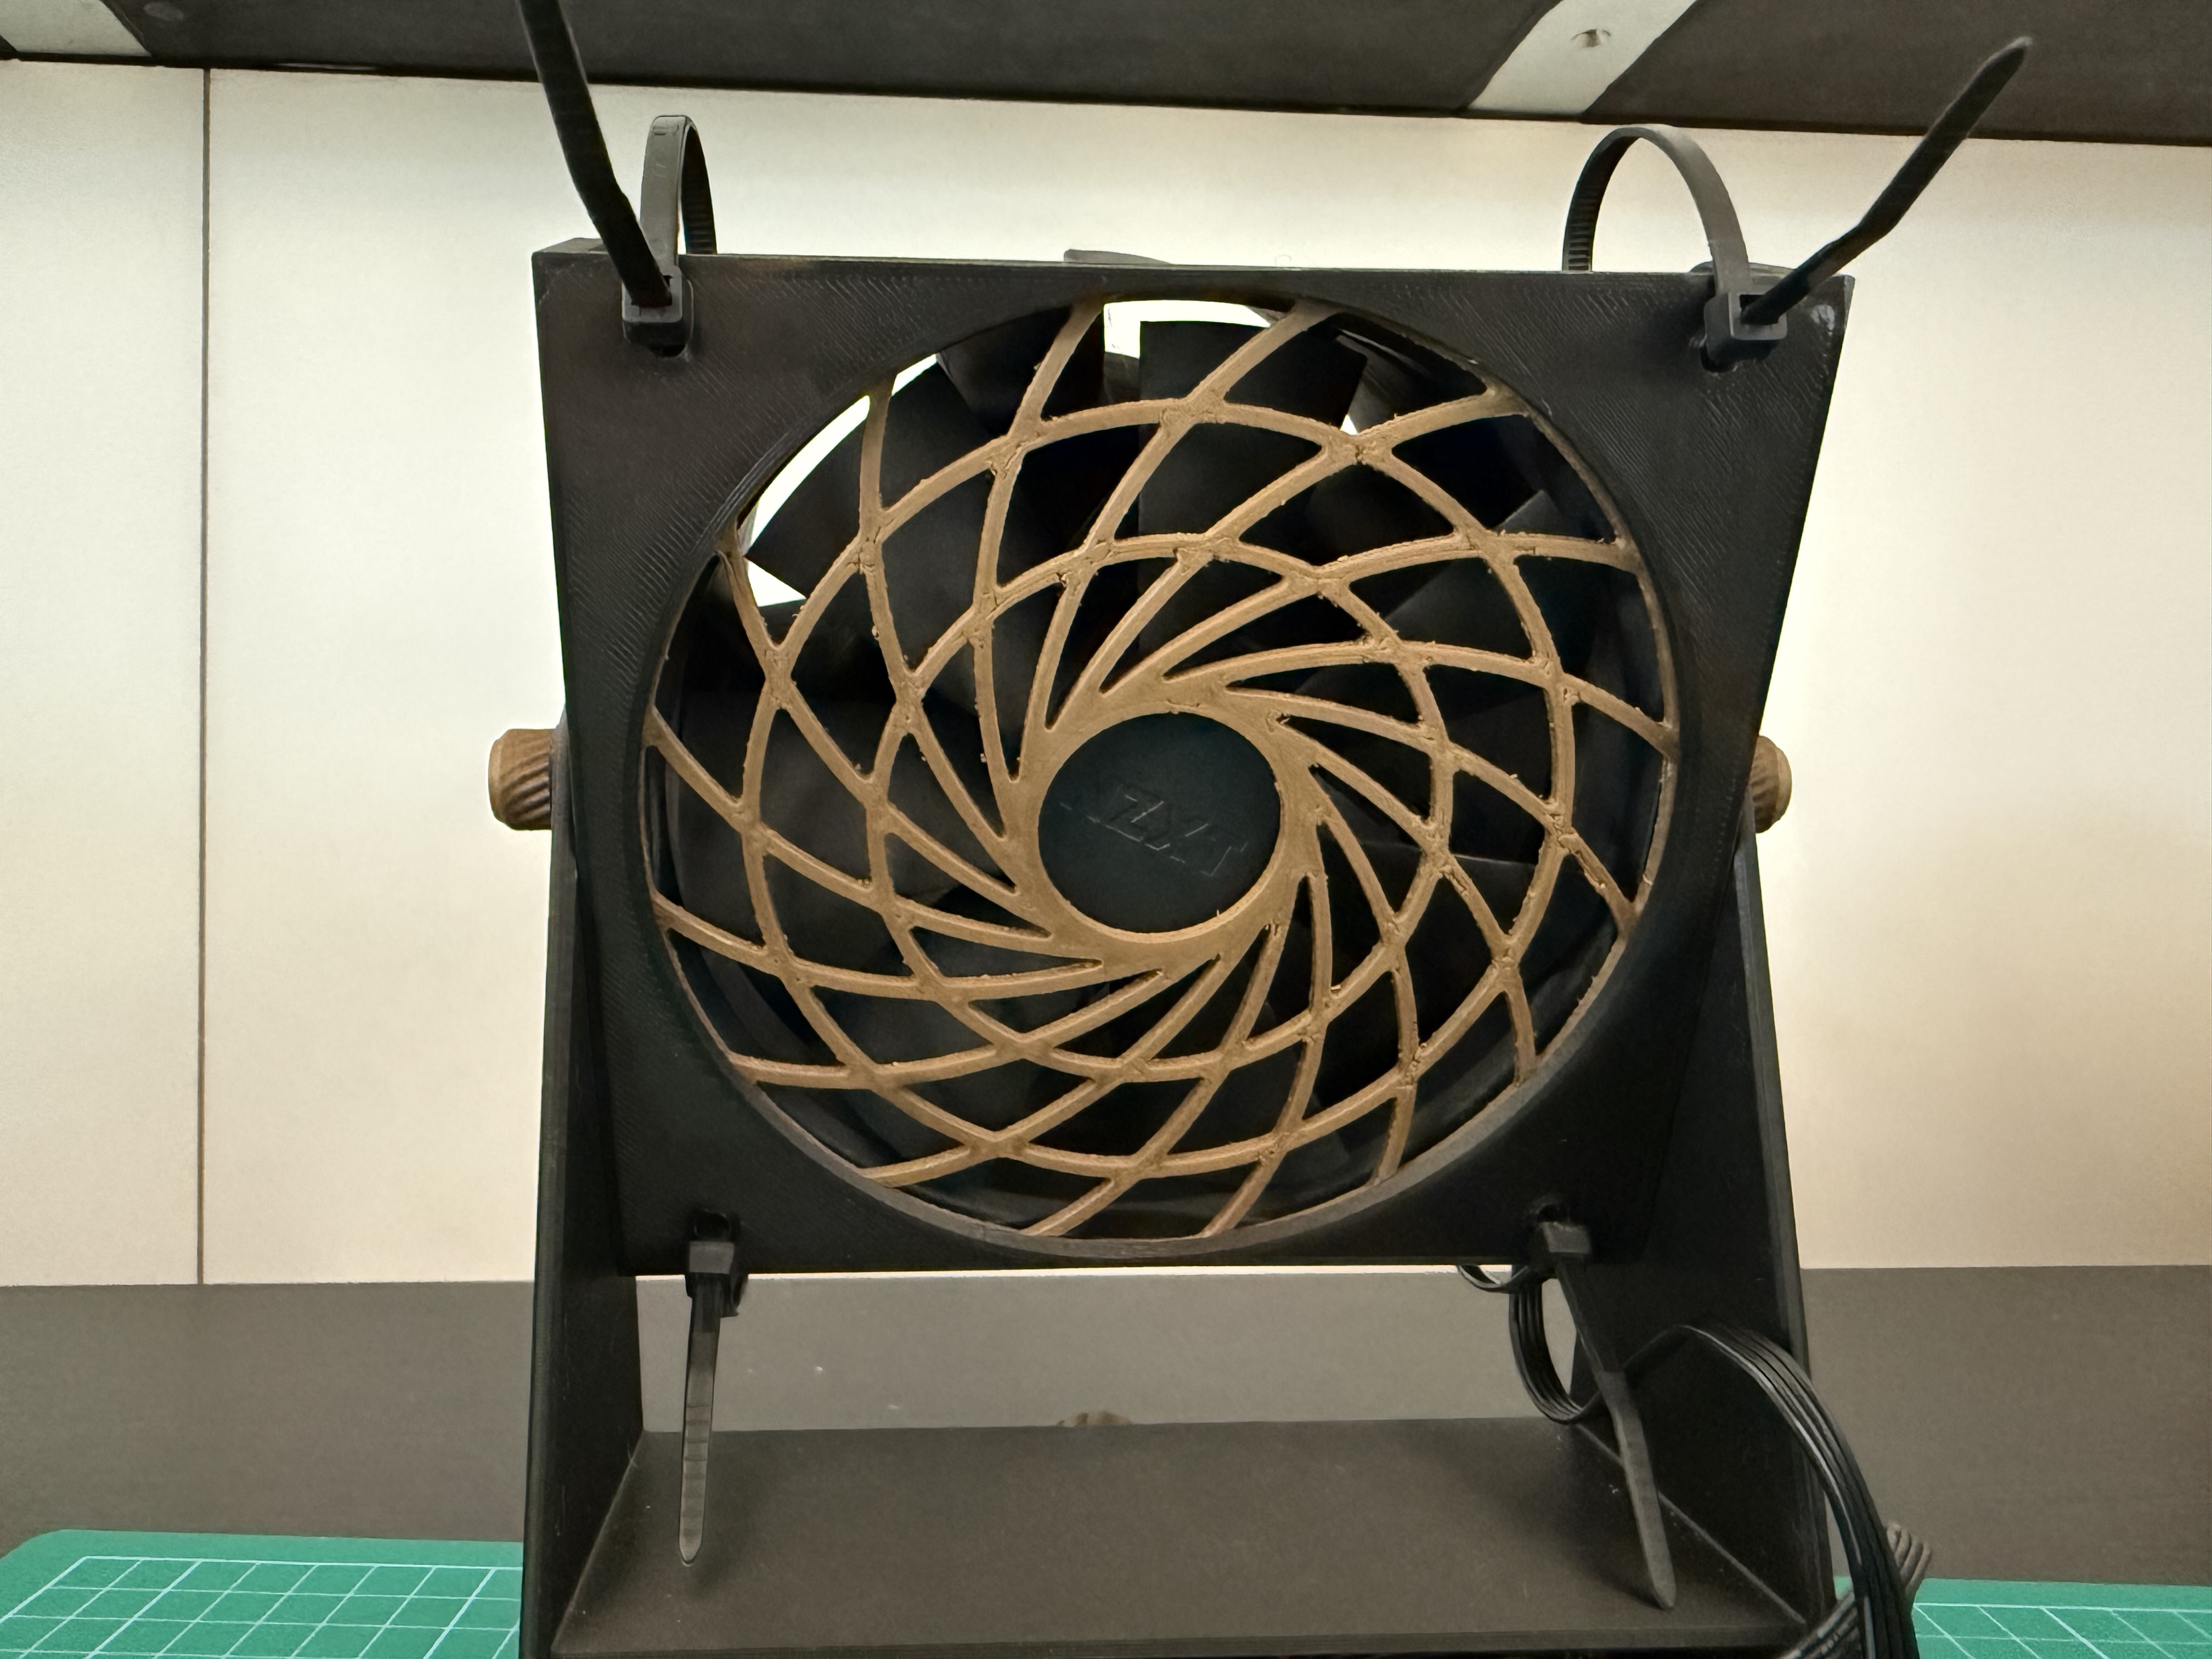
- fix the fan to the base with the 2 printed screws
- snap the electronics box cover on making sure to route the fan case through one of the openings
- press fit the knob on the potentiometer shaft