
Commander Deck Box
We calculate the final price from your selected file. You review and accept it before payment.
Saved on this device.

Stylized deck boxes to hold your commander decks while showing off your commander.
- Rating
- 5 / 5
- Likes
- 29
- Downloads
- 254
- Makes
- 4
- Views
- 1,522
- Reviews
- 2
Updated at source:
Model information
- Source
- Printables
- Category
- Other Toys & Games
- License
- Creative Commons — Attribution — Share Alike
A simple deck box that showed off your commander. They have magnet lids and hold 100 double sleeved cards with space for tokens. The lids interlock with the box so the lids don't slide off in your bag. There are currently eight lid designs and four box designs. I don't have multi-material printer and printed the multi-color lids using manual filament changes, see below for tips.
If you make one of these, please upload a picture. I would love to see what you've made. If there is a lot of interest in these, I will upload more designs. If you have a deck with two commanders, I have a dual commander version of this style.
Materials Needed
- An Ultra Pro Mini Snap Card Holder
- 12x 6mm diameter x 3mm long magnets
- ~70m of filament (or ~220g PLA) for 3 walls, 30% infill
Build Tips
- I print these with 3 walls and 30% infill for extra strength.
- Using different bottom surface patterns, like concentric or octagram spiral, can create unique looks. Use rectilinear for the top surface pattern for the smoothest surface.
- The magnets are toleranced for press fit. I recommend using an arbor press or a vice to press them in. The box needs two magnets per hole and the lid gets one magnet per hole. (You can replace eight of the 6mm x 3mm magnets with four 6mm x 6mm magnets.)
- Unsleeved cards may be scratched by 3D printed surfaces, depending on your print quality. Check for burrs before using, and consider only storing sleeved cards in these boxes. Be especially careful with glass- or carbon-fiber filaments.
Multi-Color Printing on Single Extruder Printers
This is my workflow for printing multi-color parts on a printer running Klipper (a Neptune 4 Pro) and Orca Slicer.
- Import the component by selecting all of the parts in the file selector.
- When asked “Load these files as a single object with multiple parts?” select Yes.
- In the Filament box, click on the Filament Add button until you have the right number of colors.

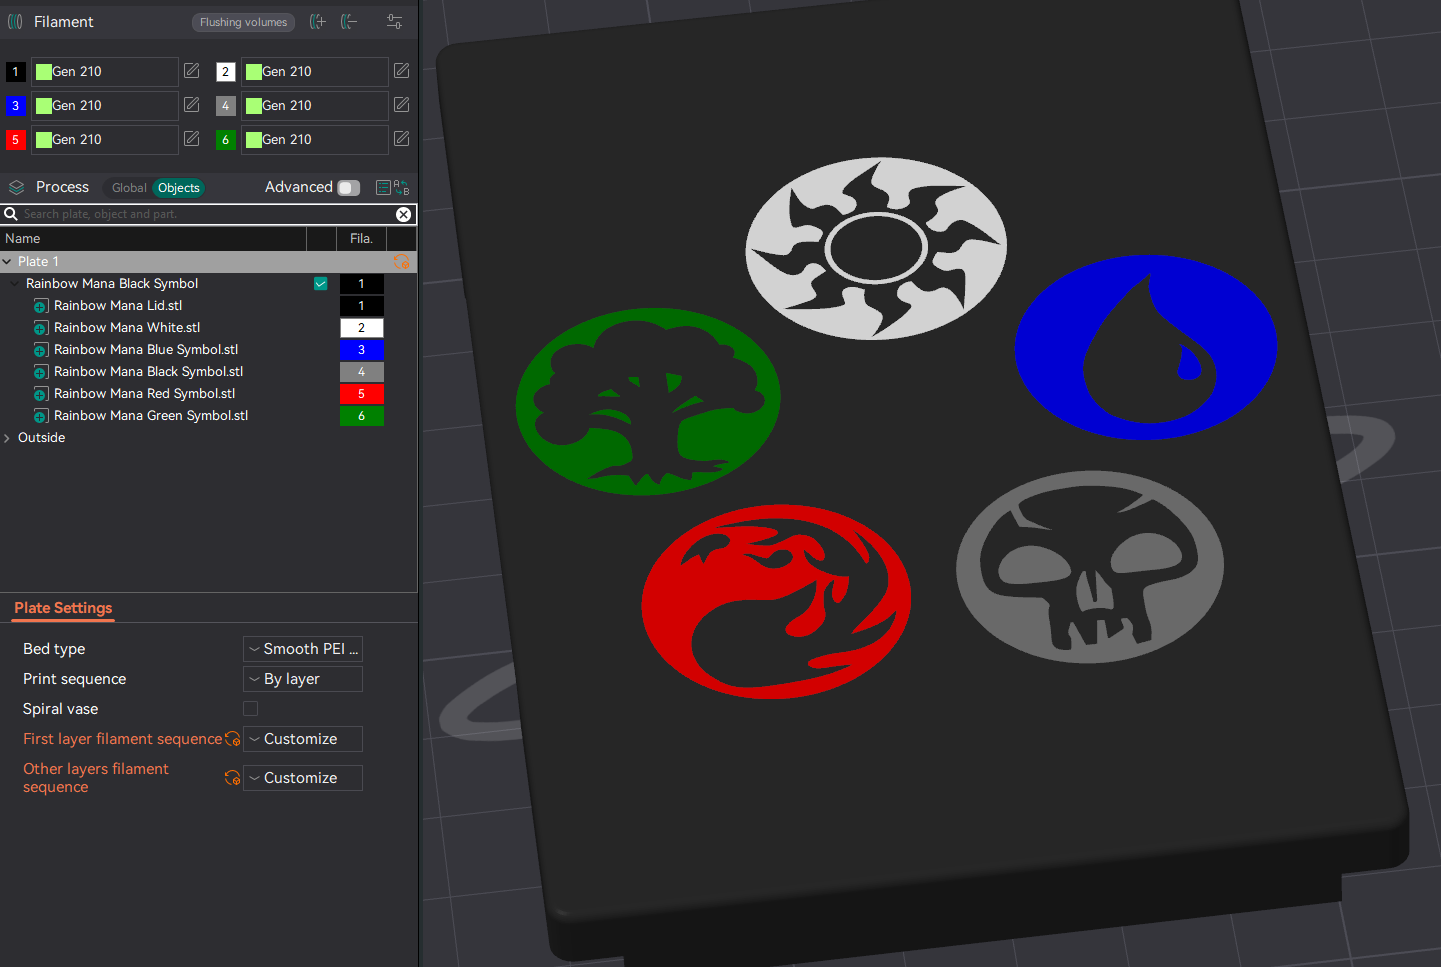
- Click on Objects and assign the filament to each part by clicking on the filament number next to each part three times. This is what the rainbow mana lid looks like when set up this way.
- Select Plate 1 in the objects browser and change “Print layer filament sequence” and “Other layer filament sequence” to Customize. Reorder the sequence to how you want to load the filaments.
- Slice and upload your print. My printer recognizes these filament changes and pauses to let me change the filament. If your printer doesn't, you can create a custom filament profile that includes a pause routine in the start or stop G-code.