
Wall peg with embedded metallic screw
We calculate the final price from your selected file. You review and accept it before payment.
Preliminary estimate for PETG
€0.60 – €0.73 net (excluding VAT)
For file: Wall-peg_0.4n_0.05mm_PETG_MINI_53m.bgcode
This is an estimate for one file. You’ll confirm the exact price before ordering.
File and estimate settings
File used for this estimate
Average indicative estimate: €0.66 excluding VAT (range midpoint).
- Weight reported by the author
- 4 g
- Print time reported by the author
- 52.8 min
- Source material
- PET
- Estimate material
- PETG
- Estimate printer
- Bambu Lab P1S - 0.4 nozzle
- Estimate process
- 0.20mm Standard
Indicative estimate for the selected file only, based on the author’s weight and print time. File variants are not added together. The final price is calculated after file analysis.
Saved on this device.

Compact, screw-mounted wall peg for hanging towels, robes, and kitchen tools in a clean, minimalist style.
- Rating
- 0 / 5
- Likes
- 0
- Downloads
- 10
- Makes
- 0
- Views
- 58
- Reviews
- 0
Updated at source:
Model information
- Source
- Printables
- Category
- Bathroom
- License
- Creative Commons — Attribution
Since my local hardware store discontinued these metallic pegs, I was looking for a replacement. Now I designed one that's so similar and I can print it at home. Just add a single screw and you can print it, too. By the way, if you like this principle of embedded screws, check out also my Embedded-Screw Knob Handles.
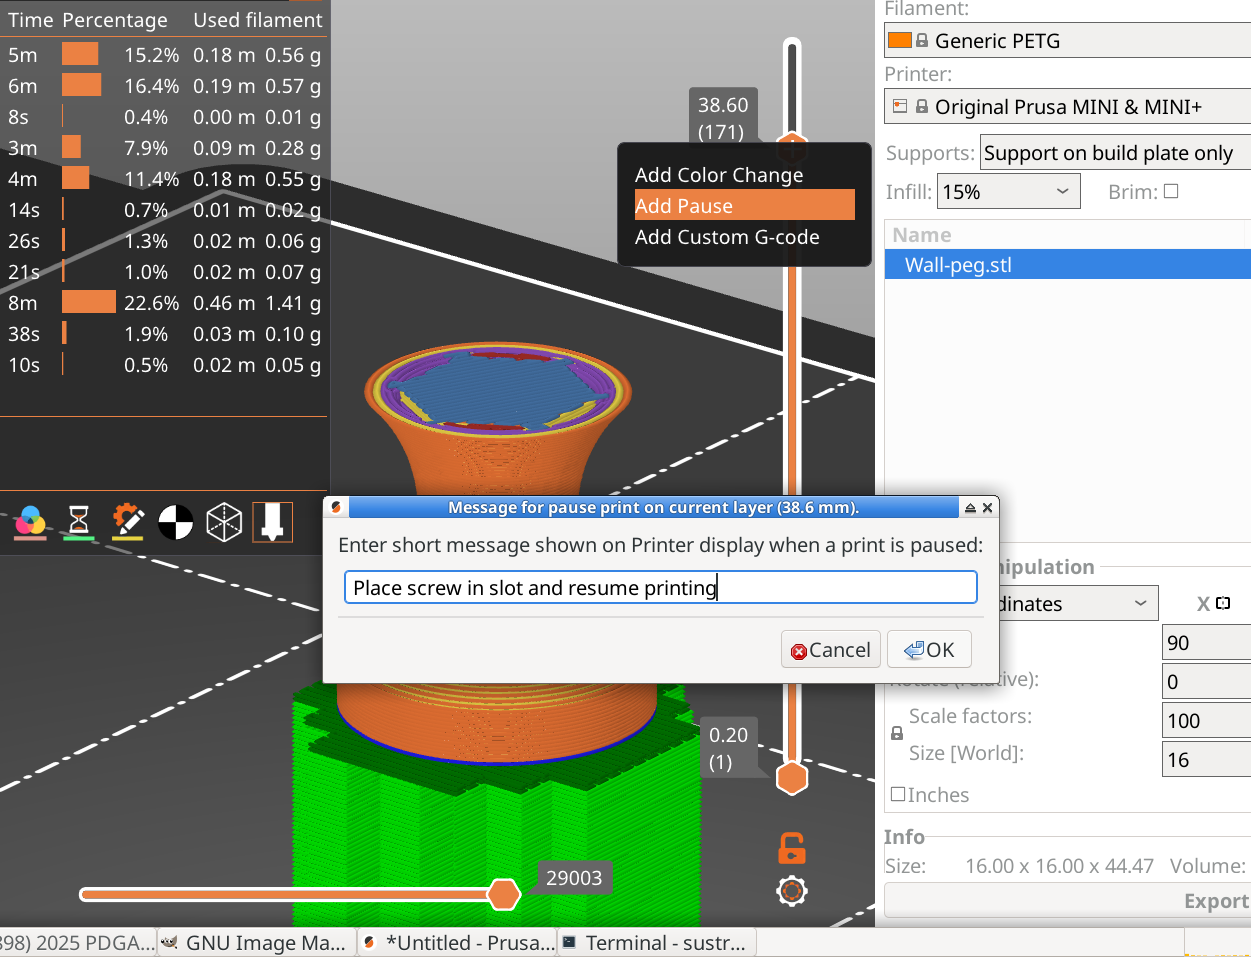
Printing
The center hole takes an M4×40 metric screw. You need to get the standard one with a hex-shaped head! The attached gcode and 3mf files have the printer pause at a proper height to insert the screw, and then finish printing over it. If you print from stl, you need to set up the pause yourself. Note that the screw sits quite snug in the print. In my PETG-based pegs I had to use a little force to push the screw in, but always with just one finger. No extreme pressure is needed. I think this is better than having the plastic peg wobble on the screw.
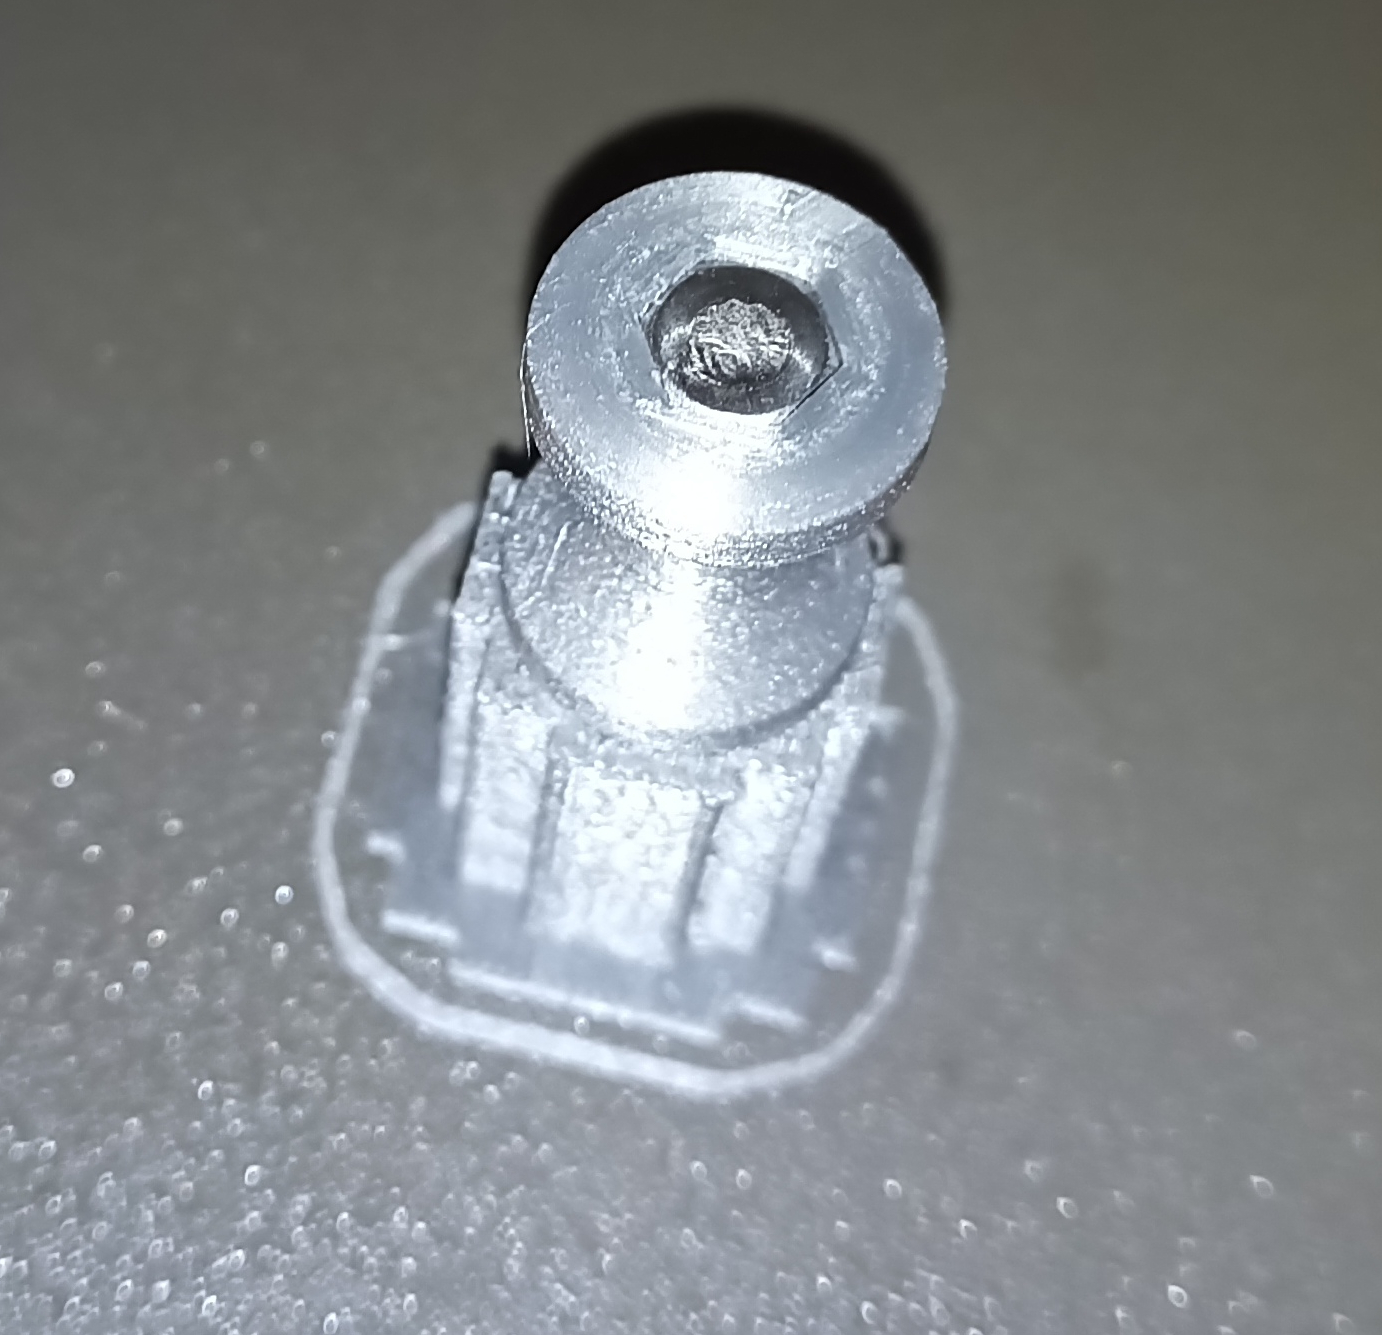
← The print in paused state, with the screw pushed in. It's time to resume printing and seal the screw in.
I print the pegs with PETG, no special magic needed. Most probably you will be screwing in the peg only once over its lifetime, so default settings for everything should be OK (0.2-mm layers, 2 perimeter walls). Feel free to add perimeters if you want to wrap the hex head in a sturdier case.
You need to print with supports, because the screw needs to protrude down from the body. The model has a small disc of scrap material at the bottom. This gives you the exact clearance over the build plate if you use a 40-mm screw (design target). For a different length of screw you will have to tweak positioning. The disc also prevents support material from entering the screw hole, so that you can just activate supports on build plate only and you re good to go.