
Recycled Spool Storage Box (Stackable System) | Caja de Almacenamiento Reciclada (Sistema Apilable)
We calculate the final price from your selected file. You review and accept it before payment.
Saved on this device.
Model information
- Source
- Printables
- Category
- Organizers
- License
- Creative Commons — Attribution — Noncommercial — Share Alike
Español: Este proyecto es una solución ecológica para reutilizar los laterales de cartón de los carretes de filamento vacíos, convirtiéndolos en cajas de almacenamiento funcionales y apilables. El diseño está estandarizado bajo las unidades de medida de altura de Gridfinity (7mm por unidad "U"), lo que facilita la integración con sistemas de organización ya existentes.
La estructura utiliza una técnica de "fusión" donde el cartón se inserta durante la impresión para quedar atrapado permanentemente por el filamento. Actualmente, el diseño se enfoca en el caparazón externo de la caja (los módulos internos de organización están en desarrollo). Es ideal para quienes buscan reducir desperdicios mientras organizan su taller.
Especificaciones de Altura (Gridfinity Standard) / Height Specifications
Unidad (U) | Medida Interna / Internal Measurement |
2U (Mínima) | 15mm |
3U | 25mm |
4U | 32mm |
5U | 39mm |
6U | 46mm |
Instrucciones de Elaboración
1. Preparación del Cartón
Utilice laterales de cartón de 3mm de espesor. Separe la cara del carrete del centro con una cuchilla. Puede usar alcohol isopropílico o agua para ablandar el pegamento.
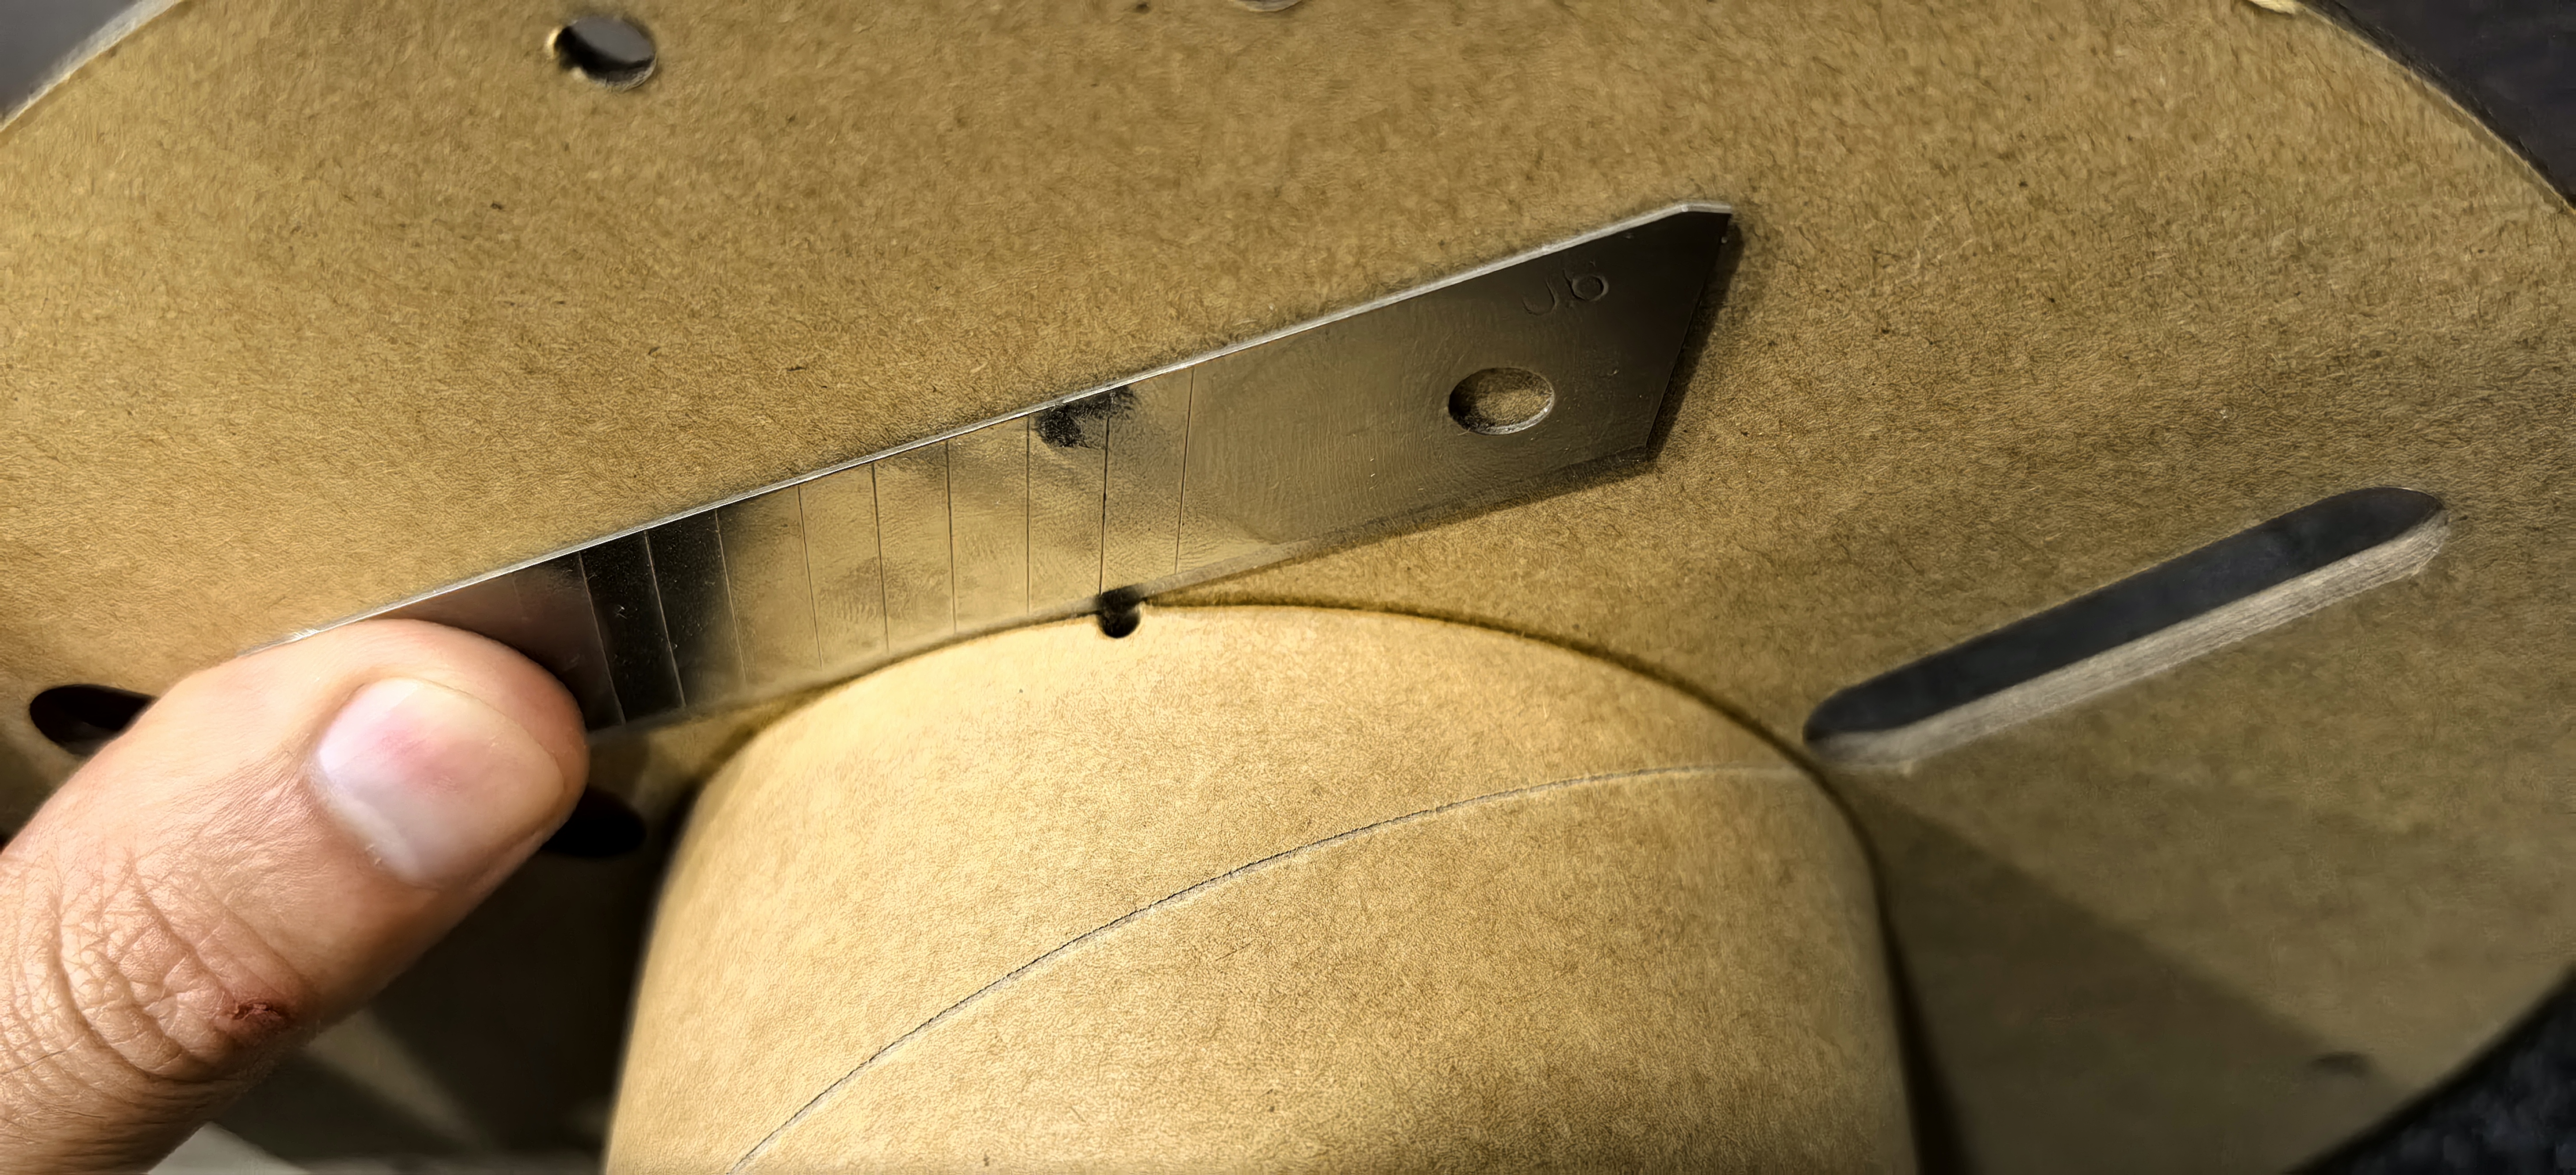
⚠Importante: Asegúrese de que el cartón quede perfectamente recto tras la separación para evitar fallos en la impresión.
2. Guía de Corte
Imprima el archivo "Guía de Corte" (diseñado para carretes de 20cm de diámetro)
Ubique la guía sobre el cartón; debe quedar justa o sin espacios "vacíos"
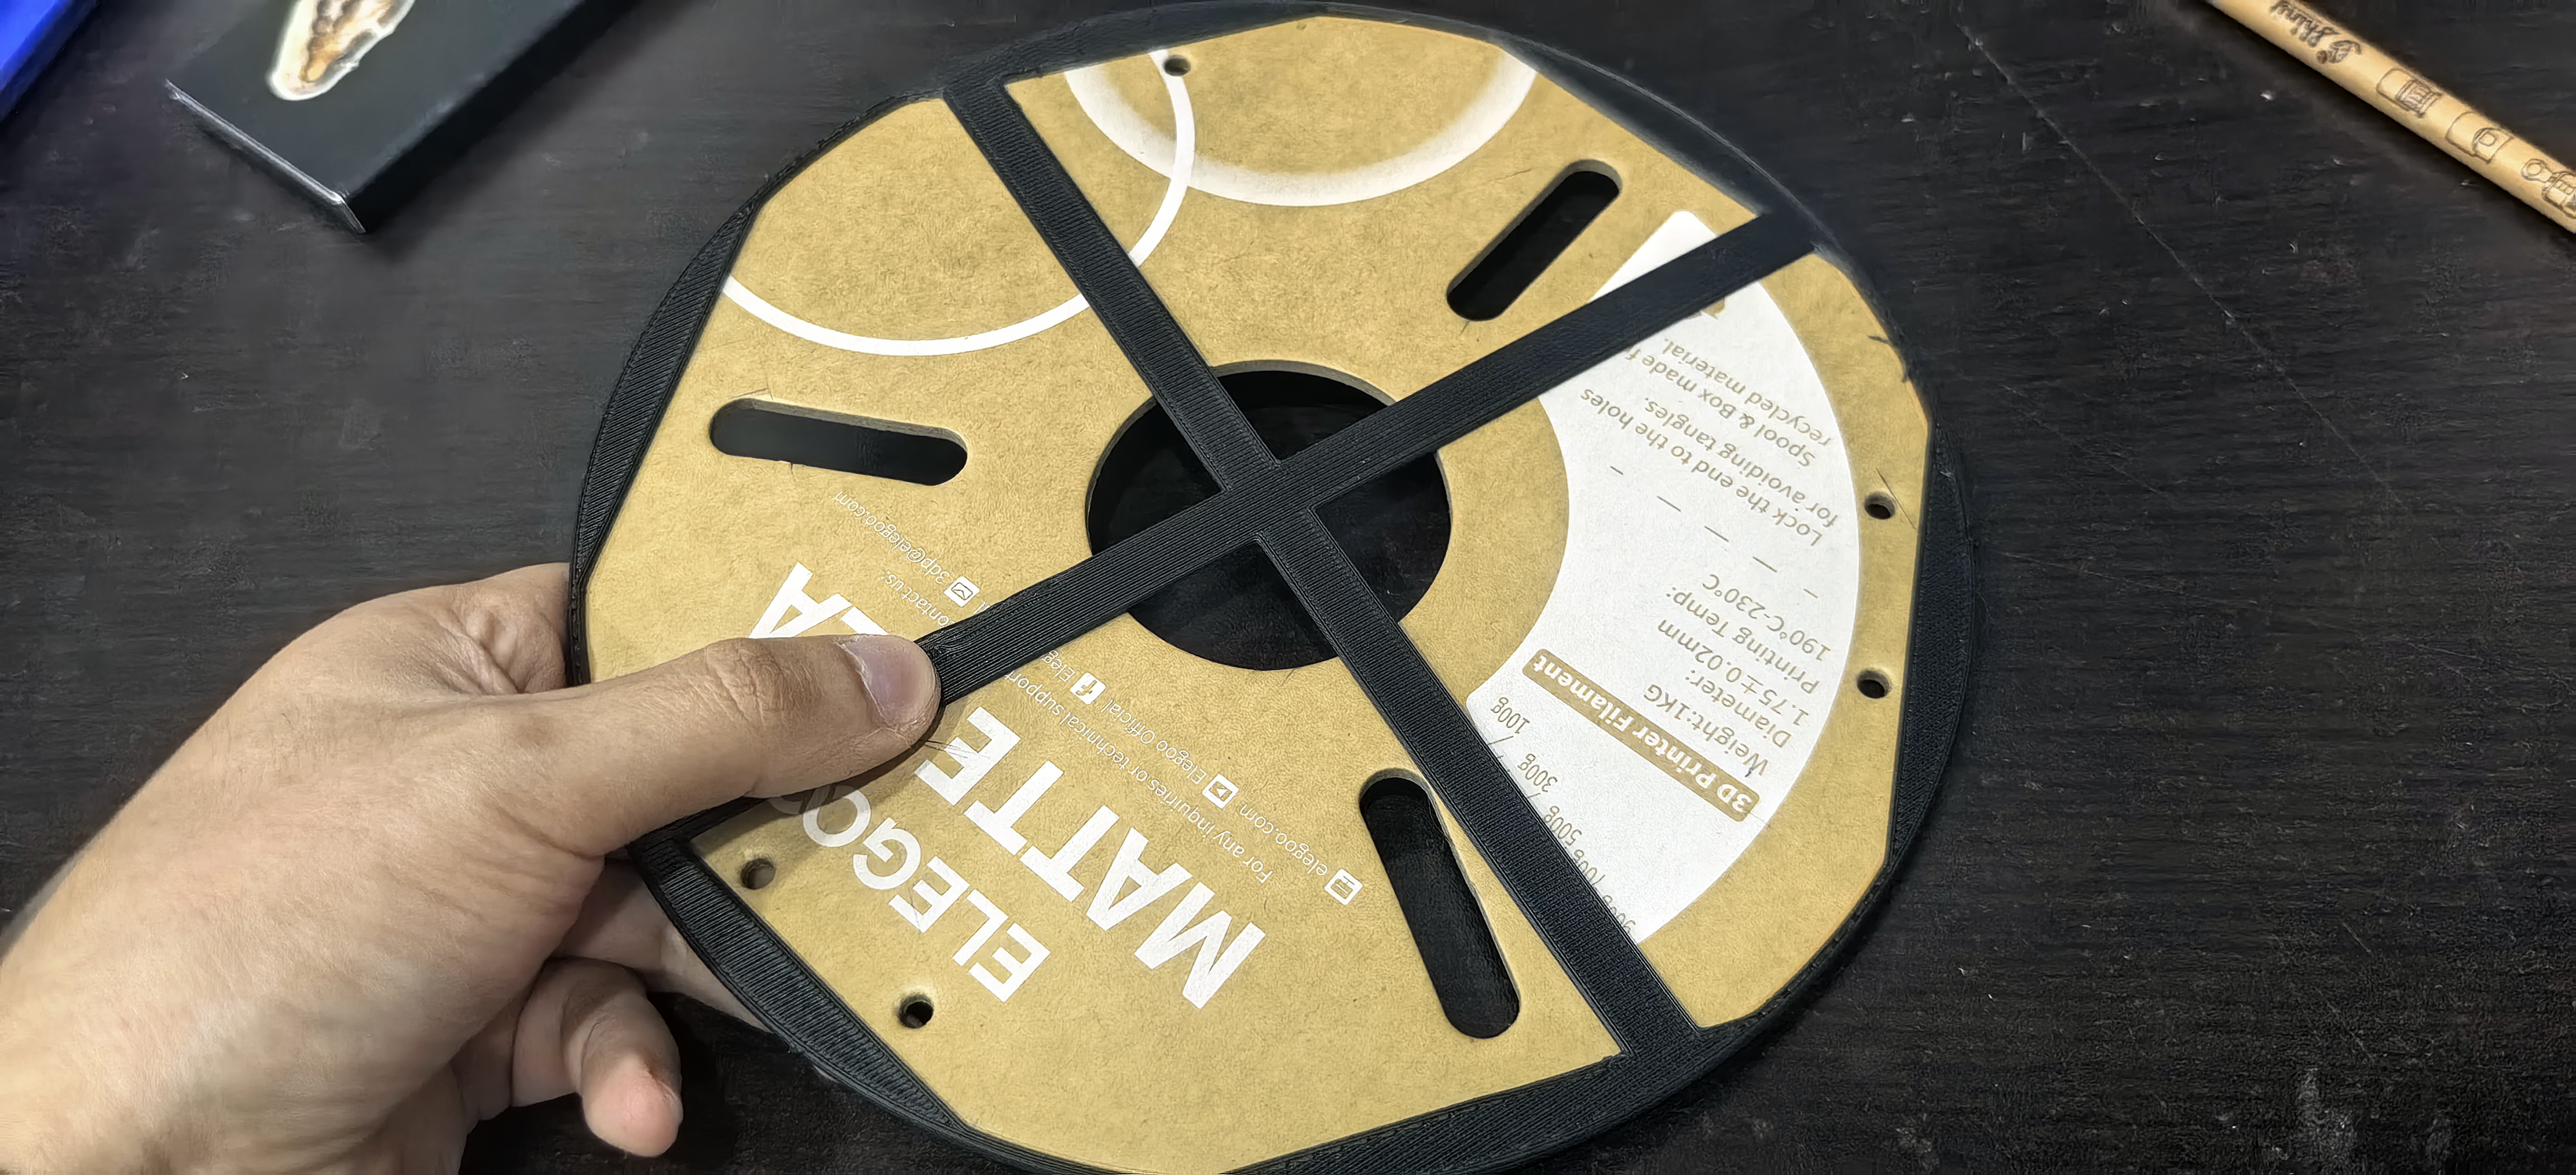
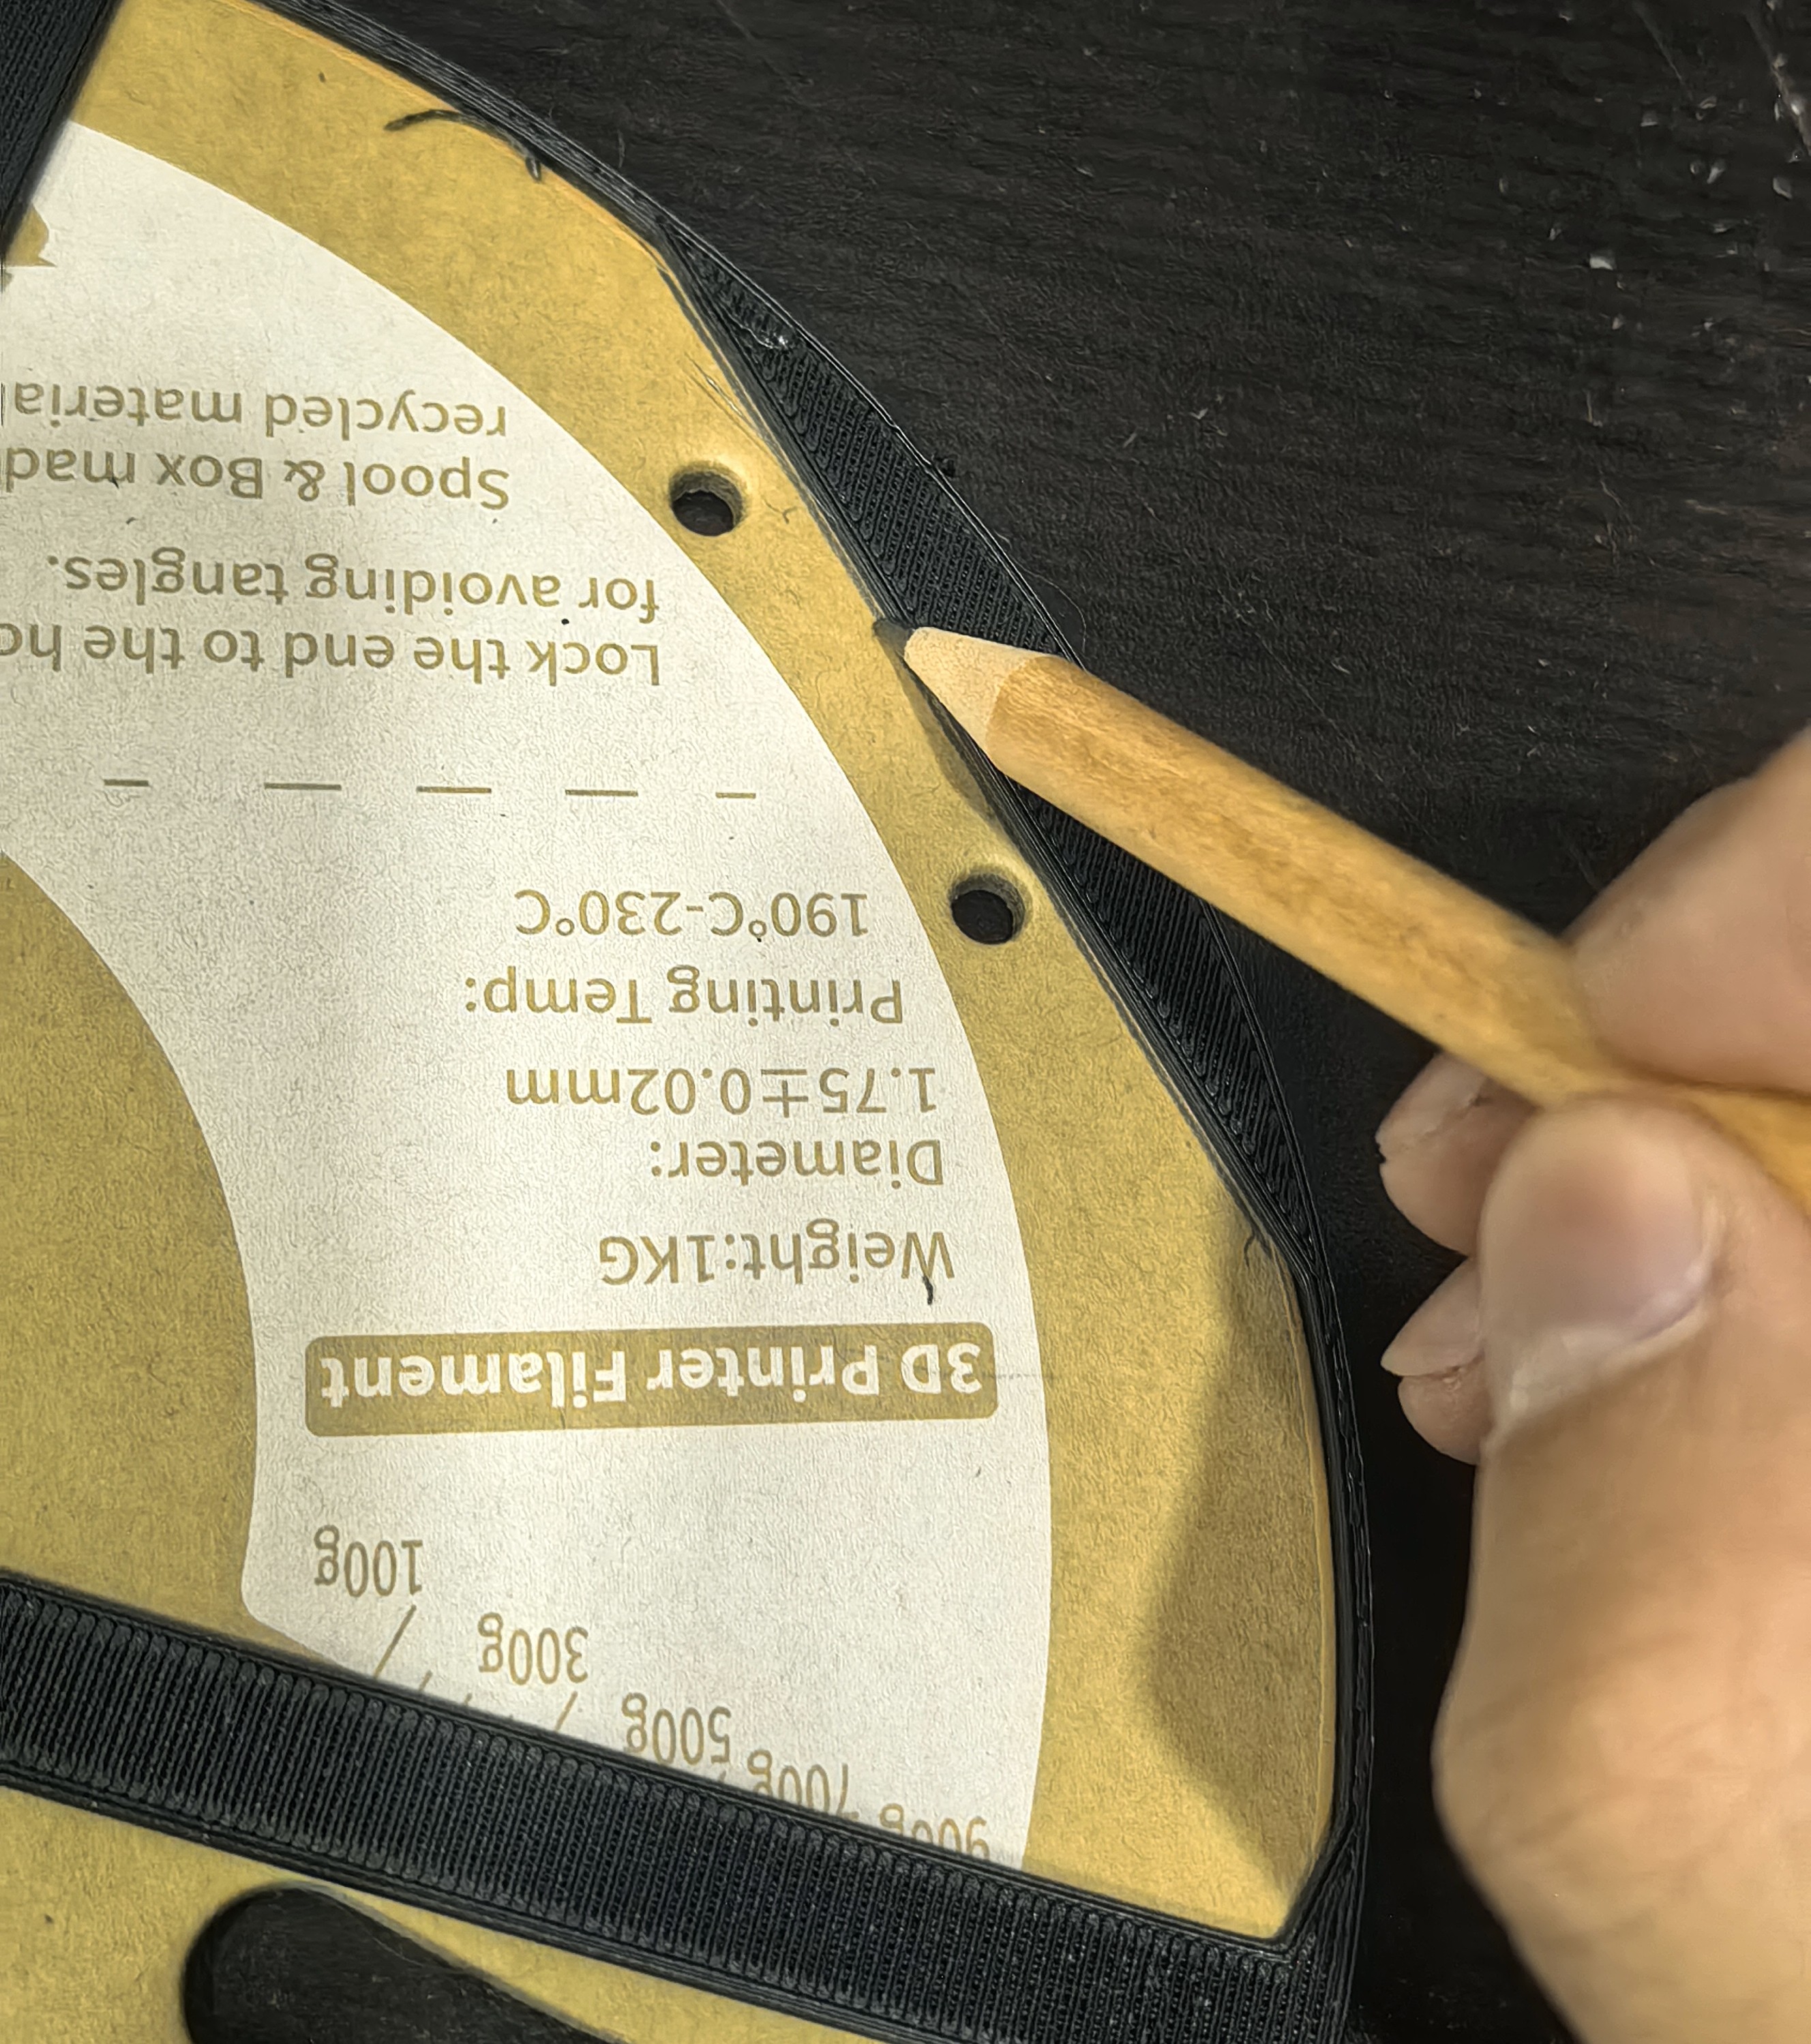
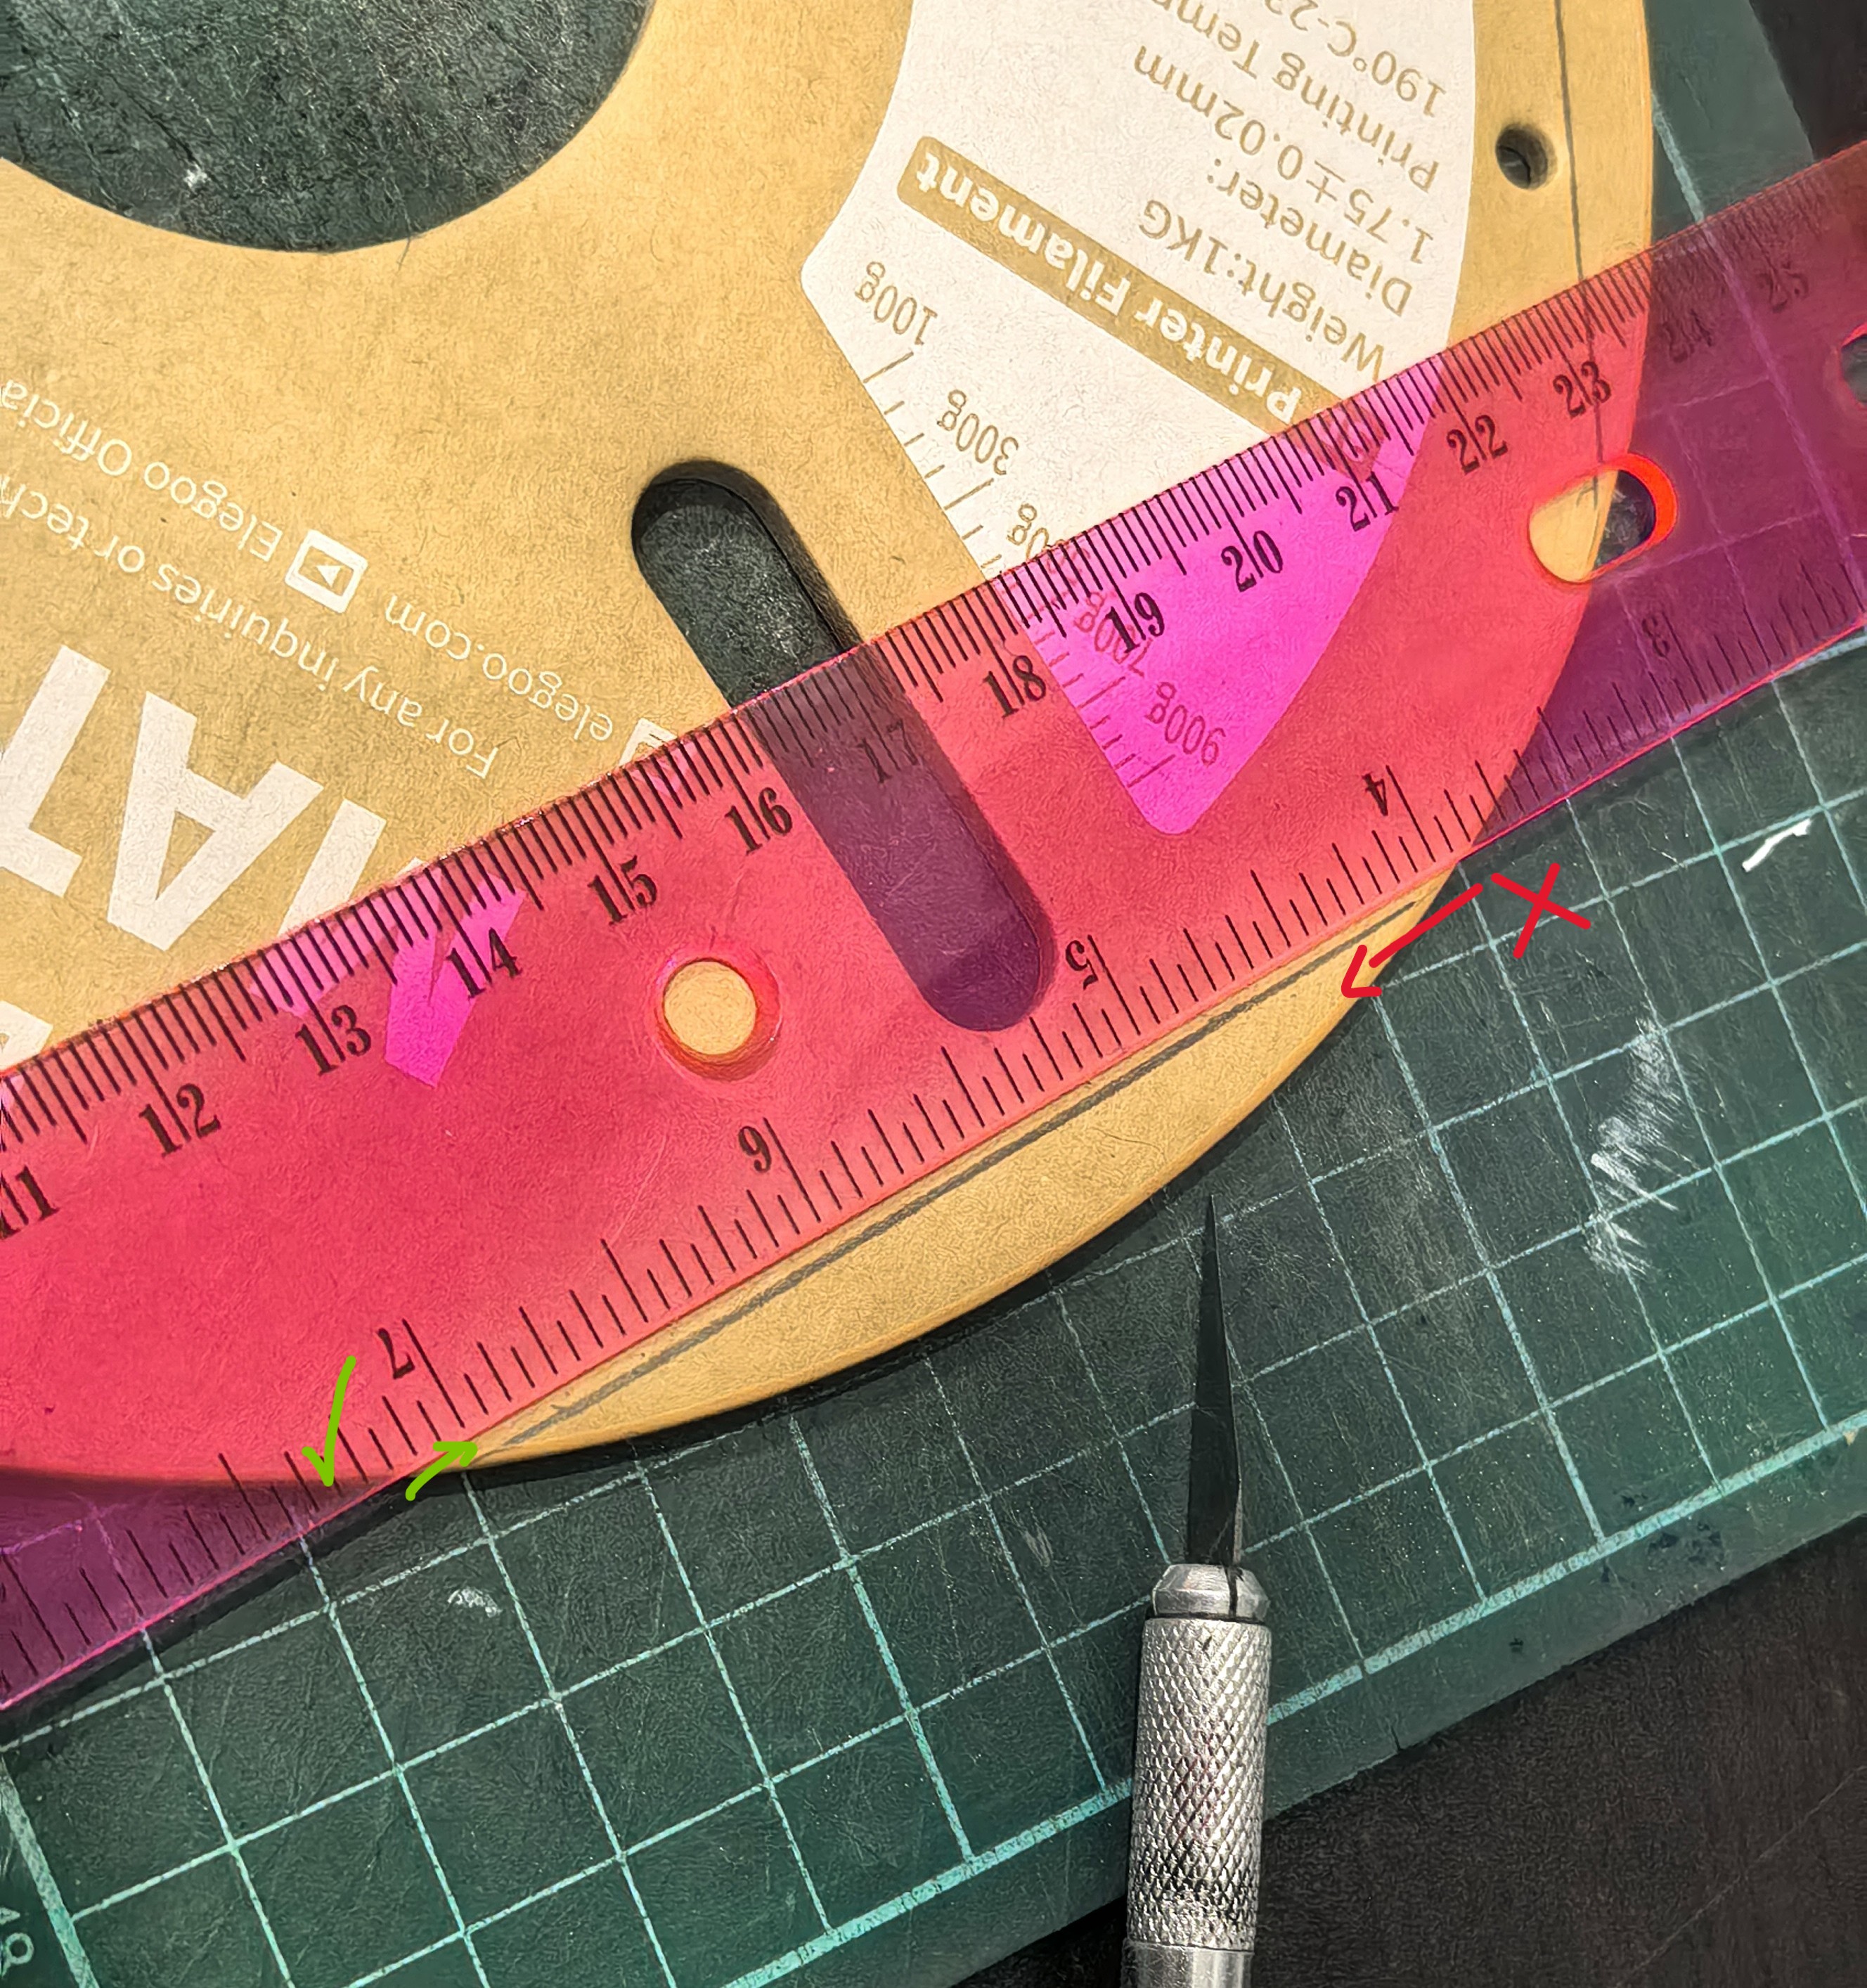
Marque el contorno con lápiz y corte por dentro de la línea. Si corta por fuera, el cartón no encajará en la pieza impresa.
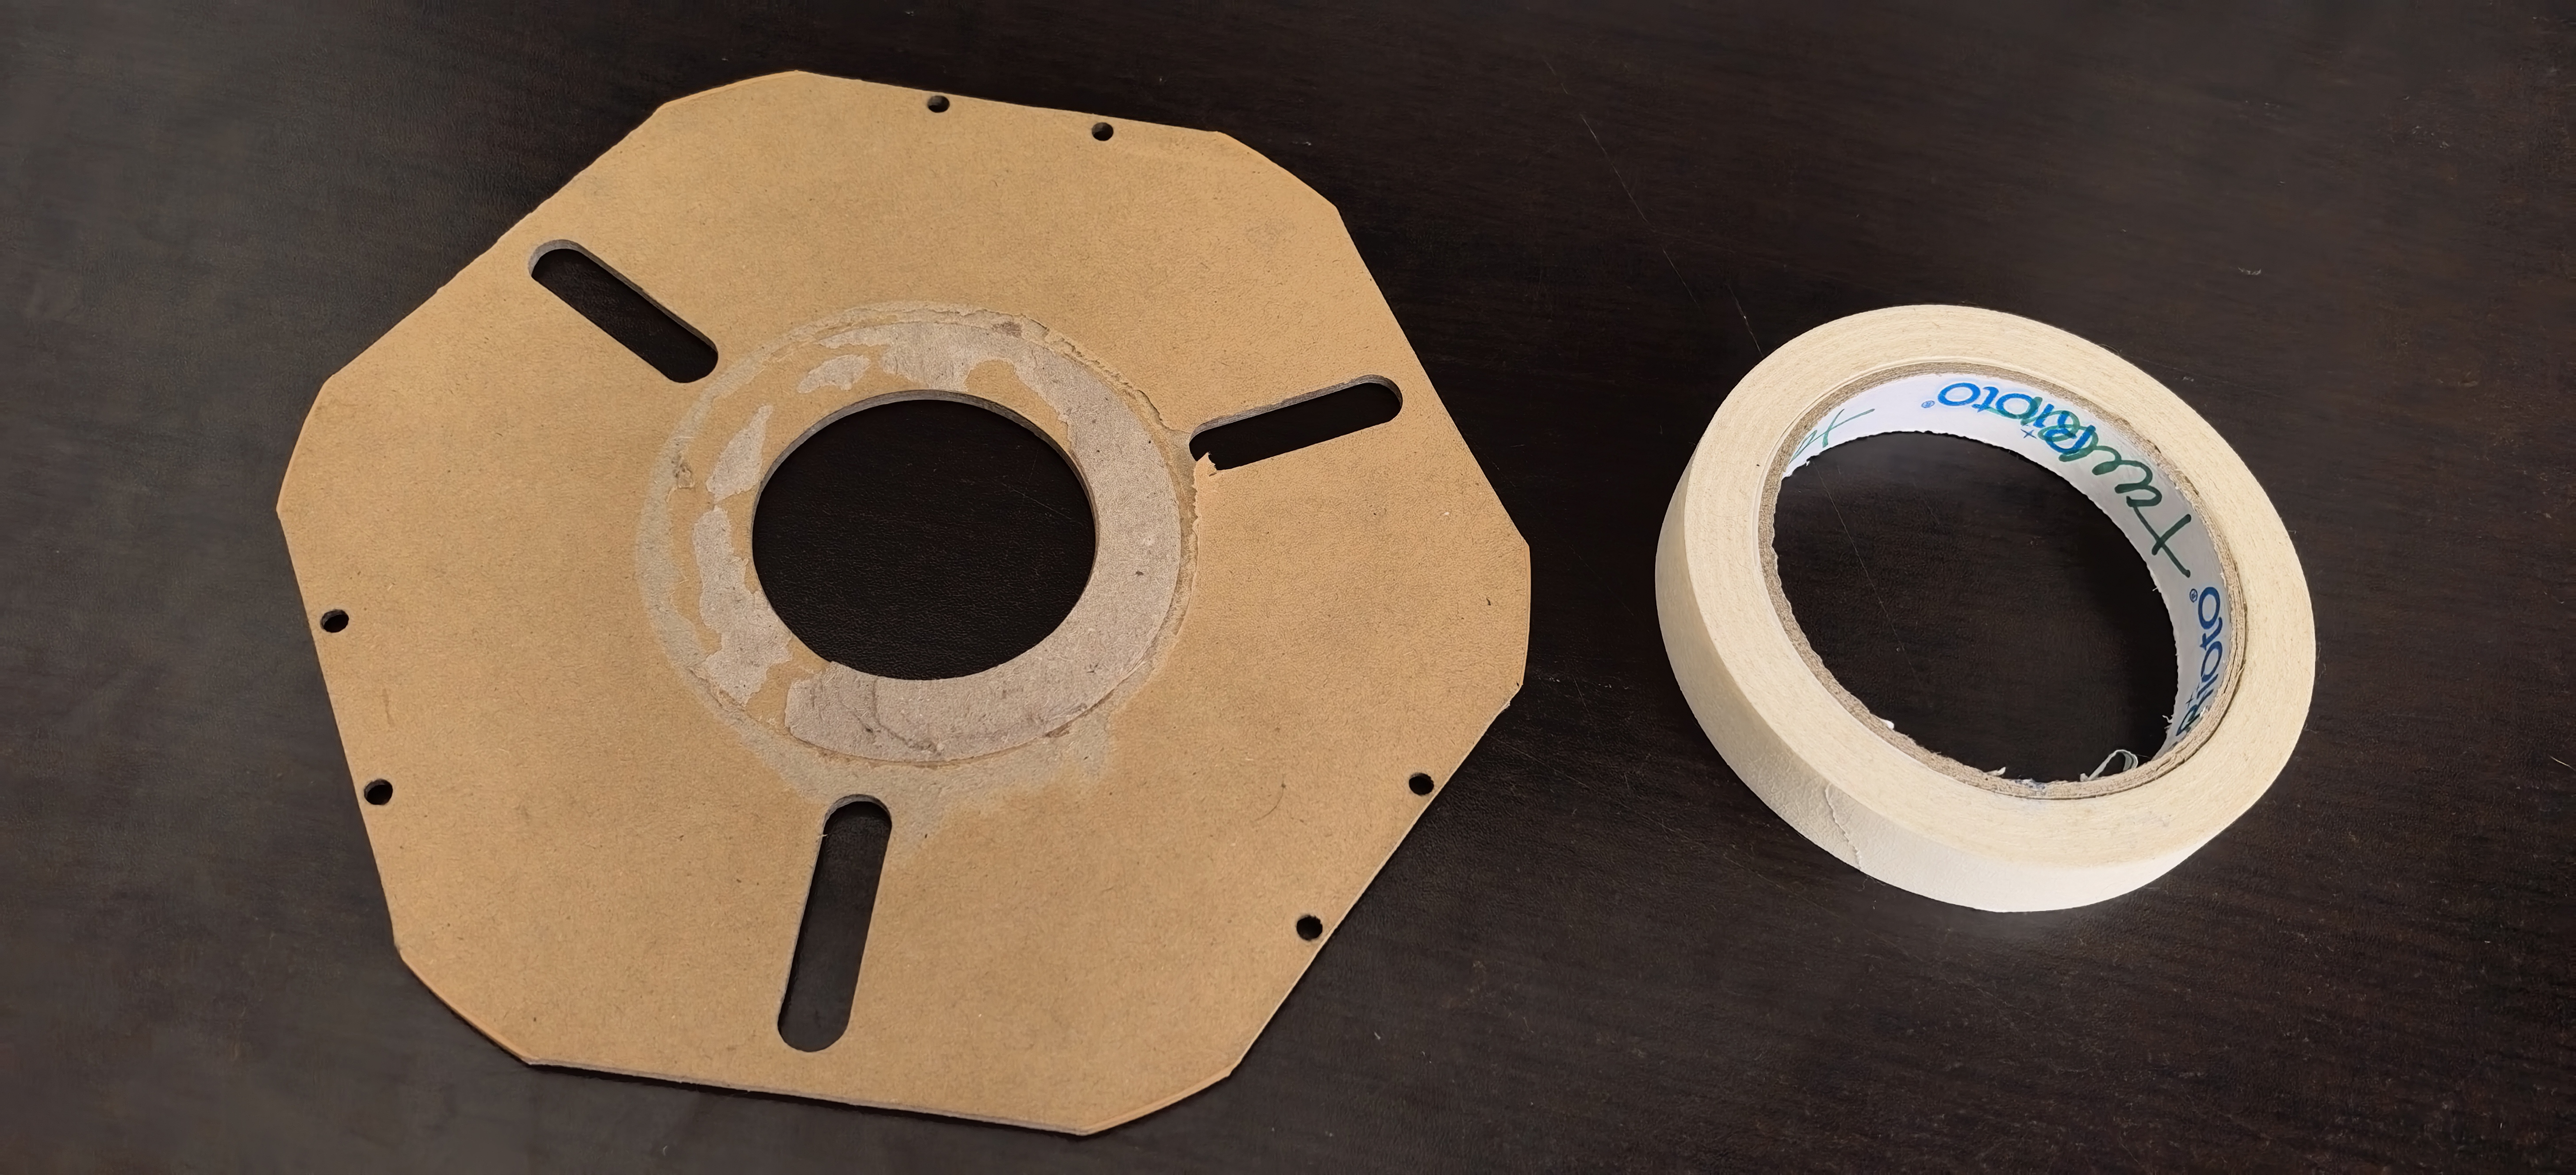
3. Preparación para el cartón:
Para que el filamento se adhiera correctamente al cartón durante la pausa:
Cubra todo el contorno (borde) del cartón con cinta de enmascarar, asegurándose de que esté bien pegada y sin grasa.
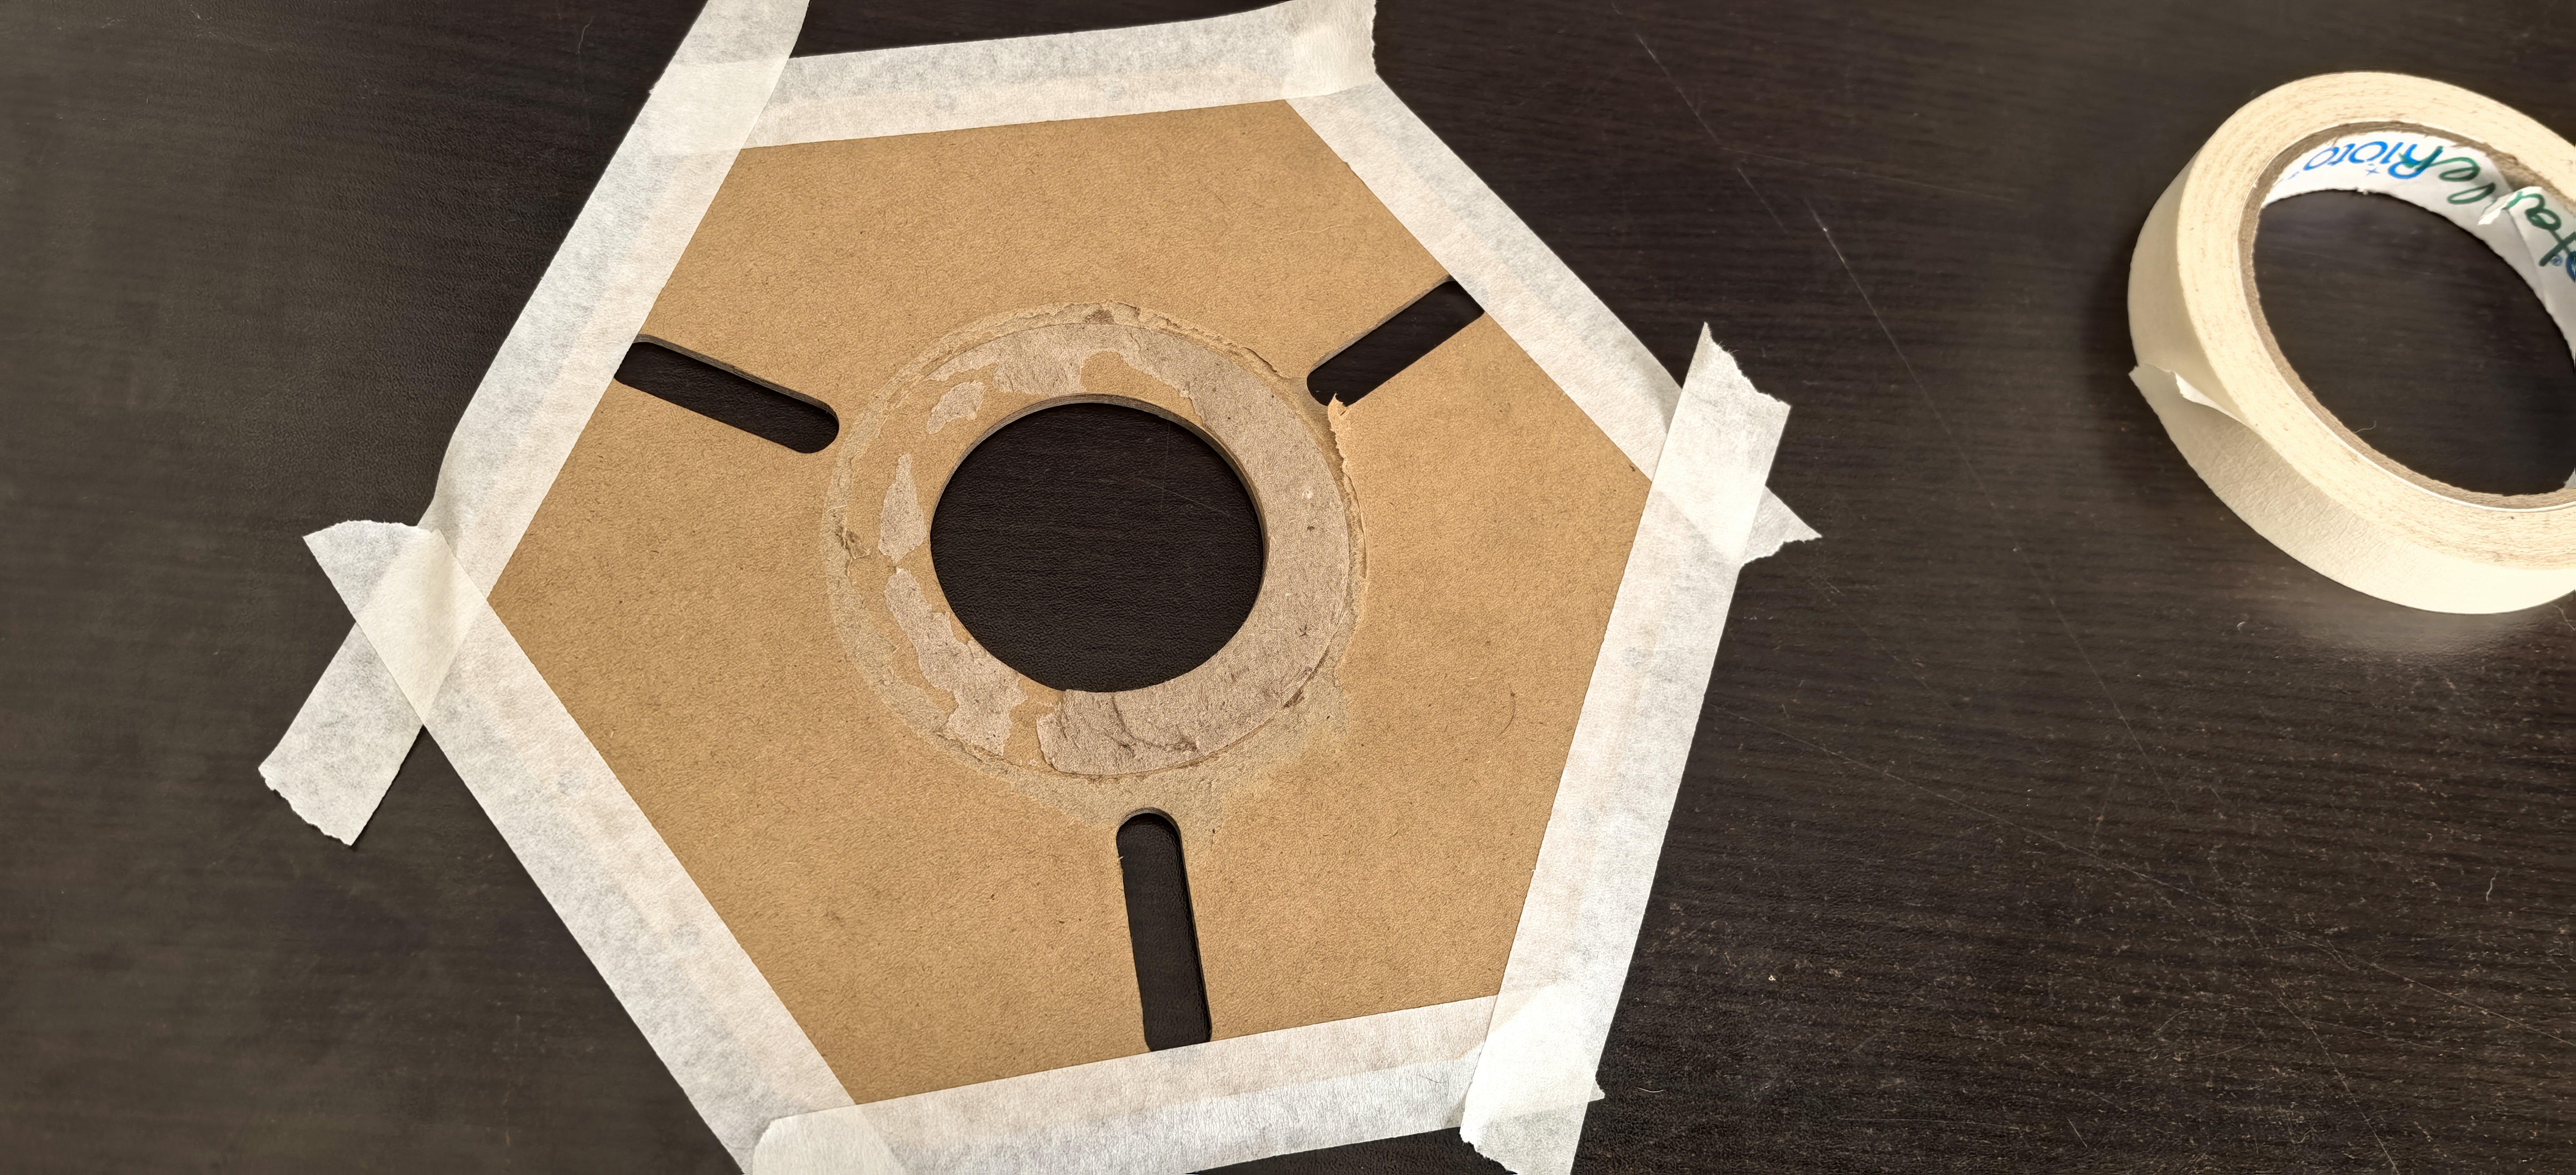
Recorte el exceso de cinta y aplique una capa de pegamento sobre ella para reforzar la adherencia.
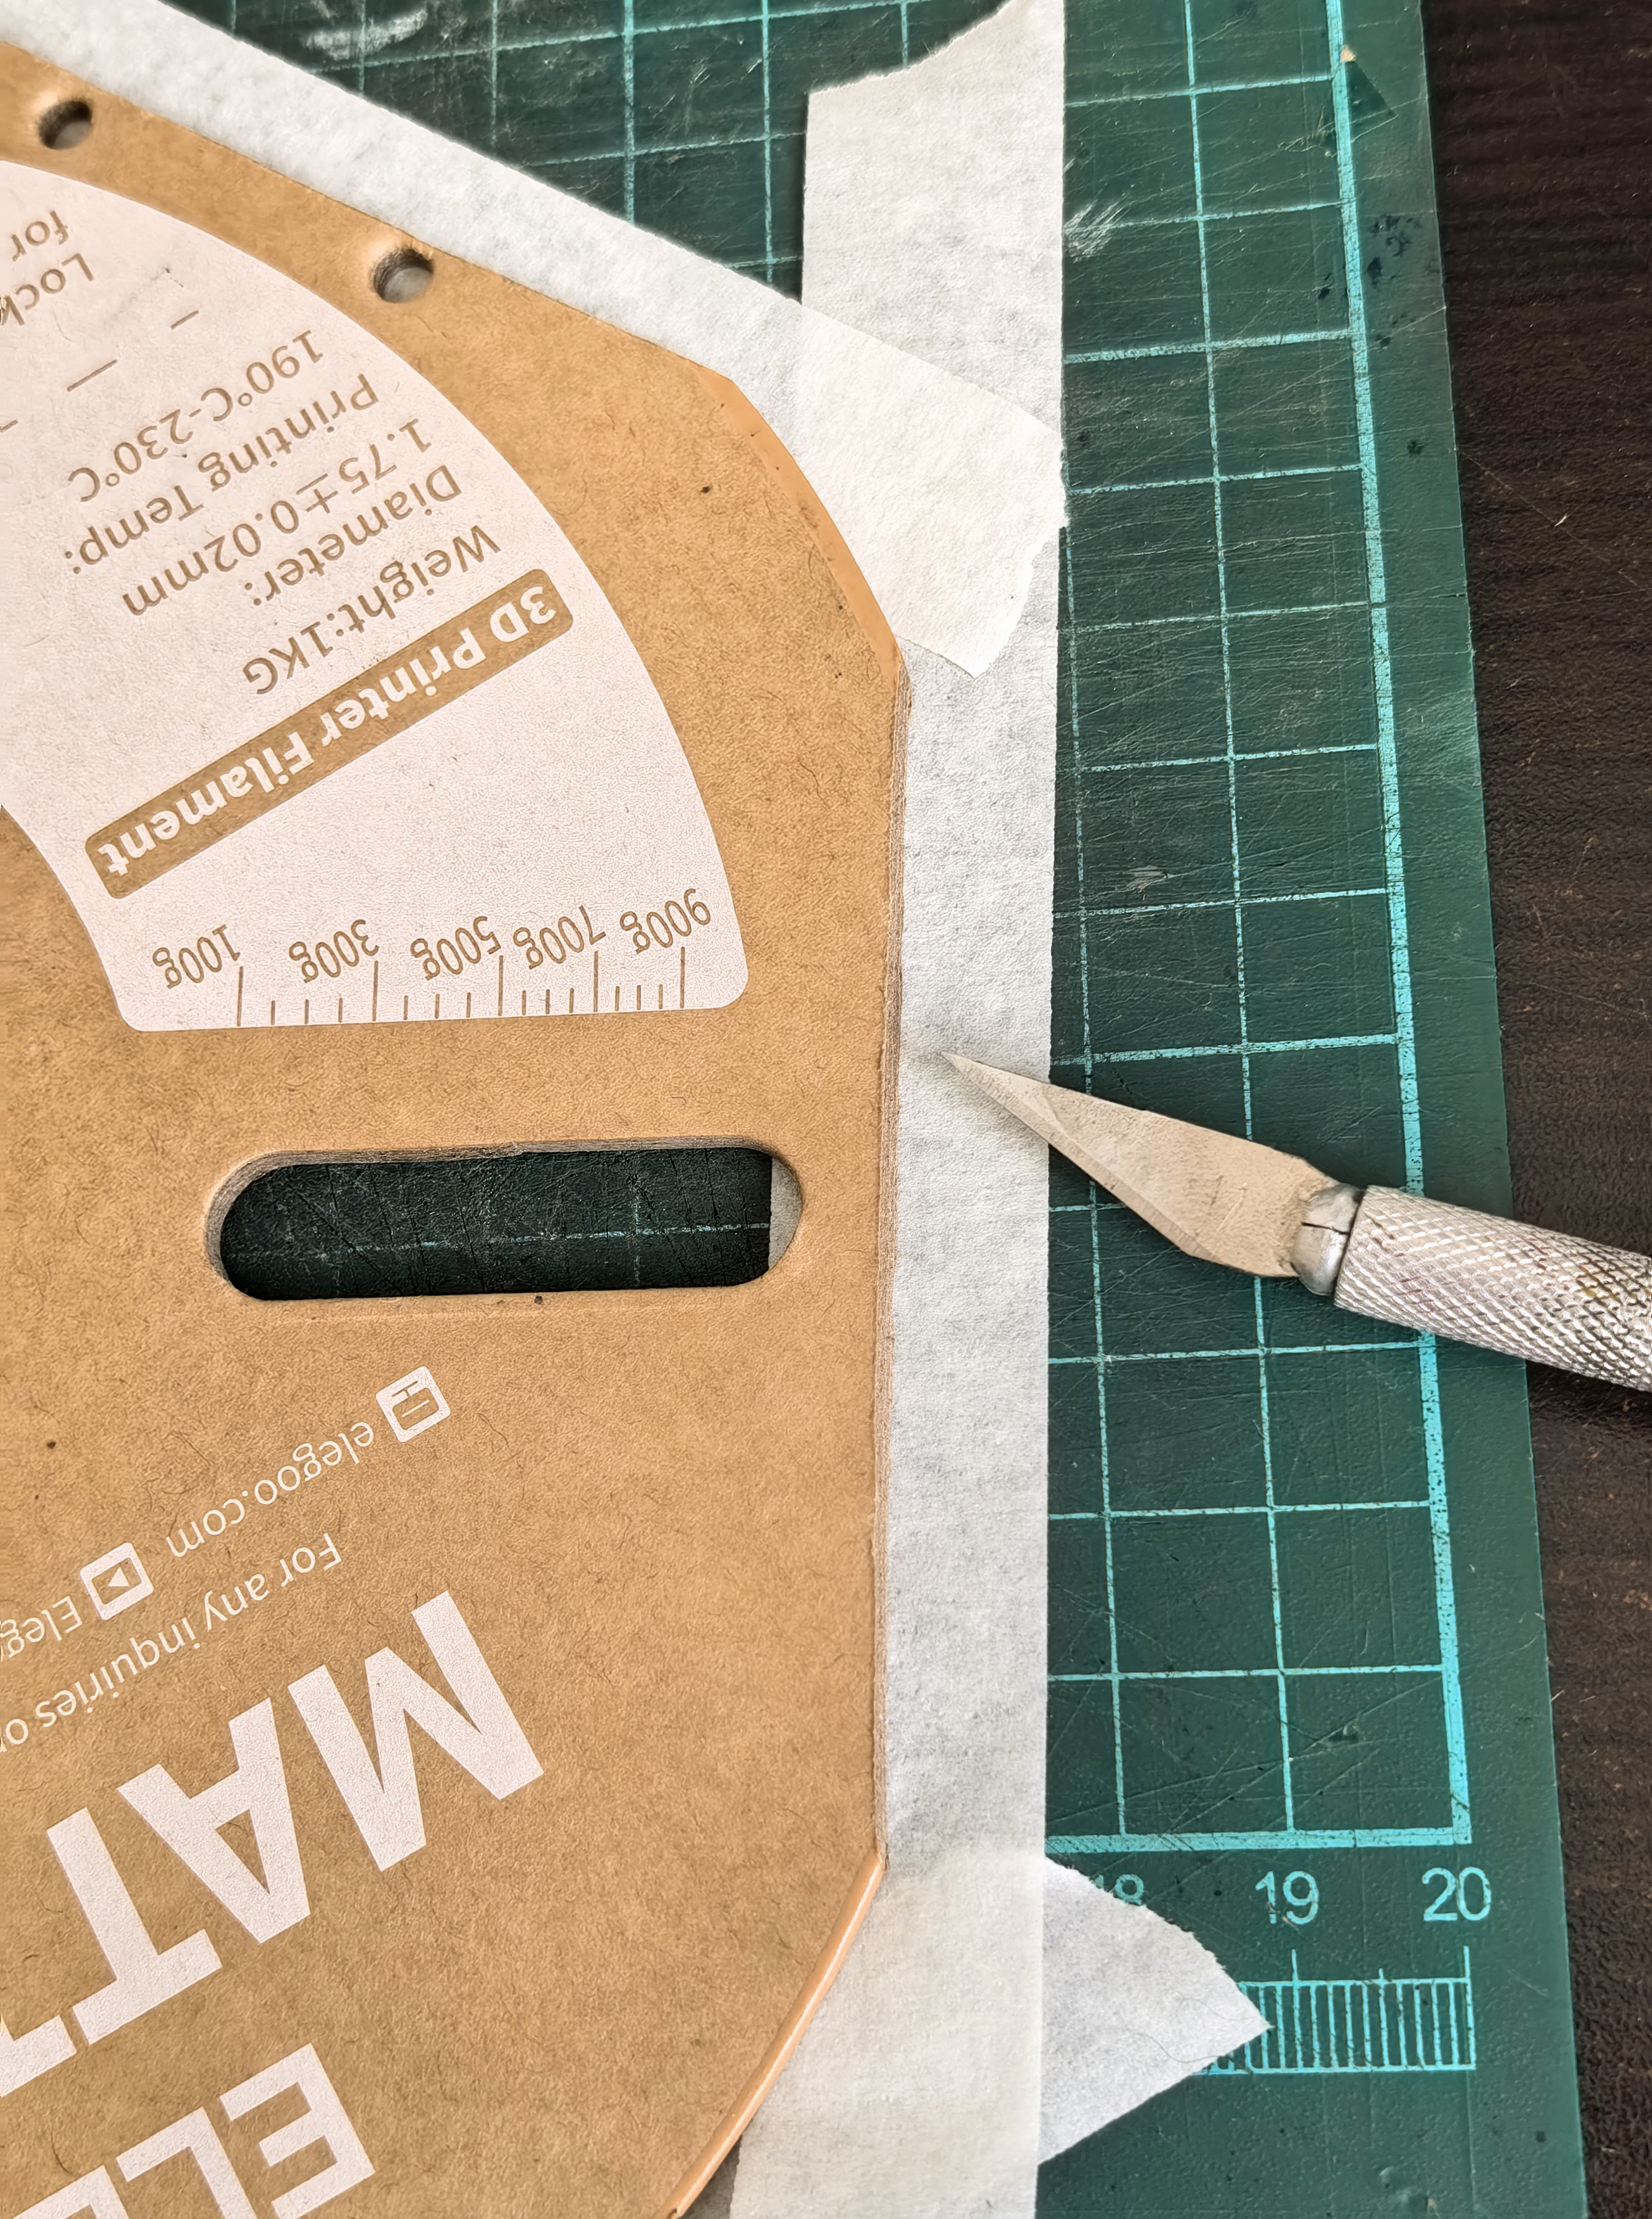
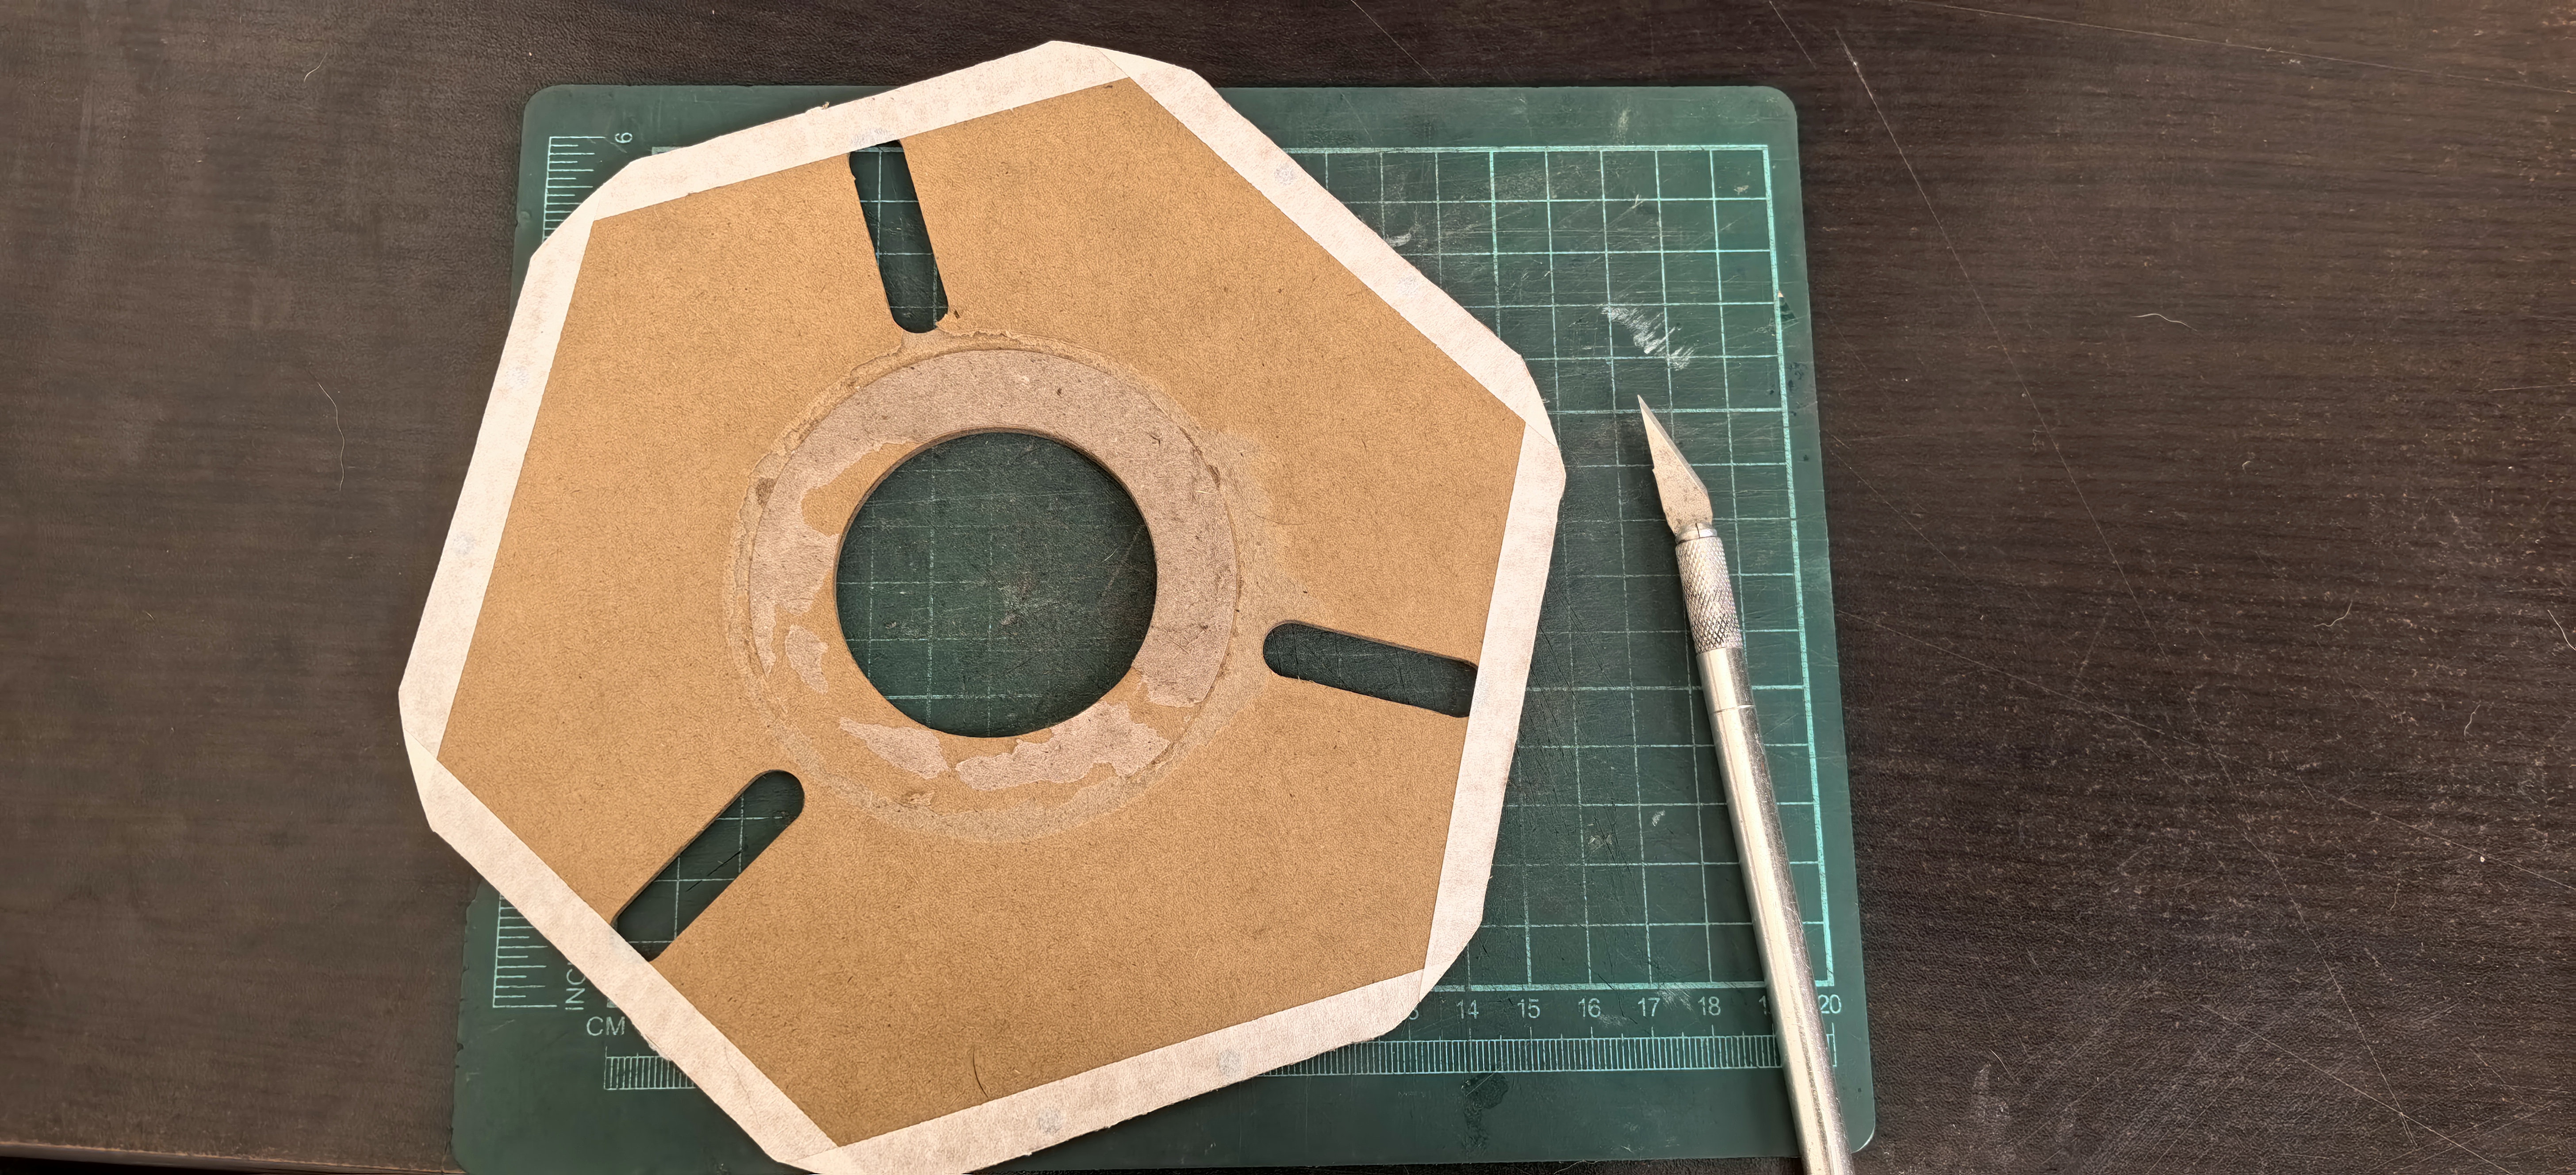
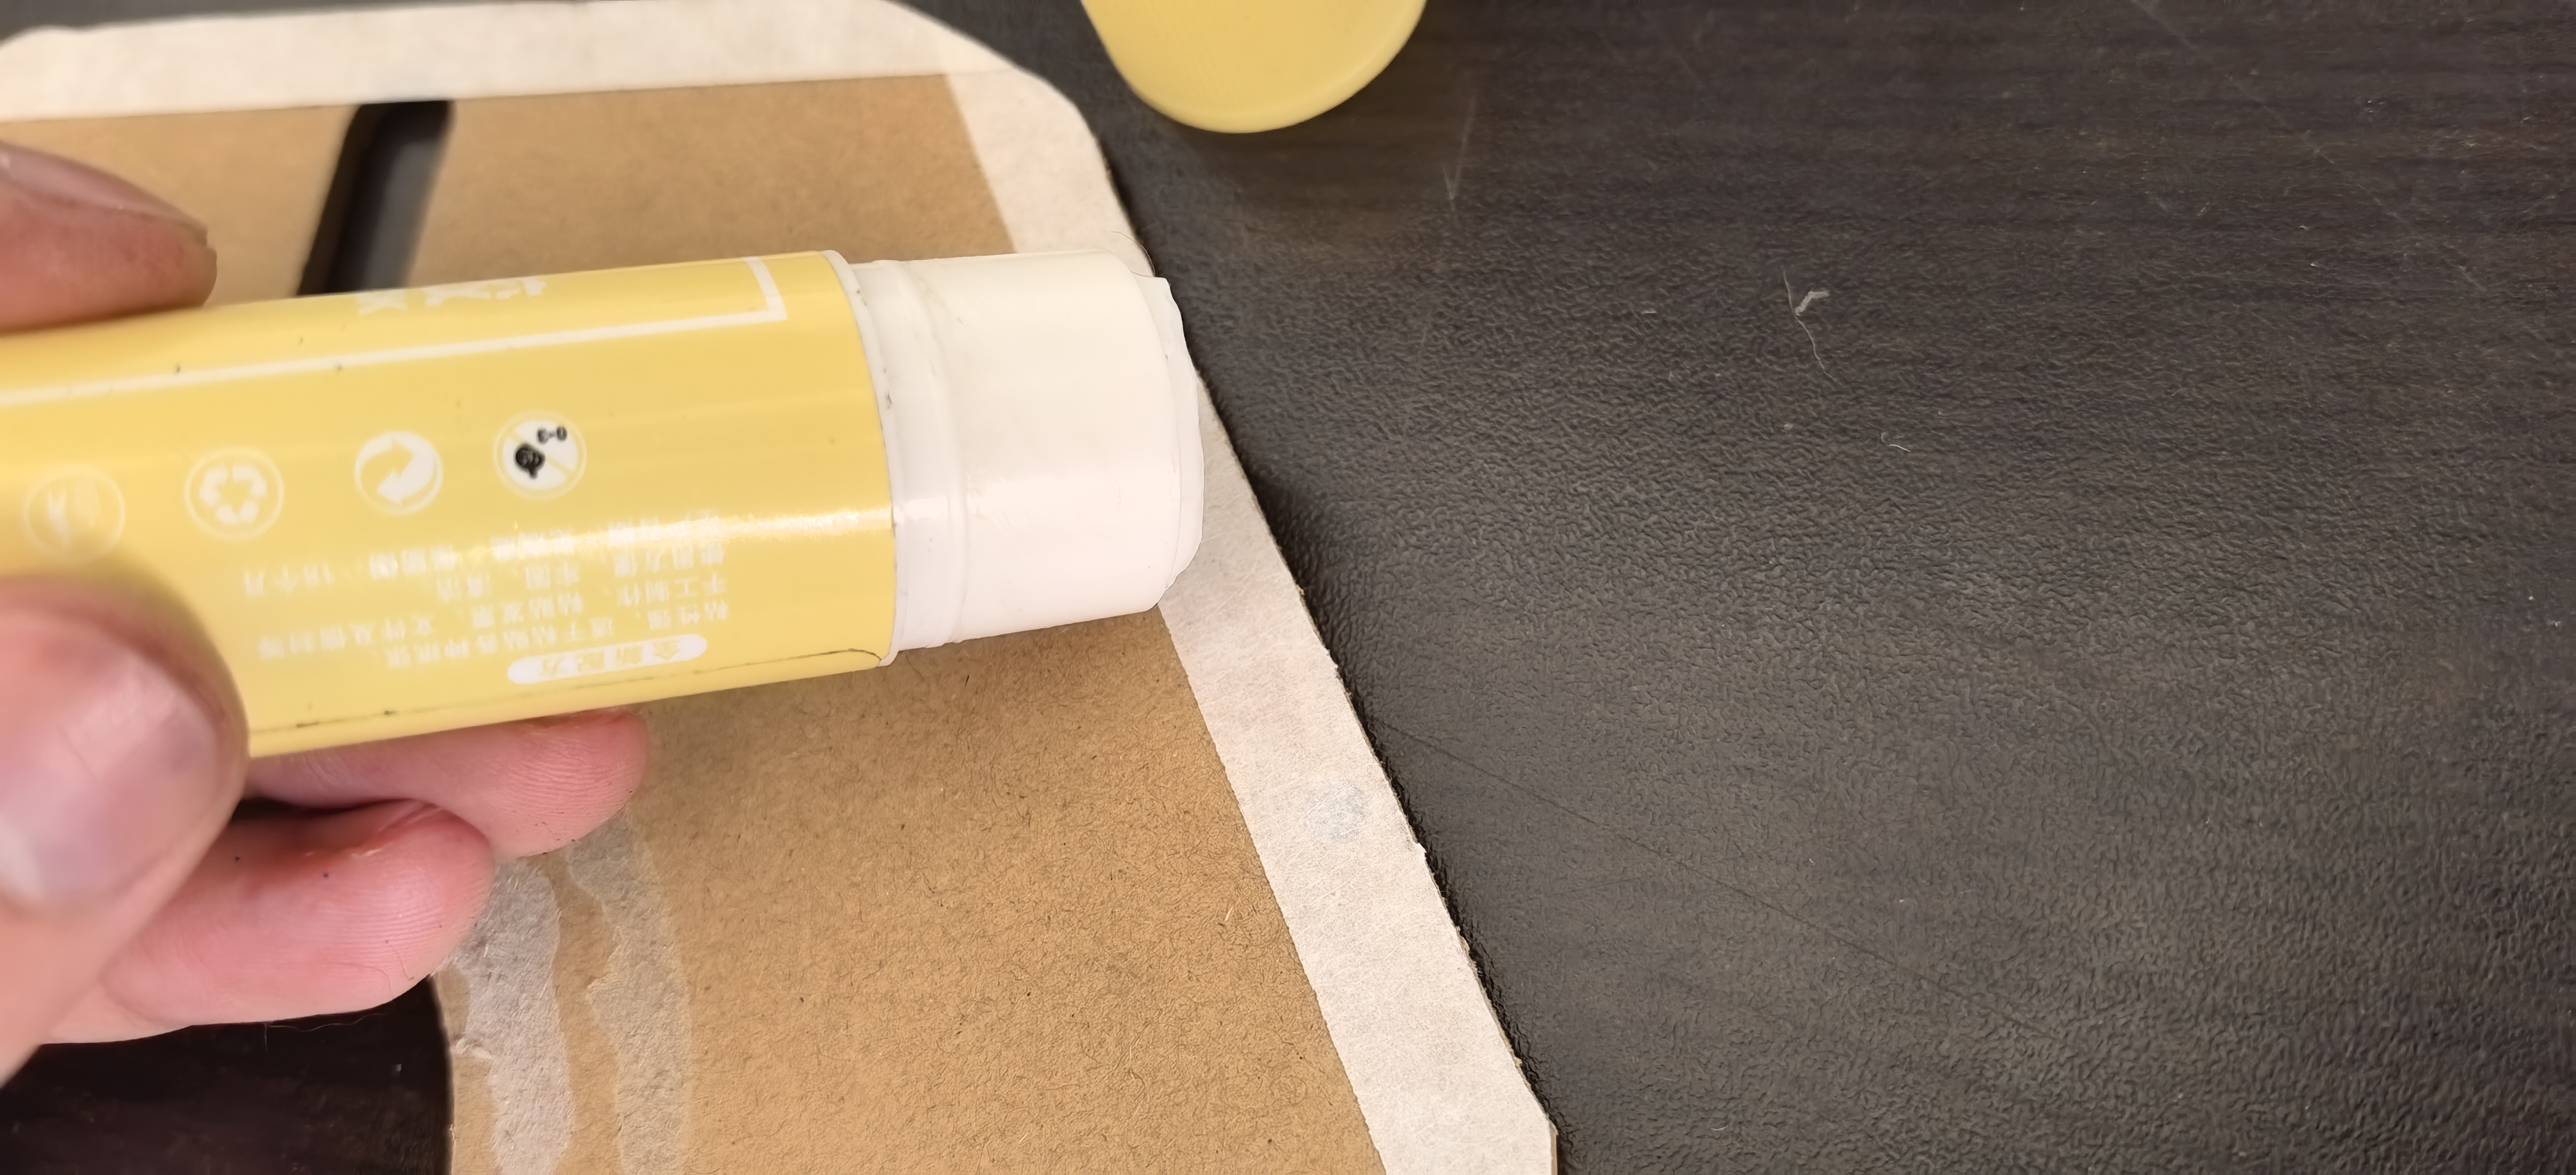
Si necesita otra medida Por favor solicitarlo.
4. Impresión de la Base / Módulo
Existen tres opciones: Tapa, Base Plana y Base con Conector.
Pausa de impresión: Configure una pausa en la última capa antes de que comience el voladizo (techo) que cubrirá el cartón.
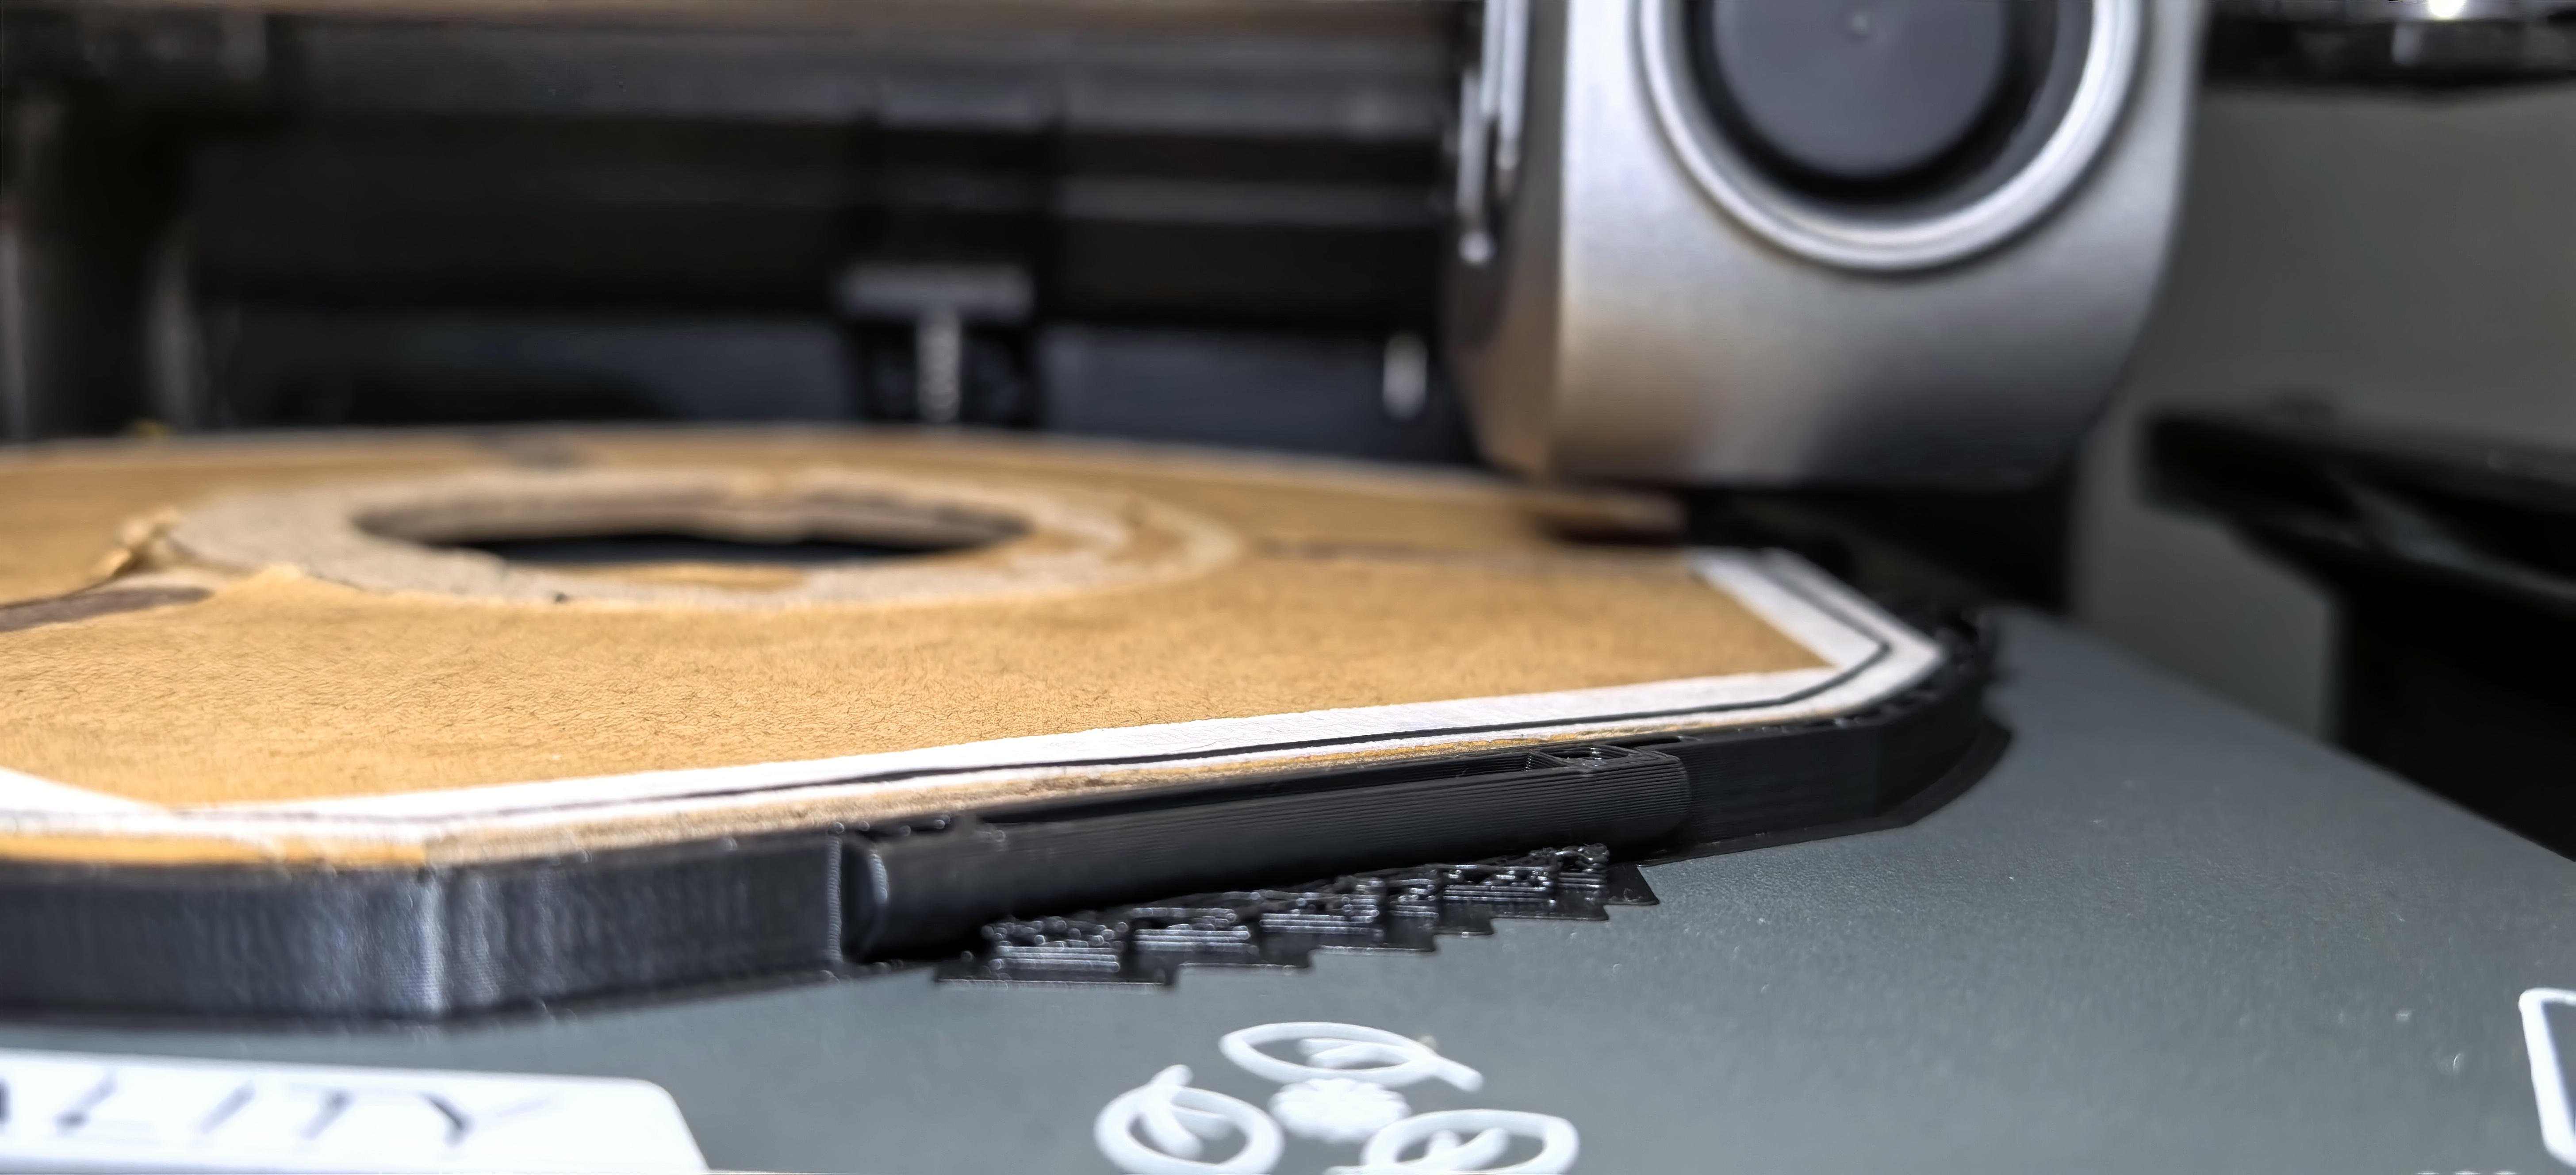
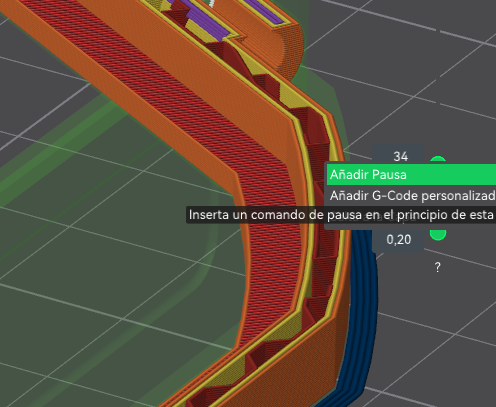
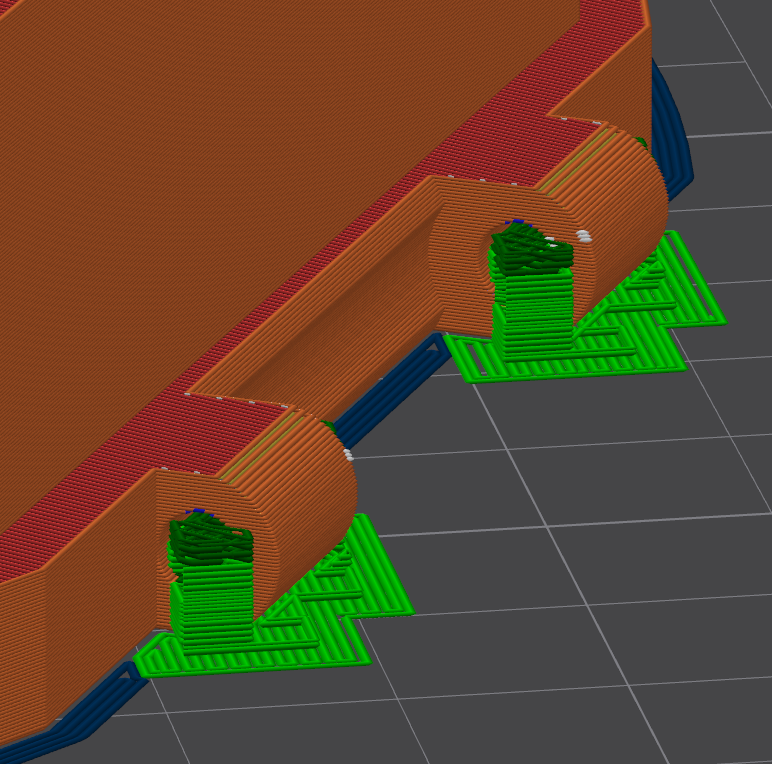
Soportes: Se recomienda usar soportes para mantener la forma circular de los encajes.
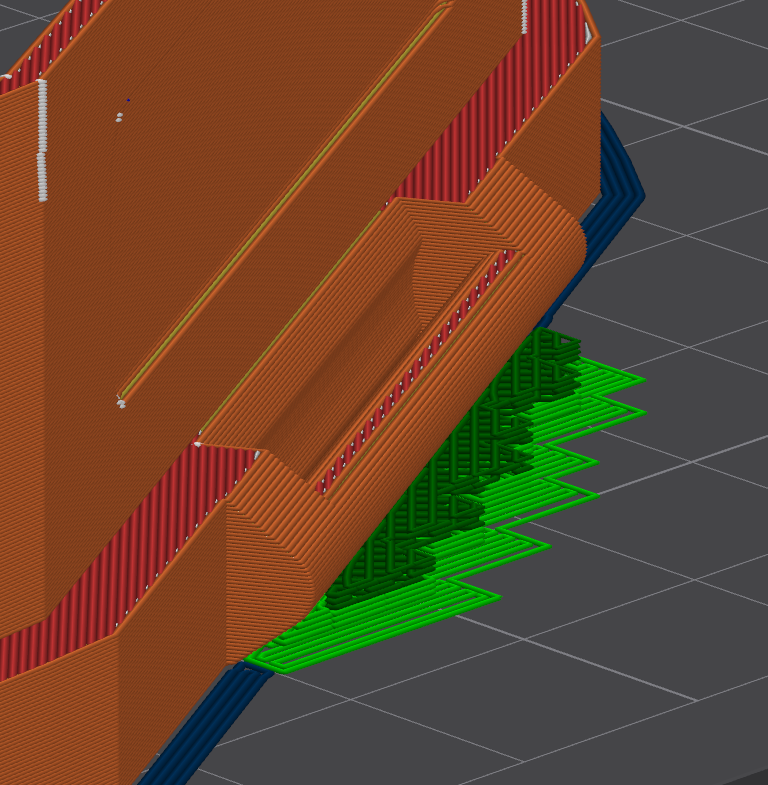
En Caso de imprimir con ABS: se recomienda usar soportes en los agujeros del eje de la bisagra:
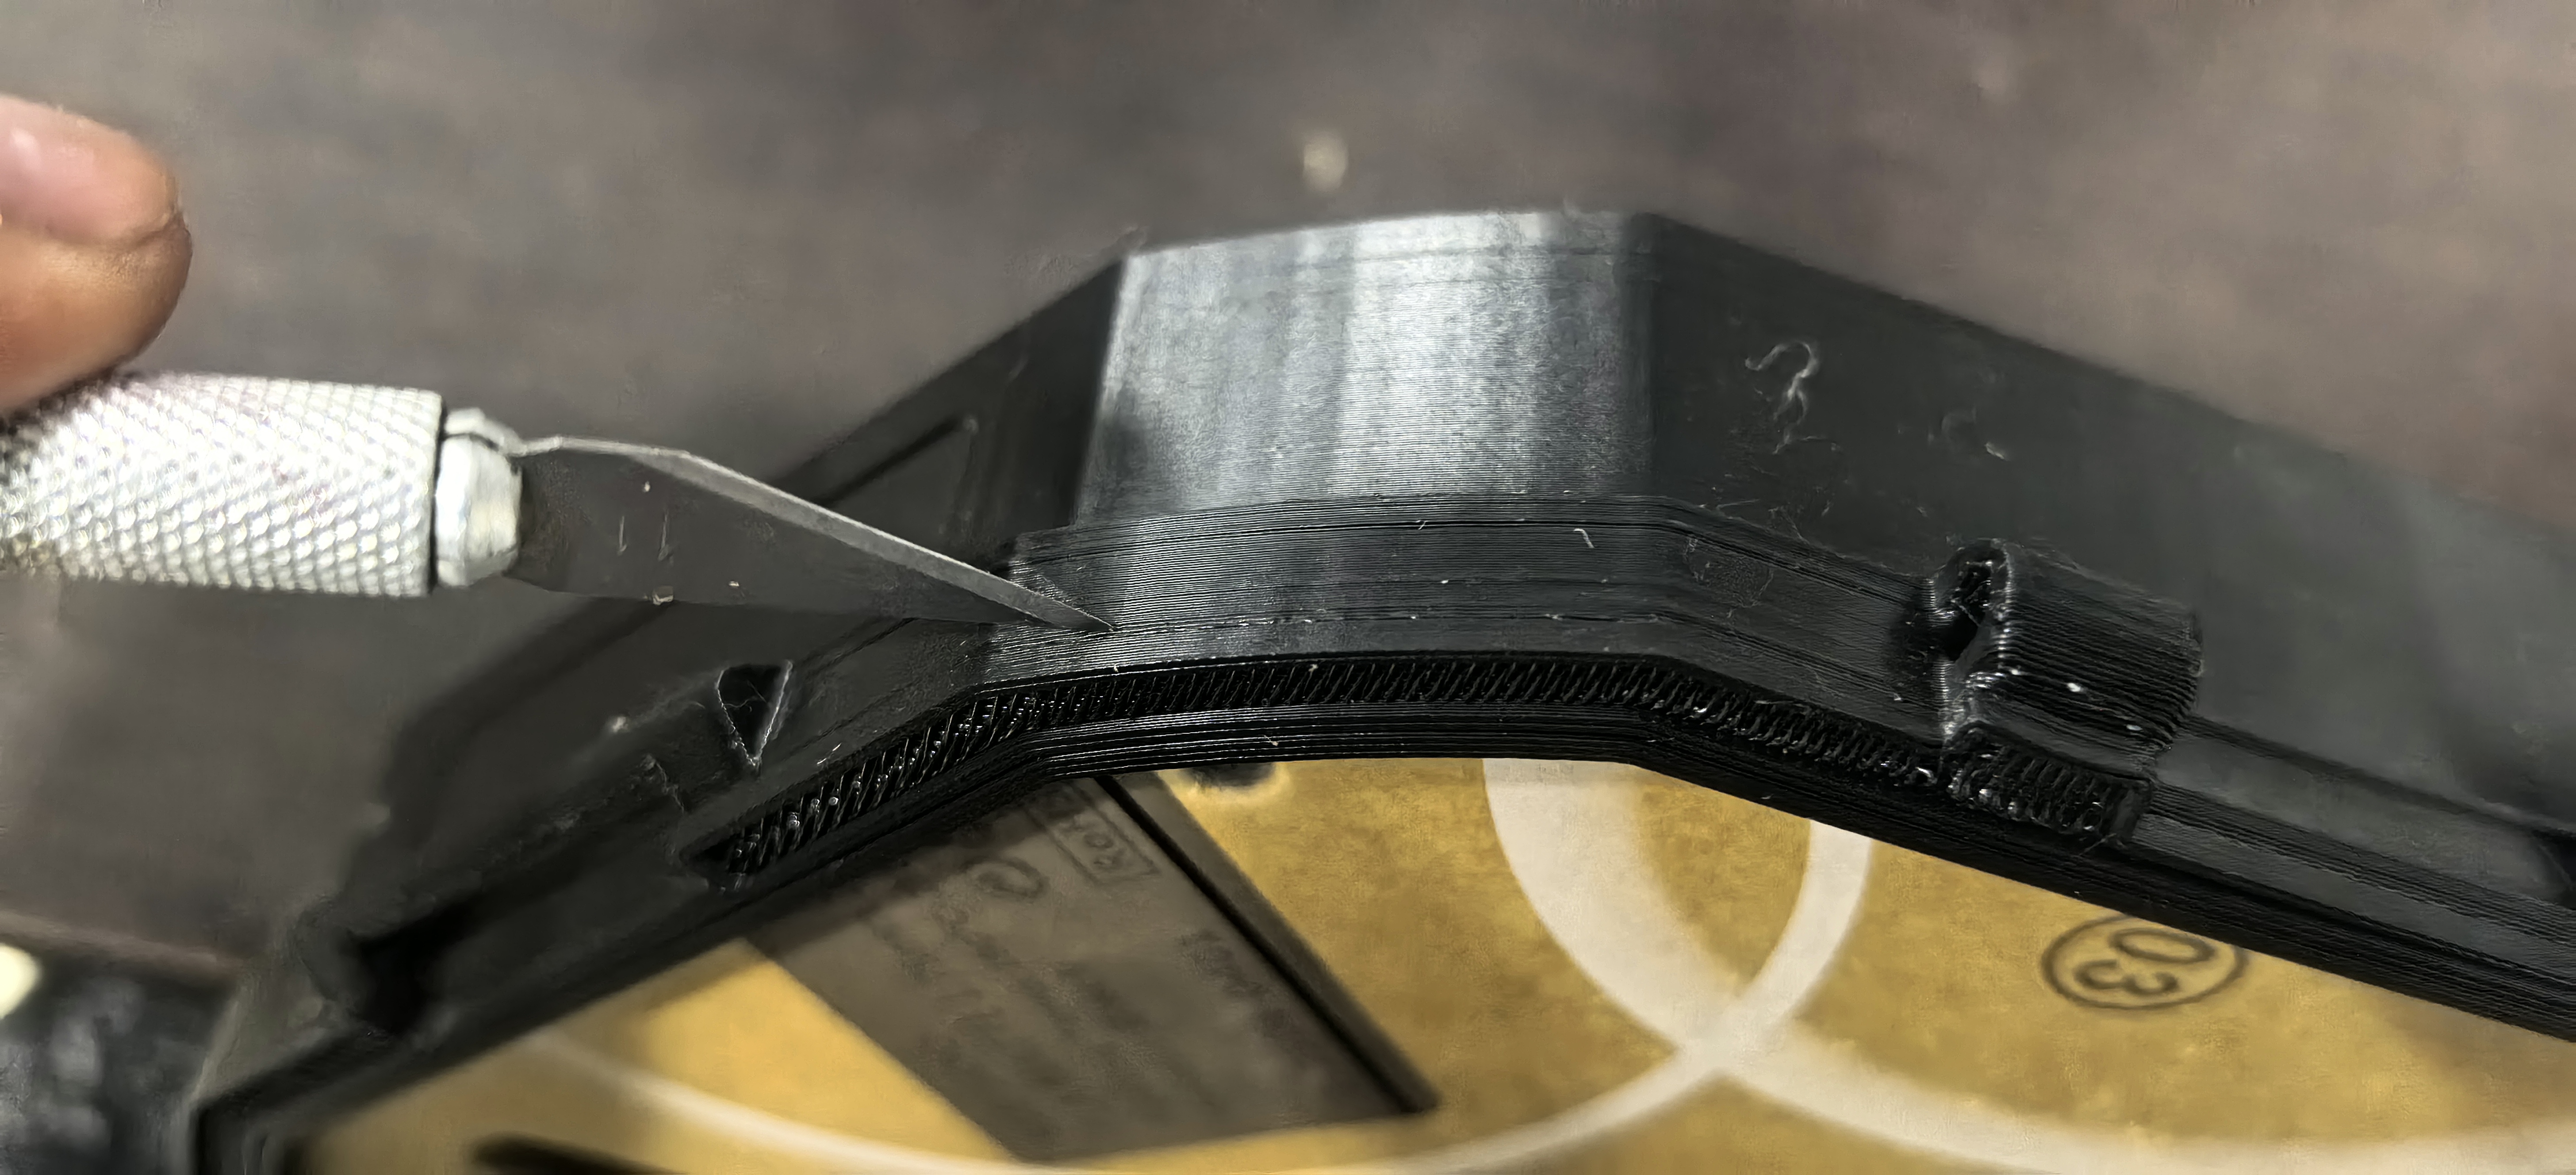
Base con Conector: Este modelo permite apilar cajas sin usar tapas intermedias. Incluye un soporte diseñado manualmente en la parte inferior; retírelo con una cuchilla tras imprimir. (Si prefiere soportes automáticos, divida el modelo en objetos en su laminador y borre el soporte integrado).
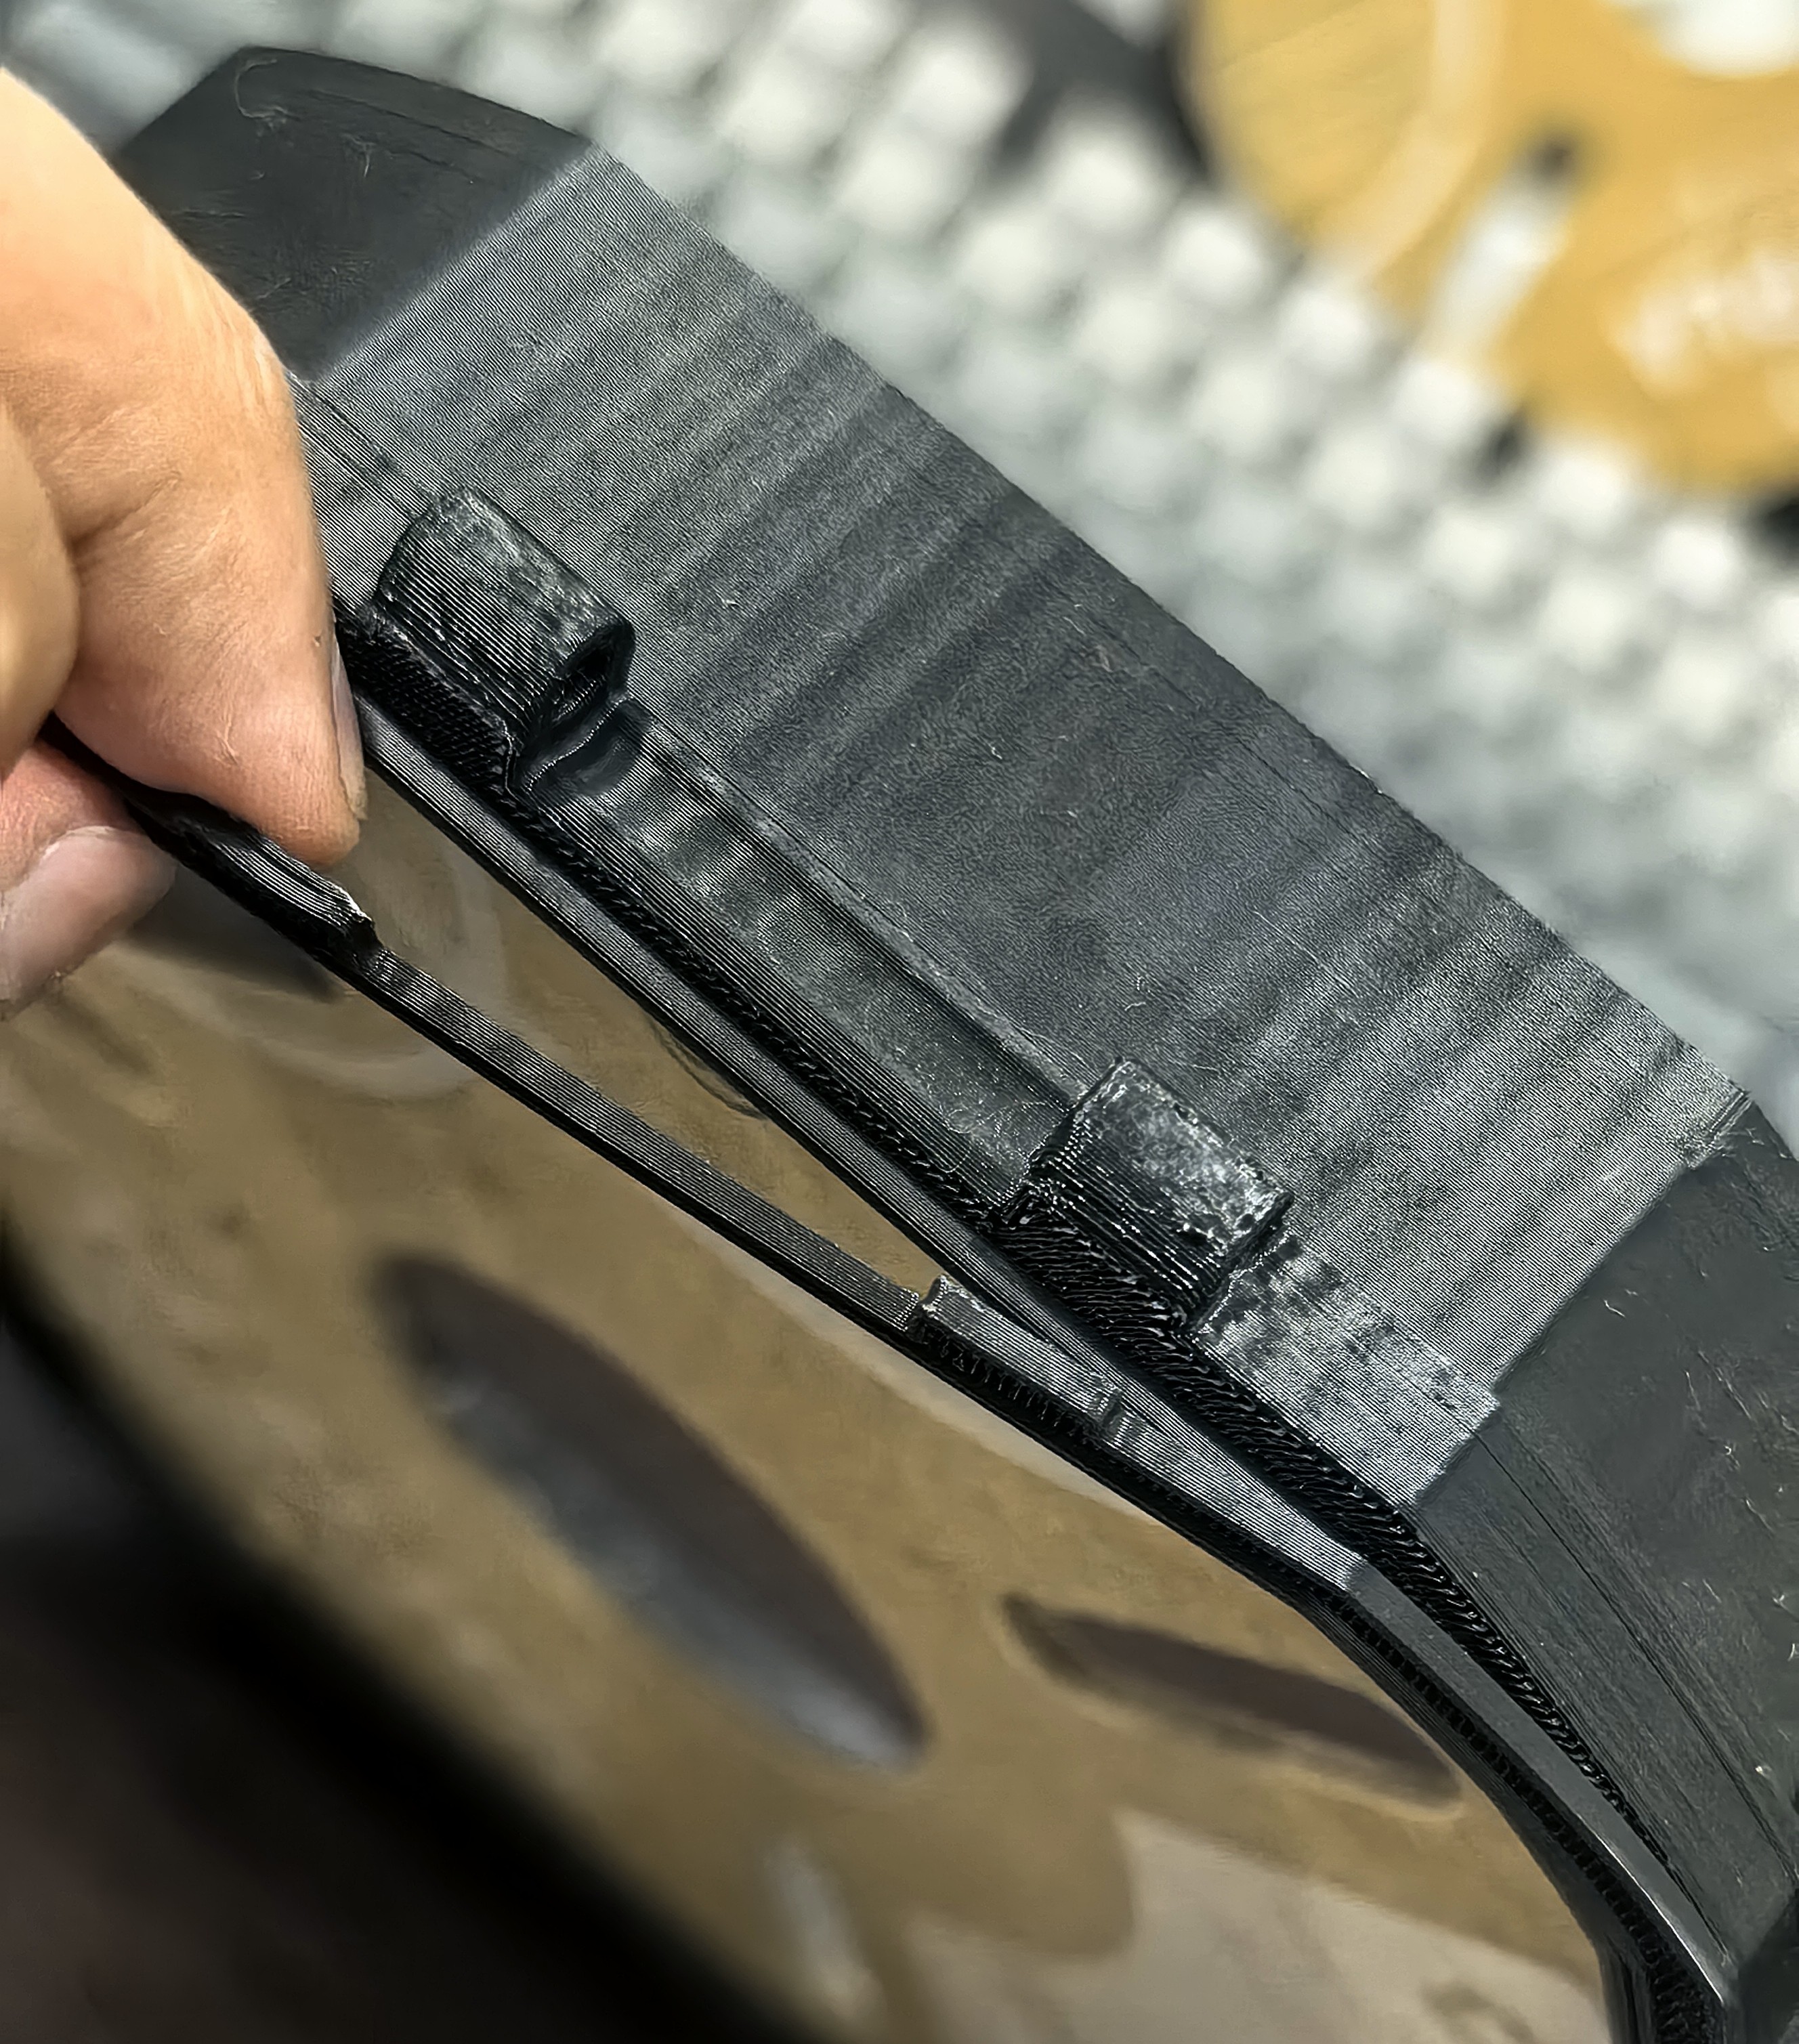
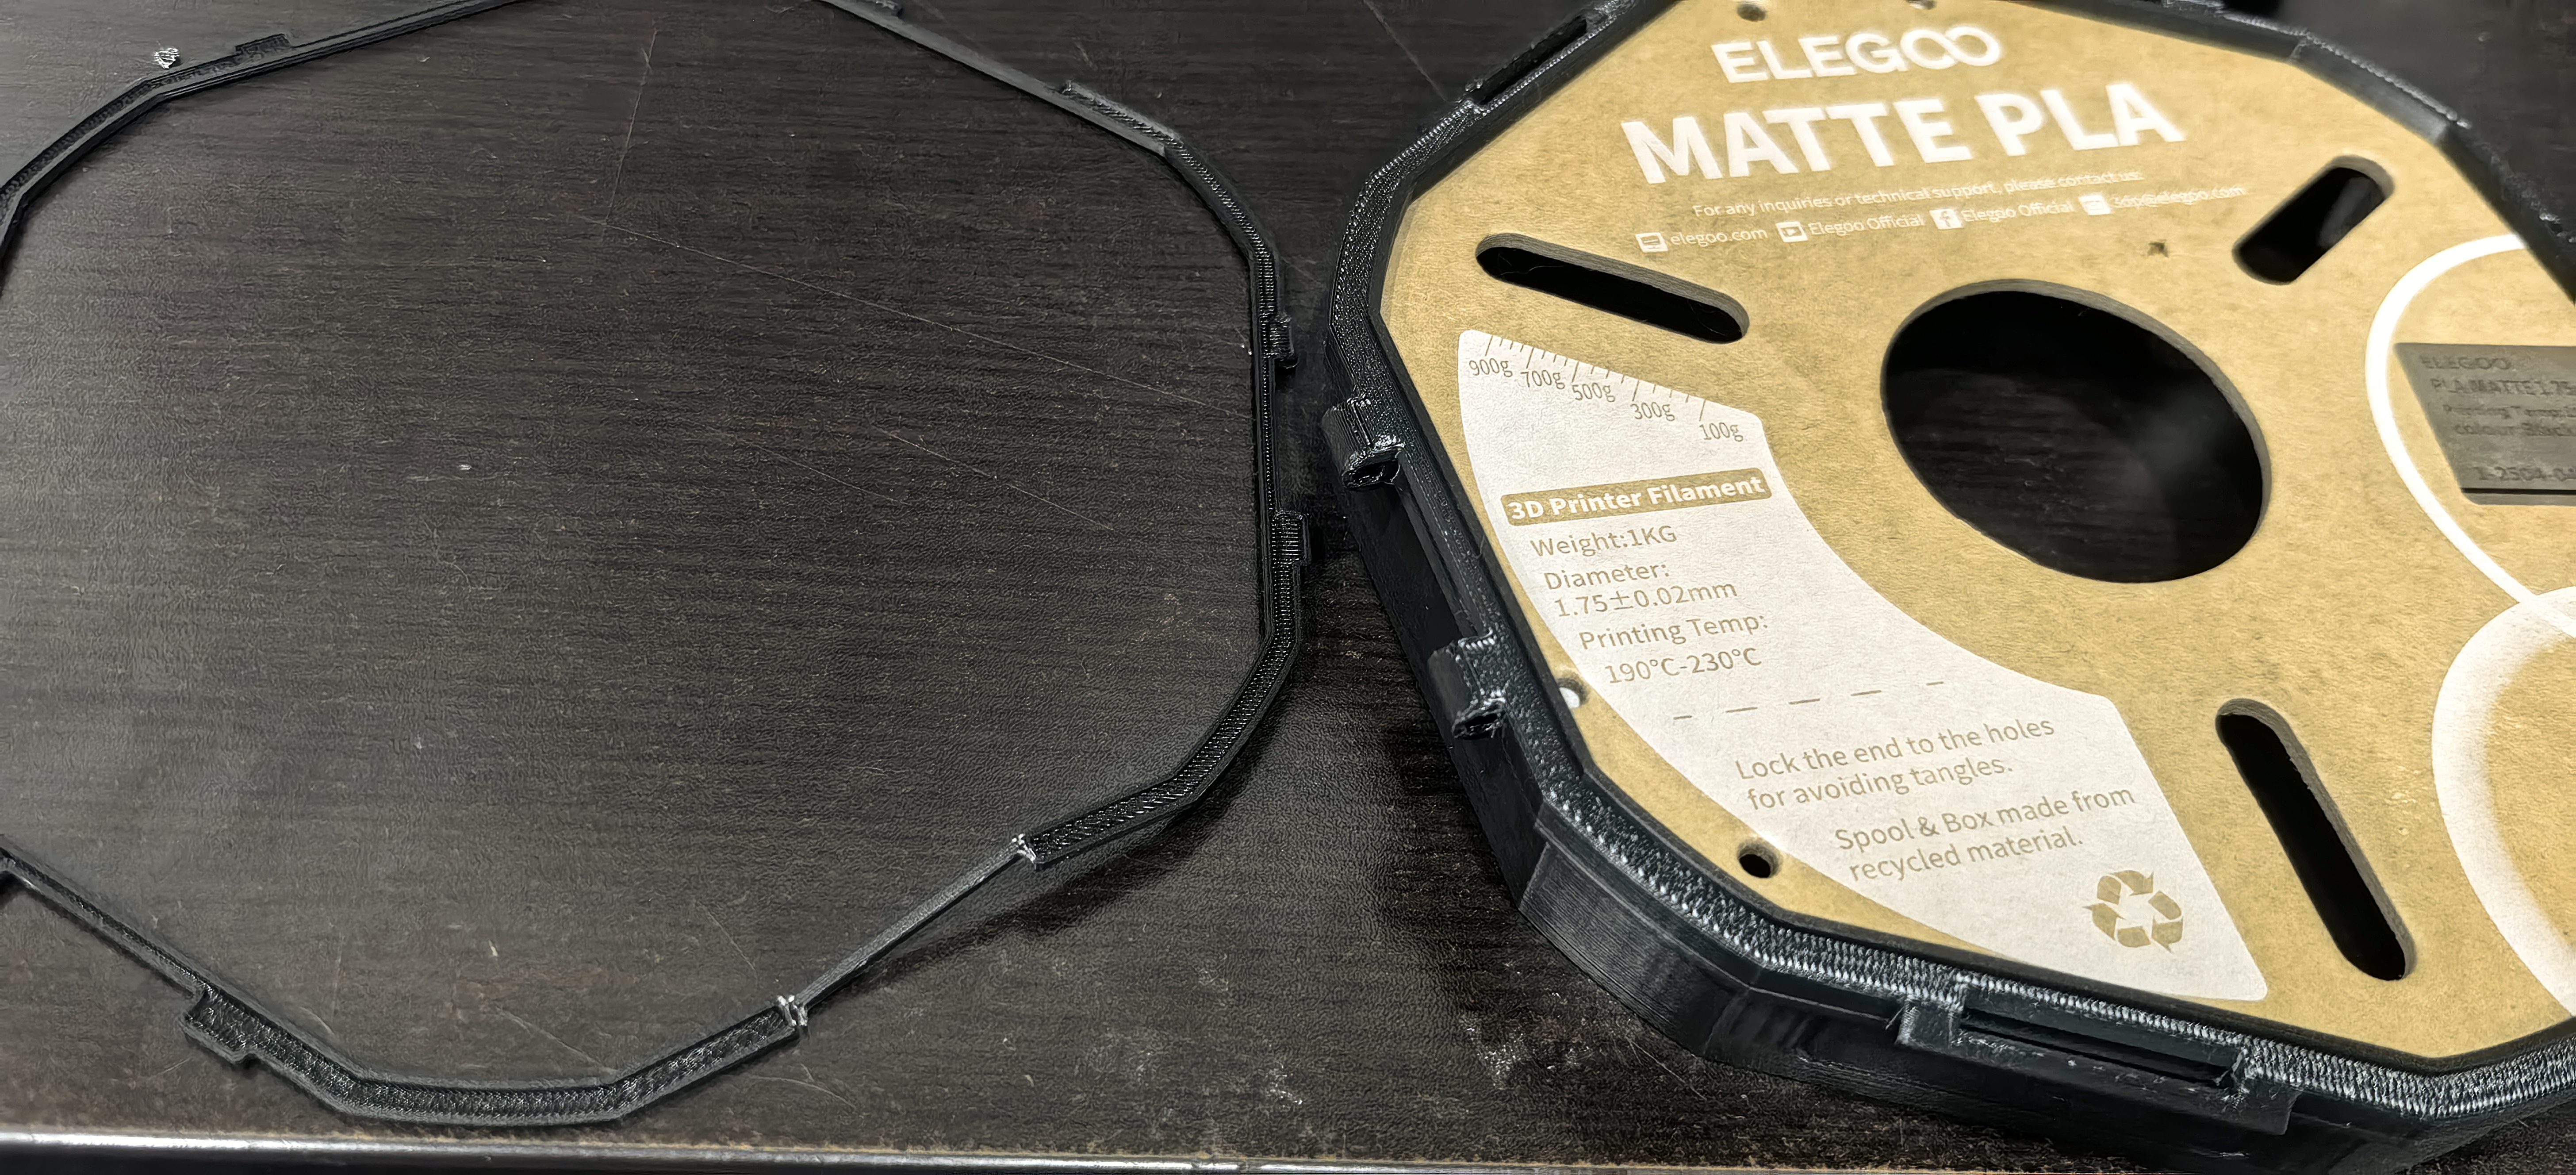
5. Broches y Ejes
Imprima estas piezas en la orientación original del archivo para respetar las tolerancias de diseño y asegurar un encaje preciso.
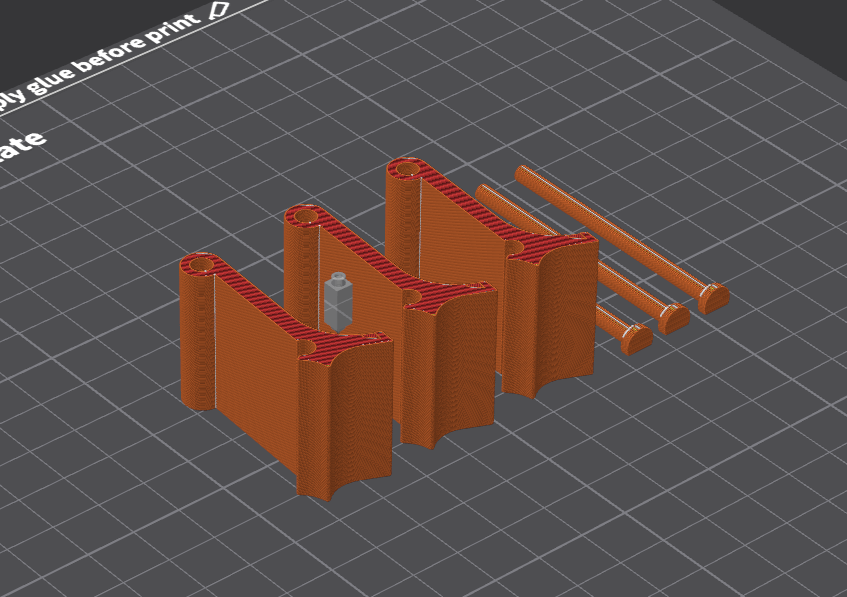
Etiquetado: Cada base incluye un espacio rectangular para etiquetas. Se adjunta un PDF con plantillas listas para usar.
¡Listo!
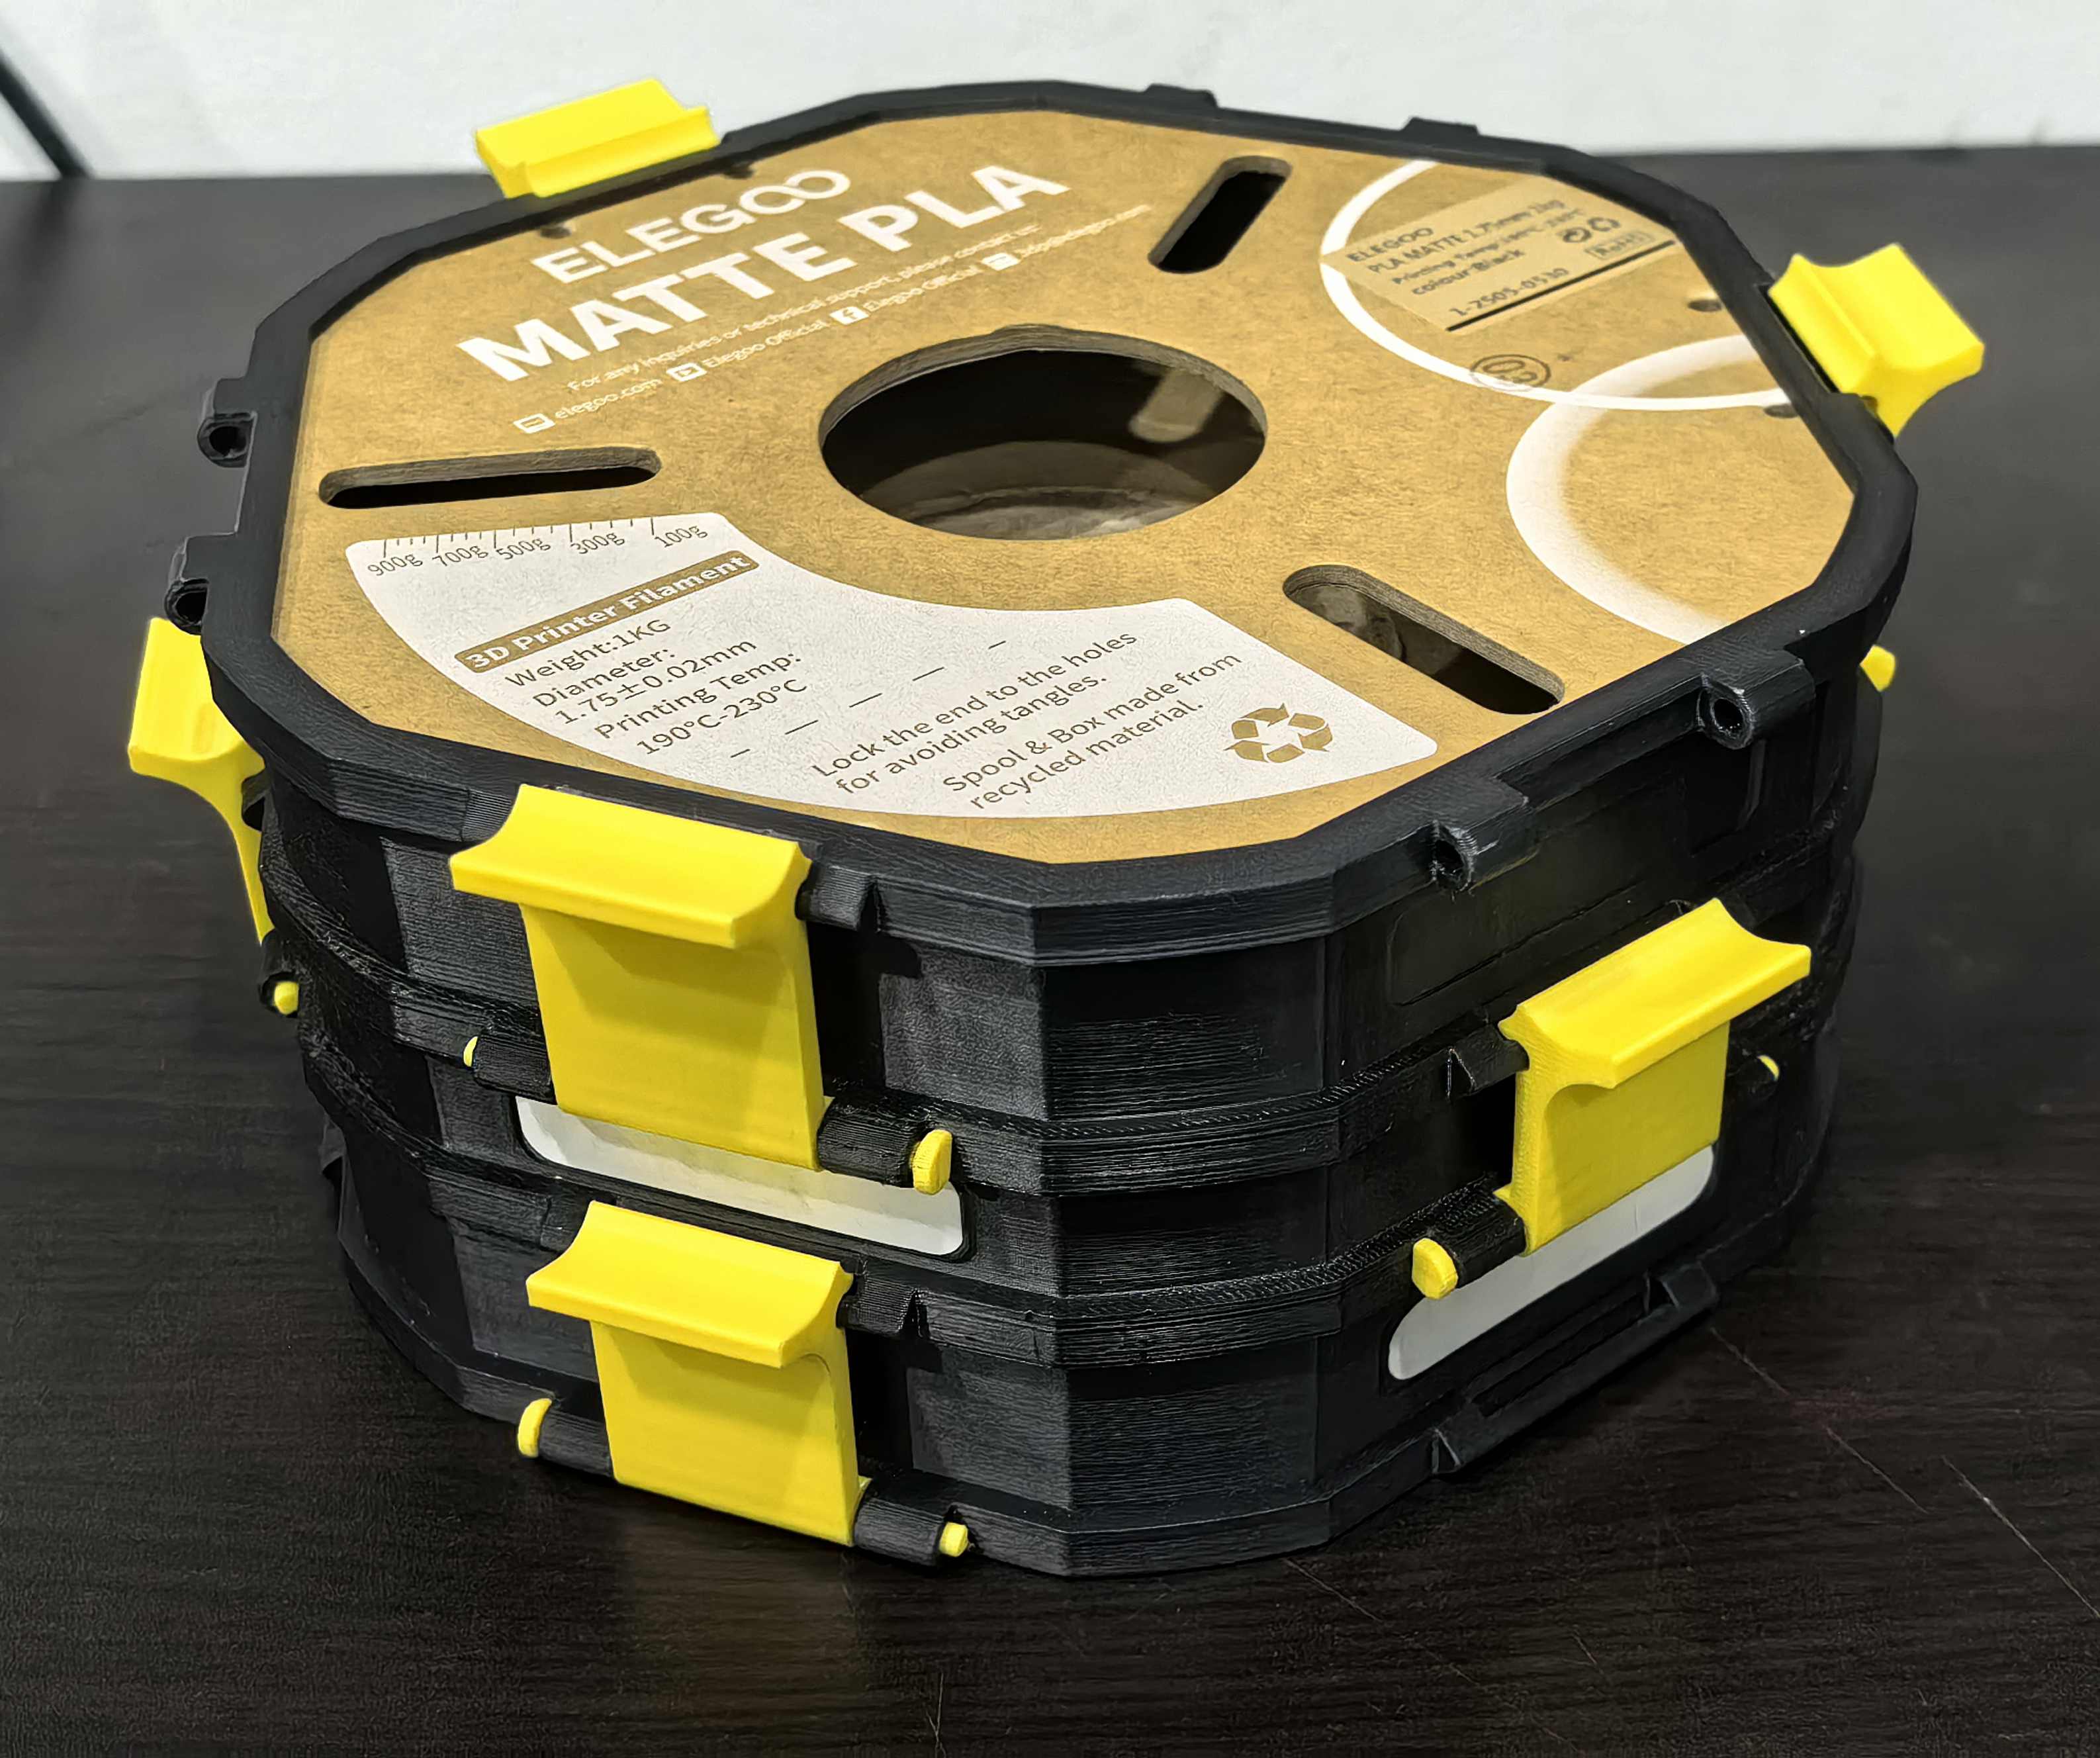
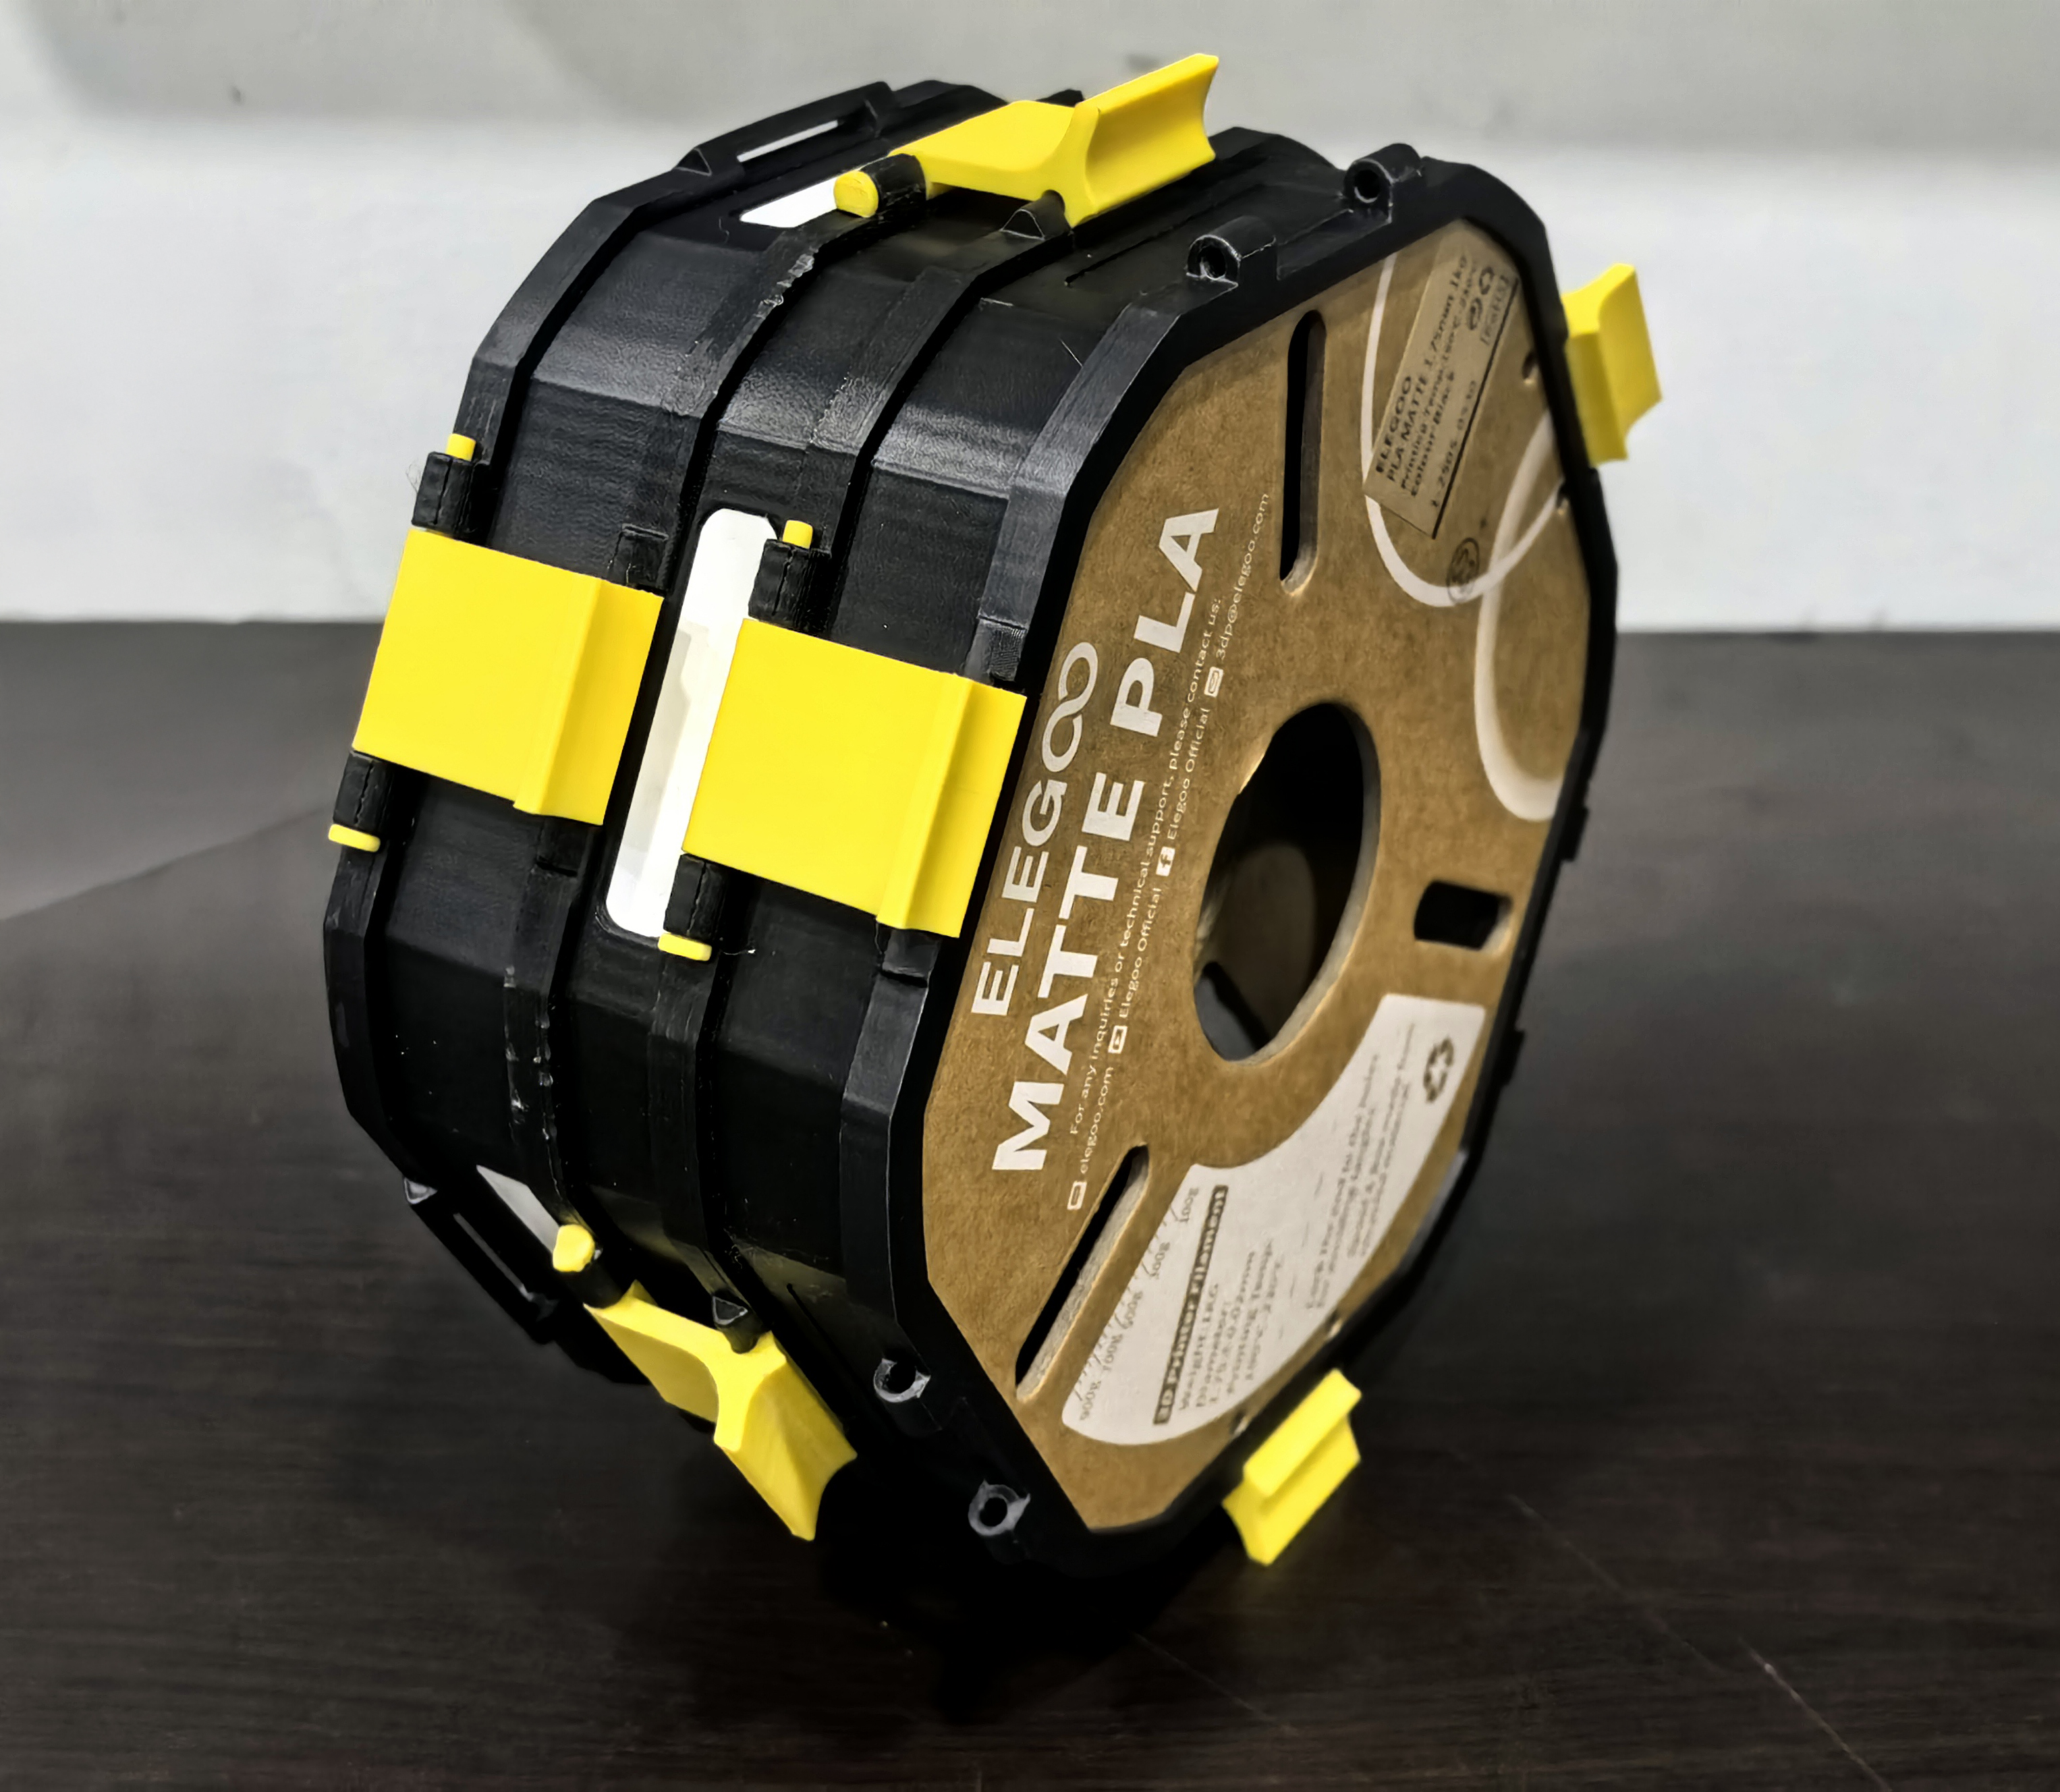
English: step images above ⬆
This project is an eco-friendly solution to repurpose the cardboard sides of empty filament spools, transforming them into functional and stackable storage boxes. The design is standardized under Gridfinity height units (7mm per "U" unit), facilitating integration with existing organization systems.
The structure utilizes a "fusion" technique where the cardboard is inserted during printing to be permanently trapped by the filament. Currently, the design focuses on the outer shell of the box (internal organization modules are under development). It is ideal for those looking to reduce waste while organizing their workshop.
Height Specifications
Unidad (U) | Medida Interna / Internal Measurement |
2U (Mínima) | 15mm |
3U | 25mm |
4U | 32mm |
5U | 39mm |
6U | 46mm |
Assembly Instructions
1. Cardboard Preparation
1. Cardboard Preparation Use 3mm thick cardboard sides. Separate the spool face from the center with a blade. You can use isopropyl alcohol or water to soften the glue.
⚠Important: Ensure the cardboard remains perfectly straight after separation to avoid print failures.
2. Cutting Guide
Print the "Cutting Guide" file (designed for 20cm diameter spools).
Place the guide on the cardboard; it should fit tightly with no "empty" spaces.
Mark the outline with a pencil and cut inside the line. If you cut outside, the cardboard will not fit into the printed part.
3. Preparation for the cardboard:
For the filament to adhere correctly to the cardboard during the pause: Cover the entire contour (edge) of the cardboard with masking tape, making sure it is well-adhered and grease-free.
Trim the excess tape and apply a layer of glue on top of it to reinforce adhesion.
If you need another measurement, please request it.
4. Base / Module Printing
There are three options: Lid, Flat Base, and Base with Connector.
Print Pause: Set a pause at the last layer before the overhang (roof) that will cover the cardboard begins.
Supports: It is recommended to use supports to maintain the circular shape of the fittings.
In case of printing with ABS: it is recommended to use supports in the hinge axis holes.
Base with Connector: This model allows boxes to be stacked without using intermediate lids. It includes a manually designed support at the bottom; remove it with a blade after printing. (If you prefer automatic supports, split the model into objects in your slicer and delete the integrated support).
5. Latches and Axles
Print these parts in the original file orientation to respect design tolerances and ensure a precise fit.
Labeling: Each base includes a rectangular space for labels. A PDF with ready-to-use templates is attached.
Done!