
The WU TANK : Micro Freestyle FPV frame (5 and 6 inch)
We calculate the final price from your selected file. You review and accept it before payment.
Saved on this device.
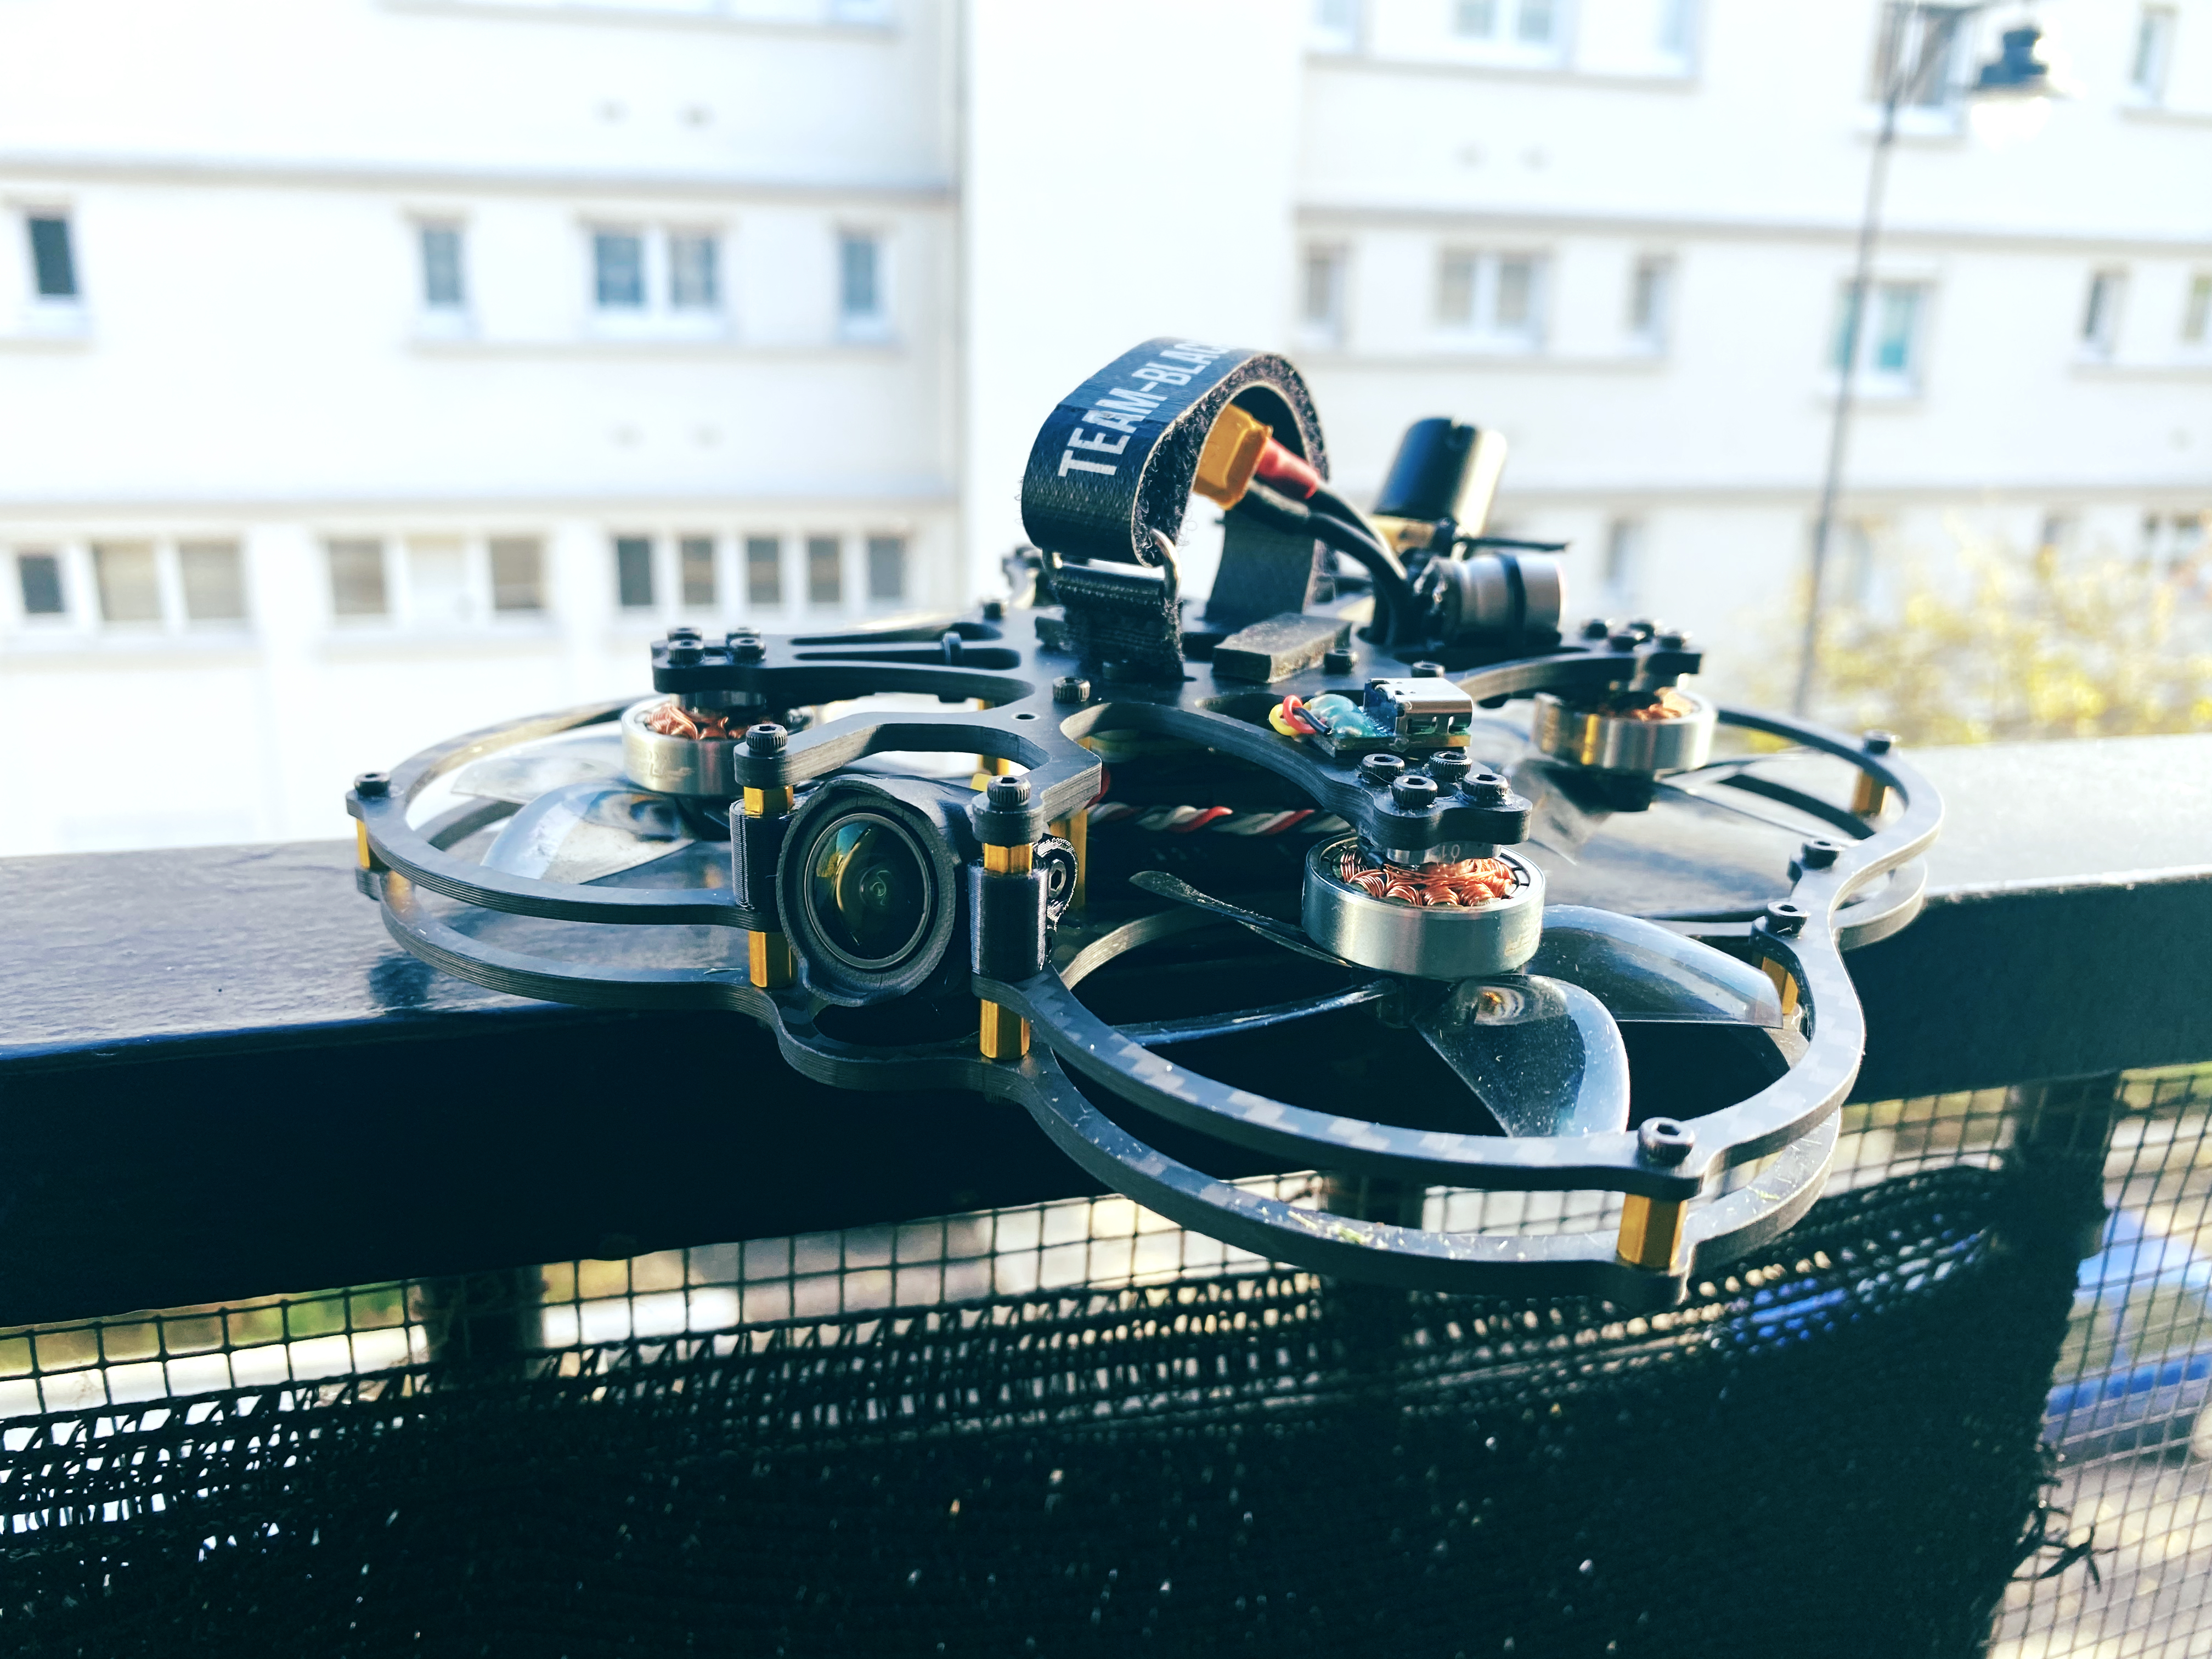
The Wu Tank was designed as an ultralight 5" and 6" freestyle frame. It comes now with deadcat arms versions as well.
- Rating
- 0 / 5
- Likes
- 18
- Downloads
- 192
- Makes
- 1
- Views
- 1,803
- Reviews
- 0
Updated at source:
Model information
- Source
- Printables
- Category
- RC & Robotics
- License
- Creative Commons — Attribution
Reach me on social medias for questions, news and support [Instagram] [Facebook] [YouTube]
If you like my work you can [support me via ko-fi]
------
Get the frame on CNCDrones (CNCMadness)
[The Wu Tank - w/ hardware, configurable options]
Get the frame on Armattan Productions (or check cutting options below)
- [The Wu Tank - light 5.25 inch WIDE X ]
- [The Wu Tank - light 5.25 inch DEADCAT]
- [The Wu Tank - light 6 inch WIDE X]
- [The Wu Tank - light 6 inch DEADCAT]
The WU TANK! is an evolution of my previous MOD-L design. It's still intended to be a versatile platform but i tried to remove the limitations of the previous version regarding to bigger setups (5 and 6" mainly). The 5" frame is 65g. it's slightly heavier than an ultralight like the 2Fiddy but it's more durable and less vibration prone.
So now this frame can be used for freestyle and even long range ! And here's the proof !
And here's a frame introduction :
Here are the improvements & specs :
- arm options (for now) :
- 5.25" WideX
- 5.25" DeadCat
- 6" WideX
- 6" DeadCat
- HD capable (obviously)
- WAY stronger and stiffer (better at vibrations management)
- Low profile body (16mm tall for a Vista setup while still having 22mm for the camera in the front)
- improved arm interlock
- Supports 20x20, 25.5x25.5 (AIO turned 45°) and 30.5x30.5 electronics
- 12x12 motor mount (thought for 2203.5/2204/2205/2203.5 setups mainly), it even supports Ummagawd 2004 motors !
- M2 hardware
- backward compatible with most of the printable accessories of the MOD-L
Assembly and hardware needed
The whole body assembly is using some uncommon components but they're easy to find, here,s what you need :
- 12x BetaFPV M2 pressnuts : [https://betafpv.com/products/m2-clamping-nuts] (available in various shops as well)
- 8x M2x10mm screws for arms locking
- 4x M2x18mm screws for rear vista assembly
- 12x M2x6mm screws for the standoffs
- 4x M2 22mm standoffs (front) : [https://www.aliexpress.com/item/32958289804.html]
- 2x M2 16mm standoffs (rear, you can add 2 more if you don't use a Vista) : [https://www.aliexpress.com/item/32958289804.html]
[Check this tips guide for assembly](pdf and images)
Getting the frame cut
My recommended places are [www.cncmadness.com] (CA/US/Worldwide) and [www.carbon-posten.de] (EU/Germany) or [CNC DRONE 91] (EU/France). Great quality cuts and fair pricing/delivery time.
you need to send the provided DXF files with the following instructions :
- 4x arms (choose the 5in or 6in file according to your needs) : 4mm carbon fiber
- 1x front plate : 2mm carbon fiber
- 1x rear plate : 2mm (or even 1.5mm) carbon fiber
- 1x top plate : 2mm carbon fiber
You can optionally ask for countersunk holes on the rear of the top plate and have your screws sitting flush.
Feel free to ask me for directions and help.
Installing the vista
Some infos here. on this frame the Vista is supposed to be installed in such a way that it's mounting screws are touching the top plate.
To achieve this i provide some 2.5mm TPU spacers to sit under the vista and highly recommend using M2x18mm hex screws coming from the top of the Vista trough the pressnuts on the frame. This allows the vista assembly to support the center of the top plate as there are no standoffs here.
Check the pictures and document provided, you'll get the idea quite easily.
Extra gear
I'm slowly adding accessories, for now :
- Universal cam mount (M3 hole)
- Insta360 GO (the 1st one) mount (M3 hole)
- Insta360GO 2 mount (M3 hole)
- GoPro Lite V2 mount (M3 hole)
- Insta SMO4K mount (M3 hole)
- DJI 20x20 cam mount
- Video antenna mount (cherry and Atomic, 4mm diameter hard tube)
I modified the mount of the mod-l which was M2 to make it M3 and slightly bigger and stronger. So this one provided here is not backward compatible.