
Educational clock
We calculate the final price from your selected file. You review and accept it before payment.
Saved on this device.
A fully printed clock model for educational purpose. Correct movement of clock hands due a clockwork of planetary gears.
- Rating
- 4.931 / 5
- Likes
- 332
- Downloads
- 1,131
- Makes
- 32
- Views
- 6,872
- Reviews
- 29
Updated at source:
Model information
- Source
- Printables
- Category
- Other 3D Objects for Learning
- License
- Creative Commons — Attribution — Noncommercial — Share Alike
This is an educational clock to teach the analogue clock.
Also interesting for lovers of clockworks or gearboxes ;)
Completely printed without supports, no need for glue or screws either!
Also fits onto the Prusa mini (:
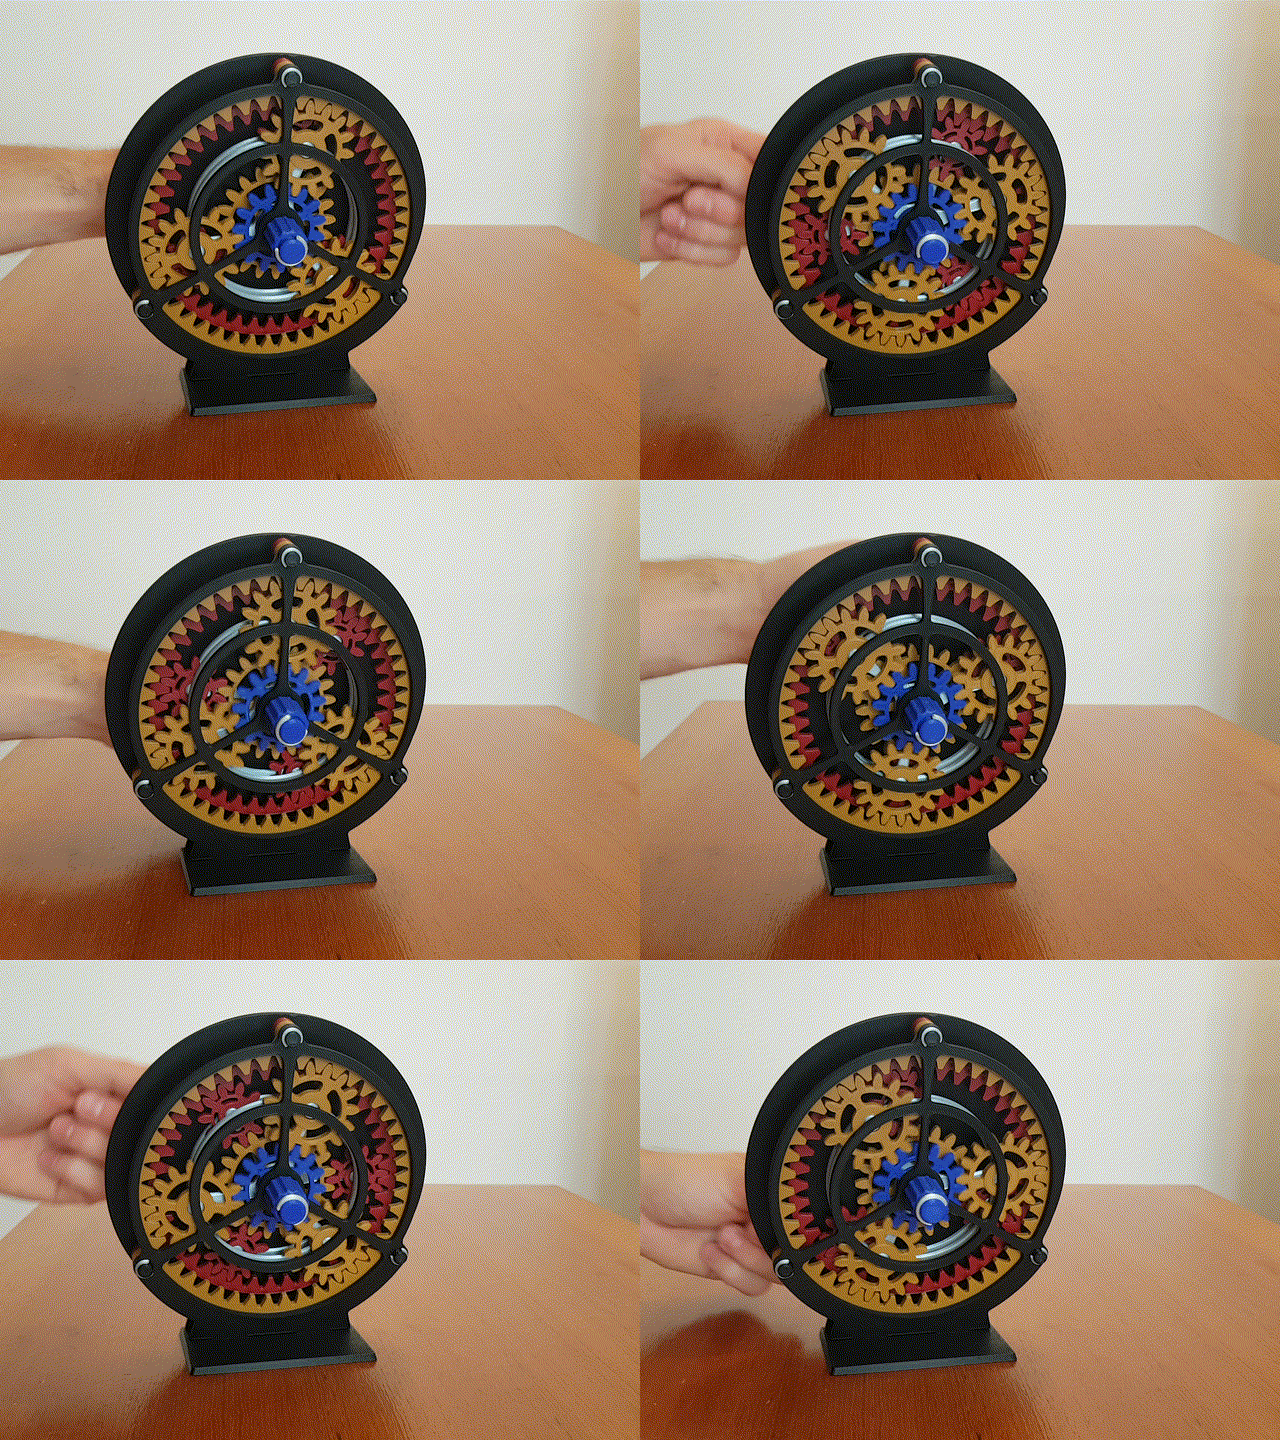
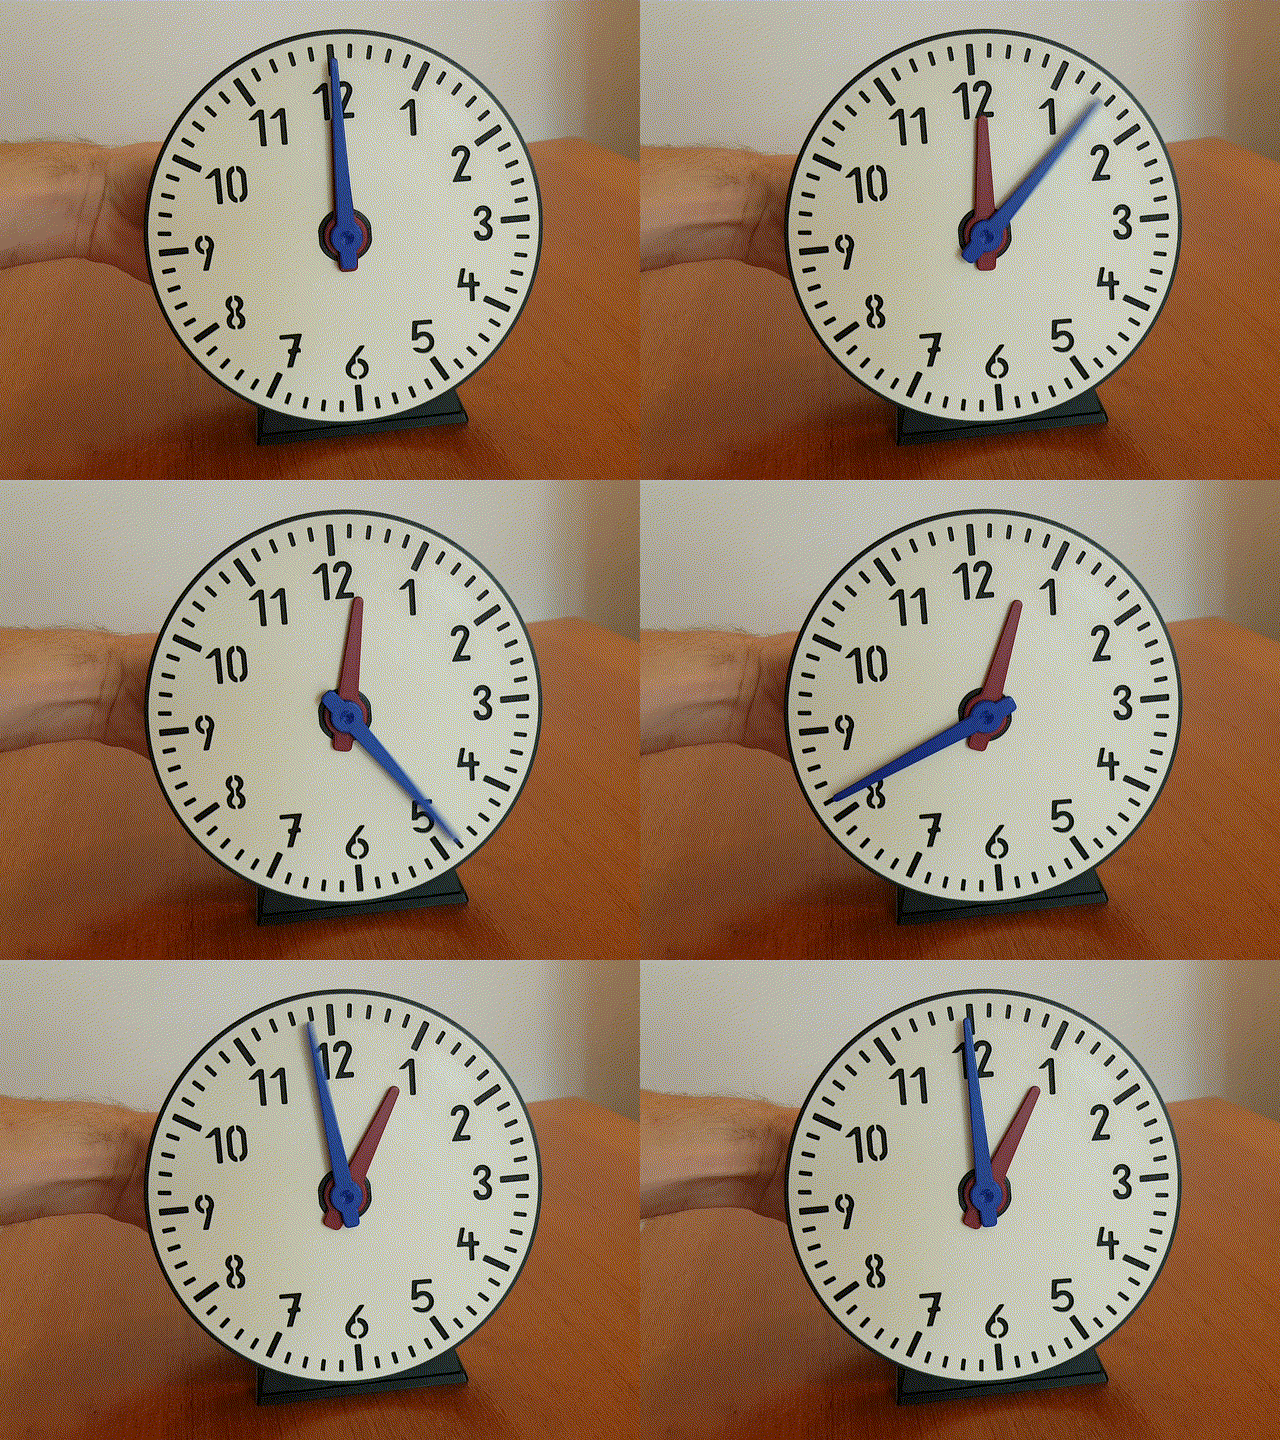
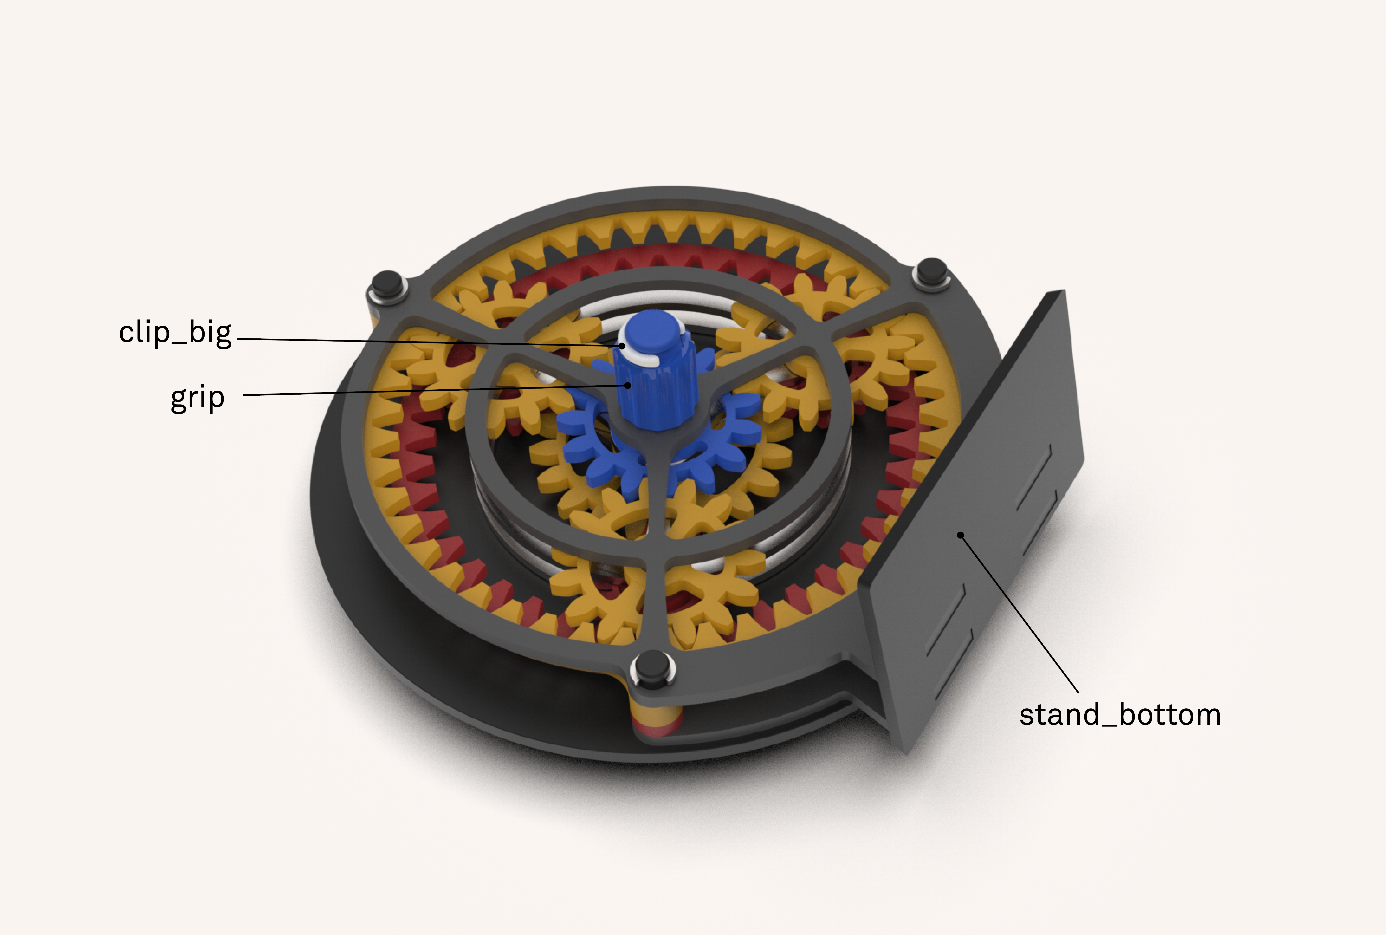
The hour- and minute hands are connected with a two-staged planetary geared clockwork on the back of the clock. Therefore they move in the correct ratio of 1:12. For a full turn of the minute hand, the hour hand will move one hour.
This can be done by directly moving the minute hand with a finger, or for a better view onto the clock face, by turning the grip on the backside of the clock.
Print specifications of the example in the pictures:
PLA, 0.2mm layer height
2 perimeters, 20% infill
about 20 hours total print time (normal print mode, with same colour separation as in the pictures, could be faster or slower with more or less filament colours)
Assembly:
- Print all parts
Amount of needed parts is in the notes of the files.
- Step 1:
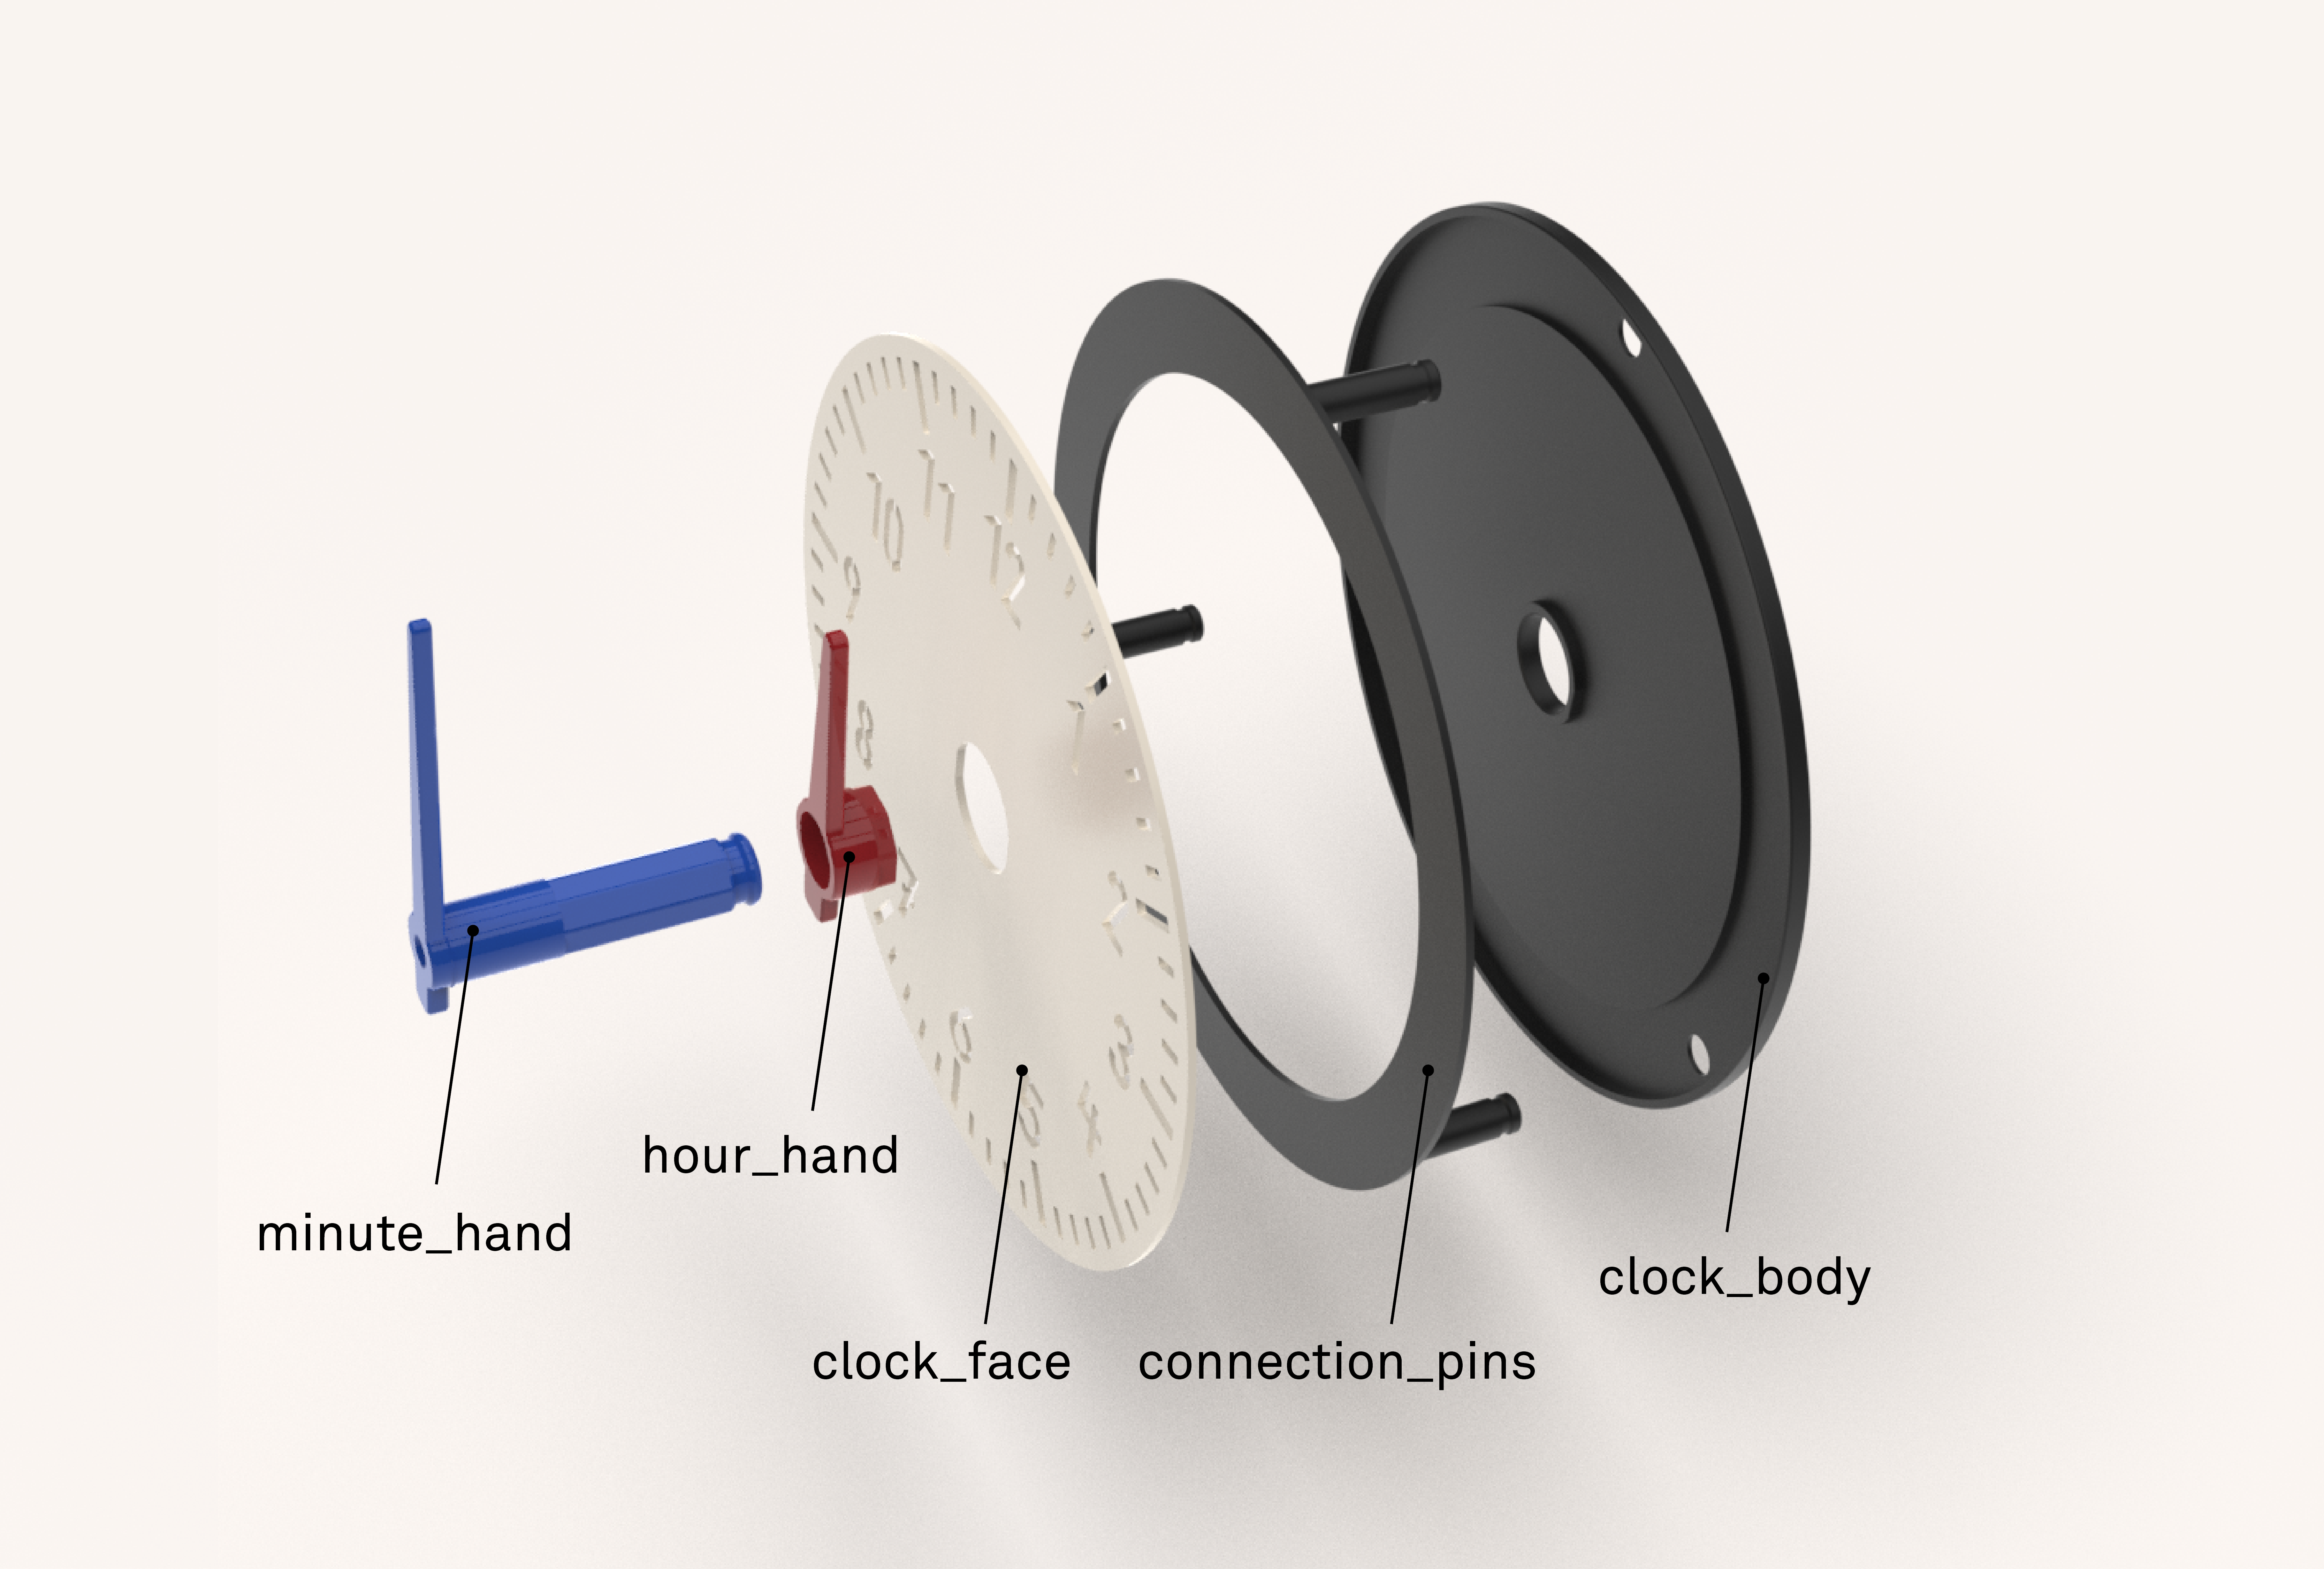
slide the connection pins through the holes of the clock_body and attach the clock_face.
make sure the “12” points towards the upward pin. Then slide the hour and minute hand through the middle hole and make sure both hands point towards “12”.
- Step 2:
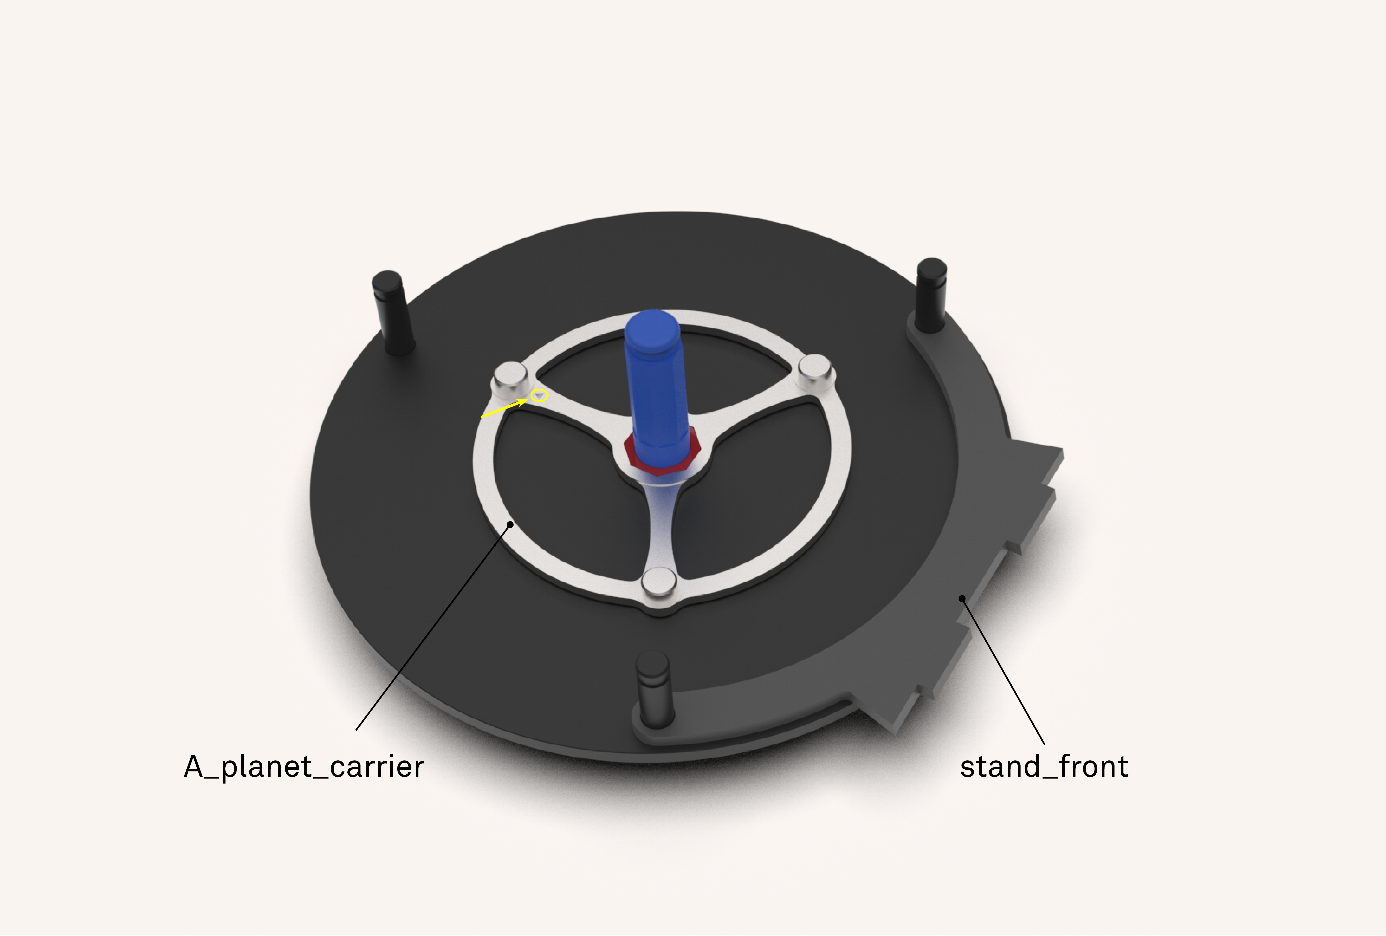
Place the partly assembled clock with the clock face onto the desk. Make sure that both hands still point towards “12”. Then attach the A_planet_carrier onto the hour_hand.
There is a little triangle engraved into the A_planet_carrier. All triangles of all parts must be installed pointing upwards toward “12”
- Step 3:
Install the A_gear_ring and the A_sun_gear, both with the triangle pointing upwards. After that install A_planet_gears.
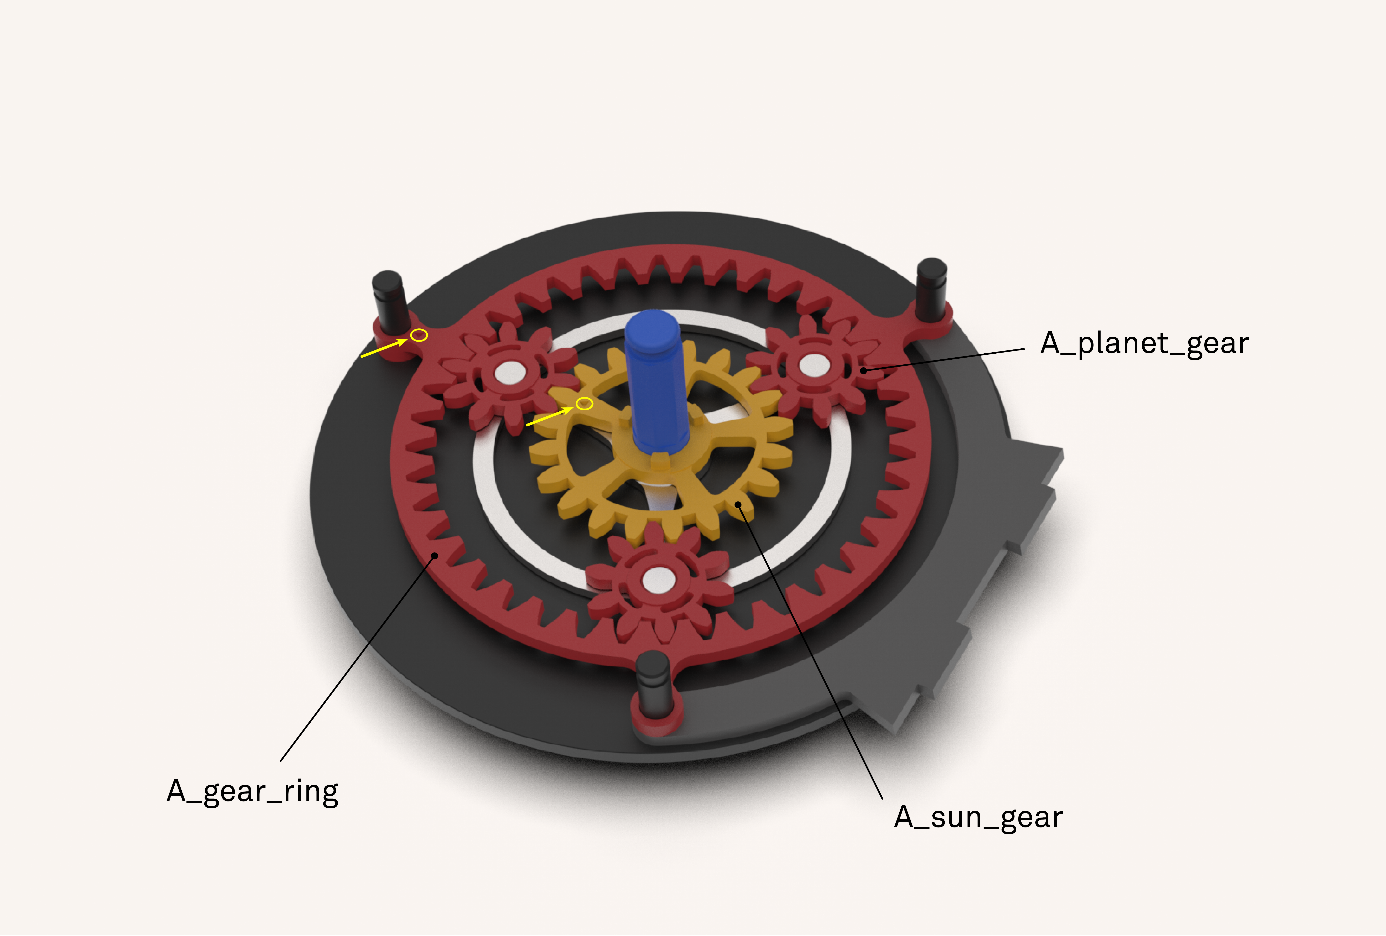
- Step 4:
Install the B_gear_gring and B_planet_carrier with the triangle pointing upwards.
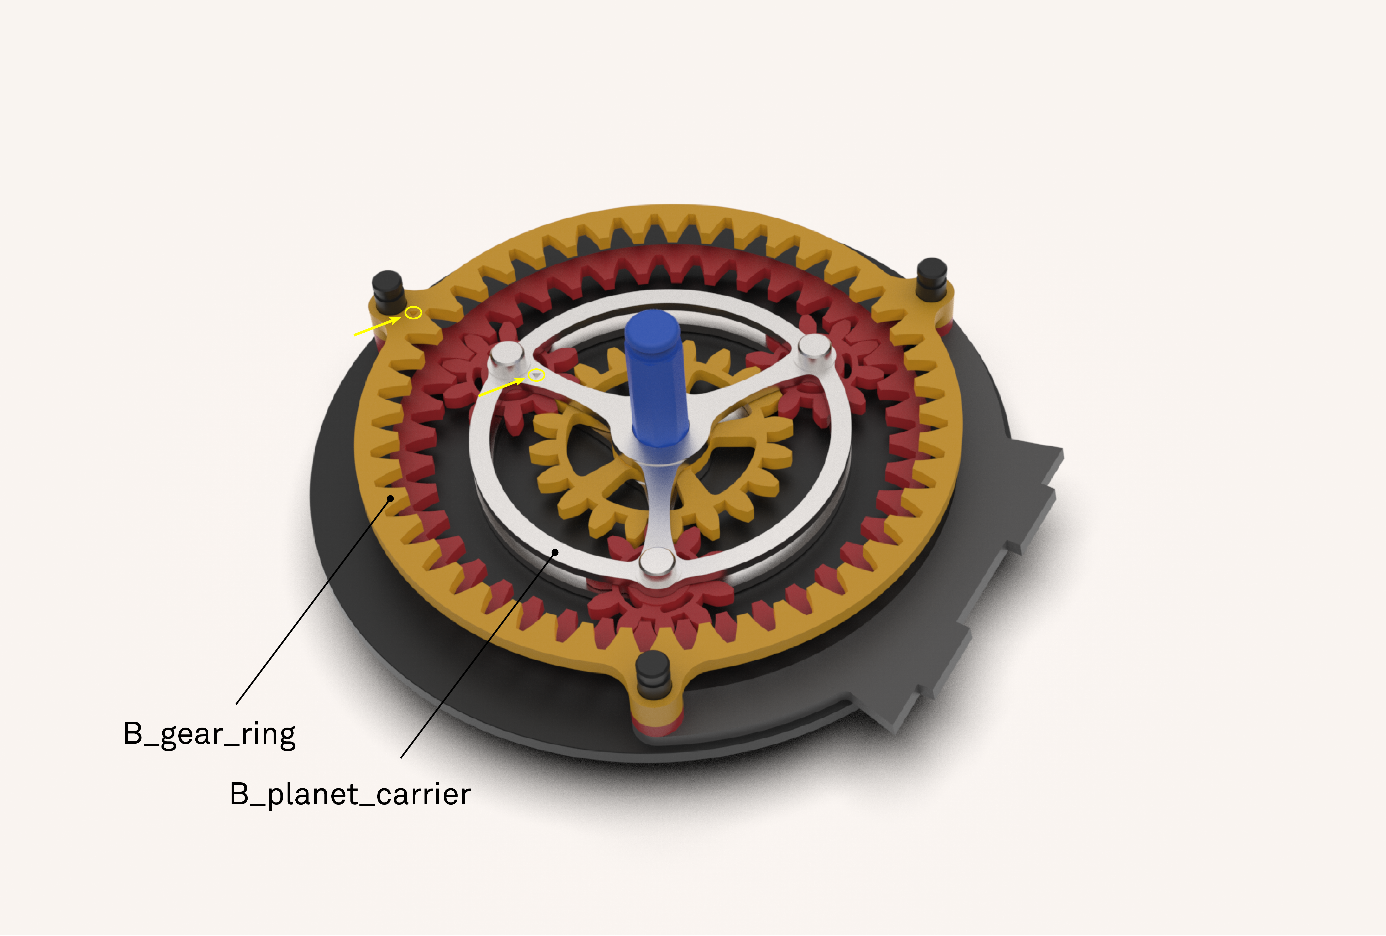
- Step 5
Place the B_sun_gear with the triangle pointing upwards. Then place the B_planet_gears.
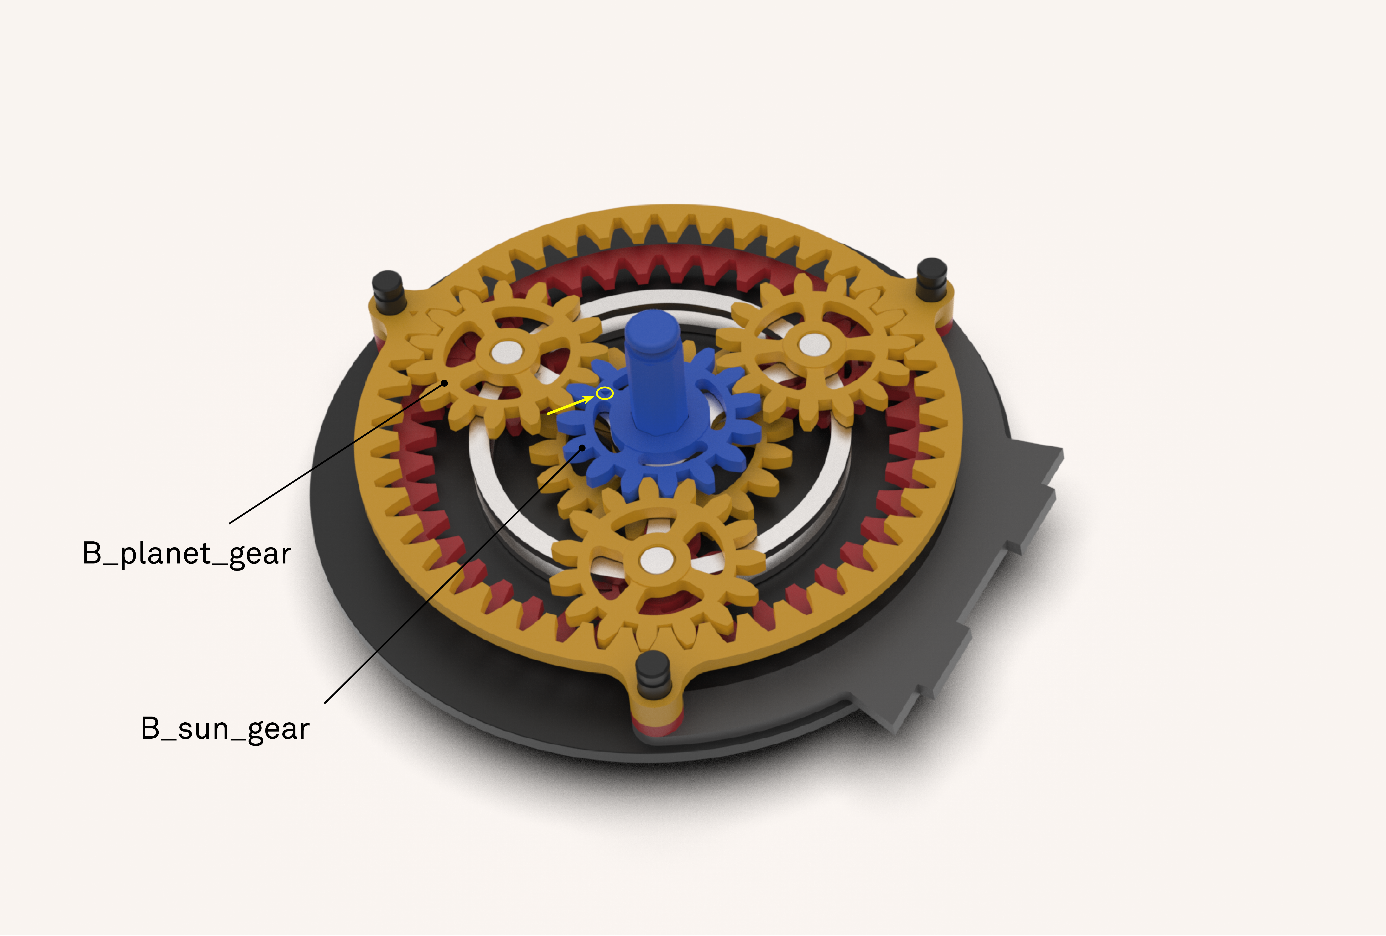
- Step 6
Slide the stand_back over the connection_pins and fix it with the small clips.
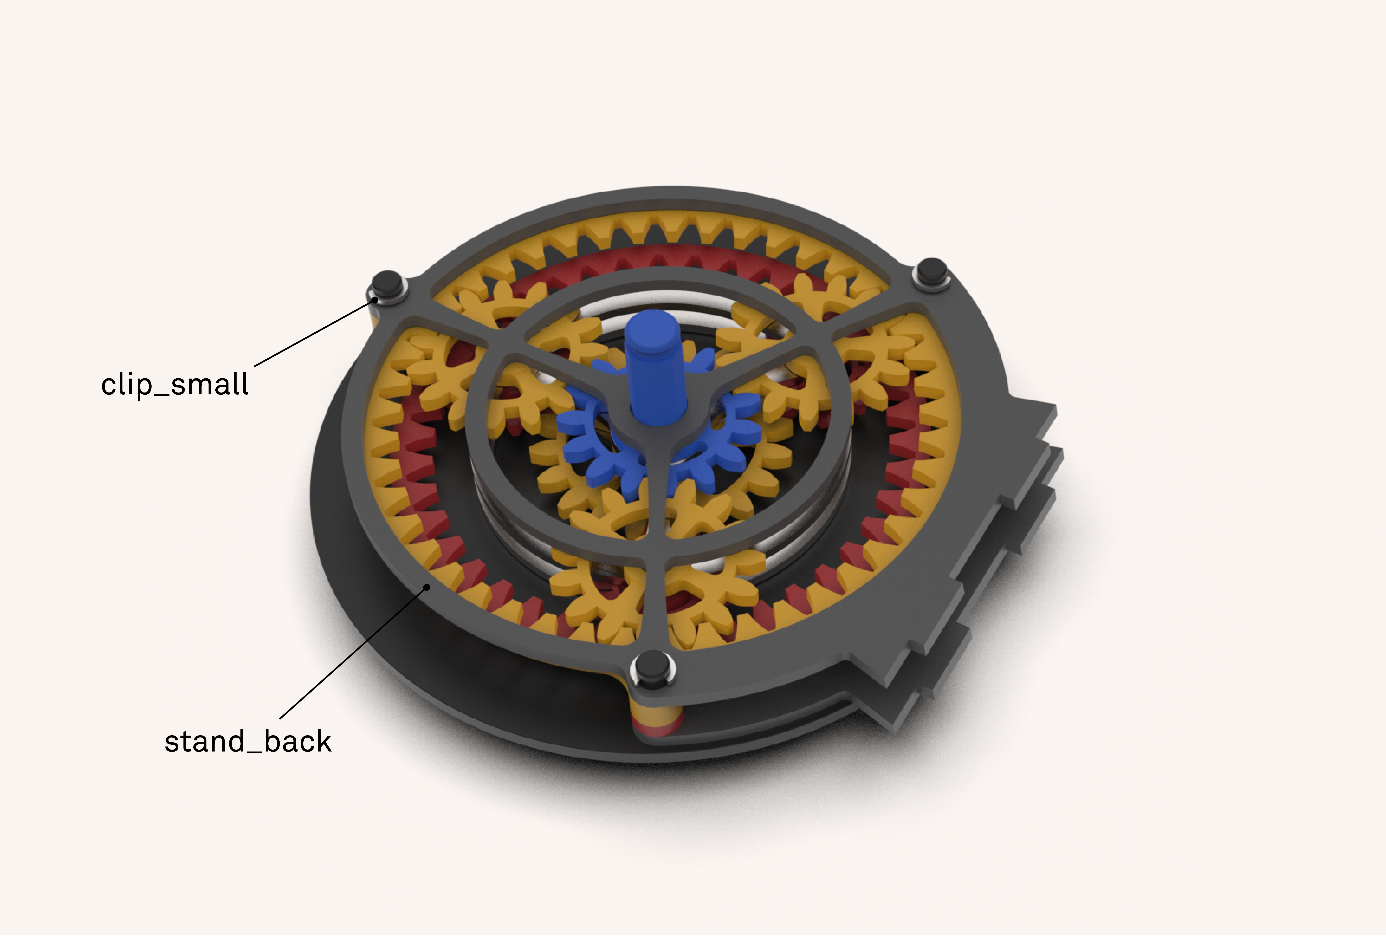
- Step 7
Install the grip and fix it with the big clip. Then attatch the stand_bottom
- Finished- have fun!