
Clamp Light Diffusion Filter
We calculate the final price from your selected file. You review and accept it before payment.
Saved on this device.
Model information
- Source
- Printables
- Category
- Office
- License
- Creative Commons — Public Domain
Introduction
A clamp light is one of the handiest home office or workspace light sources. The clamp on these lights allows you to mount these portable lights anywhere and put light where you need it. However, when illuminating areas for drawing, painting, or other artistic endeavors, the light emitted by the bulb in the clamp light is harsh and concentrated, casting annoying shadows. Diffusing material between the light source and the illuminated area softens the intense light. The diffusion material softens the light by breaking up the light rays and spreading them over a wider area. Diffusion material ranges from thin tracing paper to translucent fabrics.
I have several clamp lights in my air-brushing studio, emitting a soft diffused light that makes painting and air-brushing much easier. I created a diffusion panel by gluing a ring to some translucent white fabric. This panel is mounted to the clamp light by a simple system that holds the diffusion panel onto the end of the clamp light reflector. The mounting system removes easily when the clamp light's source (bulb) needs replacing.
Lights these Models Fit
The models in this release are designed specifically for a McMaster-Carr 1627K13 Portable Reflector Light (the specifications are in the Other Files section). However, I have found that several other manufacturers' lights, including those from the big box stores, with an 8-inch diameter reflector also work. The mounting system must surround the rim of the light reflector to secure the diffusion filter. There are a few millimeters of lee-way for the thickness and depth of the reflector rim, but it needs to be as close to 8 inches (203 mm) in diameter as possible.

The diffusion panel holder wraps around the reflector's rim to secure the diffusion panel in front of the light source. (Click to enlarge.)
Testing the Size of Your Light
To test if the diffusion holder will work with your clamp light, print the clamp ring on your 3D printer. If the reflector's rim fits into the recess of the clamp ring, everything else should work correctly. If the reflector is too large or too small, you must use the OpenSCAD file to create a set of diffusion holder pieces to fit your particular reflector size. See the instructions in the Measuring.pdf file and comments in the OpenSCAD file for details on measuring your light reflector and creating a set of custom parts.
Assembly
Assembling the holder is simple, requiring only the printed parts and six M2.5 12 mm long machine screws. Depending on the calibration of your particular 3D printer, the threads for the M2.5 machine screws may be very tight or very loose—test by fitting a screw into one of the threaded holes on the clamp ring before assembly. You may need to make adjustments before assembly if there are any issues. Even if the thread does not print perfectly, the machine screw will bite into the plastic with enough force to keep the holder together. There is not a lot of mechanical stress on the holder.
Once you have printed all the parts, the first step of assembly is to adhere the diffusion material to the filter ring. The easiest method to ensure a smooth surface is to tape the diffusion material to a flat surface. Tape one corner of the material to the flat surface and stretch the diffusion material slightly as you tape the remaining corners. Put some PVA glue on one side of the filter ring and place it glue-side down on the diffusion material. Putting a weight on the ring, such as a book, will ensure the glue properly adheres to the ring and the diffusion material.

Taping the diffusion material to a flat surface and slightly stretching the material creates a smooth surface for the diffusion panel eliminating shadows or patterns in the diffused light. (Click to enlarge.)
After allowing the glue to dry, remove any extra diffusion material with scissors, trimming as close to the filter ring as possible to ensure a correct fit into the filter holder.
A Note on Light Bulbs and Safety
I use LED bulbs in my lamps, which use less electricity and generate much less heat. After being on for hours, the reflectors on my lamps are merely warm to the touch. Remember that you are placing diffusion material near the light bulb. Using flammable materials such as tracing paper near a high heat source like an incandescent bulb is not wise.
Additionally, I printed my diffusion holders with PLA, which will deform at temperatures well below those generated by a typical 100W incandescent bulb. If you must use a high-wattage bulb that produces a lot of heat, PETG, ABS, or ASA may be a better choice of printing material.
Be aware that YOU are responsible for choosing the proper printing materials, light source, and diffusion material and following all safety precautions.
Assembling the Holder

Click to Enlarge.
- Remove the light source (bulb) from the lamp socket.
- Remove the reflector from the lamp socket and clamp assembly. In most cases, the reflector screws onto the socket and is easily removed.
- Place the clamp ring over the reflector with the recess facing the large end of the reflector. Reattach the reflector to the lamp socket and clamp assembly. If assembled correctly, the reflector's rim should fit easily into the recess of the clamp ring.
- Replace the light source (bulb) in the lamp socket.
- Put the filter ring with the diffusion material into the recess on the filter bottom holder.
- Place the filter holder top over the filter holder bottom, covering the recess and holding the filter ring in place. Align the holes in the filter top with the holes in the filter holder bottom.
- Place a M2.5-12 mm screw through a hole in the filter holder's top and bottom.
- Place the protruding M2.5-12 mm screw threads into a threaded hole on the clamp ring and screw into place. Do not tighten entirely; some slack will be necessary for later assembly.
- Repeat steps 7 and 8 for the screw hole on the opposite side of the rim.
- Repeat steps 7 and 8 for the remaining four sets of screws.
- Tighten all the screws installed in the previous steps.
When performing steps 7 through 9, clamping the pieces around the holder ring with some small hand clamps to hold them in place makes installing the screws easier.
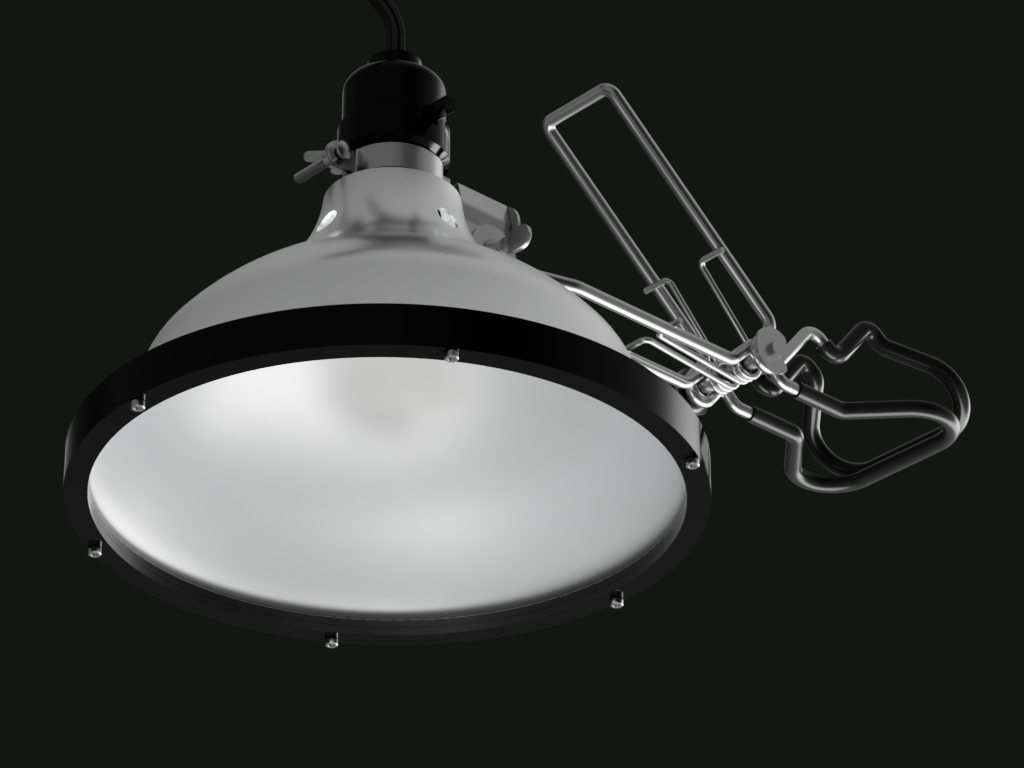
Final assembly of the diffusion filter holder.