
Fiamma F45i Winch slot / how-to 3D scan
We calculate the final price from your selected file. You review and accept it before payment.
Saved on this device.

Replacement Winch Slot (98655-134) for a Fiamma F45 awning / how-to 3d-scan and then reconstruct a geometry
- Rating
- 0 / 5
- Likes
- 13
- Downloads
- 72
- Makes
- 0
- Views
- 714
- Reviews
- 0
Updated at source:
Model information
- Source
- Printables
- Category
- Mechanical Parts
- License
- Creative Commons — Attribution
At some point during the last vacations, I did not crank back in the awning, I cranked off the winch slot to crank it back in.
Awning? Winch Slot? What are we talking about? A picture says more than 1000 Words they say!
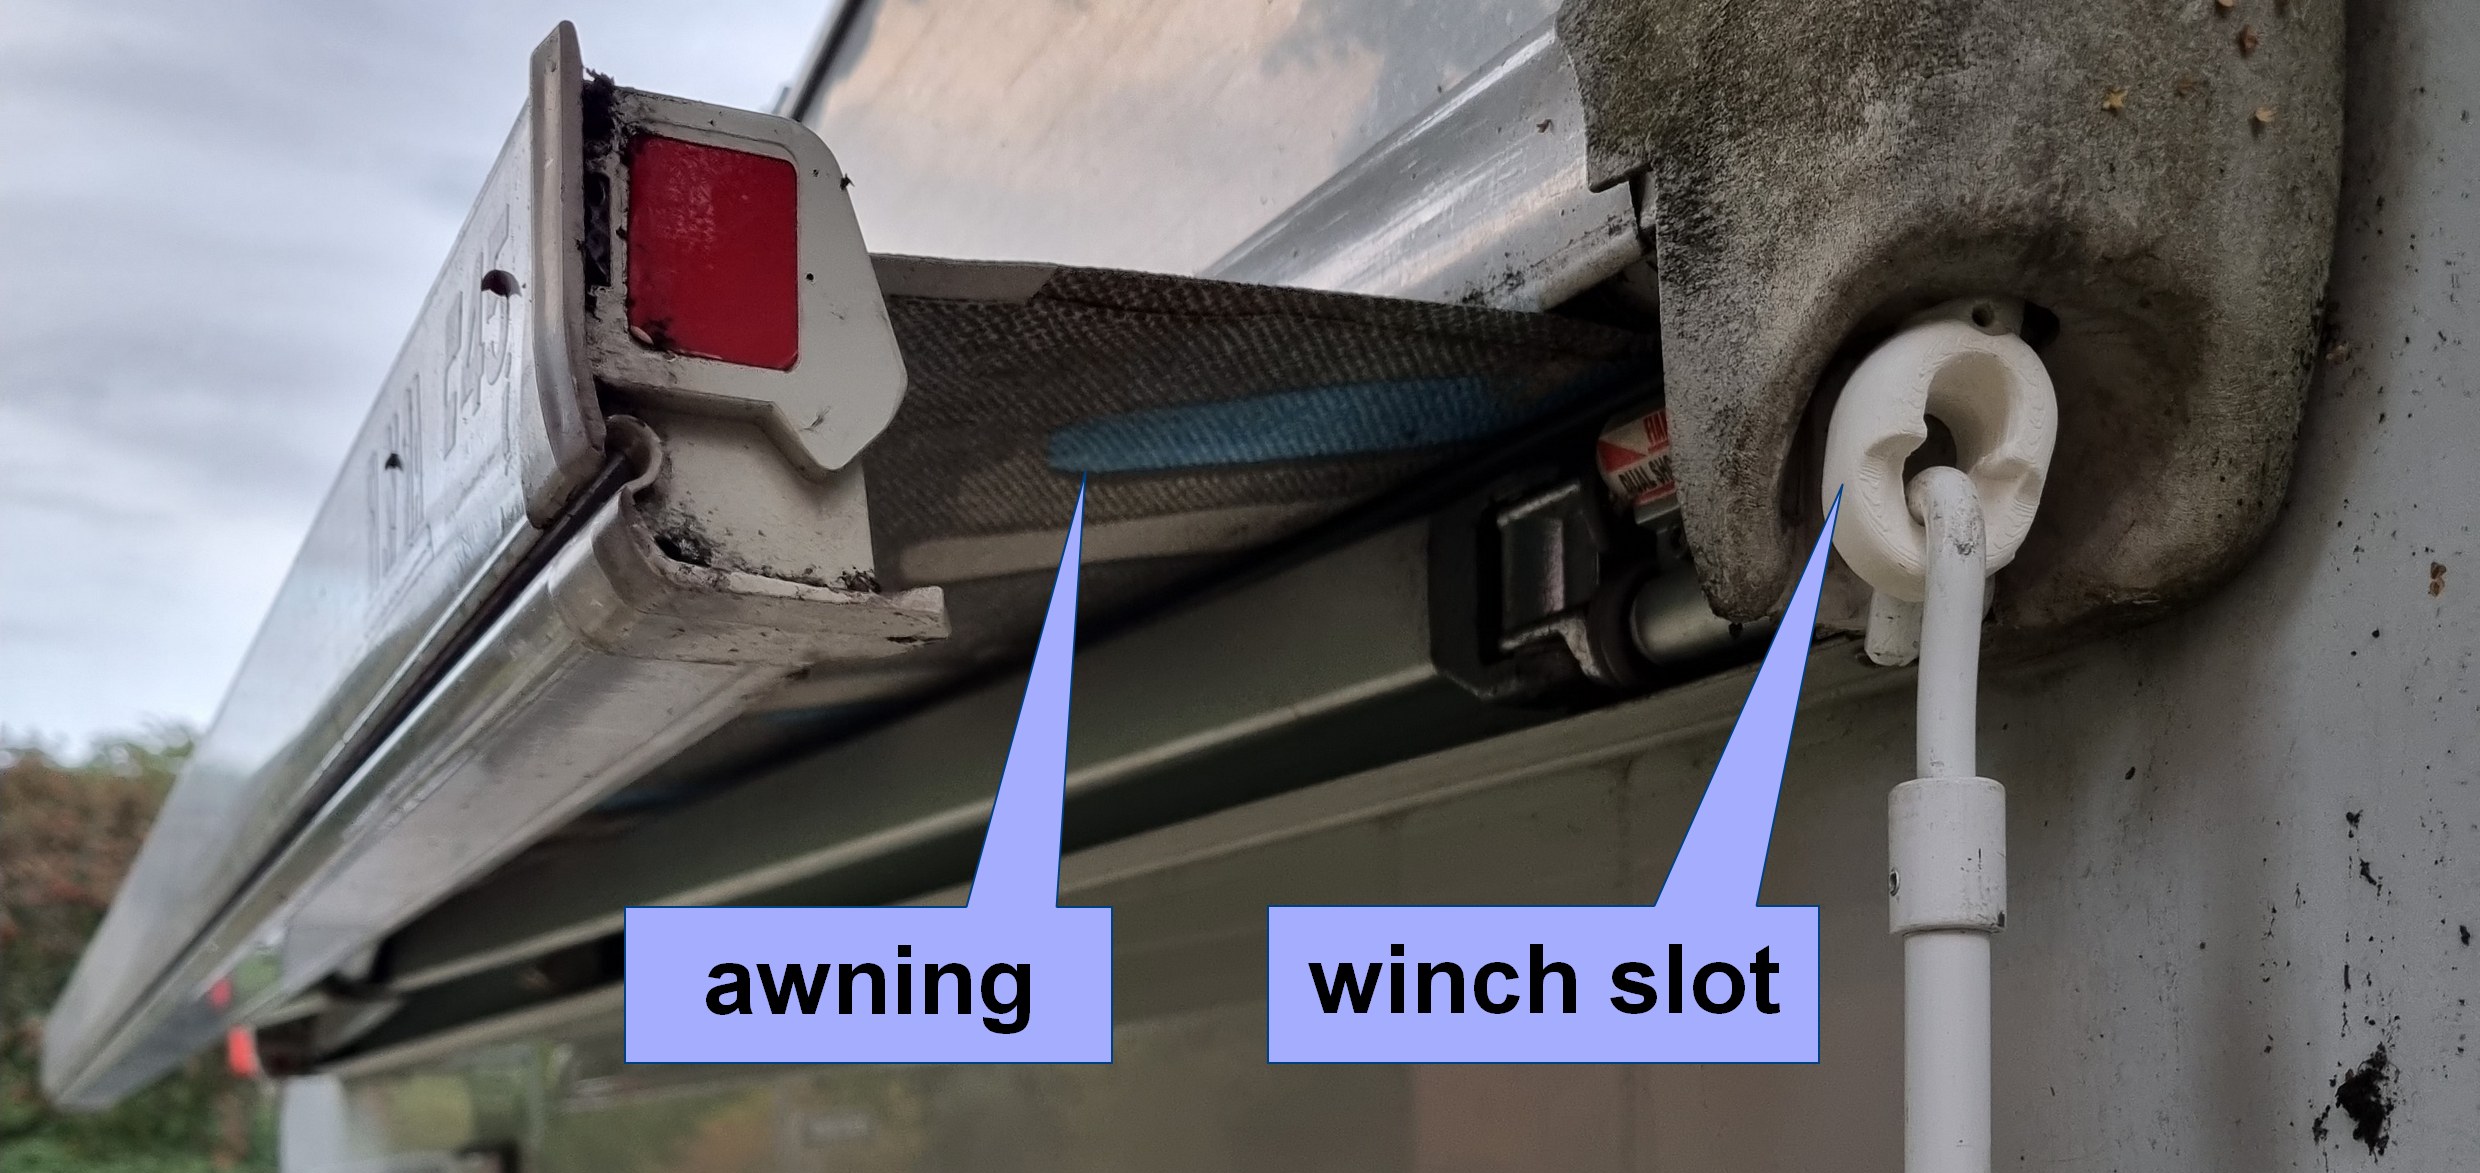
If you are just interested in the part itself, just grab the STL file and print it. There are recommendations for printing below.
My Motivation:
The part broke and so I started my journey to rebuild this part which eventually led me to 3D scanning.

I took of by taking some clear pictures of the part and making some measurements. And some guesses! Luckily the original part had some round numbers for the features I measured. This gave me confidence to round the estimated dimensions to the nearest number. It is indeed a part that can be drawn more or less easily in CAD (I did it in Onshape, see link below). However, it has more geometries than what you might start with (especially the thick part) that do not immediately serve an obvious purpose. After a long look I decided that the thick part of this part is to prevent the part from collapsing when torque is applied. After looking at the part for so long, I was hooked on doing something new for myself and recreating the part as well as possible: 3D scanning and repair in CAD.
3D Scan:

I used KIRIEngine to create a 3D scanned model of the broken part. KIRIEngine is a Web/App based service that allows you to create a 3D model from a real world object by uploading 70 pictures from multiple angles. I can really recommend trying it, at this moment you can export up to three 3D scan models per week for free. I facilitated the computation of the model by scattering the original part with water colour. This gives a random pattern on the surface and helps KIRIEngine to create the Model. The water colour obvioulsy washes of afterwards.
I glued the broken part to a pen to hold and rotate it and took the pictures. In some pictures you can see the red scatter pattern and part of the pen. In KIRIEngine I used the feature called “AI Object Masking” which I can recommend.
3D scan cleanup:
With the file exported from KIRIEngine (in STL) I had to do some cleanup: Remove the broken geometry of the part and the pen. Also: clean up the mesh (close the holes due to the pen only being partially reconstructed).
I decided to use Meshlab because it is an open source software that allows you to do just that (and much more). Since it is not intuitive, here is what I did:
- Orient the part so that all the faces you want to get rid of are in one region. Then use the "Select faces in a rectangular region" tool to select them and press delete.

- Close the hole(s) using the filter from "Filters > Remeshing, Simplification and Reconstruction > Close Holes". You may need to increase the "Max size to be closed" until your hole is fixed. Save the file with a new filename.

- If you are interested in reducing the number of faces due to file size reasons, you can do so with "Filters > Remeshing, Simplification and Reconstruction > Simplification: Quadric Edge Collapse Decimation”. This, when overdone, gives you some really interesting low poly models.

One sidenote: be careful with the save button. It immediately overwrites the “source files”. Make a backup of them before working with Meshlab.
CAD reconstruction:

As mentioned above, I had already drawn this part in Onshape. So I reused it as the basis for the reconstruction of the broken geometry. However, as the broken geometry consists of cylinders and an extruded hexagon, this could easily be done in OpenSCAD. To merge the scan with a reconstruction of the broken geometry, I ended up using OpenSCAD. I strongly recommend that you take a look at the attached OpenSCAD file to see what I did in detail. Especially if you are interested in using a 3D scan with KIRIEngine, as there is a magic scaling factor that I would not have guessed if I had not written down the dimensions and modelled the part in the first place. In short, here is what I did:
- rotated and scaled the scan to fit both size and coordinate system
- imported a CAD-drawn part with the hexagon socket. This is what I already had from the Onshape part. I could have done this in OpenSCAD as well (the basic code is at the bottom of the file).
Printing:
I recommend that you print the reconstruction lying on its side, as oriented in the scan+reconstruct STL file. This may require some support, but in my opinion, it will be the optimal orientation for the application with respect to the layers of the print.
As this is going to be a mechanically stressed part, I would recommend printing it with 100% infill. Even if your awning runs smoothly (which mine certainly did not), you may want to consider the increased torque when running into the end stop of the awning when choosing your infill.
Attached are two files for printing:
- Winch slot 3D scan with remodeled attachment point
- And a remodeled winch slot from the measurements. Onshape link here!
You will also find the above mentioned OpenSCAD file with comments and the necessary files to recreate the final STL file, so you can play around with the CAD reconstruction and the base files.
The part it replaces goes by the designation Fiamma winch slot with the number 98655-134.
It is compatible with several awnings from the F45i/Ti/S and F65S series.