
LowRider 3 CNC - table extenders to use metal struts with LR3 table - endstop/tensioner supports - v1.1
We calculate the final price from your selected file. You review and accept it before payment.
Saved on this device.

New version modified from original to provide 10mm worth of adjustability on accommodating length of LR3 gantry. v1.1
- Rating
- 0 / 5
- Likes
- 25
- Downloads
- 108
- Makes
- 0
- Views
- 1,555
- Reviews
- 0
Updated at source:
Model information
- Source
- Printables
- Category
- Tools
- License
- Creative Commons — Attribution — Noncommercial
NOTE: In September, 2023, a fellow V1E maker ( @steved on the V1E forum ) needed a little bit of adjustability on the location of the right-side belt-tensioner+endstop mounts in his metal-strut-based LowRider, so I made this v1.1 remix of the original design, which provides 10mm worth of adjustability. If your LR3 X gantry is a bit too long (not more than 10mm too long), you can use this new v1.1 version. The only changed parts are the two right-side mounts ("LR3 Tensioner Extender Front RIGHT" and “LR3 Tensioner Extender Rear RIGHT”). To go back to the original design, click here.
NOTE: As of Sept. 19, 2023, there is not yet a "WOOD INSERTS EDITION" of this v1.1 design. If one gets made, I will aim to link to it from here.
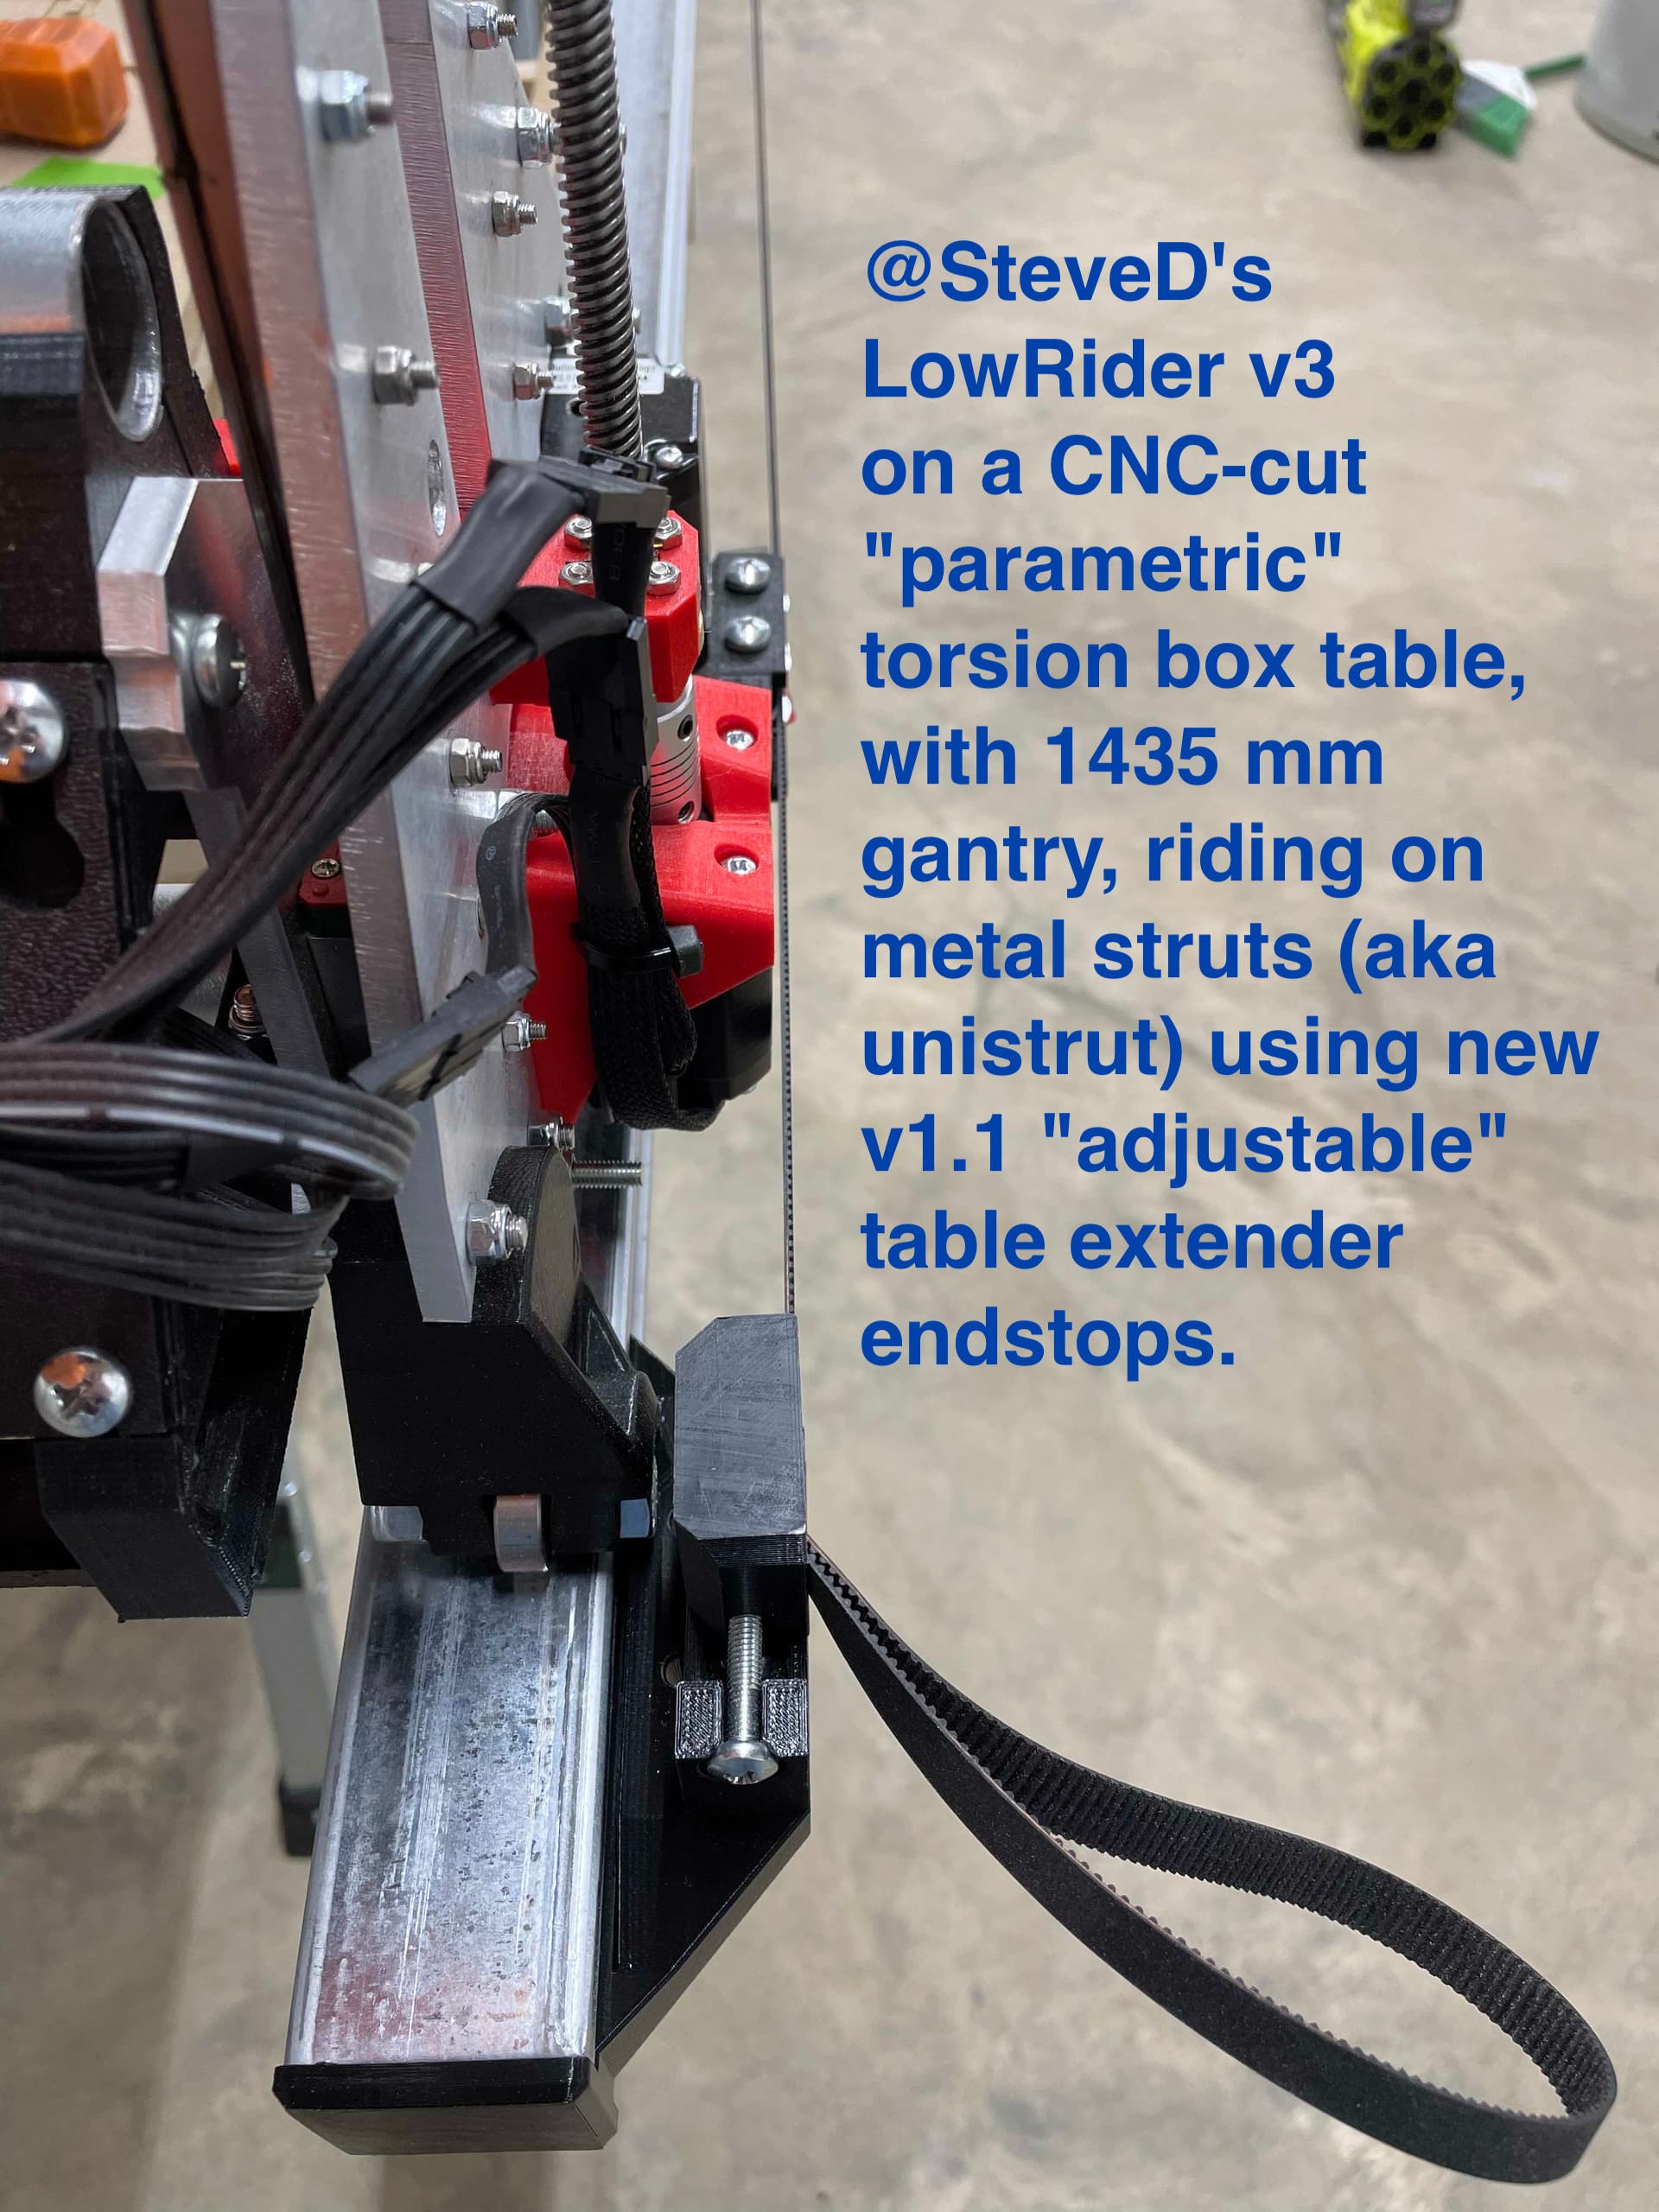
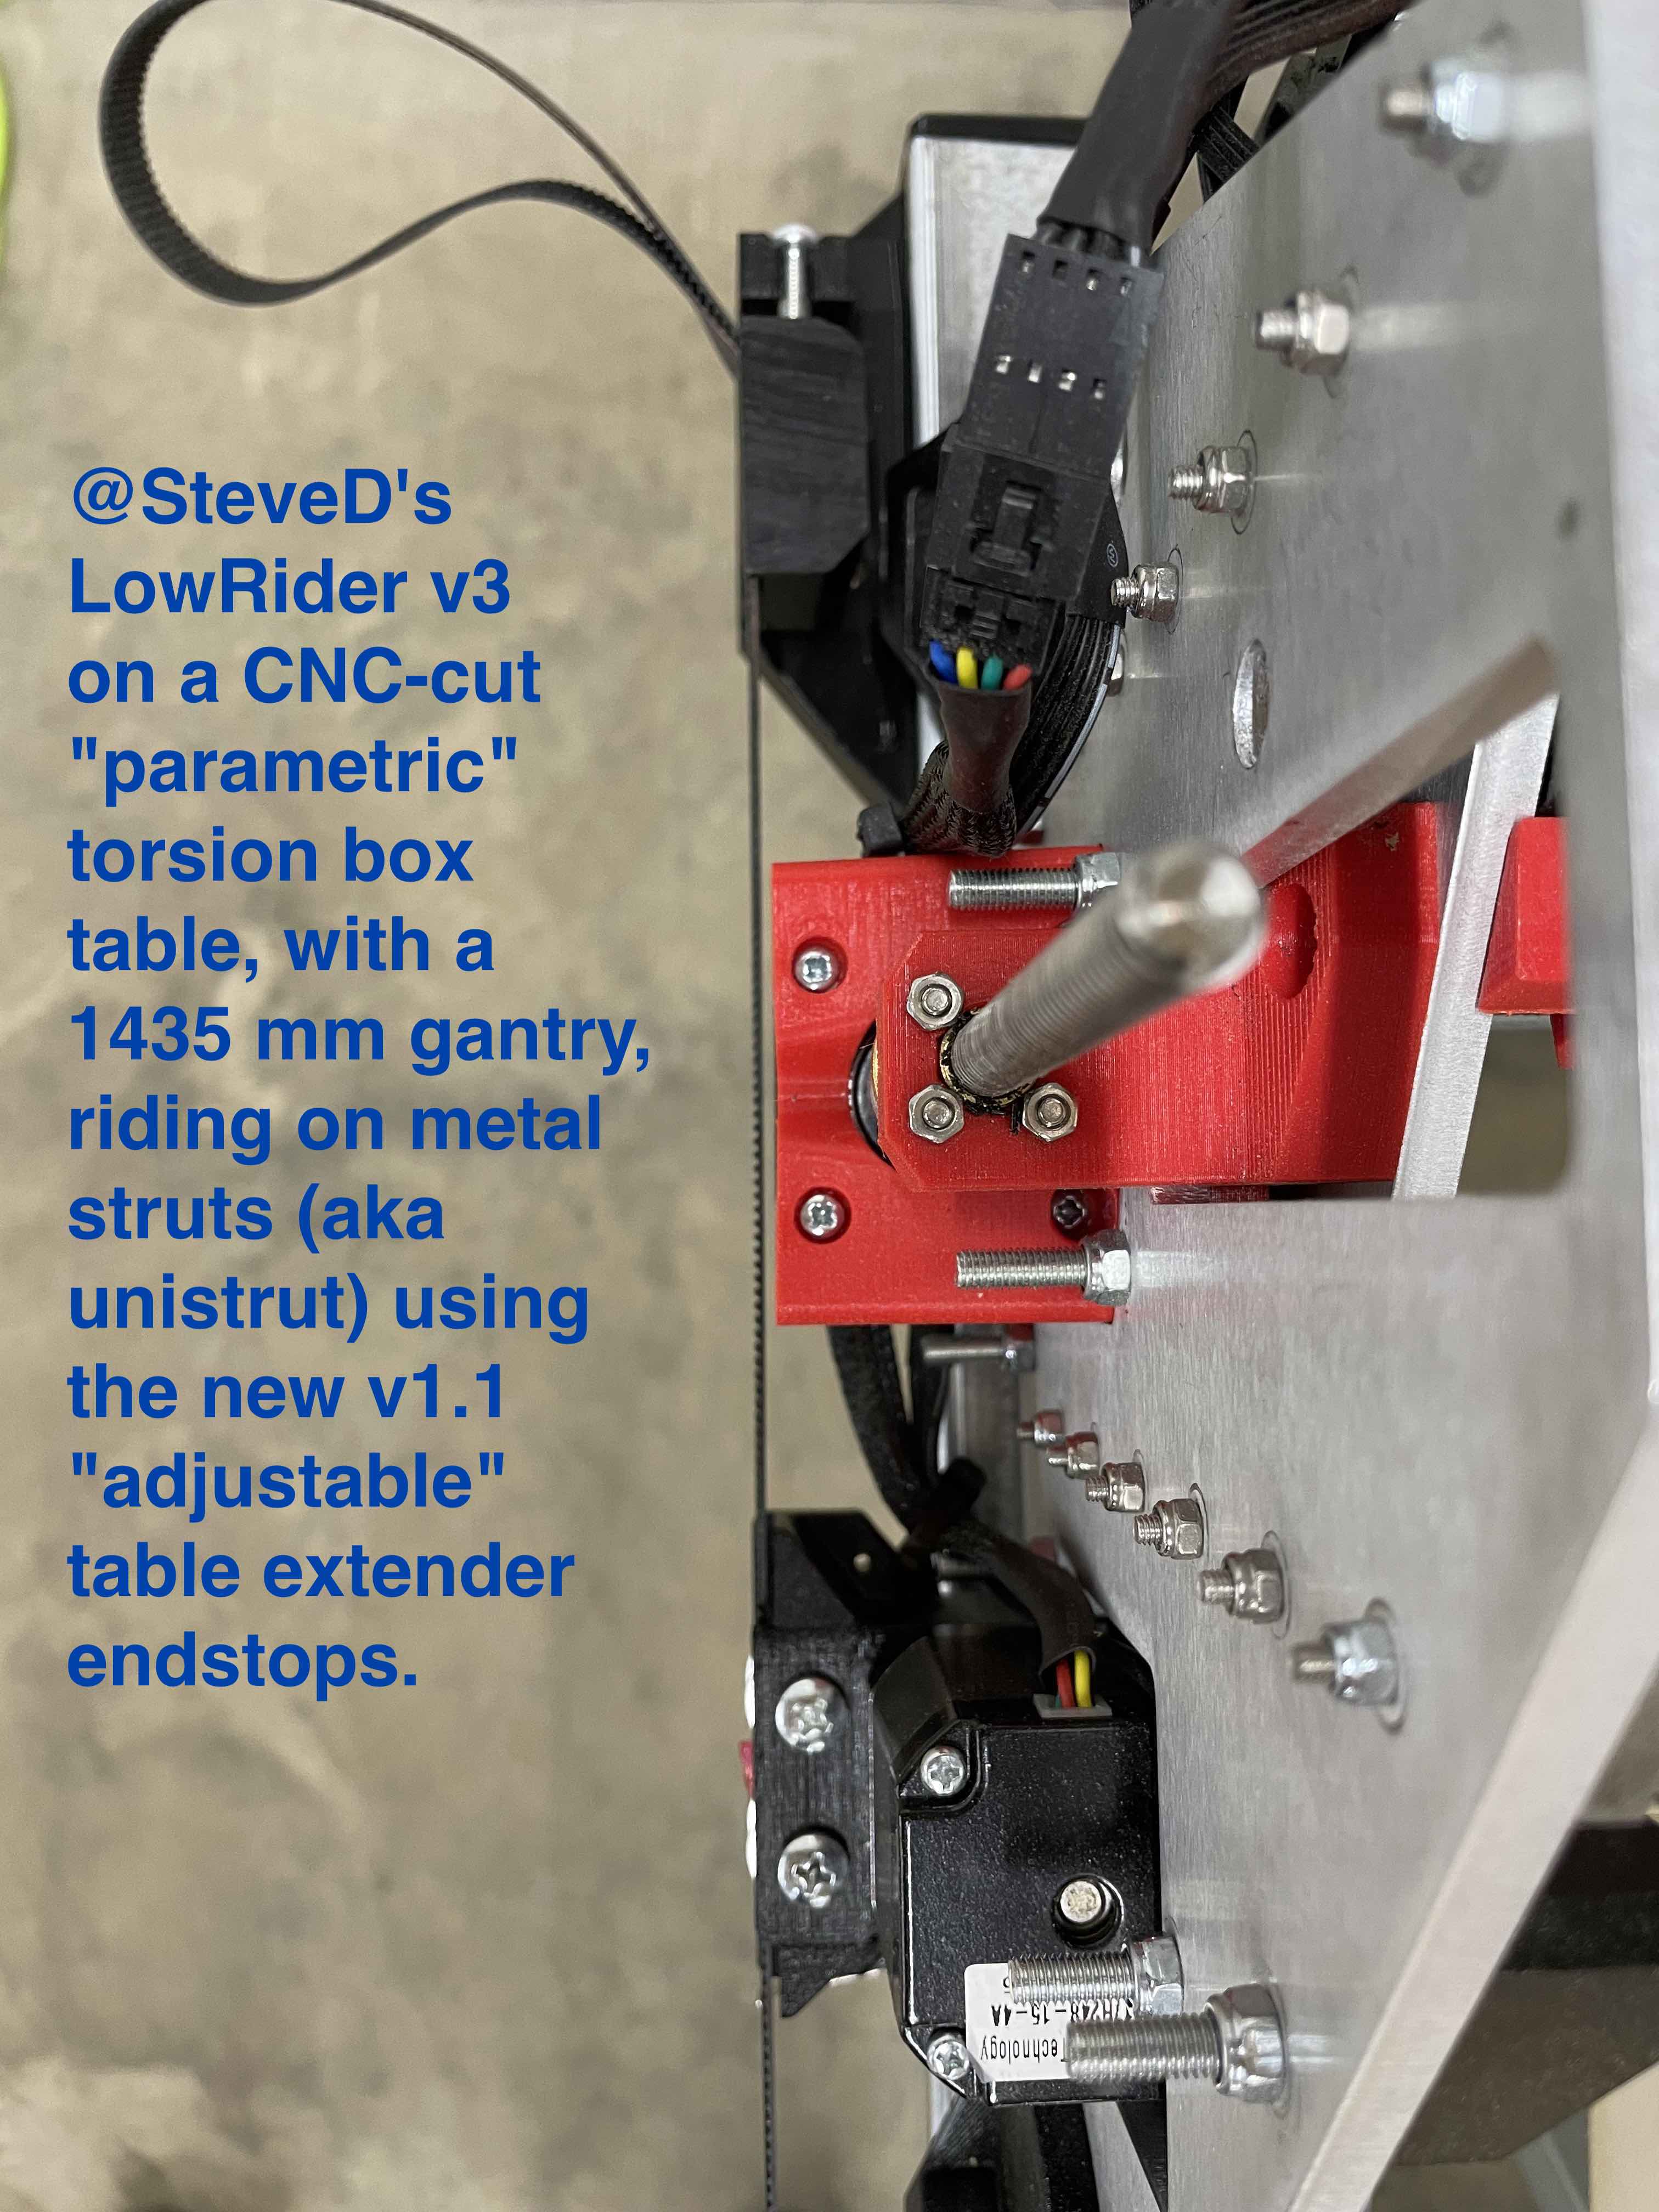
I upgraded my LowRider v2 to LowRider v3. Normally this means a wider table is needed if you want to maintain the same cutting area. However, if you have metal struts on your LowRider 2 table, then you can add these “end-caps” I designed in order to widen your table's “reach” and thus use your existing table without widening it. With these extenders I can still cut 49" x 97" MDF sheets.
The original V1 Engineering LowRider 3 tensioner bases and tensioner mounts attach directly to these.
Caveat:
- The original V1 Engineering LowRider 3 tensioner bases have holes intended for slightly thinner screws, and I drilled them out to accept M5.
Notes:
- As of May 3, 2024: Two folders of this design are provided:
- Regular for Y rail on the right (stock LR3)
- Mirrored for Y rail on the left (mod'd LR3)
- There are nut capture slots on the bottom sides of each, which accept two M5 nuts per corner, and then you can attach the tensioner bases to these.
My LowRider v3 upgrade process is detailed on the V1 Engineering forum here: https://forum.v1engineering.com/t/on-upgrade-path-lr2-lr3-clarksburg-wv-usa/32920/
You want these strong, not so much to avoid breaking but primarily to avoid flexing. I printed these with 1.8mm thick walls, which is the equivalent of 4 ½ perimeter walls —if using a 0.4 nozzle at normal settings. I do only 3 walls and have it be as thick as 4.5 walls, because I print with walls that are 0.6mm thick instead of 0.4mm thick. Stock 0.4 nozzles can handle this if your extruder can keep up. I have two printers with 0.6 nozzles and several others with 0.4 nozzles. I run them all at 0.3mm layer height and 0.6mm wall thickness.
Change log:
- Friday, May 3, 2024: Added non-mirrored set, and arranged all files into two folders:
- Regular for Y rail on the right (stock LR3)
- Mirrored for Y rail on the left (mod'd LR3)
- Tuesday, September 19, 2023 - re-uploaded corrected versions of the new “Front LEFT” and “Rear LEFT” extenders, as they were wrong. Kudos to Steve (@steved on V1E forum) for the heads-up and collaboration on fix. I confirmed the issue and fixed it.
- Monday, September 18, 2023 - initial upload.
My PayPal tip jar: https://paypal.me/design8studio
Various LowRider 3 CNC remixes:
View all my models and remixes on Printables:
*Amazon product links are affiliate links.