1 / 1
Mantis Arm
Order a print of this model
We calculate the final price from your selected file. You review and accept it before payment.
Estimated printing price per file
€0.90 – €1.10 net (excluding VAT)
For file: post mount vertical_0.4n_0.2mm_PLA_MINI_1h8m.gcode
This is an estimate for one file. You’ll confirm the exact price before ordering.
File and estimate settings
File used for this estimate
Average indicative estimate: €1.00 excluding VAT (range midpoint).
- Weight reported by the author
- 10 g
- Print time reported by the author
- 1.12 hr
- Source material
- PLA
- Estimate material
- PLA
- Estimate printer
- Bambu Lab P1S - 0.4 nozzle
- Estimate process
- 0.20mm Standard
Indicative estimate for the selected file only, based on the author’s weight and print time. File variants are not added together. The final price is calculated after file analysis.
Saved on this device.

Remix of my Mantis Clamp that adds a post mount and 3-point dial articulated arm. Still (mostly) Print-In-Place!
- Rating
- 4.667 / 5
- Likes
- 101
- Downloads
- 251
- Makes
- 3
- Views
- 1,979
- Reviews
- 3
Updated at source:
Model information
- Source
- Printables
- Category
- Tools
- License
- Creative Commons — Attribution — Noncommercial — Share Alike
Still (mostly) Print-In-Place!
Print Instructions:
- Supports required under for the ‘post’ portion of the clamp as well as the Qube500 mount points & post-hole. I recommend organic supports for this.
- I've place some special voids inside the post to ensure additional perimeters are there for strength. If that isn't enough strength for you, you can also insert a M3x20 screw into the hold at the bottom of the post.
Post-Print Instructions:
- Remove the supports.
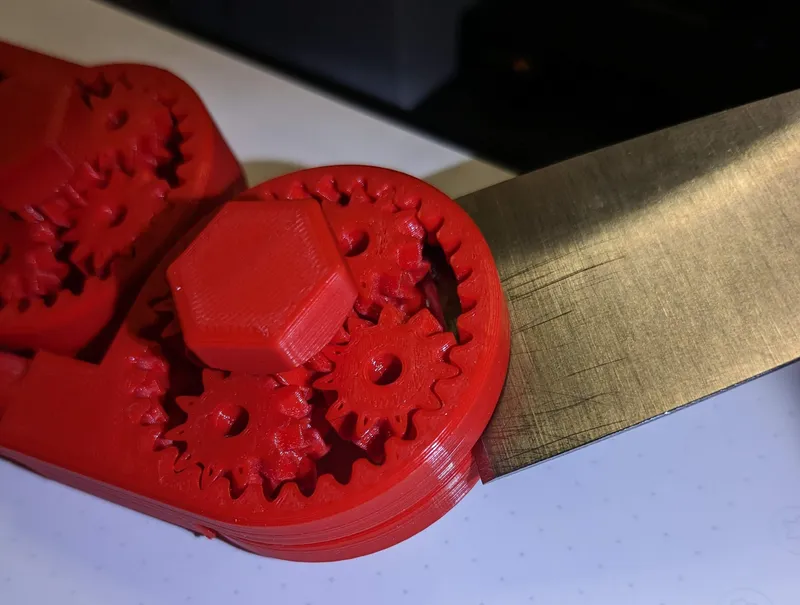
- Slid a thin metal piece (knife/scraper tool) into the groove between the outer ring of the planetary gears connected to the ‘post’. Slide the knife along the joint to separate the two rings as much as possible.
- Rotate the dial clockwise to move the post away from the clamp gears
- Rinse and Repeat above steps 2 & 3 for the remaining planetary gear systems
- While slowly inserting the post into the post-hole, twist the parts around the post's axis of rotation so that the two parts work each other smooth..
- Enjoy!