
Over-engineered HomePod Mini wall mount (EU Plug)
We calculate the final price from your selected file. You review and accept it before payment.
Saved on this device.

This is a compact, sturdy and absurdely over-engineered Apple HomePod Mini wall mount. It is meant for EU plugs only.
- Rating
- 5 / 5
- Likes
- 8
- Downloads
- 71
- Makes
- 2
- Views
- 1,309
- Reviews
- 2
Updated at source:
Model information
- Source
- Printables
- Category
- Other House Equipment
- License
- Creative Commons — Attribution — Noncommercial — Share Alike
Context
After searching for a good HomePod Mini wall mount, I always encountered the same issues. either no cable management, or hanging below the socket, and most important with all the weight on the tiny Apple charger.
Why yet another wall mount?
With all the real estate EU plugs provide, it would be a shame to make all the weight of a HomePod rest on the charger. In that spirit, I designed a sturdy, compact, and very over-engineered HomePod Mini wall mount where the socket itself supports the weight of the structure and speaker. It is quite sturdy, holds firmly in place, and is easy to plug or unplug.
How it works
The wall mount is printed in two parts and does not require any glue, screws or tools to install. Here is how it works.
The Core holds the Apple charger, most of the wiring, and had two protrusions that will fit the EU socket. Those protrusions will make contact with the socket, and transfer the weight to the wall. They also remove the wiggle room that most wall holders have when they rely only on the charger pins to keep everything together.
The Shell will slide around the Core and lock the cable in place. Due to the tight tolerances of the assembly, the pressure from cables around will keep it in place. It has two rails in which the cable holder arms from the Core will slide. The Shell also has the platform to hold the HomePod Mini.
How to assemble
Step 1
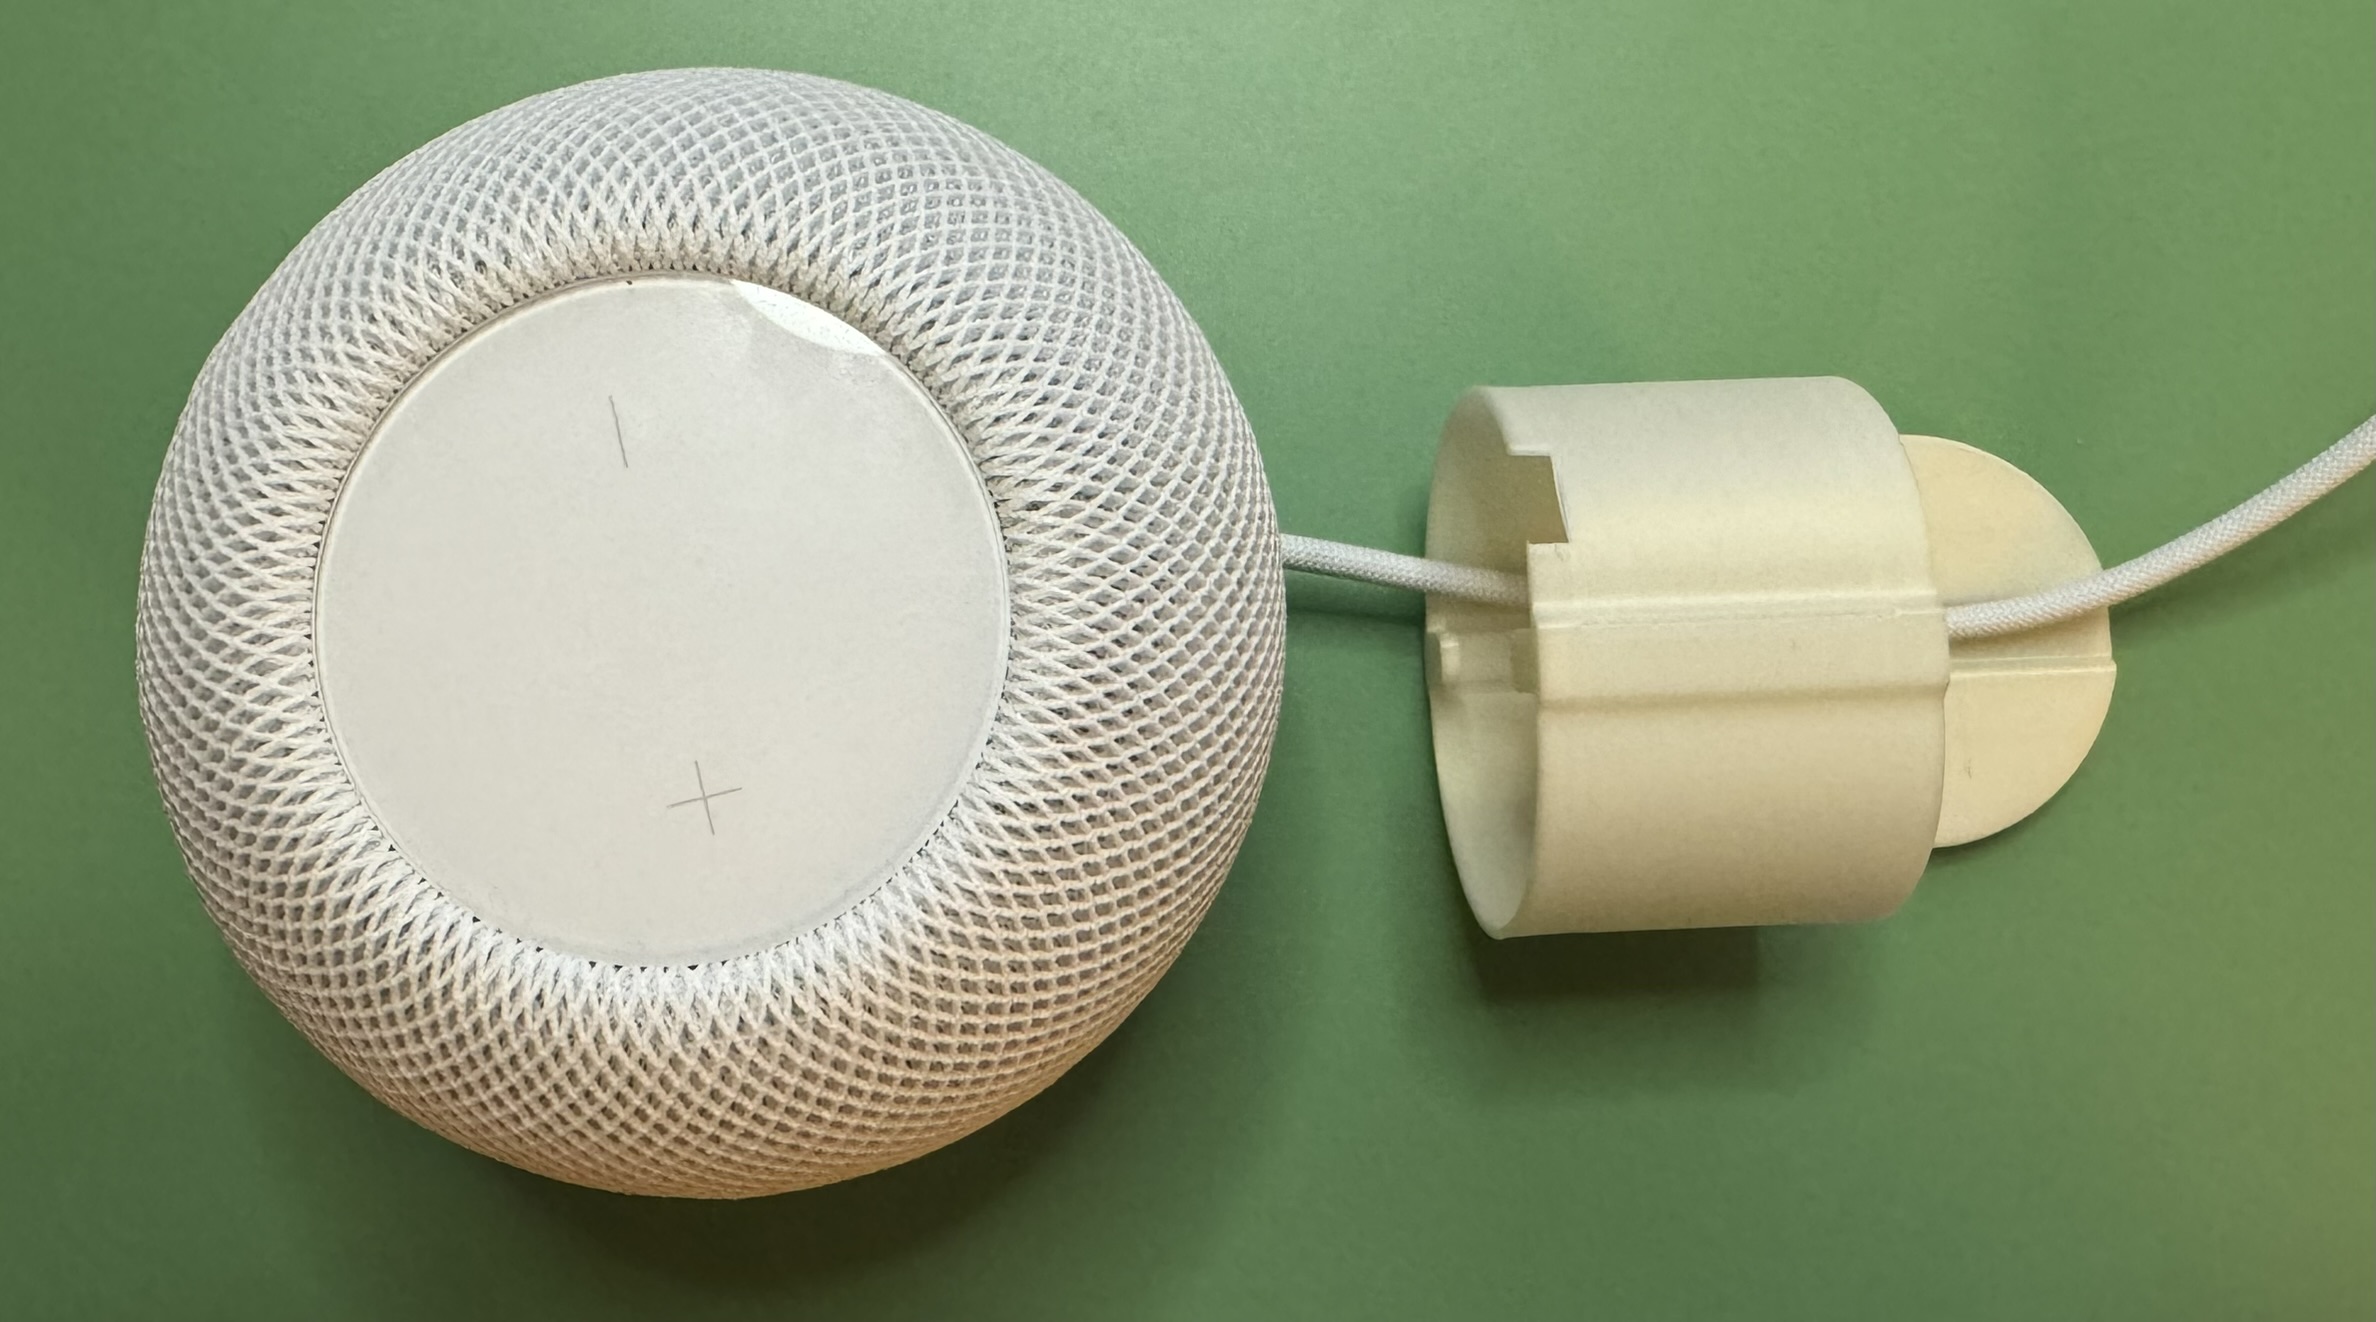
Pass your HomePod Mini cable inside the Shell.
Note: the platform part should be opposite to the HomePod Mini.
Step 2

Place the charger in the Core ang plug it through the hole at the back. Loop the cable and start wrapping the core with it. The back panel (where the USB-C plug is) will have one of the corners slightly cut compared to the others. This is the entry point. Make sure the cable is very tight around the charger and use the cable dents to keep it in place.
Note: You can choose how “bent” you want the cable to be around its USB-C plug. You will have a bit of extra length at the end, so if you do not want to damage the connector you do not have to make it bend too much.
Step 3

Finish wrapping the cable around the Core. It should be tight all across. Hold it so it does not get away.
Step 4
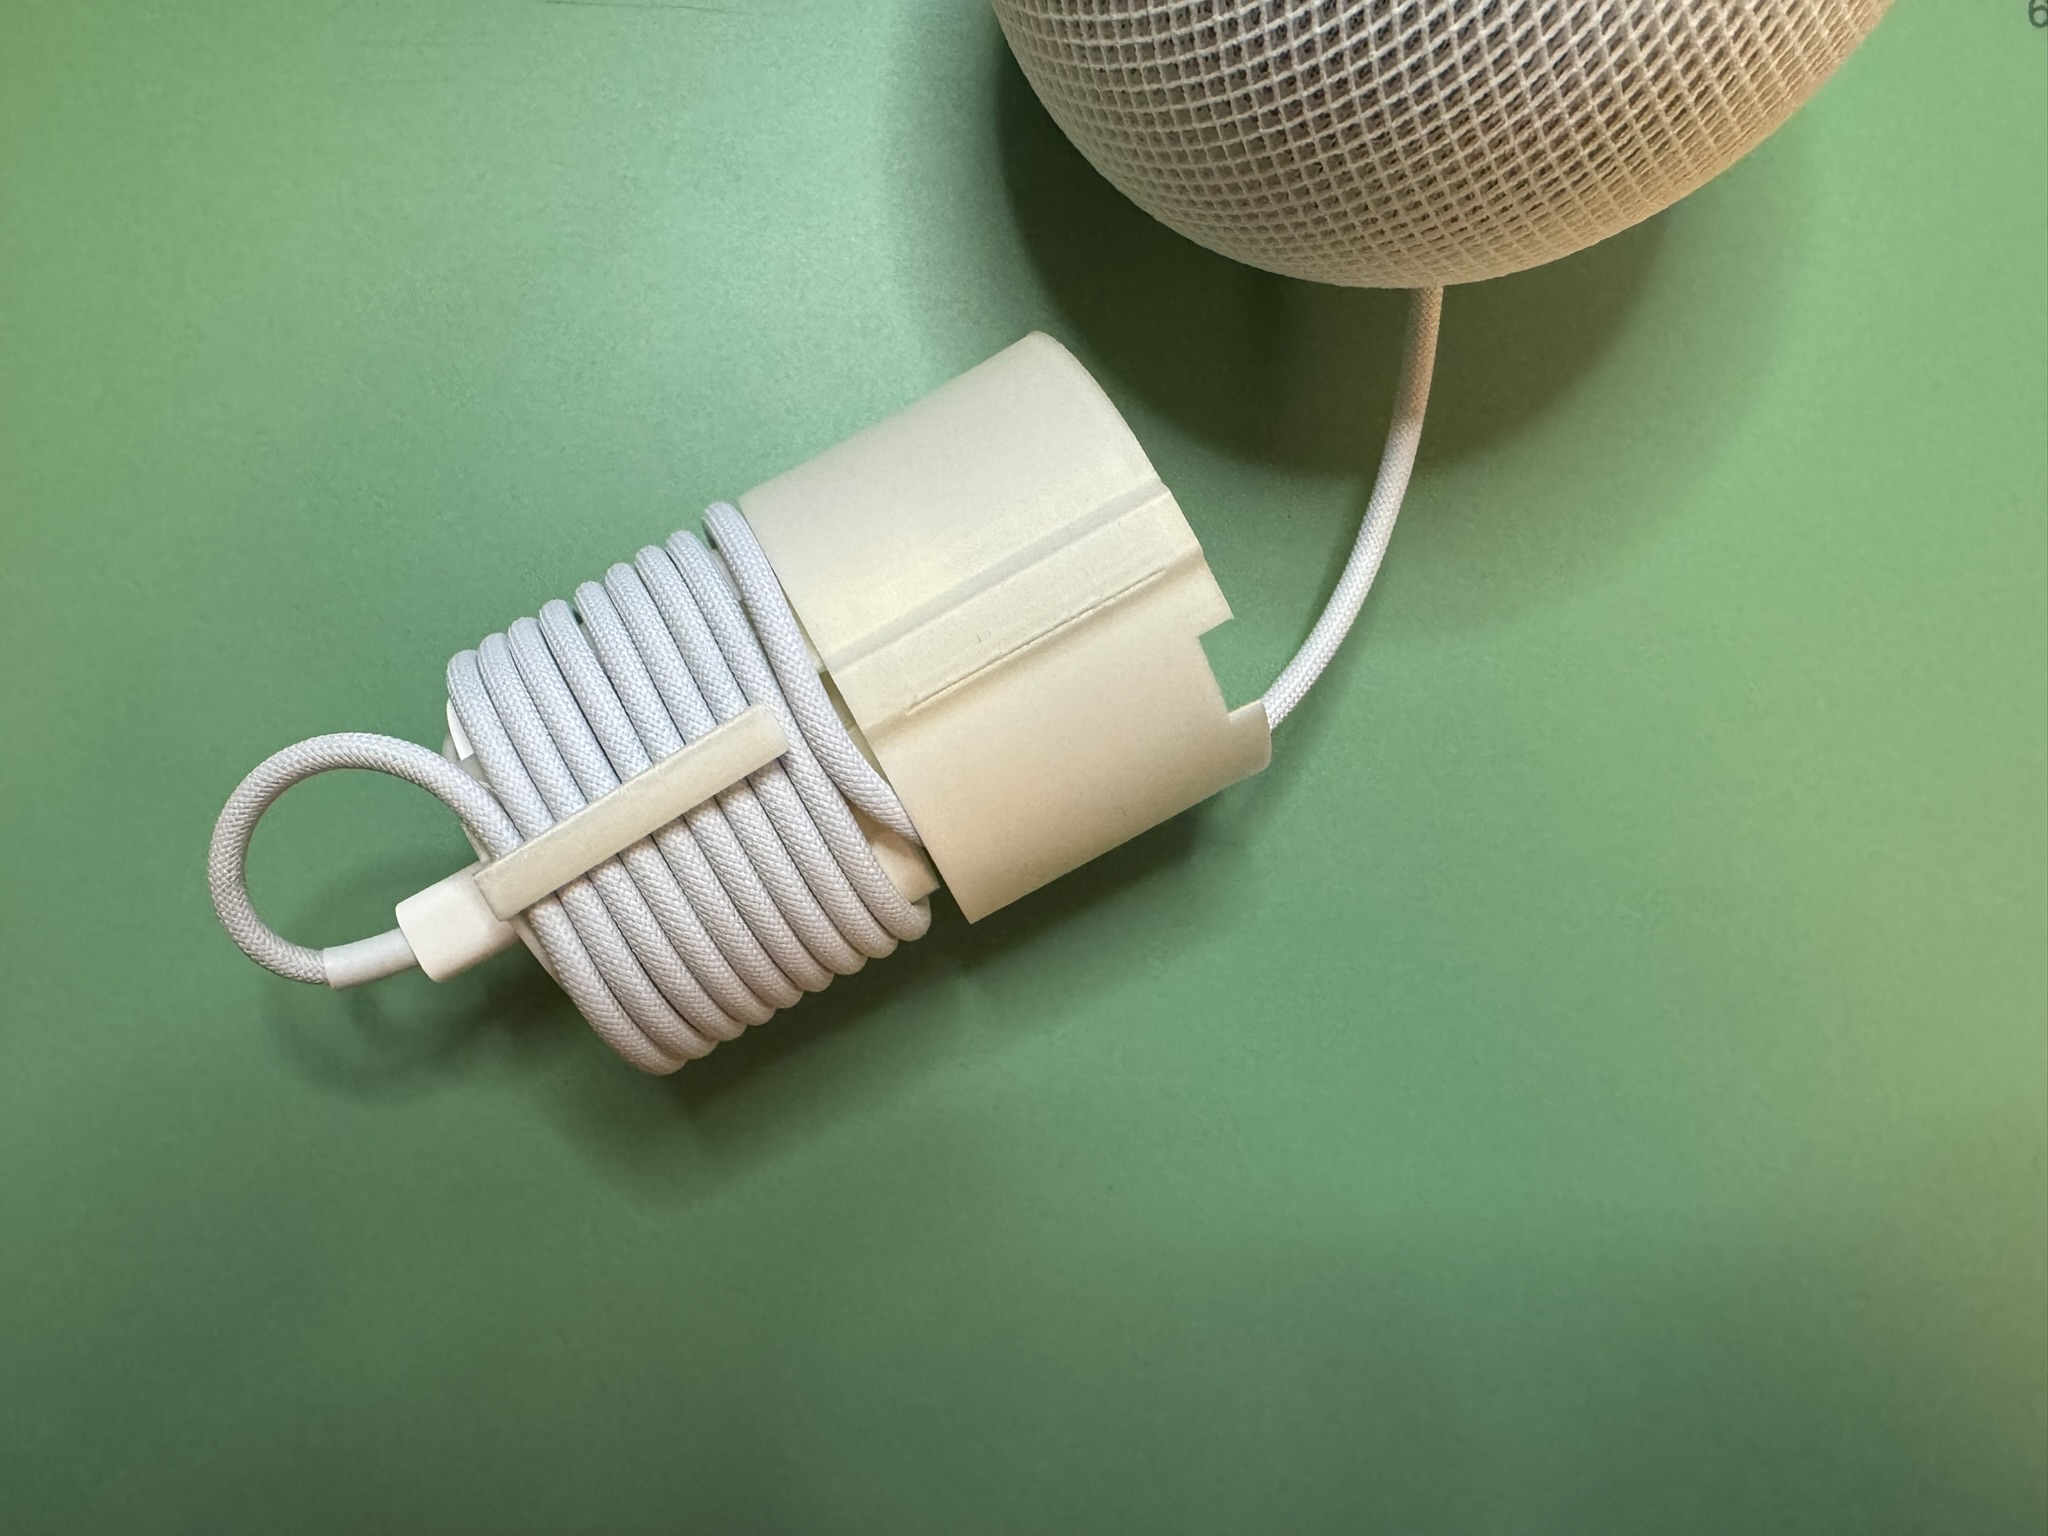
Aligh the Shell with the Core like in the picture. At this point, the last loop of your cable should be on the bottom (opposite to the shell platform) and coming out like in the picture. If it is not the case, make sure you started to wrap your cable at the right spot and start over Step 2.
Now start pushing the Shell onto the Core. Make sure the bottom rail (the one you see in the picture) covers correctly the bottom arm and does not go between the arm and the cable.
Note: also make sure the top rail covers the top arm, but this sould always be the case since the top rail is longer.
Step 5

Push the Shell all the way around the Core. The cable needs to come out from the hole on the side.
Note: it is a very tight fit!
Step 6

Plug and enjoy!