
TARS Robot: Magnetic Joints
We calculate the final price from your selected file. You review and accept it before payment.
Estimated printing price per file
€3.60 – €4.40 net (excluding VAT)
For file: TARS_0.4n_0.2mm_PLA_MINIIS_3h28m.bgcode
This is an estimate for one file. You’ll confirm the exact price before ordering.
File and estimate settings
File used for this estimate
Average indicative estimate: €4.00 excluding VAT (range midpoint).
- Weight reported by the author
- 61 g
- Print time reported by the author
- 3.47 hr
- Source material
- PLA
- Estimate material
- PLA
- Estimate printer
- Bambu Lab P1S - 0.4 nozzle
- Estimate process
- 0.20mm Standard
Indicative estimate for the selected file only, based on the author’s weight and print time. File variants are not added together. The final price is calculated after file analysis.
Saved on this device.
Desktop toy of TARS, a robot from the movie Interstellar.
- Rating
- 0 / 5
- Likes
- 136
- Downloads
- 392
- Makes
- 2
- Views
- 3,356
- Reviews
- 0
Updated at source:
Model information
- Source
- Printables
- Category
- Action Figures & Statues
- License
- Creative Commons — Attribution — Noncommercial — Share Alike
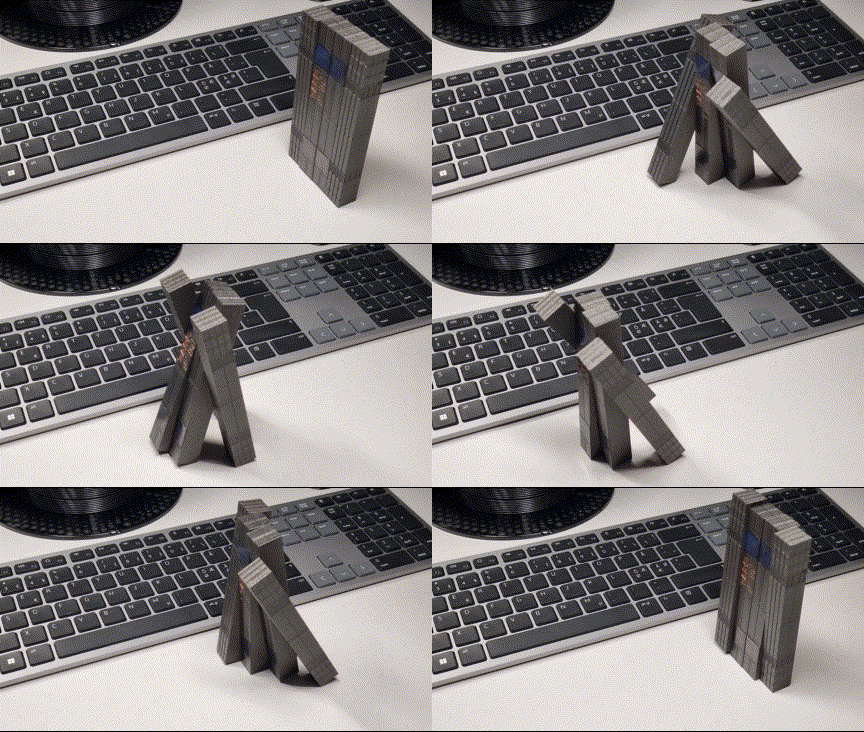
This is my model of TARS from the movie Interstellar. TARS body consist of 4 legs, this model uses magnets to form joints and keep everything together. The magnetic joints slides along the full leg length which makes for a very flexible and expressive model.
Build Instructions
Quick overview:
- Print the legs with pause print to embed magnets.
- Paint the TARS text and braille using a marker pen.
- Print monitor graphics on photo paper, cut to size and attach using double sided tape.
About Printing
The model files are in the recommended orientation and should be easy prints. Inside each leg are slots to hold magnets. A pause print must be added at the top of the slots for inserting the magnets.
The TARS text and braille is easy to fill in with a marker pen (I used metallic gold + red).
About Magnets
I used 6 mm diameter, 2 mm thick neodymium magnets bought from Amazon. Since they are quite small, I used them in stacks of two for extra holding power. Bigger is probably better, the slot fits up to 4 mm thick magnets. Each slot should have two magnets for more stable legs (12 in total), single stronger magnets might also work (6 in total).
All magnets should be inserted with the same polarity direction in every slot. This is very important as otherwise the legs would repel instead of hold together. I printed one leg at a time to reduce the risk of mistakes. This is what it should look like before resuming print:


About Monitor Screens
TARS has two monitor screens on the top center legs. I used screenshots from my own terminal and printed on photo paper (see the zip file). The photo paper is cut to size (16 mm x 15 mm) and attached using double sided tape. The lower legs also uses the photo paper but just plain black.
Final Word
Let me know if anything in the instructions is not clear. Good luck.