
Same Layer Color Change Test Non MMU
We calculate the final price from your selected file. You review and accept it before payment.
Saved on this device.
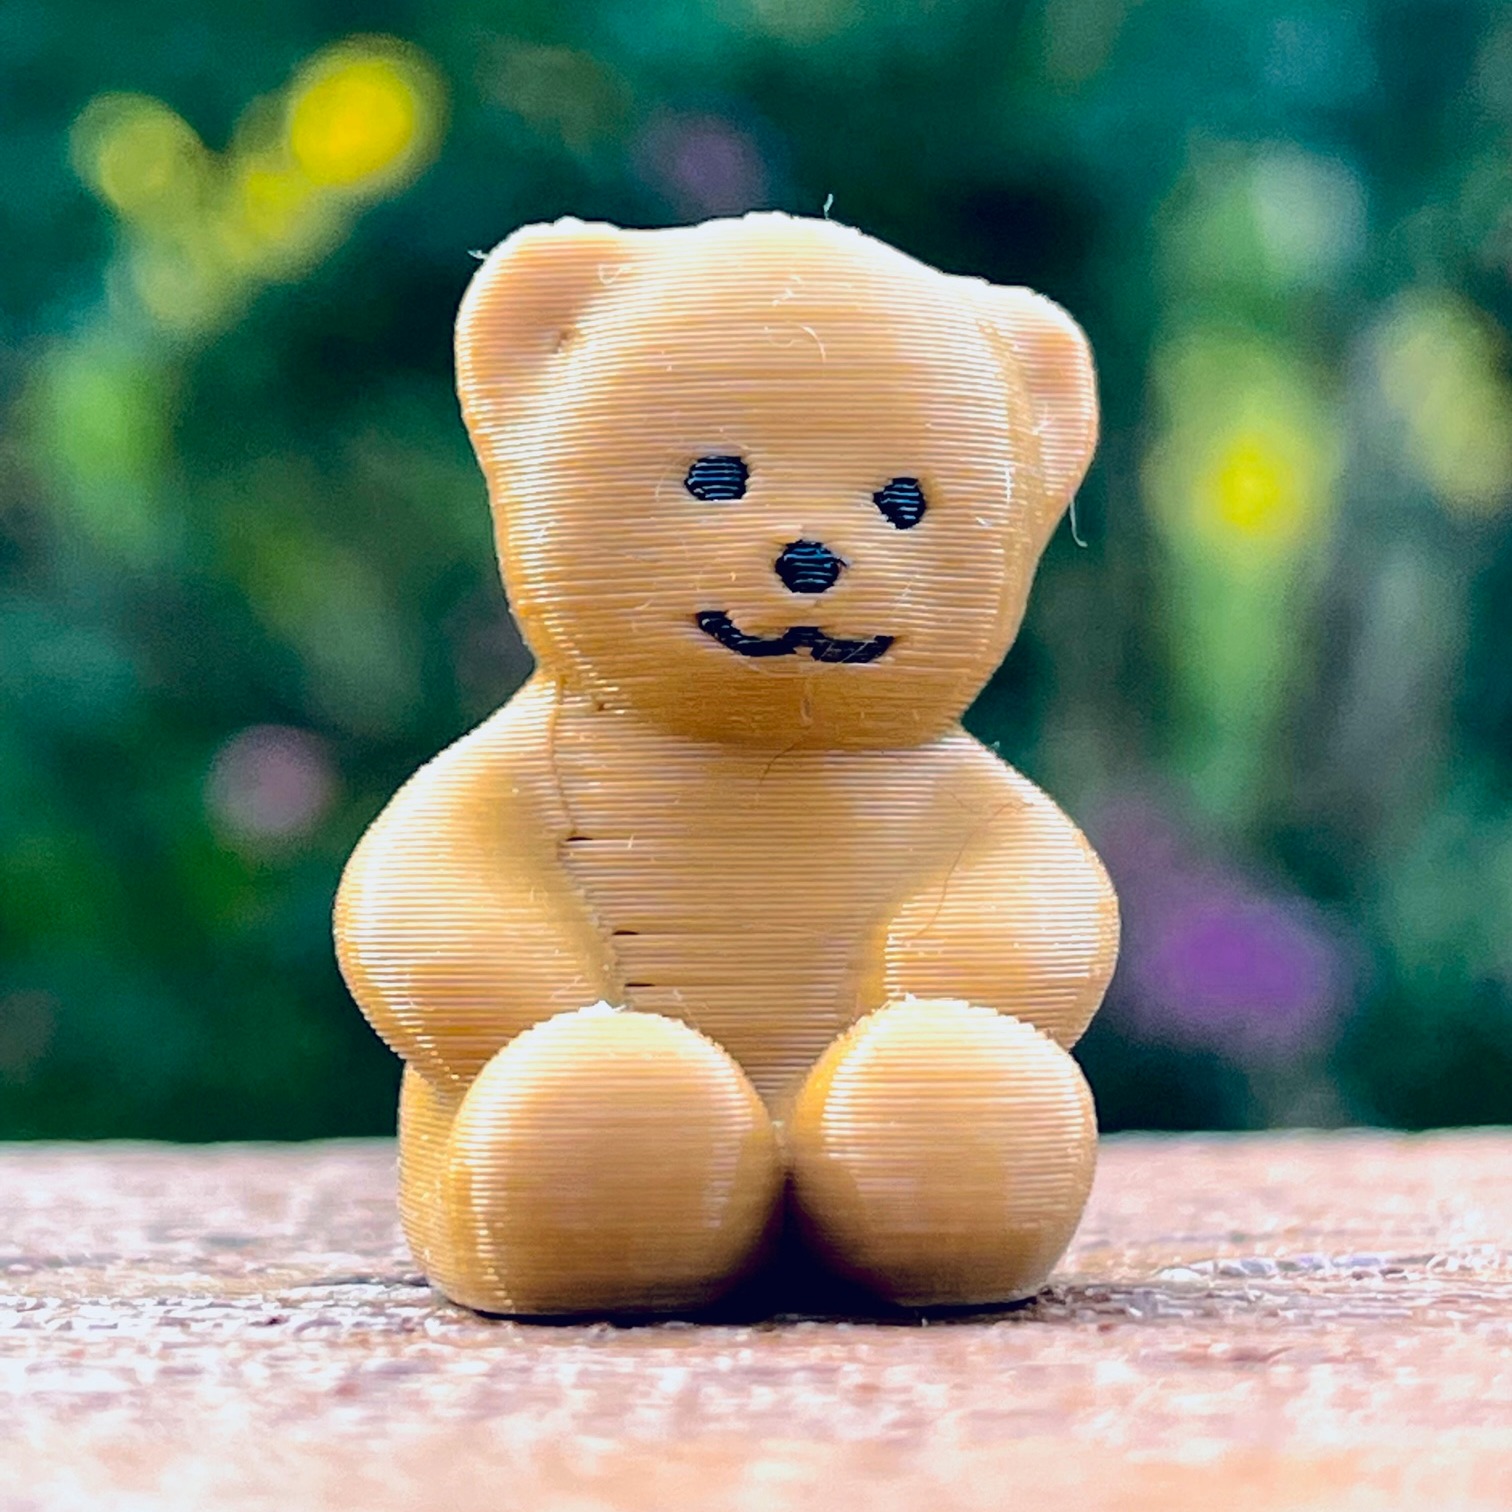
This is a small print that tests color changes on the same Z height layer as well as additional color changes.
- Rating
- 5 / 5
- Likes
- 9
- Downloads
- 98
- Makes
- 2
- Views
- 753
- Reviews
- 1
Updated at source:
Model information
- Source
- Printables
- Category
- Test Models
- License
- Standard Digital File License
I made this multipart model to test color changes with M600 on a tool change on the same layer height. There are three types of color changes in this model: part color changes, full layer color changes, and full layer for a part on the same layer as another part. No MMU is needed.
I did this today successfully with single extruder on MK3S+:
- different colors on the same flat layer, an inlay
- as well as 3D objects higher up the model as separate features like eyeballs
Note that if you have a color that is on its own layer and uses that entire layer you can use the color changer feature in slicer, but if they are one the SAME layer as a different color that it what I am talking about here in this process.
Here are my longer notes, not specific to this model but to the process in general:
First design or get a model and export out all components separately for each color as a separate stl. This model here is a good test as it is tiny.
Start up a single extruder profile in Prusaslicer. We will then modify this.
Add the first stl to Prusaslicer, then rt click on it on the view, choose add part, select all the other stls to add them as subparts.
Then add mulitiple extruders in slicer, such as 3
-Assign extruder color whatever you like for visuals
-to the right for each stl assign it an extruder number in the model view
-Under printer settings/custom gcode scroll down to get to tool change and type in M600 in that box.
-go to printer settings/multiple extruders and enable the wipe tower
-optional: print settings/no sparse layers enable if the model is really flat and the wipe tower wont get get knocked into
Unfortunately, ideally you want a model that was created properly with the colors that occupy the same layer height stored as two STLs from the same project. Ideally the person who made the model did this, but if you do it in fusion 360 make sure they are separate bodies or components in the same project. In fusion 360 select the root project as the active one, and then select all the bodies for the first color and export that out as one STL, repeat for each additional color group. This way they share the same coordinate space and will align perfectly in slicer.
In prussaslicer add the one you want to be printed first (the text of the inlay), then right click on it and choose 'add part' to add the second color part so it is attached in the same coordinate system to the first. Add each additional color section as well this way as a part. (It turns out better if you do the delicate, inlayed text as the first part, even if it is a small part of the model, and then add the rest as the added part.)
Under printer settings/general/capabilities add two extruders. (You dont need 3+ extruders if you have more than 2 parts. Do not check 'single extruder multi material because you will be doing the changing with a tool change command, rather than an MMU. Under printer settings/custom gcode scroll down to get to tool change and type in M600 in that box. This is the command to pause the print and to ask you to change the filament manually.
I found that on a small model with 14 color changes where it was only printing a few small dots for a few seconds (ie some small eyeballs) I got alot of oozing and inconsistency. If this happens and you want to improve quality over speed you will need to enable the wipe tower option. I know you dont have an MMU but the wipe tower also will get the flow correct and almost eliminate blobbing when it starts to print the new color. To enable the wipe tower go to printer settings/multiple extruders/ and enable the wipe tower. If your model is small and you have a lot of layers with no color changes, you might consider enabling the experimental setting to "no sparse layers' under wipe tower. I don't think you need to do this for only one or two main color changes for a large area though like an inlay.
Now go back to the platter view and slice the model. On the right under name you will see your 2 or 3 or four different color parts. Assign the first one to extruder 1, the second to extruder 2, and the 3rd back to extruder 1, and then just alternate if needed for more. Note that you can have as many colored parts as you want, the printer doesn't know what color you will load, only that you need to change the color with a tool change command.
Note that you can also now introduce additional layer color changes in the slicer view by dragging the layer height icon up or down the change height and left clicking, Note in the printer settings/customer gcode/color change gcode section this is also an M600 command, and you can do this for colors changes that occupy the entire layer.
Now during the actual print when you do the tool color change it will ask if if the color is correct. Wait a few seconds and let the junk that is there cool, hold it with your hand, then click OK. It will extrude a little more at this point. Grab that newly extruded part as teh extruder moves away along with the cooled glob you were already holding so that mess doesnt get dragged onto the print area.
Good luck! Obviously a whole easier option is to add your text as a new layer (1.25mm thick) on a base layer about 2.25mm thick, and use a color layer change in slicer, but if you want inlayers or 3 objects that are both in the same area this is how to do it. The model I was working with had an inlay on the base first two layers ( some white text on a black base underneath) and a black nose of the dog and black eyes as 3d stls higher up in the model in 3D space crossing many many layers of other colors. that I cut out of the main model so the STLs did not overlap in 3D space.
Another quick tip - you need to know what color to change into on a color change, so you need to go into the layer by layer view and see what order each change does, and then on a notepad write out the color order. Obviously after five or so changes this becomes almost impossible to do correctly and you will make a mistake if you are not careful, hence the need for an MMU at that point.