
Extrusion Multiplier Test
Obliczymy ostateczną cenę na podstawie wybranego pliku. Sprawdzisz ją i zaakceptujesz przed płatnością.
Zapisane na tym urządzeniu.

Calibrate your extrusion multiplier with this multi-level visual & dimensional test print for precise settings.
- Ocena
- 4 / 5
- Polubienia
- 13
- Pobrania
- 128
- Wydruki
- 2
- Wyświetlenia
- 780
- Oceny
- 2
Aktualizacja u źródła:
Informacje o modelu
- Źródło
- Printables
- Kategoria
- Test Models
- Licencja
- Creative Commons — Attribution — Share Alike
Update: After some testing, I've managed to create a version 2 that prints in less time and uses less material, ~10m ~30m.
This multi-level calibration test print is designed to help you fine-tune your extrusion multiplier settings for precise filament extrusion. Each level features a visual test area to assess surface quality and a dimensional accuracy test area for accurate measurements.
Step-by-step Guide (using PrusaSlicer)
Step 1: Download and Prepare the Model
- Download the model from.
- Open the model in PrusaSlicer.
- Configure your slicer settings based on your filament type, printer, and desired print quality.
Step 2: Customize the G-Code
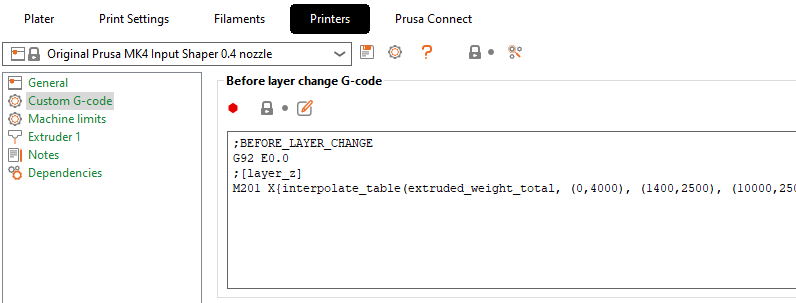
- Go to Printer settings > Custom G-code > Before layer change G-code.
- Paste the provided G-code into this section, and make the necessary changes to the extrusion multiplier values to what you want to test.
Note: The commandM221sets the extrusion multiplier, andS100sets the value, 100 to 100% or 1.00. The provided code will by default test 1.00, 1.01, 1.02, 1.03, 1.04 and 1.05.
{if layer_z>=0.00 && layer_z<5.00} M221 S100 {endif}
{if layer_z>=5.00 && layer_z<10.00} M221 S101 {endif}
{if layer_z>=10.00 && layer_z<15.00} M221 S102 {endif}
{if layer_z>=15.00 && layer_z<20.00} M221 S103 {endif}
{if layer_z>=20.00 && layer_z<25.00} M221 S104 {endif}
{if layer_z>=25.00} M221 S105 {endif}
Step 3: Print
- Start the print job in your printer.
- Once the print is complete, remove the test from the print bed.
Step 4: Visual Inspection and Dimensional Measurement
- Visual Inspection: Examine the top surface of each level for gaps or excessive extrusion. These visual cues can help you identify extrusion multiplier settings that are too low or too high.
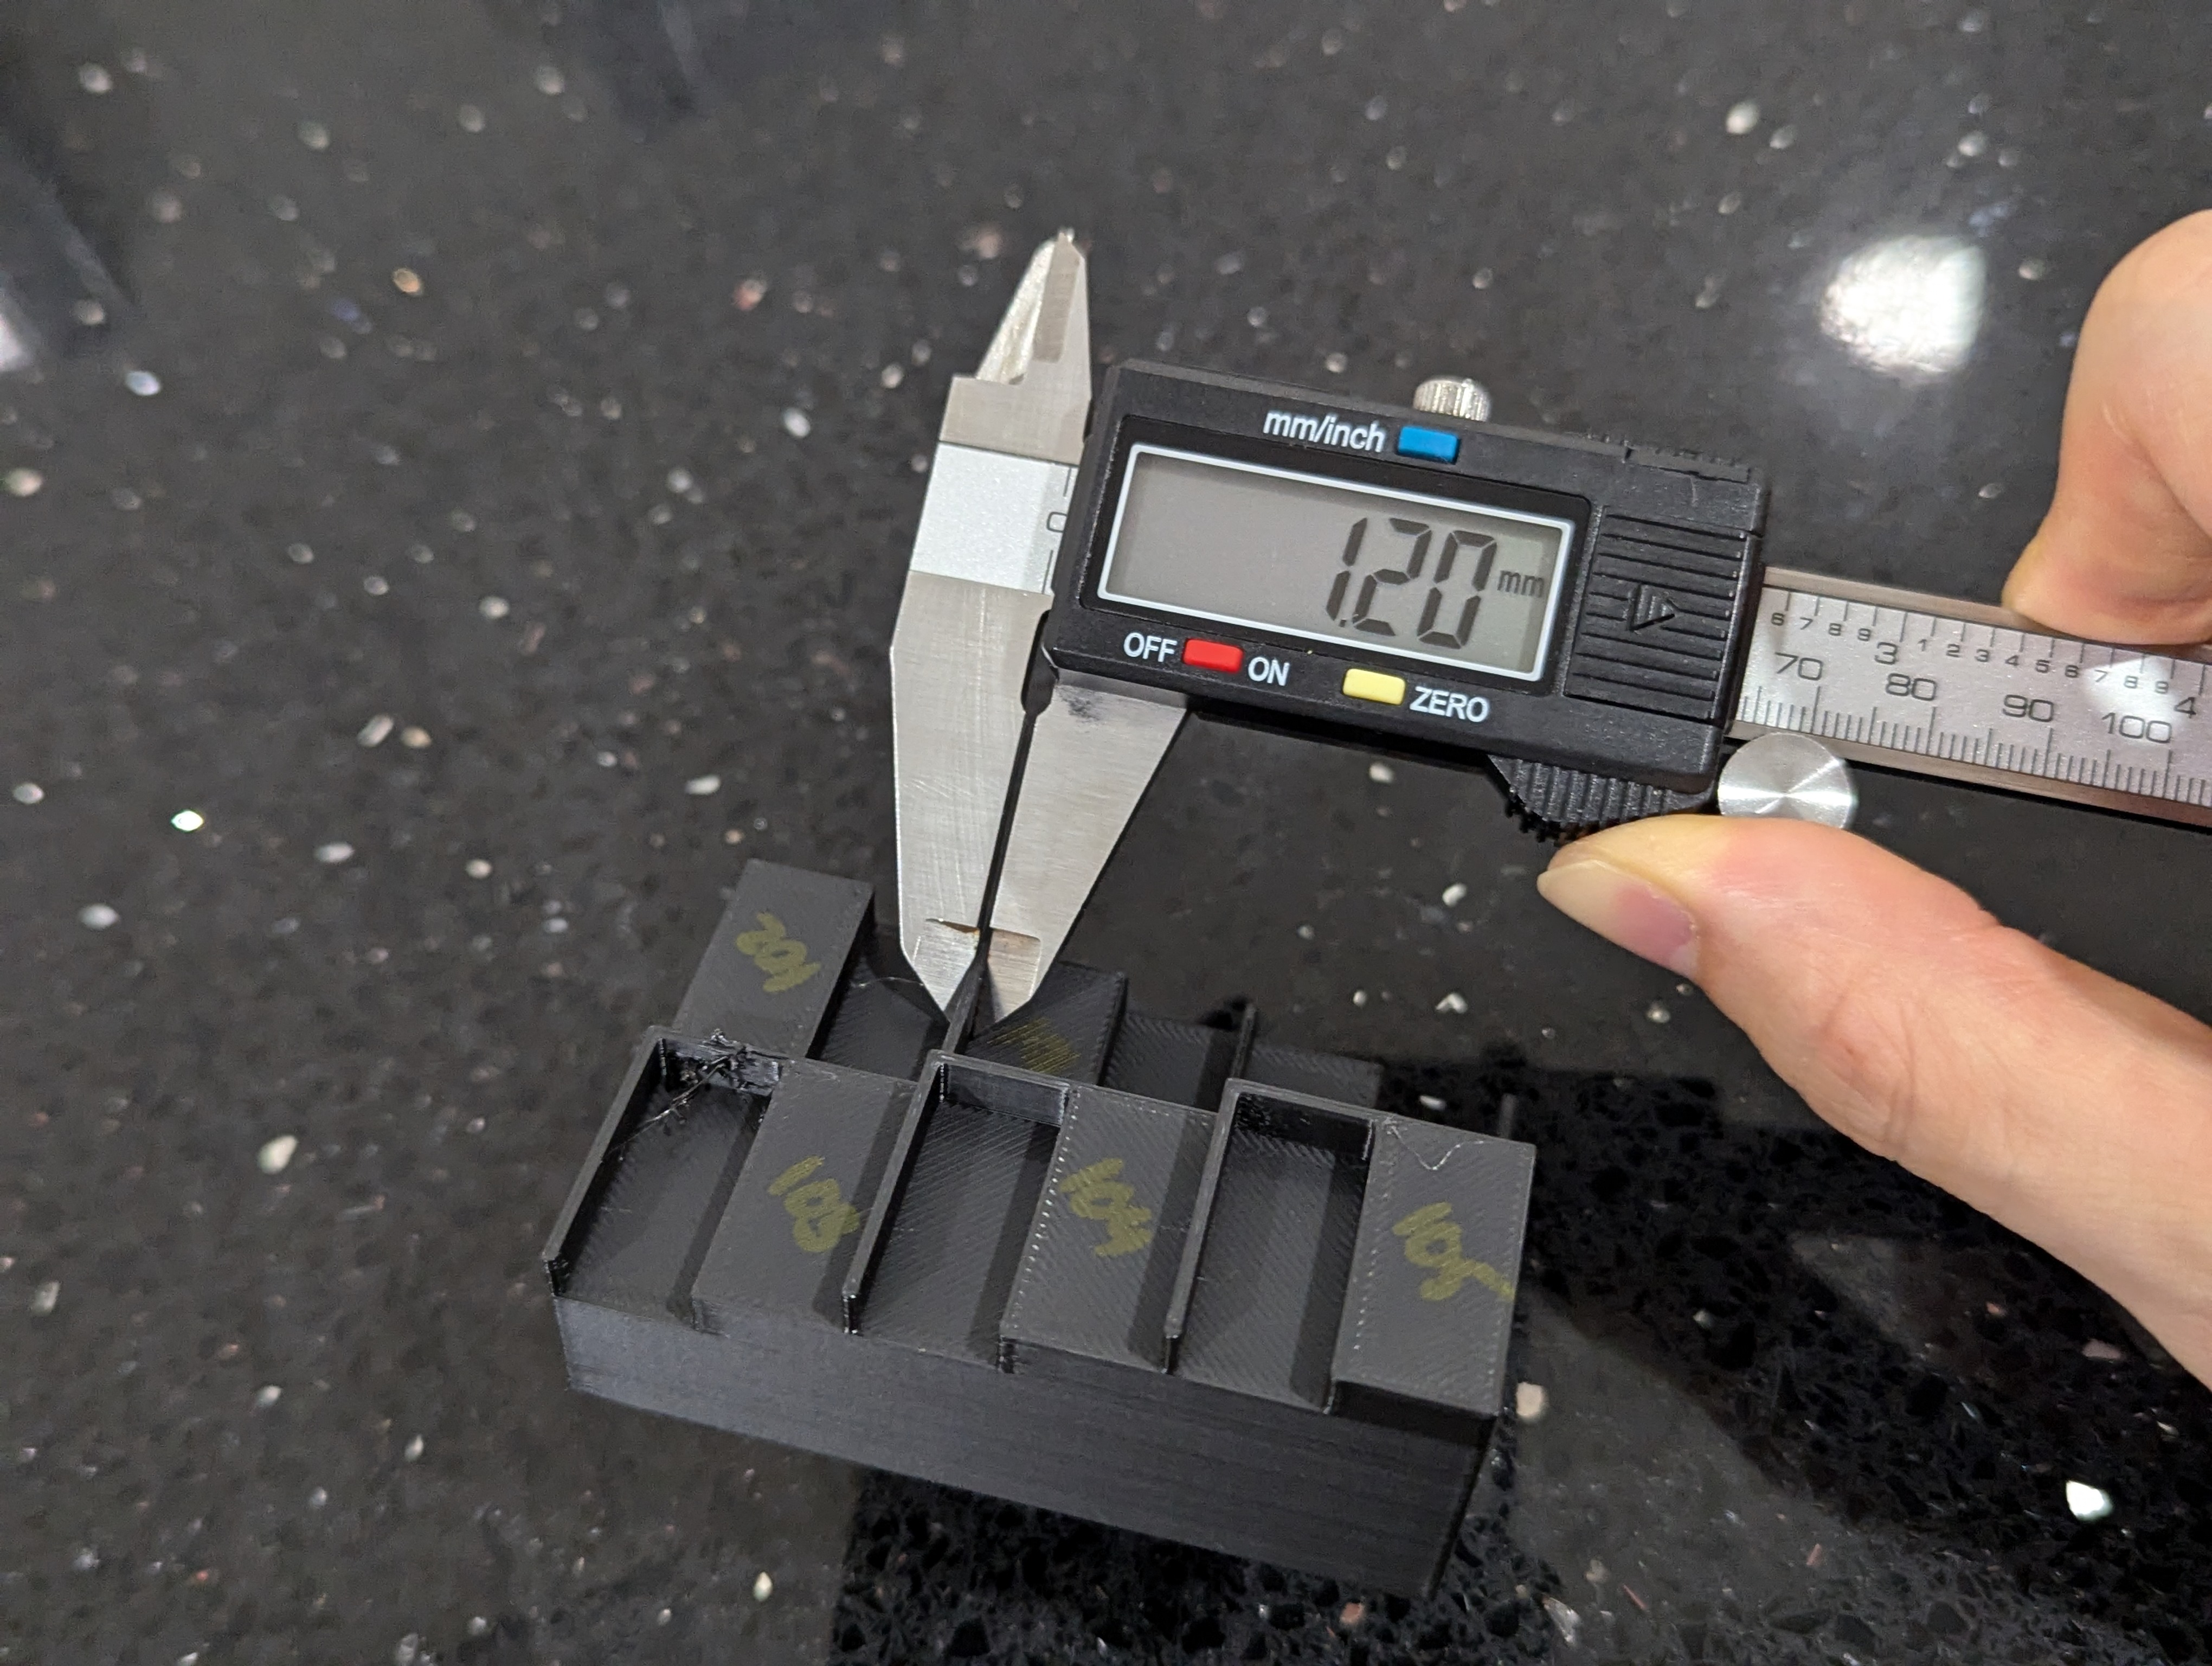
- Dimensional Measurement: Use a high-precision calliper to measure the wall thickness of each level. Compare the measured dimensions to the designed dimension (1.2mm) to determine the optimal extrusion multiplier setting.
Step 5: Analyze Results and Refine Settings
- Identify the level that most closely matches the desired dimensional accuracy.
- The extrusion multiplier value associated with that level is likely the optimal setting for your filament and printer.
- If necessary, fine-tune the extrusion multiplier settings by printing additional calibration cubes with smaller increments.
Additional Tips:
- Start with a wider range of extrusion multipliers (e.g., 0.90 to 1.15) to narrow down the optimal range and then move to a smaller range once you find the closest ones.
- Use a calliper with high precision to measure the wall thickness accurately.
Print it yourself and calibrate your printer for optimal results. Share your findings and help others achieve perfect prints!