
Extrusion Multiplier Test
We calculate the final price from your selected file. You review and accept it before payment.
Preliminary estimate for PETG
€0.48 – €0.59 net (excluding VAT)
For file: PETG 0.85-1.10 CORE1 / extrusion-multiplier-test-tool-85-110_04n_028mm_petg_coreone_17m.bgcode
This is an estimate for one file. You’ll confirm the exact price before ordering.
File and estimate settings
File used for this estimate
Average indicative estimate: €0.54 excluding VAT (range midpoint).
- Weight reported by the author
- 13 g
- Print time reported by the author
- 16.8 min
- Source material
- PET
- Estimate material
- PETG
- Estimate printer
- Bambu Lab P1S - 0.4 nozzle
- Estimate process
- 0.20mm Standard
Indicative estimate for the selected file only, based on the author’s weight and print time. File variants are not added together. The final price is calculated after file analysis.
Saved on this device.

Calibrate your extrusion multiplier with this multi-level visual & dimensional test print for precise settings.
- Rating
- 4 / 5
- Likes
- 13
- Downloads
- 128
- Makes
- 2
- Views
- 780
- Reviews
- 2
Updated at source:
Model information
- Source
- Printables
- Category
- Test Models
- License
- Creative Commons — Attribution — Share Alike
Update: After some testing, I've managed to create a version 2 that prints in less time and uses less material, ~10m ~30m.
This multi-level calibration test print is designed to help you fine-tune your extrusion multiplier settings for precise filament extrusion. Each level features a visual test area to assess surface quality and a dimensional accuracy test area for accurate measurements.
Step-by-step Guide (using PrusaSlicer)
Step 1: Download and Prepare the Model
- Download the model from.
- Open the model in PrusaSlicer.
- Configure your slicer settings based on your filament type, printer, and desired print quality.
Step 2: Customize the G-Code
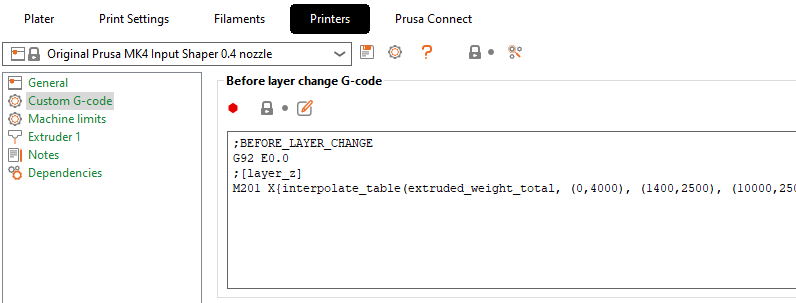
- Go to Printer settings > Custom G-code > Before layer change G-code.
- Paste the provided G-code into this section, and make the necessary changes to the extrusion multiplier values to what you want to test.
Note: The commandM221sets the extrusion multiplier, andS100sets the value, 100 to 100% or 1.00. The provided code will by default test 1.00, 1.01, 1.02, 1.03, 1.04 and 1.05.
{if layer_z>=0.00 && layer_z<5.00} M221 S100 {endif}
{if layer_z>=5.00 && layer_z<10.00} M221 S101 {endif}
{if layer_z>=10.00 && layer_z<15.00} M221 S102 {endif}
{if layer_z>=15.00 && layer_z<20.00} M221 S103 {endif}
{if layer_z>=20.00 && layer_z<25.00} M221 S104 {endif}
{if layer_z>=25.00} M221 S105 {endif}
Step 3: Print
- Start the print job in your printer.
- Once the print is complete, remove the test from the print bed.
Step 4: Visual Inspection and Dimensional Measurement
- Visual Inspection: Examine the top surface of each level for gaps or excessive extrusion. These visual cues can help you identify extrusion multiplier settings that are too low or too high.
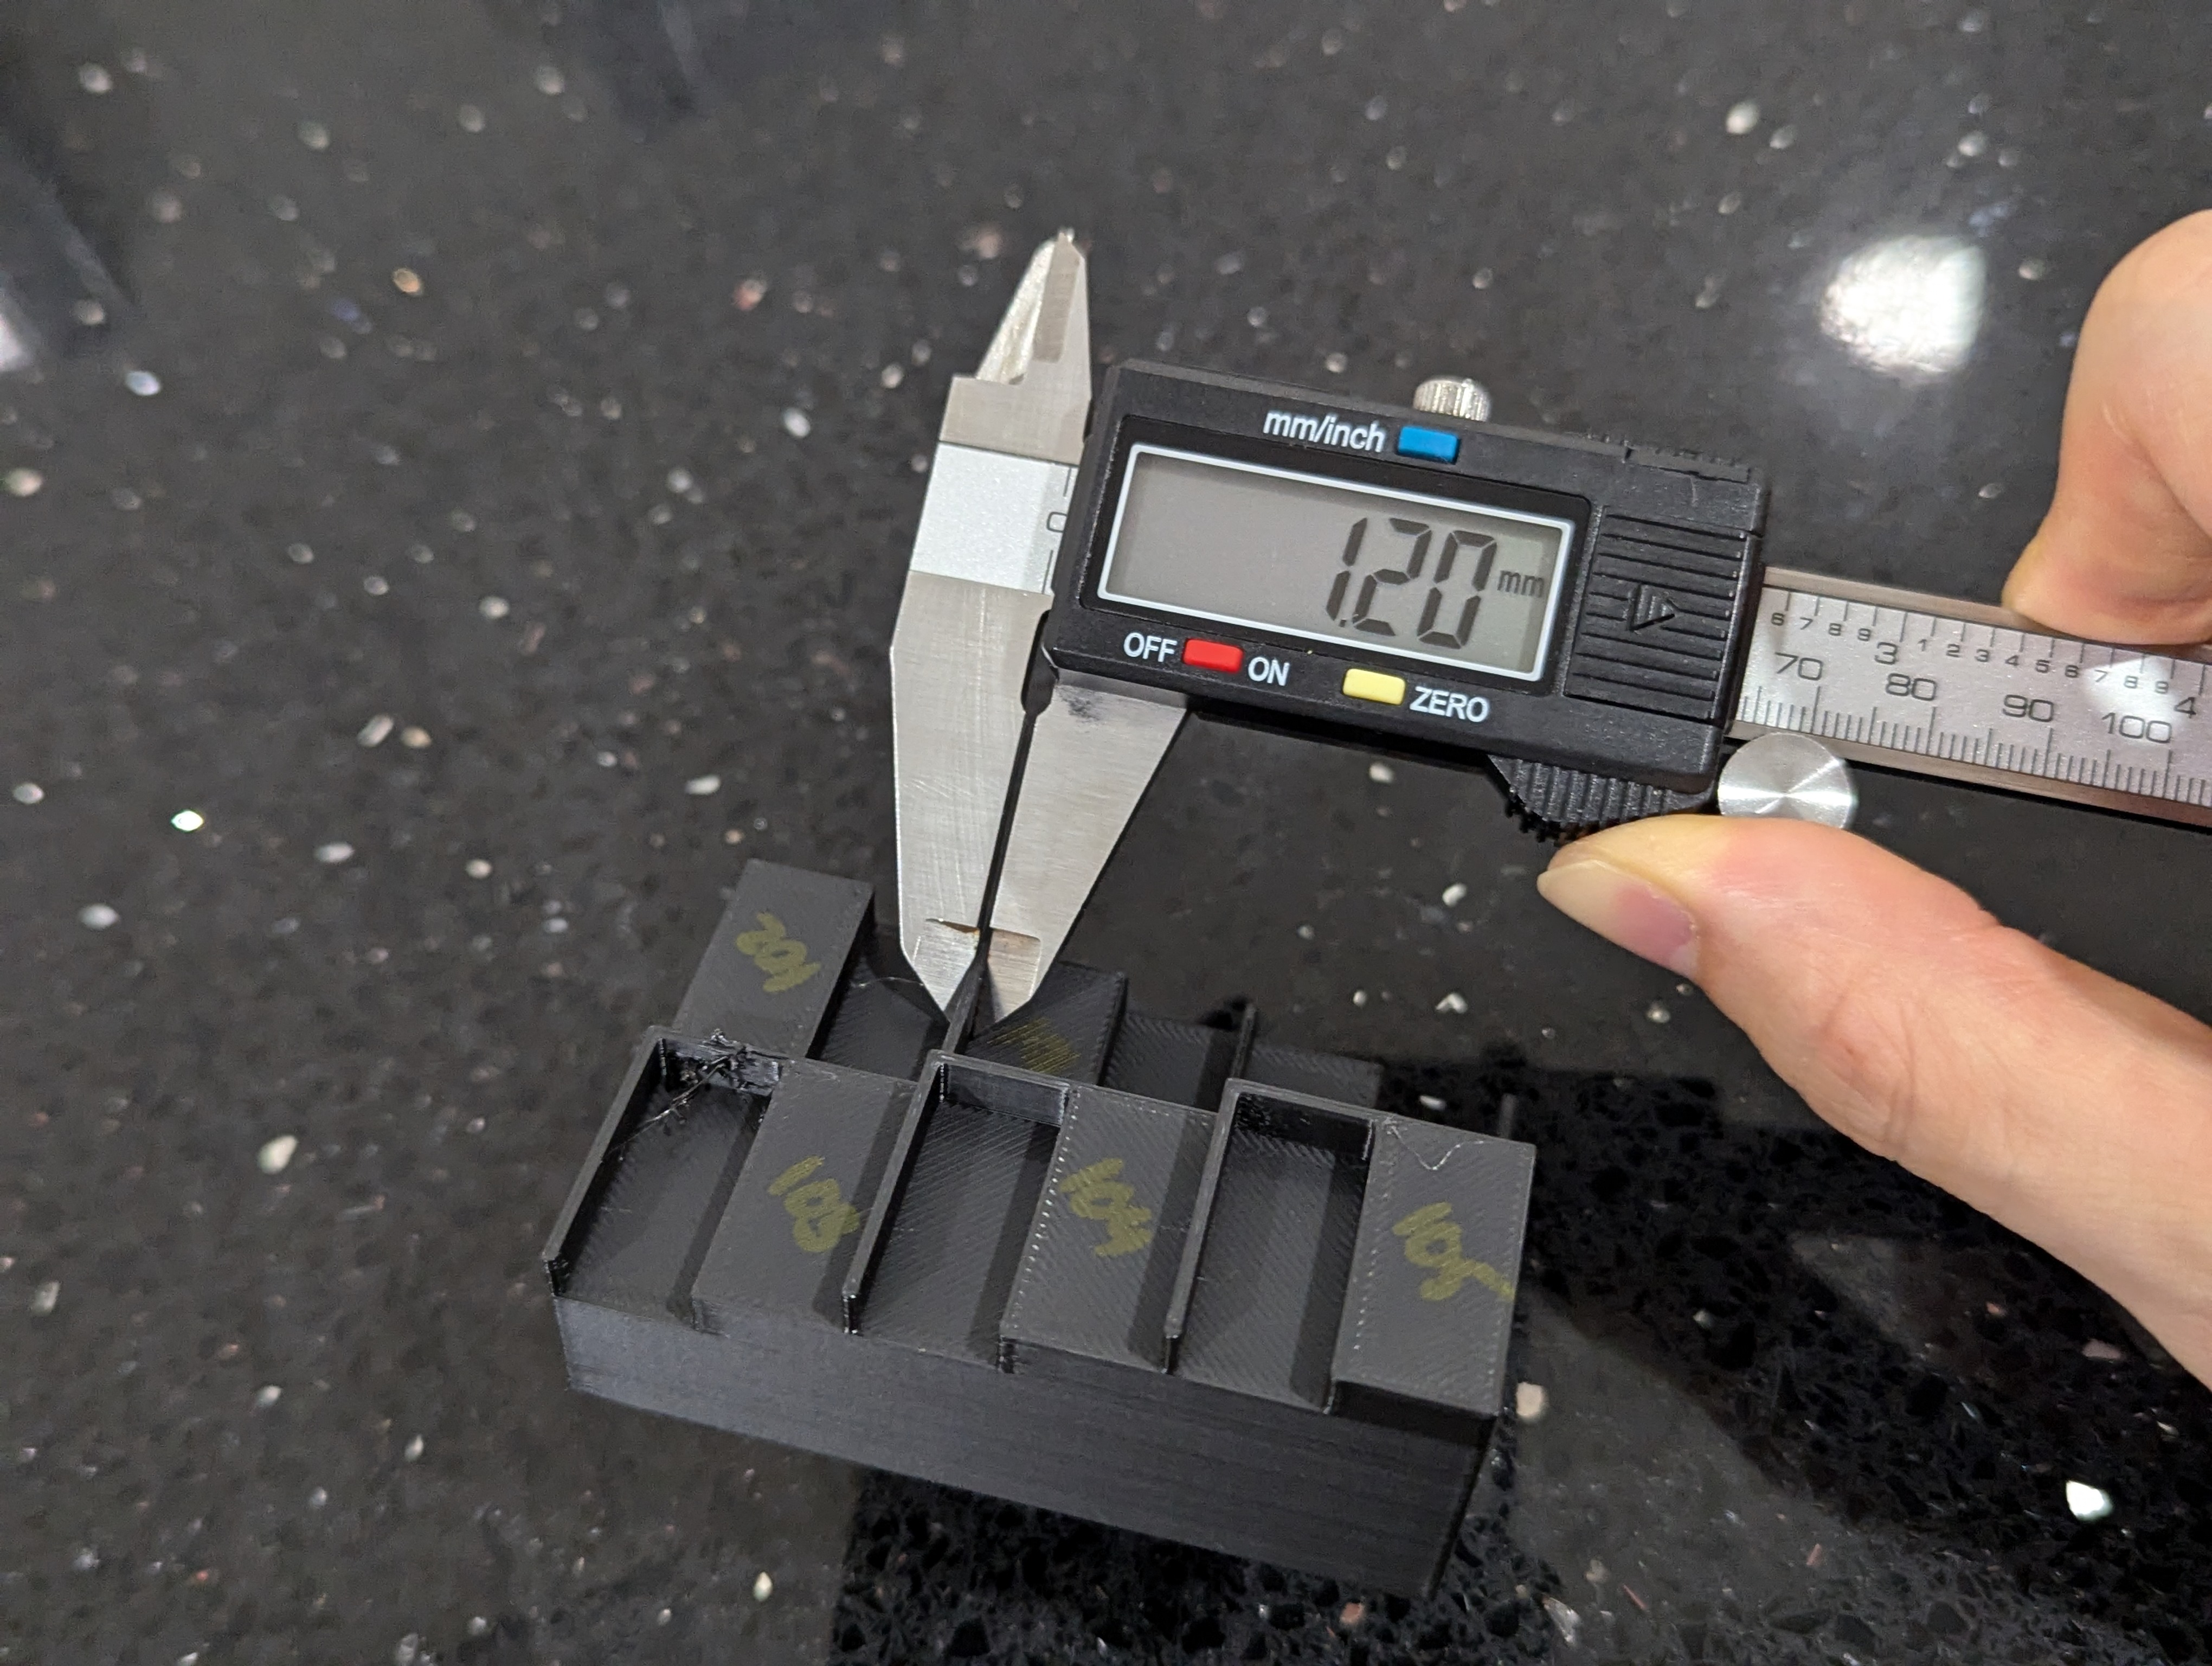
- Dimensional Measurement: Use a high-precision calliper to measure the wall thickness of each level. Compare the measured dimensions to the designed dimension (1.2mm) to determine the optimal extrusion multiplier setting.
Step 5: Analyze Results and Refine Settings
- Identify the level that most closely matches the desired dimensional accuracy.
- The extrusion multiplier value associated with that level is likely the optimal setting for your filament and printer.
- If necessary, fine-tune the extrusion multiplier settings by printing additional calibration cubes with smaller increments.
Additional Tips:
- Start with a wider range of extrusion multipliers (e.g., 0.90 to 1.15) to narrow down the optimal range and then move to a smaller range once you find the closest ones.
- Use a calliper with high precision to measure the wall thickness accurately.
Print it yourself and calibrate your printer for optimal results. Share your findings and help others achieve perfect prints!