
1 / 6
Bugaboo Cameleon 3 Wheel Bearing Replacement Tools & Guide
Zamów wydruk tego modelu
Obliczymy ostateczną cenę na podstawie wybranego pliku. Sprawdzisz ją i zaakceptujesz przed płatnością.
Zapisane na tym urządzeniu.

Easy guide for Bugaboo Cameleon 3 wheel bearing replacement. Step-by-step & parts included. Standard 608/6900 bearings
- Ocena
- 0 / 5
- Polubienia
- 5
- Pobrania
- 17
- Wydruki
- 0
- Wyświetlenia
- 421
- Oceny
- 0
Aktualizacja u źródła:
Informacje o modelu
- Źródło
- Printables
- Kategoria
- Tools
- Licencja
- Creative Commons — Attribution — Noncommercial
Clear, step-by-step instructions for replacing front and rear wheel bearings on the Bugaboo Cameleon 3 stroller. Includes parts, tools, and assembly steps.
Bill of Materials (BOM):
- Front Wheels:
- Rear Wheels:
I recommend Kugellager-Express for quality ball bearings, competitive prices, and professional service—perfect for reliable DIY parts.
Tools Needed:
- Two 4mm Allen keys
- M8 screw or Ø8mm Pin (at least 70 mm long)
- Thin-tipped pliers
- Flat screwdriver
- Hammer
- Printed parts
- “Wheel Support" - Front Wheels
- "Spacer" - Rear Wheels
- "Impact Pad" - Rear Wheels
Instructions:
Front Wheels Replacement
- Remove Pin Screw
- Use two 4mm Allen keys to unscrew the pin screw. Remove the pin screw.
- Remove the Pin
- Place the wheel on top of the "Wheel Support".
- Use an M8 screw or Ø8mm Pin(at least 70 mm long) to push the pin out of the wheel. Use a hammer if needed.
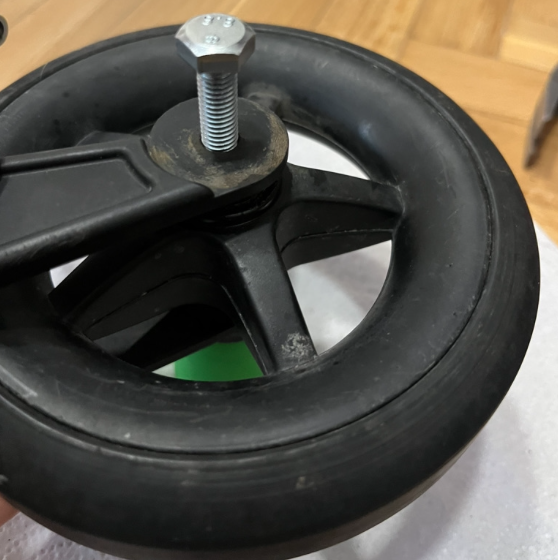
- Caution: Do not damage the pin threads.
- Remove Bearings
- Separate the wheel parts. Use the Pin or a flat screwdriver to carefully pry out the old bearings.

- Clean all parts
- Clean each part. Do not use acetone (it can damage the rubber seals on the new bearings amongst other things).

- Prepare New Bearings
- Insert two 608-2RS ball bearings and 10 M8 washers into each wheel (5 on each side of the wheel as spacers). Note: New washers replace the built-in spacer of the old bearings.

- Reassemble the Wheel
- Insert the pin partway into the wheel, and place 5 M8 washers onto the pin.
- Insert the wheel and push the pin further until the pin tip is visible on the opposite side.
- Use thin-tipped pliers to insert the remaining 5 M8 washers one at a time.

- Tighten the Pin
- Push the pin fully into place. Insert and tighten the pin screw with two Allen keys.
- Repeat Steps 1-6 for the second wheel if necessary.
Rear Wheels Replacement
- Remove the Push-On Lock Washer
- Use a flat screwdriver to carefully pry off the lock washer.
- If the teeth bend, carefully bend them back to their original shape.
- Remove the Shaft and Bearings
- Pull out the shaft. Use a screwdriver or the shaft to pry out the old bearings.

- Note: The old bearings have built-in spacers, but you can replace them with two 6900-2RS bearings per wheel.
- Clean All Parts
- Clean each part. Do not use acetone (it can damage the rubber seals on the new bearings).
- Reassemble Rear Wheel Assembly
- Place the "Spacer" into the "Wheel Support".

- Position the wheel assembly over the spacer with the shaft facing down.

- Use the "Impact Pad" to reinstall the push-on lock washer. Do not bend or damage the washer.

- Ensure Correct Fit
Ensure the "Wheel Support" holds the parts securely. The fit should not be tight or loose—either can damage the bearings.