
TRP DHR Evo Integrated mount for AXS Pod Controller
Obliczymy ostateczną cenę na podstawie wybranego pliku. Sprawdzisz ją i zaakceptujesz przed płatnością.
Zapisane na tym urządzeniu.
This model is both the left and right sides to mount AXS Pod Controllers to TRP DHR Evo brake levers.
- Ocena
- 0 / 5
- Polubienia
- 9
- Pobrania
- 39
- Wydruki
- 0
- Wyświetlenia
- 513
- Oceny
- 0
Aktualizacja u źródła:
Informacje o modelu
- Źródło
- Printables
- Kategoria
- Outdoor Sports
- Licencja
- Creative Commons — Attribution — Noncommercial
This design is both the left and right sides to mount AXS Pod Controllers to TRP DHR Evo brake levers.
The infinite clamp that comes with the pods is pretty sleek, but I didn’t like some aspects of it and wanted an integrated mount. I didn’t see any good options on the market so I designed my own.
I started with a 3D scan of my setup with the pod in a comfortable position and designed my own mount around the scan, using this position as the “neutral” setting on the new mount. From there it has 20 degrees rotation toward the rider and 15 degrees away, and the Pod itself can of course rotate 360*. I made a complete mount for both right and left sides (if you have an AXS reverb and using a Pod controller). Below is a photo showing original setup with Infinite clamp so that you can try to compare to yours and get an idea if my integrated mount would work for you.

I printed prototypes in PLA (even tried PPA-CF) but this was not strong enough for actual use, and ended up having them printed out of aluminum (outsourced) and then powder coated. Below is a screenshot showing my order from Craftcloud, the service provider I used (Shenzhen 3D Innovate), and finish options so you can order the parts yourself using the attached STEP files (use the “v3” files, I improved clearances a bit). Also included in the main photos are the raw aluminum parts as they come from the manufacturer, prior to powder coating.
I learned AFTER receiving my order that Shenzhen can offer black anodizing if you message them before ordering (I think you can include a “build note” or something with your order too). I do not have personal experience with the appearance of anodized 3D printed aluminum, but I probably would have used that option had I known about it.

Files to upload for the right (derailleur) side:
For the left side (if using a Pod for AXS Reverb), just substitute the “left” files. The spacer is the same for both sides.
- TRP_Lever_Mount_Right_v3.step
- SRAM_Pod_Clamp_Right_v3.step
- SRAM_TRP_Spacer_v3.step
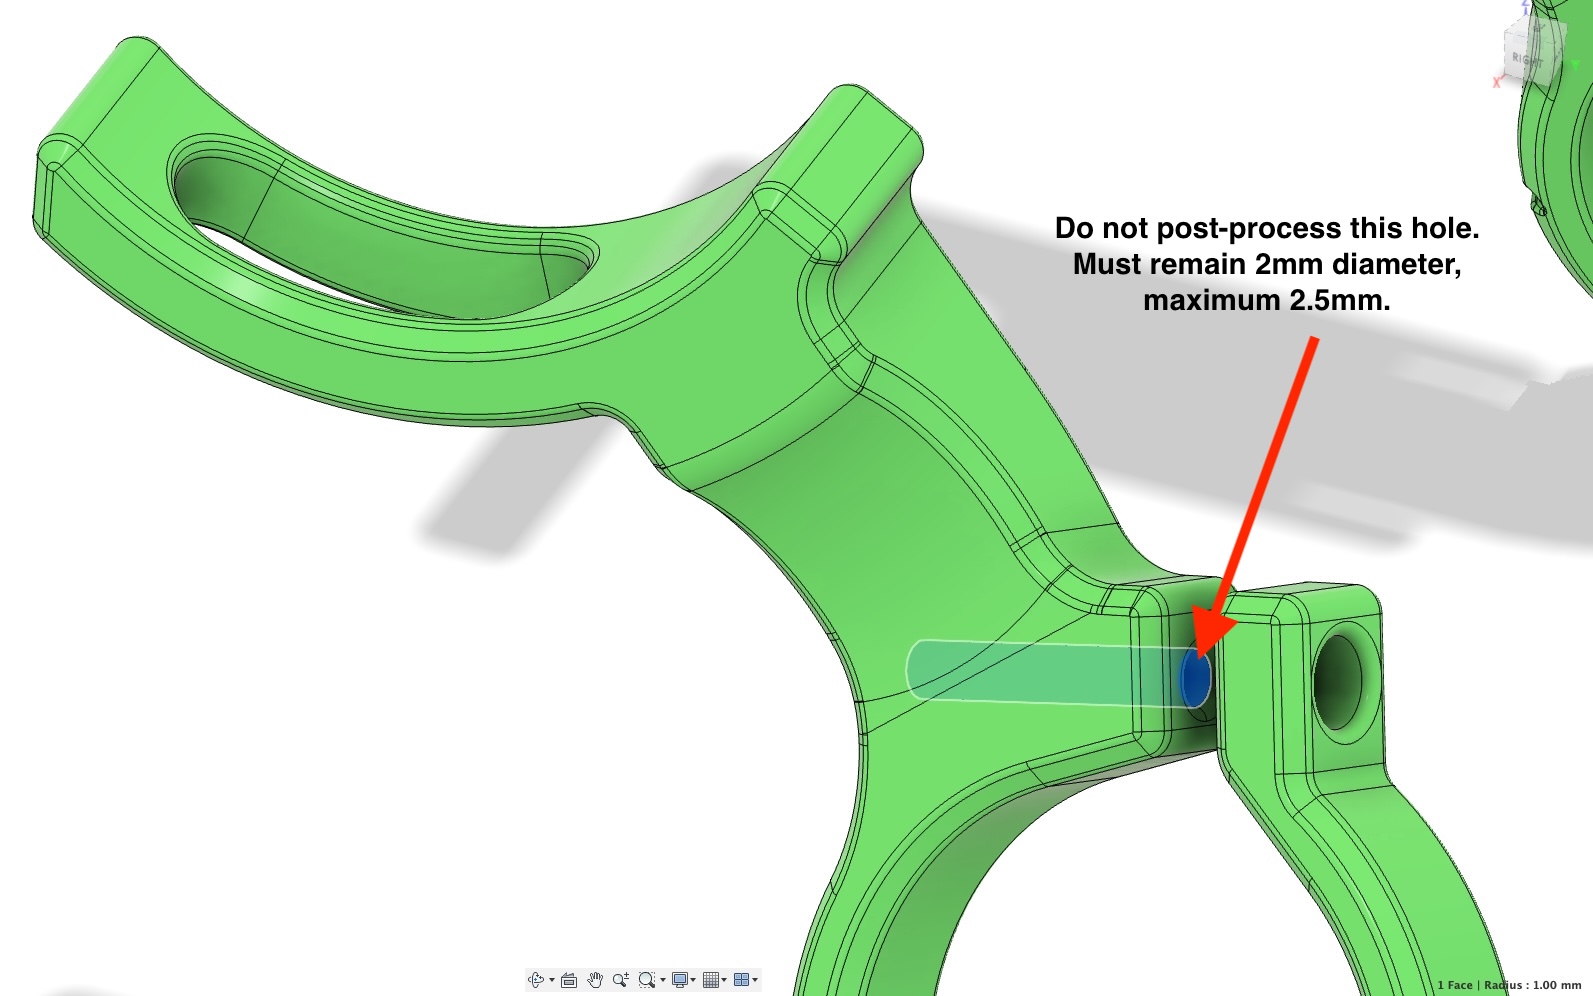
Also if you do make an order for these, message them before they start production to specify one of the holes should not receive any post processing, see below. They oversized the hole too large for the screw threads but they did reprint the parts at no cost.
Tools and hardware you'll need:
- M5x10 screws x2
- 12mm length should work as well. I used brake rotor bolts, so you may have these already.
- M3x12 screws x2
- M5x0.8 tap and 4.2mm drill bit
- Optional but recommended: M5x0.8 Helicoil kit with STI tap and bit
- I stripped the threads into the printed aluminum for the M5 screw but the helicoil threads feel much more secure. You could skip straight to the helicoil, but trim the insert down first.
- M3x0.5 tap and 2.5mm drill bit


Phew, ok, I think that's it! Hope you like it.