
Filament weight scale spool holder - Prusa CORE One
Obliczymy ostateczną cenę na podstawie wybranego pliku. Sprawdzisz ją i zaakceptujesz przed płatnością.
Zapisane na tym urządzeniu.

Measure the weight of your spool while it's on the printer!
- Ocena
- 5 / 5
- Polubienia
- 105
- Pobrania
- 116
- Wydruki
- 4
- Wyświetlenia
- 3553
- Oceny
- 4
Aktualizacja u źródła:
Informacje o modelu
- Źródło
- Printables
- Kategoria
- Prusa Parts & Upgrades
- Licencja
- Creative Commons — Public Domain
Spool holder with Integrated filament weight scale for Prusa CORE One
| This is a preview build! Instructions may be unclear or missing. You should have sufficient electronics experience to solder or crimp your own connectors and program a micro-controller. |
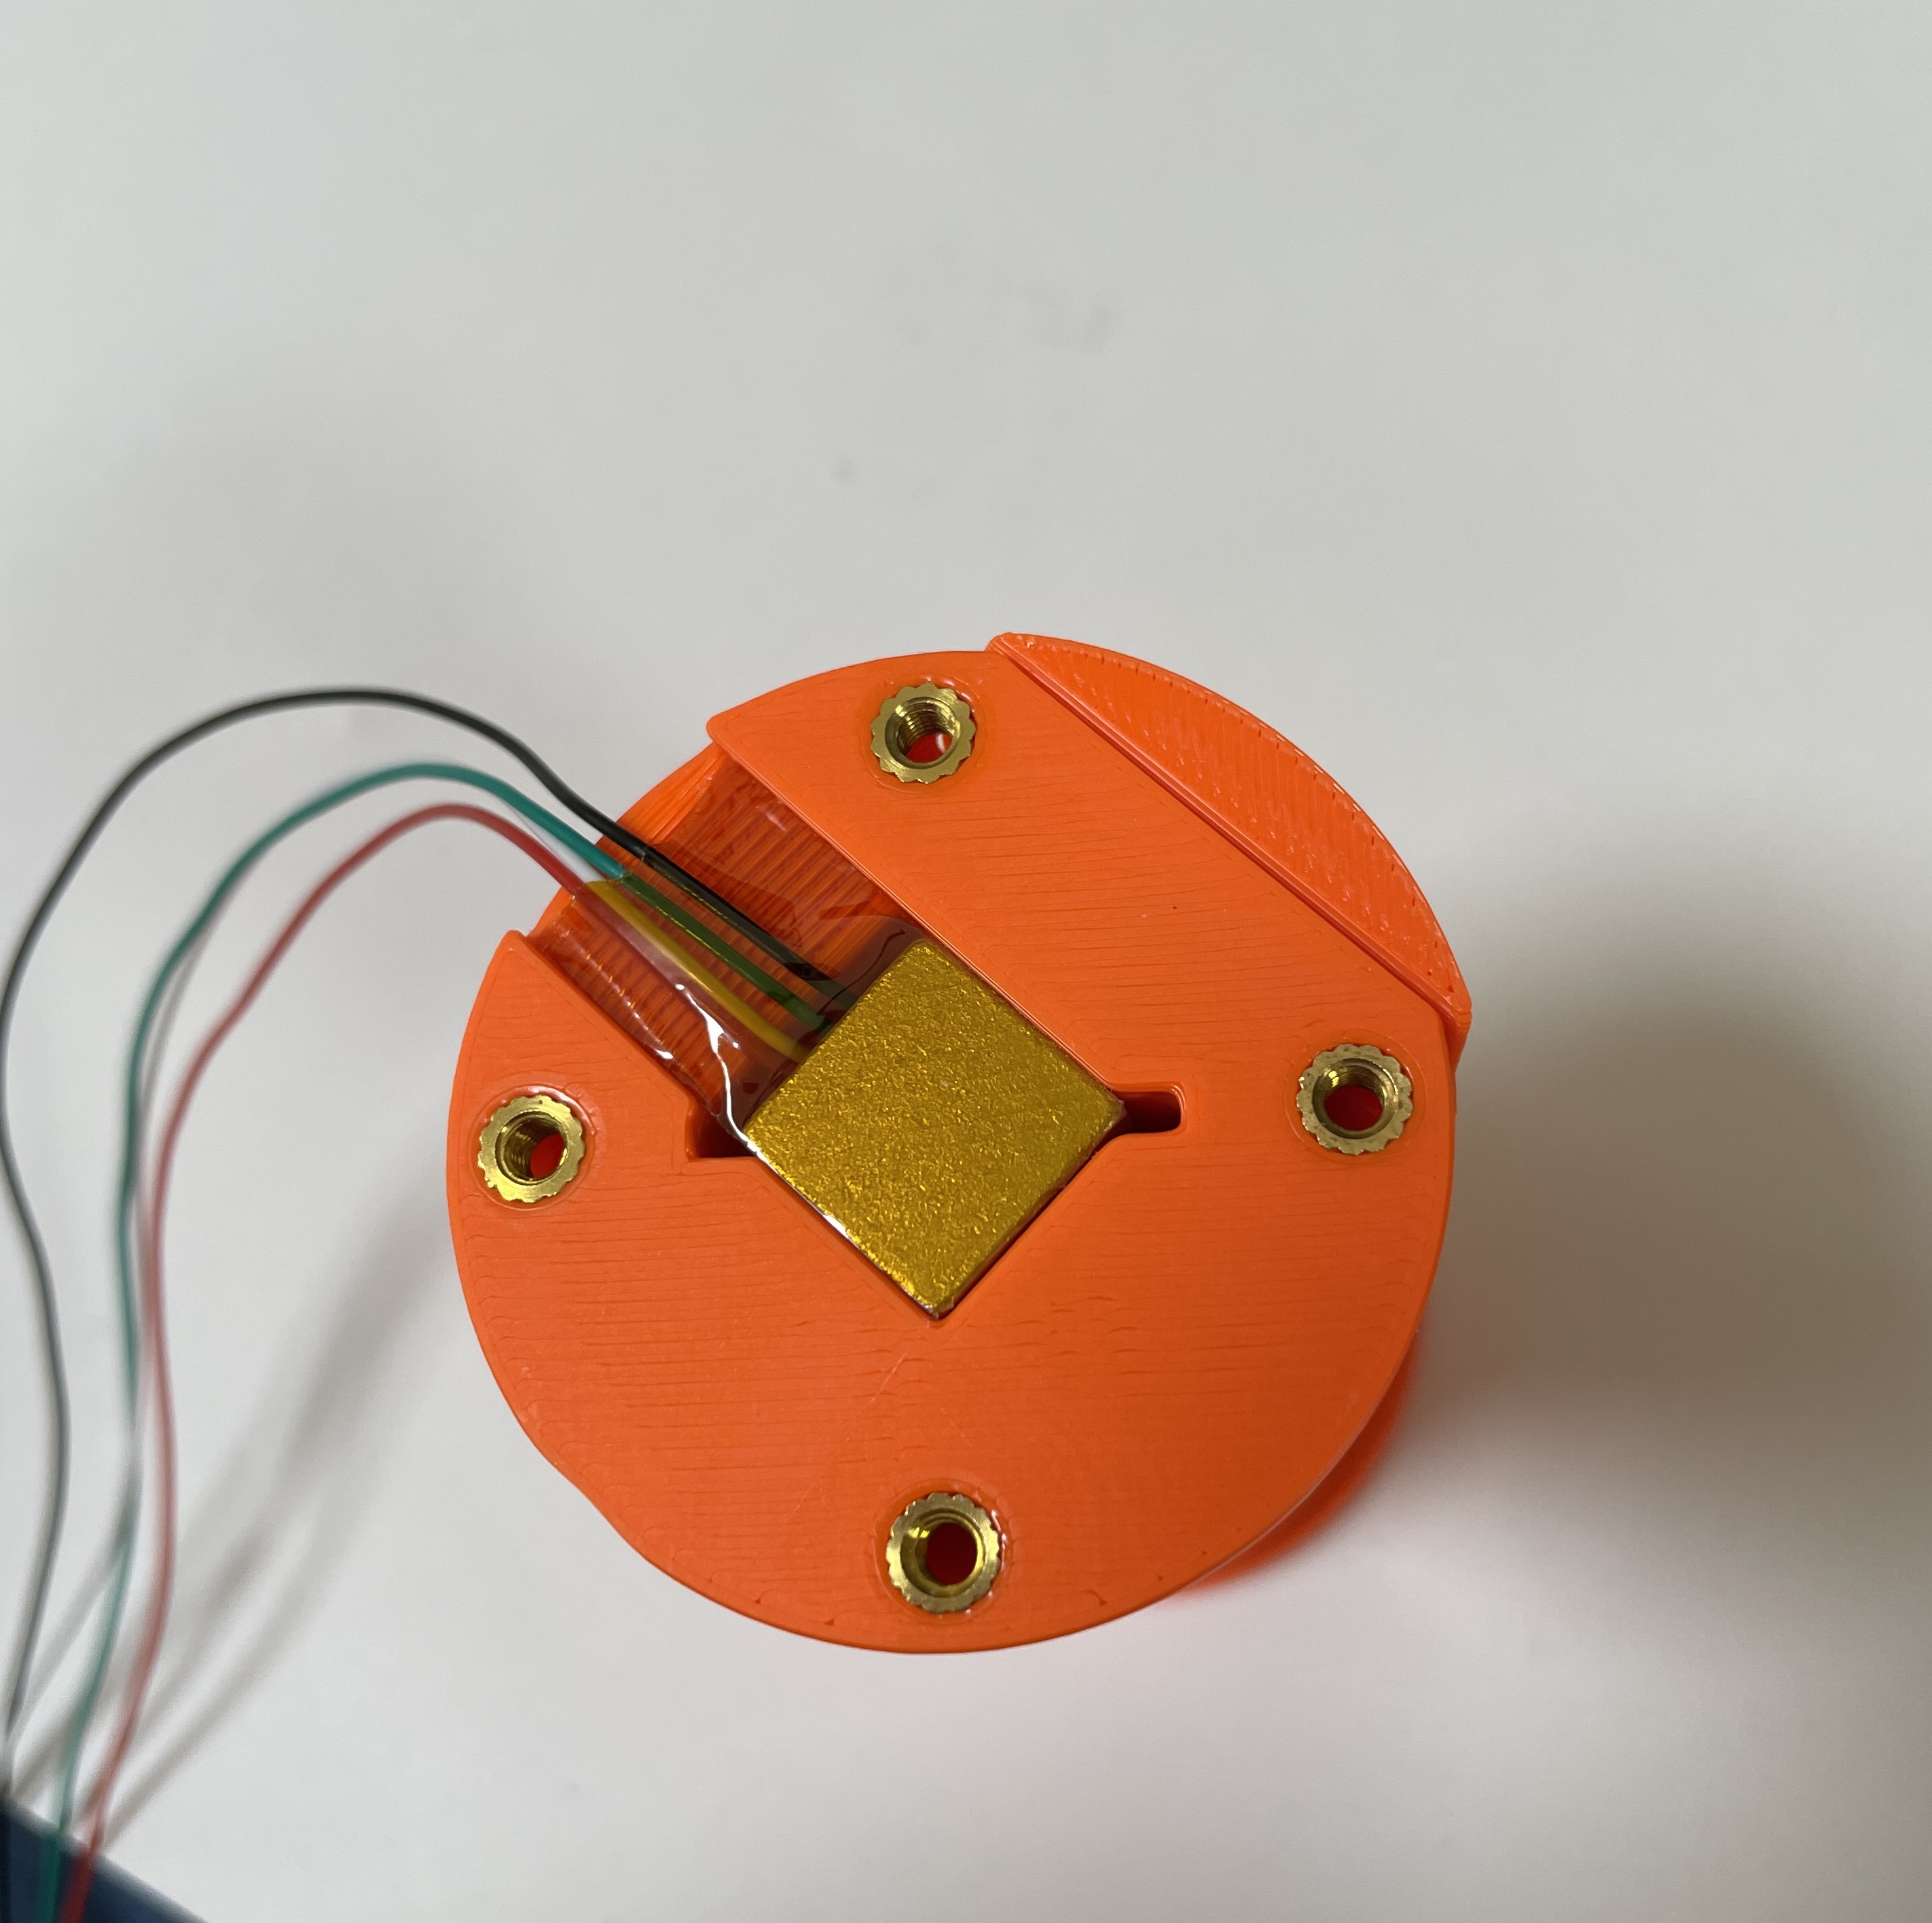
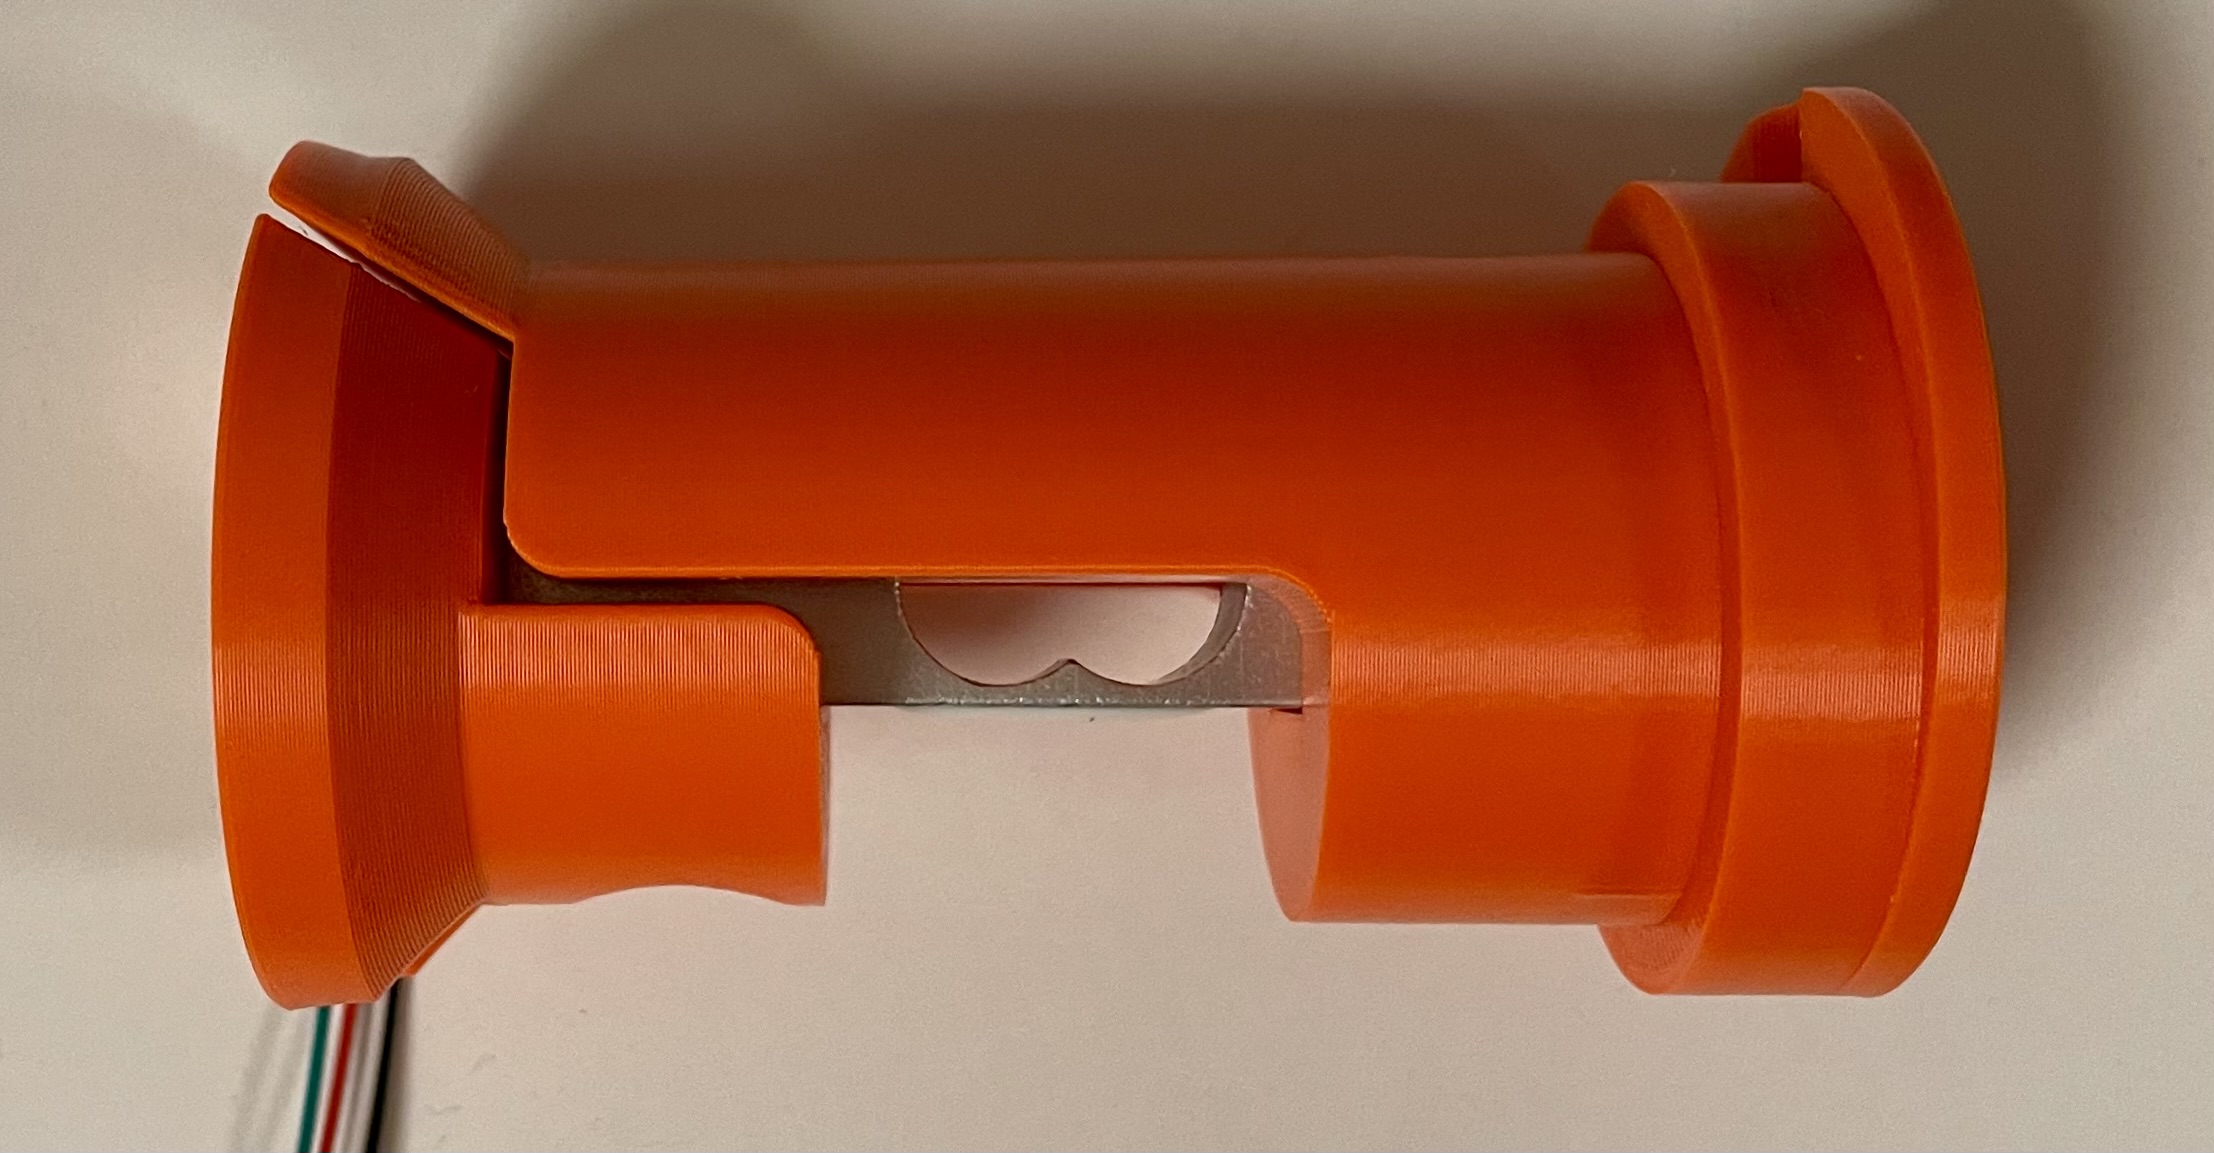
This is a spool holder for the Prusa CORE one with an integrated load cell to measure filament spool weight. It takes up no extra space* compared to the stock filament spool. It's connected to a micro-controller flashed with ESPHome.
I also added a PN532 NFC reader to tag my spools but this is completely optional. I have not yet added instructions or files for that but included my config.
* The electronics take up space
NOTE: Don't expect great precision. While calibration can help, there is going to be drift in the measurements especially as the chamber temperature heats and cools. The intent of this project is to be a general measuring system – not a precision scale.
Hardware required
- 5kg load cell, straight bar (pictured). Dimensions are 80mm long, 12.7mmx12.7mm. 2xM4 holes on the load side and 2x5mm holes on the static mounting side.

- HX711 Load cell ADC
- ESP32-C6 recommended but anything that is supported by ESPHome
- QTY 2, M4x16mm button head fasteners
- QTY 2, M5x16mm button head fasteners
- M3 x 5 x 4mm heat set inserts (Voron style)
- M3 x 8mm Torx T10 fasteners (these are reused from the original spool holder)
Instructions
- Print the parts. Minimum 3 walls, 20% infill. PETG or ASA recommended
- Program your micro-controller using the config below, replacing the values as required
- Insert the heat set inserts to the bottom half
- Insert the load cell into the bottom half with the wires leading out of the back. (Towards the printer chamber). The arrow should be on the opposite side.
- (Optionally) Tape down the wires with some Kapton tape
- Screw in the M5 fasteners to secure the bottom half of the load cell
- Attach the top half of the spool holder with the M4 fasteners
- Affix to the CORE One, while keeping the wires out of the way and avoid tangles.
Programming the microcontroller for ESPHome
In my photos I used a Wemos D1 Mini but this is the ESP8266 and not recommended by ESPHome. If you are buying a new microcontroller for this project, I would recommend an ESP32. The config below is one for the ESP32-C6-DevKitC-1.
Open ESPHome Builder and use the following config, modifying the pins for those matching your microcontroller:
substitutions:
spoolman_url: "http://192.168.1.110:7912" # replace this with your Spoolman server and portesphome:
name: prusa-core-one-filament-scale
friendly_name: Prusa CORE One Filament Scale
esp32:
board: esp32-c6-devkitc-1
flash_size: 8MB
variant: esp32c6
framework:
type: esp-idf
logger:
api:
encryption:
key: "<there's_a_random_key_here>"
ota:
- platform: esphome
password: "<there's_a_random_password_here>"
wifi:
ssid: !secret wifi_ssid
password: !secret wifi_password
ap:
ssid: "prusa-core-one-filament-scale"
password: "random_characters_here"
captive_portal:
http_request:
sensor:
- platform: hx711
id: gross_filament_weight
name: "HX711 Value"
dout_pin: GPIO0
clk_pin: GPIO1
gain: 128
update_interval: 10s # Change this to a longer value once you've calibrated the HX711. 30s is good
filters:
- calibrate_linear:
- 23000 -> 0
- 61550 -> 100
- 155000 -> 200
- 235000 -> 500
- 439000 -> 973 # These are example values. You will need to calibrate these
unit_of_measurement: g
number:
- platform: template
name: "Spoolman Spool ID"
id: spoolman_spool_id
icon: "mdi:printer-3d"
min_value: 0
max_value: 999999999
step: 1
restore_value: True
optimistic: True
button:
- platform: template
id: send_to_spoolman
name: "Send weight to Spoolman"
on_press:
then:
- if:
condition:
- switch.is_on: toggle_spoolman_update
then:
- http_request.send:
url: !lambda |-
char buf[256];
sprintf(buf, "%0.f", id(spoolman_spool_id).state);
return ((std::string) "${spoolman_url}/api/v1/spool/" + buf + "/measure").c_str();
method: PUT
headers:
Content-Type: application/json
json:
weight: !lambda "return std::to_string(id(gross_filament_weight).state);"
switch:
- platform: template
name: "Send to Spoolman?"
id: toggle_spoolman_update
icon: "mdi:server"
restore_mode: RESTORE_DEFAULT_ON
optimistic: True
Optional LED on the devkit board
light:
- platform: esp32_rmt_led_strip
rgb_order: GRB
pin: GPIO8
num_leds: 1
chipset: ws2812
name: "Board light indicator"
id: board_led
Everything below here is completely optional
Remove everything below if you are not using
an NFC reader
i2c:
sda: GPIO4
scl: GPIO5
scan: true
id: bus_a
Tags have a single NDEF text record. It is
formatted as:
spool_id:<id>
Example:
spool_id:37
pn532_i2c:
- update_interval: 1s
- on_tag:
then:
- light.turn_on:
id: board_led
brightness: 100%
red: 0%
green: 100%
blue: 0%
flash_length: 5s
- lambda: |
if (!tag.has_ndef_message()) {
return;
}
auto message = tag.get_ndef_message();
auto records = message->get_records();
for (auto &record : records) {
std::string payload = record->get_payload();
size_t pos = payload.find("spool_id:");
int spool_id = atoi(payload.substr(pos + 9).c_str());
id(spoolman_spool_id).publish_state(spool_id);
ESP_LOGI("custom", "Scanned spool ID: %d", spool_id);
}
return;
- button.press: send_to_spoolman
Connecting hardware
Connect the load cell to the HX711 ADC board following this wiring scheme:
Red → E+
Black → E-
White → A-
Green → A+
Wire the HX711 to 3.3V power (VCC), ground(GND), clock (SCL/SCK) and data (DOUT/DT).
If you're adding a PN532 NFC reader, then you'll need to share the 3.3V power with the HX711. This will require some soldering or crimping multiple connectors. I tried the HX711 with 5V with no issues but it's likely going to cause premature failure.
Calibrating the scale
The printer should not be printing while doing this or else it could throw off the values. It should also be around room temperature.
- On a kitchen scale or similar, measure 5 known spool weights, including an empty spool (lightest you can find). Write these measurements down and keep them in mind.
- After flashing the micro-controller, assembling everything and mounting the filament holder to the printer, load up the logs for ESPHome.
- Note the initial value you're receiving from the HX711. In my case it was around 23000. This is your tare weight (IE: your zero). Write this down as your 0.
- Load up the empty spool. Wait around 60 seconds. Write down that value.
- Repeat this step with the other spools waiting ~60 seconds for the weight to “settle.”
- Fill in the values in your ESPHome config. Example below:
      - calibrate_linear:
  - 23000 -> 0
  - 61550 -> 101
  - 155000 -> 220
  - 235000 -> 550
  - 439000 -> 973
Here's a little chart you can use to write things down:
| Filament Weight | HX7111 Value |
This should be enough to get you started.
This is a CC0 model. Remixes welcome!
Write a comment or post a make!