
HyperX MINI mouse shell
Obliczymy ostateczną cenę na podstawie wybranego pliku. Sprawdzisz ją i zaakceptujesz przed płatnością.
Zapisane na tym urządzeniu.

The uncompromising smallest shell for HyperX Pulsefire Saga mouse.
- Ocena
- 0 / 5
- Polubienia
- 16
- Pobrania
- 43
- Wydruki
- 0
- Wyświetlenia
- 435
- Oceny
- 0
Aktualizacja u źródła:
Informacje o modelu
- Źródło
- Printables
- Kategoria
- Computers
- Licencja
- Creative Commons — Attribution — Noncommercial — Share Alike
The smallest shell for the HyperX Pulsefire Saga mouse, while still maintaining a smooth design. The width is the same as the chassis width, the length is only 1mm larger and the shell height is just 3mm higher. Useful for small hands, for travel, or simply to save space.
I took an uncompromising approach to this, so in some regions the chassis is even exposed which does not affect the function and smoothness of the surface. As part of the thickness optimization, there are through screw holes in some spots instead of blind holes, just enough for threaded length of the screw.
Printing in general:
- 2 perimeters
- 0.2mm layer (0.15mm)
- 10% infill, rectilinear
Body printing:
The body part is very easy to print. You don't need any supports, just place the part on the rear flat face. Consider using a brim.
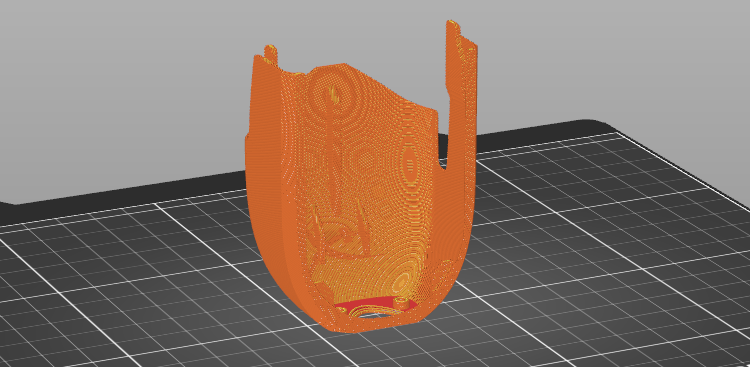
Buttons part printing:
Probably the trickiest part to print. Print this in vertical orientation (placed on the flat narrow back face). I used organic supports (0.1mm Z distance), support on build plate only and "don't support bridges' option ON. In some spots I was able to make the shape that doesn't need support compared to the original part.
One more tip for "bed slingers": In my opinion it is better to align the part with X axis so that the bed (Y axis) moves less during printing.

Front part printing:
Keep the orientation of the stl model (on the bottom face). Use organic support (0.1mm Z distance) on build plate only and "don't support bridges' option ON. I also had to manually block supports on the upper face of USB hole. Overhang threshold 15deg.
Note that the fixing holes on the brackets tend to be smaller after printing. Be prepared to drill them larger.

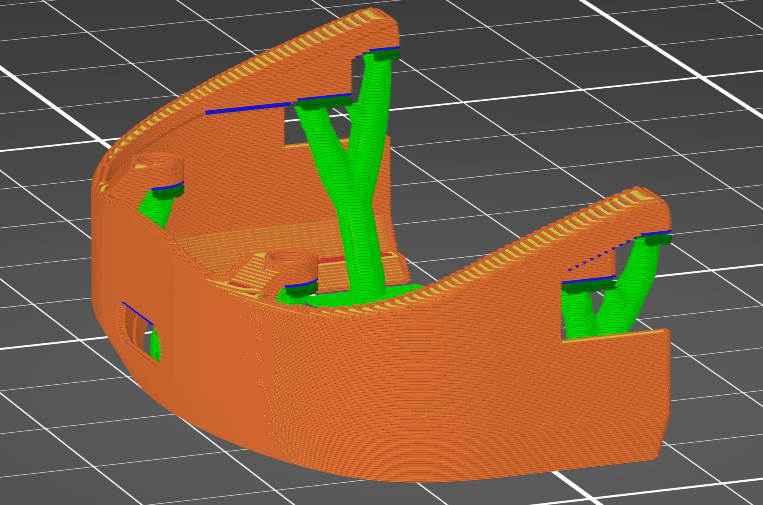
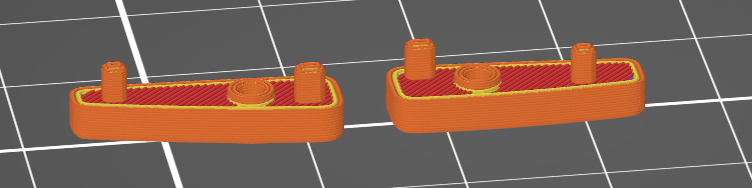
Thumb buttons printing:
These are very easy to print. Print it on the flat faces where the thumb touches the button.
Overall this was a great contest that I enjoyed and I would like to thank HyperX for making it possible and sharing their great mouse design with us. Also a big thank you to the Prusa team who hosted this contest on the PRINTABLES platform. 👌👍👏