
Side Edge Tuning Tool - Ski und Snowboard
Obliczymy ostateczną cenę na podstawie wybranego pliku. Sprawdzisz ją i zaakceptujesz przed płatnością.
Zapisane na tym urządzeniu.
Tuning tool um die Seitenkante von Ski und Snowboards zu bearbeiten.
- Ocena
- 5 / 5
- Polubienia
- 15
- Pobrania
- 65
- Wydruki
- 2
- Wyświetlenia
- 715
- Oceny
- 1
Aktualizacja u źródła:
Informacje o modelu
- Źródło
- Printables
- Kategoria
- Tools
- Licencja
- Creative Commons — Attribution — Noncommercial — NoDerivatives
[GERMAN]
Hallo zusammen,
nach der Suche nach einem guten Schleiftool für Snowboards ist letztlich ein eigenes Tool entstanden, um den Anforderungen von Ski und Snowboards gerecht zu werden. Dies sind beim Snowboard vor allem die geschwungenen oder welligen Beläge und Formen.
Die gesamte Diskussion, wie ein solches Tool aussehen müsste und die Nachteile, die zum Beispiel andere Tools haben, ist hier zu finden (Deutsch): Snowboard Forum - Schleiftool Seitenkante
Verfügbar sind die Grundversionen von 85° bis 90°. Dies sind als 3D Druck vollkommen ausreichend, um mit Ihnen die Seitenkante zu bearbeiten. Es empfiehlt sich eine kommerzielle Feilenklemme zu verwenden, um die Feile zu fixieren. Die Nutzung nur mit der Hand ist aber ebenfalls möglich.
Es sind Modifikationen vorhanden, die das Bearbeiten der Kante erleichtern und nach Bedarf hinzugefügt werden können.
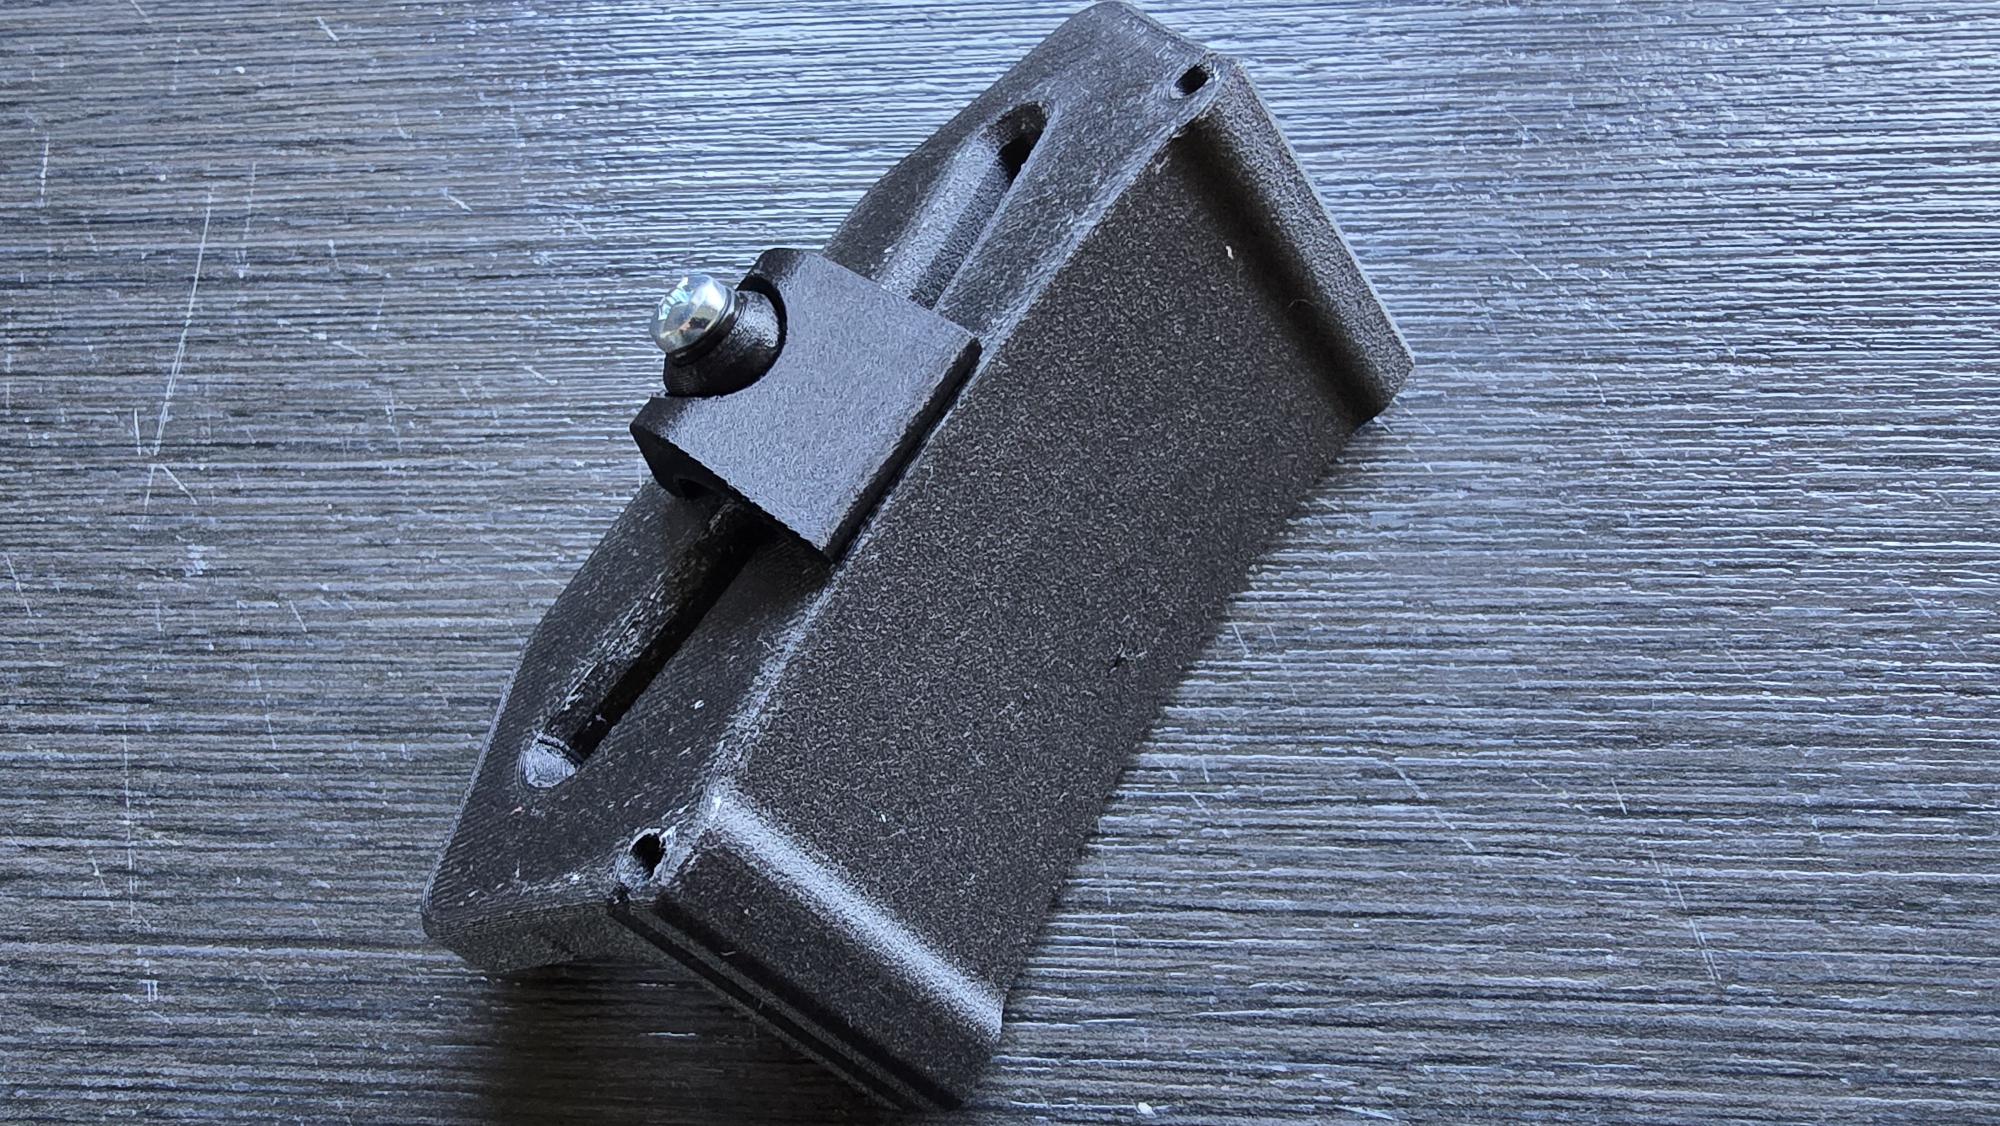
Modifikation 1 - Feilenklemme
Durch die Modifikation wird die Feile auf dem Tool fixiert. Dies ersetzt eine kommerzielle Feilenklemme.
Benötigt werden zusätzlich:
- Datei SideEdgeTool_ClampBall und SideEdgeTool_Clamp
- 1x Rundkopfschraube M4x40mm (Baumarkt)
- 1x Unterlegscheibe Metall M4 (Baumarkt)
- 1x optional - Unterlegscheibe Gummi oder Plastik M4x8x1mm klein (Baumarkt oder Ali-Express)
- 1x Messing Schmelzeinsatz M4, Außendurchmesser 6mm, Länge 5mm (Ali-Express)
- 1x Rändelschraube M4 (Ali-Express) oder Alternativ die Datei SideEdgeTool_Knob mit einem Messing Schmelzeinsatz M4



Modifikation 2 - Spahnabfang
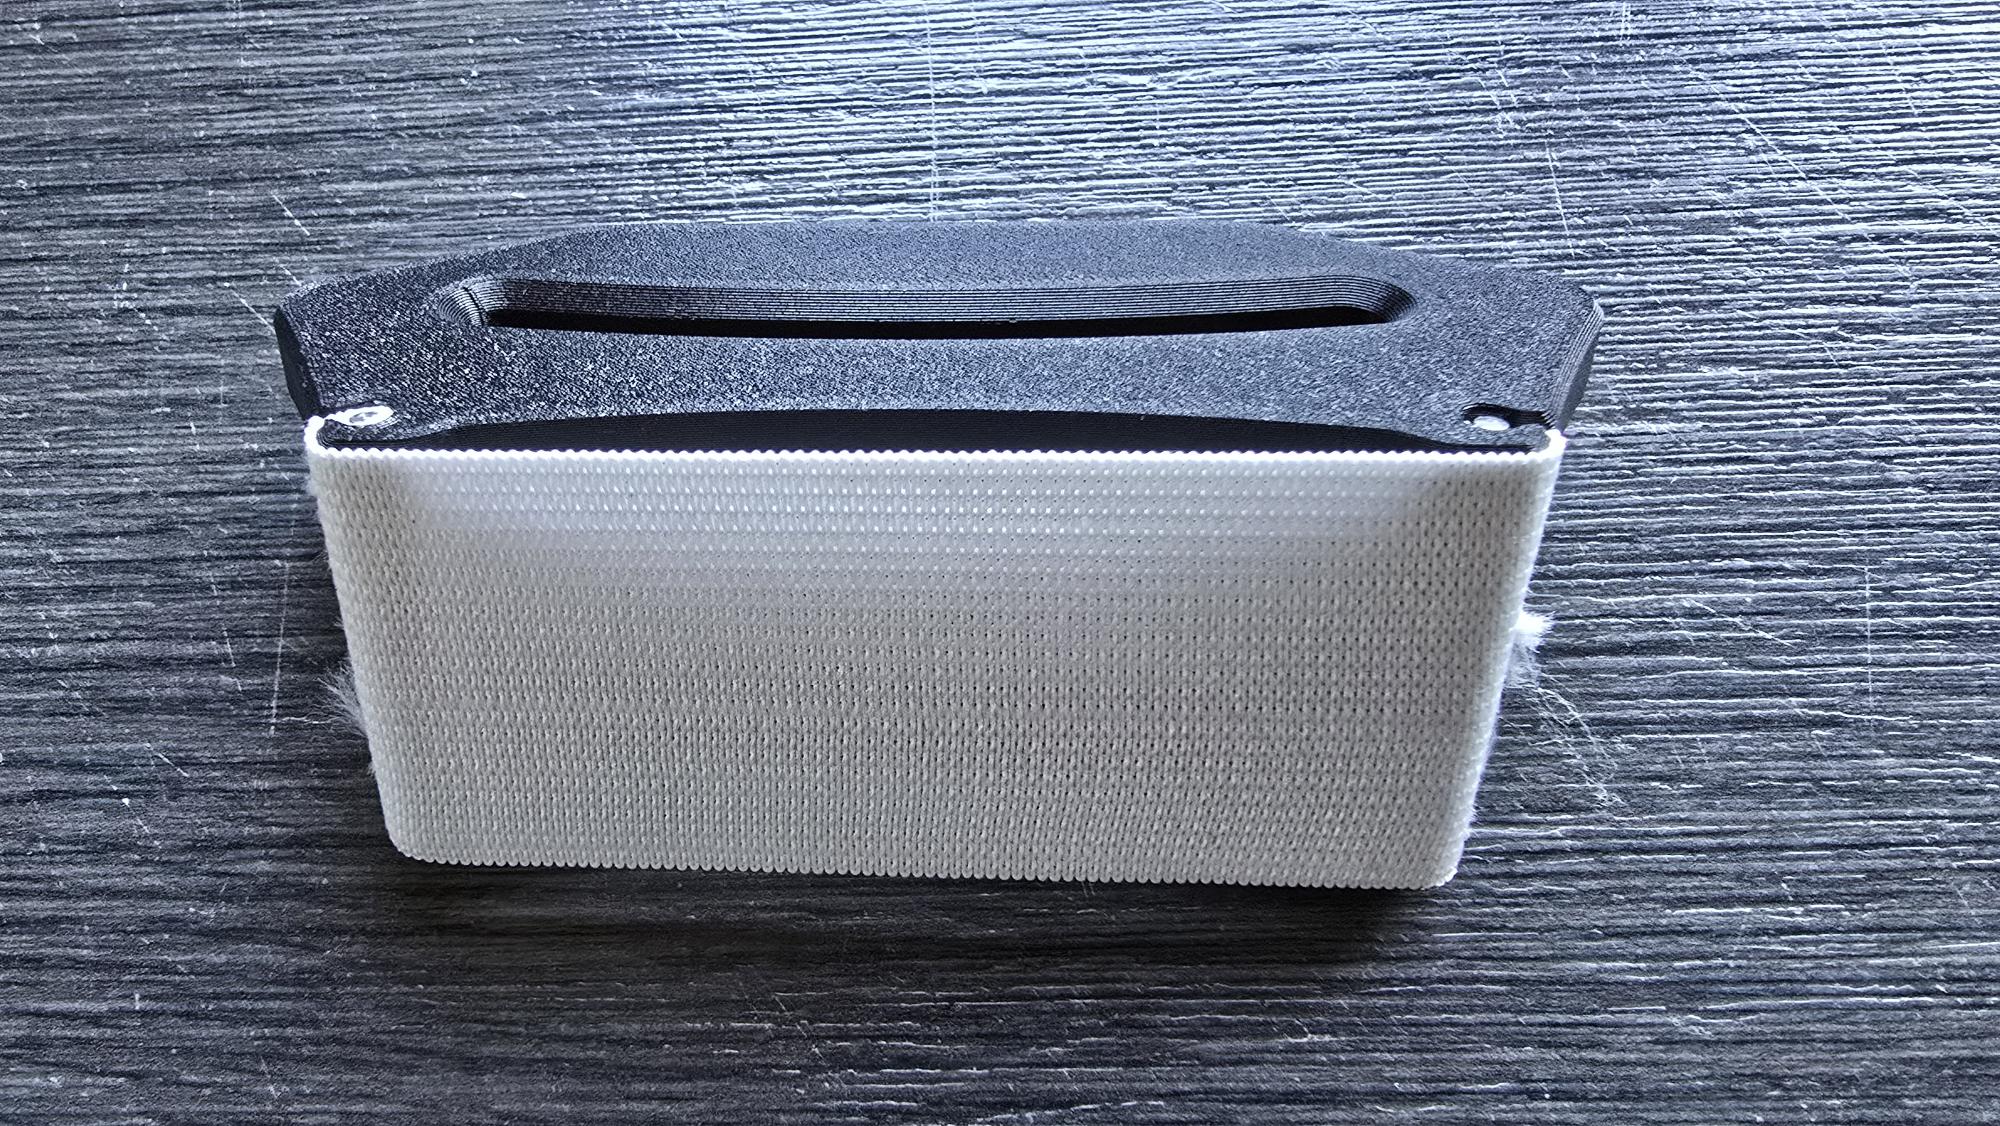
Der Spahnabfang sorgt dafuer, dass die Metallspähne sich nicht im Belag festsetzt. Dieser sammelt sich in dem genutzten Hosengummi. Das Band muss insbesondere dann erneuert werden, wenn viel Material abgetragen wird. Dies ist nach etwa 3 bis 5 Paar Ski notwendig, wenn man den Winkel der Seitenkannte veraendert und nicht nur erneuert. Das Band wird in die Aussparrungen an den beiden Seiten eingedrueckt und dann mit den beiden Bolzen fixiert. Es hilft am Anfang, wenn man ein bisschen von dem Band an der Oberseite rausschauen laesst, um den Bolzen leichter einzuschieben. Wenn der Bolzen eingeschoben ist, am besten das überstehende Band lang ziehen und mit der Schere bündig abschneiden, dann steht nichts über (siehe Bild).
Benötigt werden zusätzlich:
- 1x Hosengummi, 40mm Breit, 150mm lang, schwarz oder weiß (Amazon)
- 2x Metallbolzen, 3x40mm (Ali-Express)

Druckempfehlung
Aufgrund der Reibungswärme insbesondere an der Metallkante empfiehlt sich mindestens PETG. Für die Optik wurde hier PETG CF verwendet und hat sich als sehr stabil und langlebig erwiesen.
- Filament - PETG CF
- Wandanzahl: mindestens 4
- Füllung: 20%
Das Tool wird inzwischen mehrfach verwendet und wurde getestet. Die Genauigkeit beim 3D Druck liegt bei einer Abweichung im Winkel von etwa 0,03° bis 0,04° und ist damit sehr gut als Tool geeignet.
Die STEP Dateien sind für Modifikationen beigefügt. Es wäre gut, wenn Verbesserungsvorschläge im Forum oder hier als Kommentar diskutiert werden können. Die Remix Culture ist abweichend von der CC 4.0 Lizenz grundsätzlich erlaubt.
Ich arbeite derzeit an weiteren Erweiterungen / Tools rund um Ski und Snowboards.
[US]
Hello everyone,
after searching for a good edge tool for snowboards, we developed our own tool to meet the requirements of skis and snowboards. For snowboards, these are primarily the curved or wavy bases and shapes. The entire discussion about what such a tool should look like and the disadvantages of other tools, for example, can be found here (German): Snowboard Forum - Schleiftool Seitenkante
The basic versions are available from 85° to 90°. These are perfectly adequate for 3D printing to work on the side edge. It is recommended to use a commercial file clamp to secure the file. However, it is also possible to use it by hand. Modifications are available to make it easier to work on the edge and can be added as required.
Modification 1 - file clamp
This modification secures the file to the tool. It replaces a commercial file clamp.
Additional items required:
- SideEdgeTool_ClampBall and SideEdgeTool_Clamp files
- 1x M4x40mm round head screw (hardware store)
- 1x metal washer M4 (hardware store)
- 1x optional - rubber or plastic washer M4x8x1mm small (hardware store or Ali-Express)
- 1x brass heat insert M4, outer diameter 6mm, length 5mm (Ali-Express)
- 1x knurled screw M4 (Ali-Express) or alternatively the file SideEdgeTool_Knob with a brass melt insert M4


Modification 2 - metal chips catcher
The metal chips catcher ensures that metal chips do not get stuck in the base. These are collected in an elastic waistband. The waistband must be replaced, especially when a lot of material is removed. This is necessary after about 3 to 5 pairs of skis if you change the angle of the side edges and do not just refresh them. The waistband is pressed into the recesses on both sides and then secured with the two metal pins. It helps at the beginning to leave a little of the waistband sticking out at the top to make it easier to insert the metal pin. Once the bolt is inserted, it is best to pull the excess waistband and cut it flush with scissors so that nothing sticks out (see picture).
You will also need:
- 1x elastic waistband, 40mm wide, 150mm long, black or white (Amazon)
- 2x metal pins, 3x40mm (Ali-Express)


Print recommendation
Due to the frictional heat, especially at the metal edge, PETG is recommended as a minimum. PETG CF was used here for the appearance and has proven to be very stable and durable.
- Filament - PETG CF
- Number of walls: at least 4
- Infill: 20%
The tool has now been used several times and has been tested. The accuracy of the 3D print is within an angle deviation of approximately 0.03° to 0.04°, making it a very suitable tool.
The STEP files are included for modifications. It would be helpful if suggestions for improvement could be discussed in the forum or here as comments. Remix culture is generally permitted, deviating from the CC 4.0 license.
I am currently working on further enhancements / tools related to skiing and snowboarding.