
Adapter from Raspberry Pi 5 case to NVME SSD hat
Obliczymy ostateczną cenę na podstawie wybranego pliku. Sprawdzisz ją i zaakceptujesz przed płatnością.
Wstępna wycena dla PETG
0,74 € – 0,91 € netto (bez VAT)
Dla pliku: SSD Standoff - Holder_0.4n_0.15mm_PETG_MK3.9S_58m.bgcode
To wstępna wycena jednego pliku. Dokładną cenę poznasz przed zamówieniem.
Plik i założenia wyceny
Plik użyty do wyceny
Średnia wycena orientacyjna: 0,82 € netto (środek widełek).
- Masa podana przez autora
- 8 g
- Czas druku podany przez autora
- 57,6 min
- Materiał u źródła
- PET
- Materiał wyceny
- PETG
- Drukarka wyceny
- Bambu Lab P1S - 0.4 nozzle
- Proces wyceny
- 0.20mm Standard
Orientacyjna wycena wyłącznie wybranego pliku, oparta na masie i czasie druku podanych przez autora. Warianty plików nie są sumowane. Ostateczna cena zostanie obliczona po analizie pliku.
Zapisane na tym urządzeniu.
Adapter to mount Geekworm X1001 NVME SSD hat to Edatech ED-Pi5Case-B for the Raspberry Pi 5.
- Ocena
- 0 / 5
- Polubienia
- 3
- Pobrania
- 14
- Wydruki
- 0
- Wyświetlenia
- 339
- Oceny
- 0
Aktualizacja u źródła:
Informacje o modelu
- Źródło
- Printables
- Kategoria
- Computers
- Licencja
- Creative Commons — Attribution — Share Alike
Adapter to mount Geekworm X1001 NVME SSD hat to the passively cooled Edatech ED-Pi5Case-B for the Raspberry Pi 5.
The included standoffs with the X1001 won't fit, so this is an adapter.
Print in PETG or another heat resistant material, the Edatech case is one massive heatsink for the Pi and as such gets fairly hot.
Note! This is incompatible with using the camera connectors, as the slots in the case for those is used as locating features.
Needed hardware
The Geekworm X1001 and the Edatech case (obviously)
3x M2 hexnuts
3x M2 bolts (any length in the range of M2x6 to M2x10 should work, I used M2x8)
6x M2 washers
Printing instructions
Printed in PETG, other materials may work. PLA is not recommended, the case does get fairly warm. If you have a Mk3.9s or Mk4s my 3mf PrusaSlicer project should be usable as is, otherwise look at it for inspiration for printing settings. In particular:
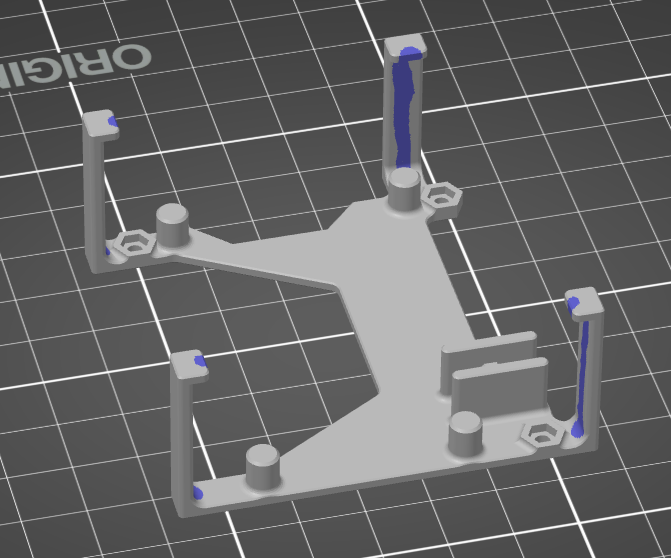
Make sure to paint on seams on the inside of the legs for best result (see project 3mf file for where):
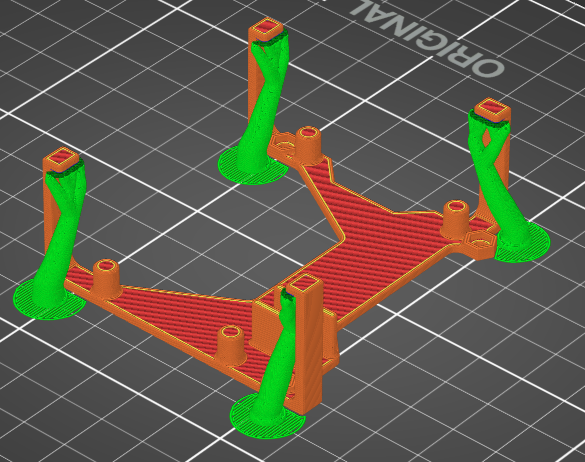
Make sure to enable organic supports for the tabs:
Installation instructions
Insert the flat flex into the slot on the Pi.
Mount the case around the Pi, threading the flat flex through the designated hole in the case.
If you use any length of SSD apart from 2280, you need to install the SSD in the hat first, as that needs access from the underside of the PCB. For full length 2280 SSDs you can mount the SSD at the end if you want.
Insert hexnuts in the hex-shaped holes on the underside of the adapter.
Mount the NVME hat to the adapter, putting a washer between the PCB and the adapter as well as one on top. The former washer helps get the PCB off the adapter for some breath-ability, the latter helps as the holes in the PCB are for M2.5 (which I didn't have handy).
Clip the adapter onto the Pi case, the PETG has enough flex to make this work.
Insert the other end of the flat flex cable into the connector on the hat.
CAD / Remixing
Made with OnShape, and here is a link to the model if you want to remix it (according to CC-by-sa 4.0). If you don't use OnShape, the STEP file is also included in the files section.