
PolyDryer DUAL-PORT ADAPTER for The Ultimate Cereal Container Filament Drybox - Official Remix
Obliczymy ostateczną cenę na podstawie wybranego pliku. Sprawdzisz ją i zaakceptujesz przed płatnością.
Zapisane na tym urządzeniu.

PolyDryer Adapter allows for proper air circulation for The Ultimate Cereal Container Filament Drybox - Official Remix.
- Ocena
- 4,857 / 5
- Polubienia
- 143
- Pobrania
- 441
- Wydruki
- 9
- Wyświetlenia
- 3682
- Oceny
- 7
Aktualizacja u źródła:
Informacje o modelu
- Źródło
- Printables
- Kategoria
- Accessories
- Licencja
- Creative Commons — Attribution — Noncommercial
Firstly, MAJOR thanks to @GunplaMark for all the hard work on the original “The Ultimate Cereal Container Filament Drybox - Official Remix” system! Brilliant work, we all owe you a dept of gratitude!
⚠ NOTE: This adapter is designed for the “OFFICIAL REMIX” version, and I have not tested compatibility with the “Original” version by @GunplaMark.
📁 STEP Files included! 📁
POLYDRYER AIRFLOW DESIGN:
The PolyDryer Box is designed with 2 ports: the rear port serves as the “supply” of heated air, and the front port serves as the “return” allowing the internal fan to recirculate warm air up from the rear, around the filament spool, and back down to the heating element in the base.
ORIGINAL POLYDRYER ADAPTER LIMITATIONS:
The PolyDryer Adapter from @GunplaMark is a good starting point, but has some limitations from only using the main circular opening in the storage box for both “supply” and “return” airflow. I suspect the adapter from @GunplaMark significantly reduces the internal air circulation, and thus reduces the effectivity of filament drying. Additionally, the distance the warm air must travel is greatly increased, causing heat loss along the way and further reducing the effectivity of the dryer.
NEW SOLUTION - POLYDRYER DUAL-PORT ADAPTER:
In my design/remix, an additional opening is cut into the storage box lid, following the existing embossed hexagon in the injection mold.
A new TPU Gasket Ring and Hexagon Seal cover ensures the box stays airtight.
Two new adapter ports for the PolyDryer allow for proper air circulation and more effective filament drying as intended.
REQUIRED STORAGE BOX:
From @GunplaMark's list, please use his recommended storage boxes with the HEXAGON on the lid: https://www.amazon.com/gp/product/B07NP98YKY?th=1&linkCode=sl1&tag=gunplagallery-20&linkId=a5450031b4b664e87343ca22a40cc0d5&language=en_US&ref_=as_li_ss_tl
🛠 PRINT + ASSEMPLY INSTRUCTIONS:
All files are oriented correctly for printing.
NO SUPPORTS ARE NEEDED, although some cosmetic drooping may occur inside the curved air duct.
Default print settings are fine (0.2mm-0.25mm layer height, 15% infill, 2 perimeters).
Print these in PETG or other high-temperature filament:
- PolyDryer Adapter - Front Adapter Port
- PolyDryer Adapter - Rear Adapter Port
- PolyDryer Adapter - Rear Port Seal
- (@GunplaMark's original “Lid-Seal” model for the existing circular opening.)
Print the “PolyDryer Adapter - Rear Port Gasket Ring” with TPU (Shore hardness 95A or similar squishiness recommended for a good seal).

CUT OUT EXISTING HEXAGON IN LID:
Using a SHARP utility knife/X-Acto knife, CAREFULLY cut around the very outer edge of the hexagon on the INSIDE of the lid.
⚠ BE CAREFUL AND TAKE YOUR TIME! ⚠ Use multiple passes to cut through the lid.
📎CUT ACCURATELY! Proper adapter alignment depends on it.


INSERT TPU GASKET RING:
The wider part (face of model that is flat on the print sheet) goes on the OUTSIDE of the lid, narrower part on the INSIDE.

TEST FIT HEXAGONAL AND CIRCULAR SEALS:

TEST FIT ADAPTER PORTS:
Remove the seal covers, and place the FRONT and REAR adapter ports on the PolyDryer vents.
⚠ NOTE “FRONT” AND “BACK” ALIGNMENT ARROWS:


PLACE LID ONTO ADAPTER PORTS:
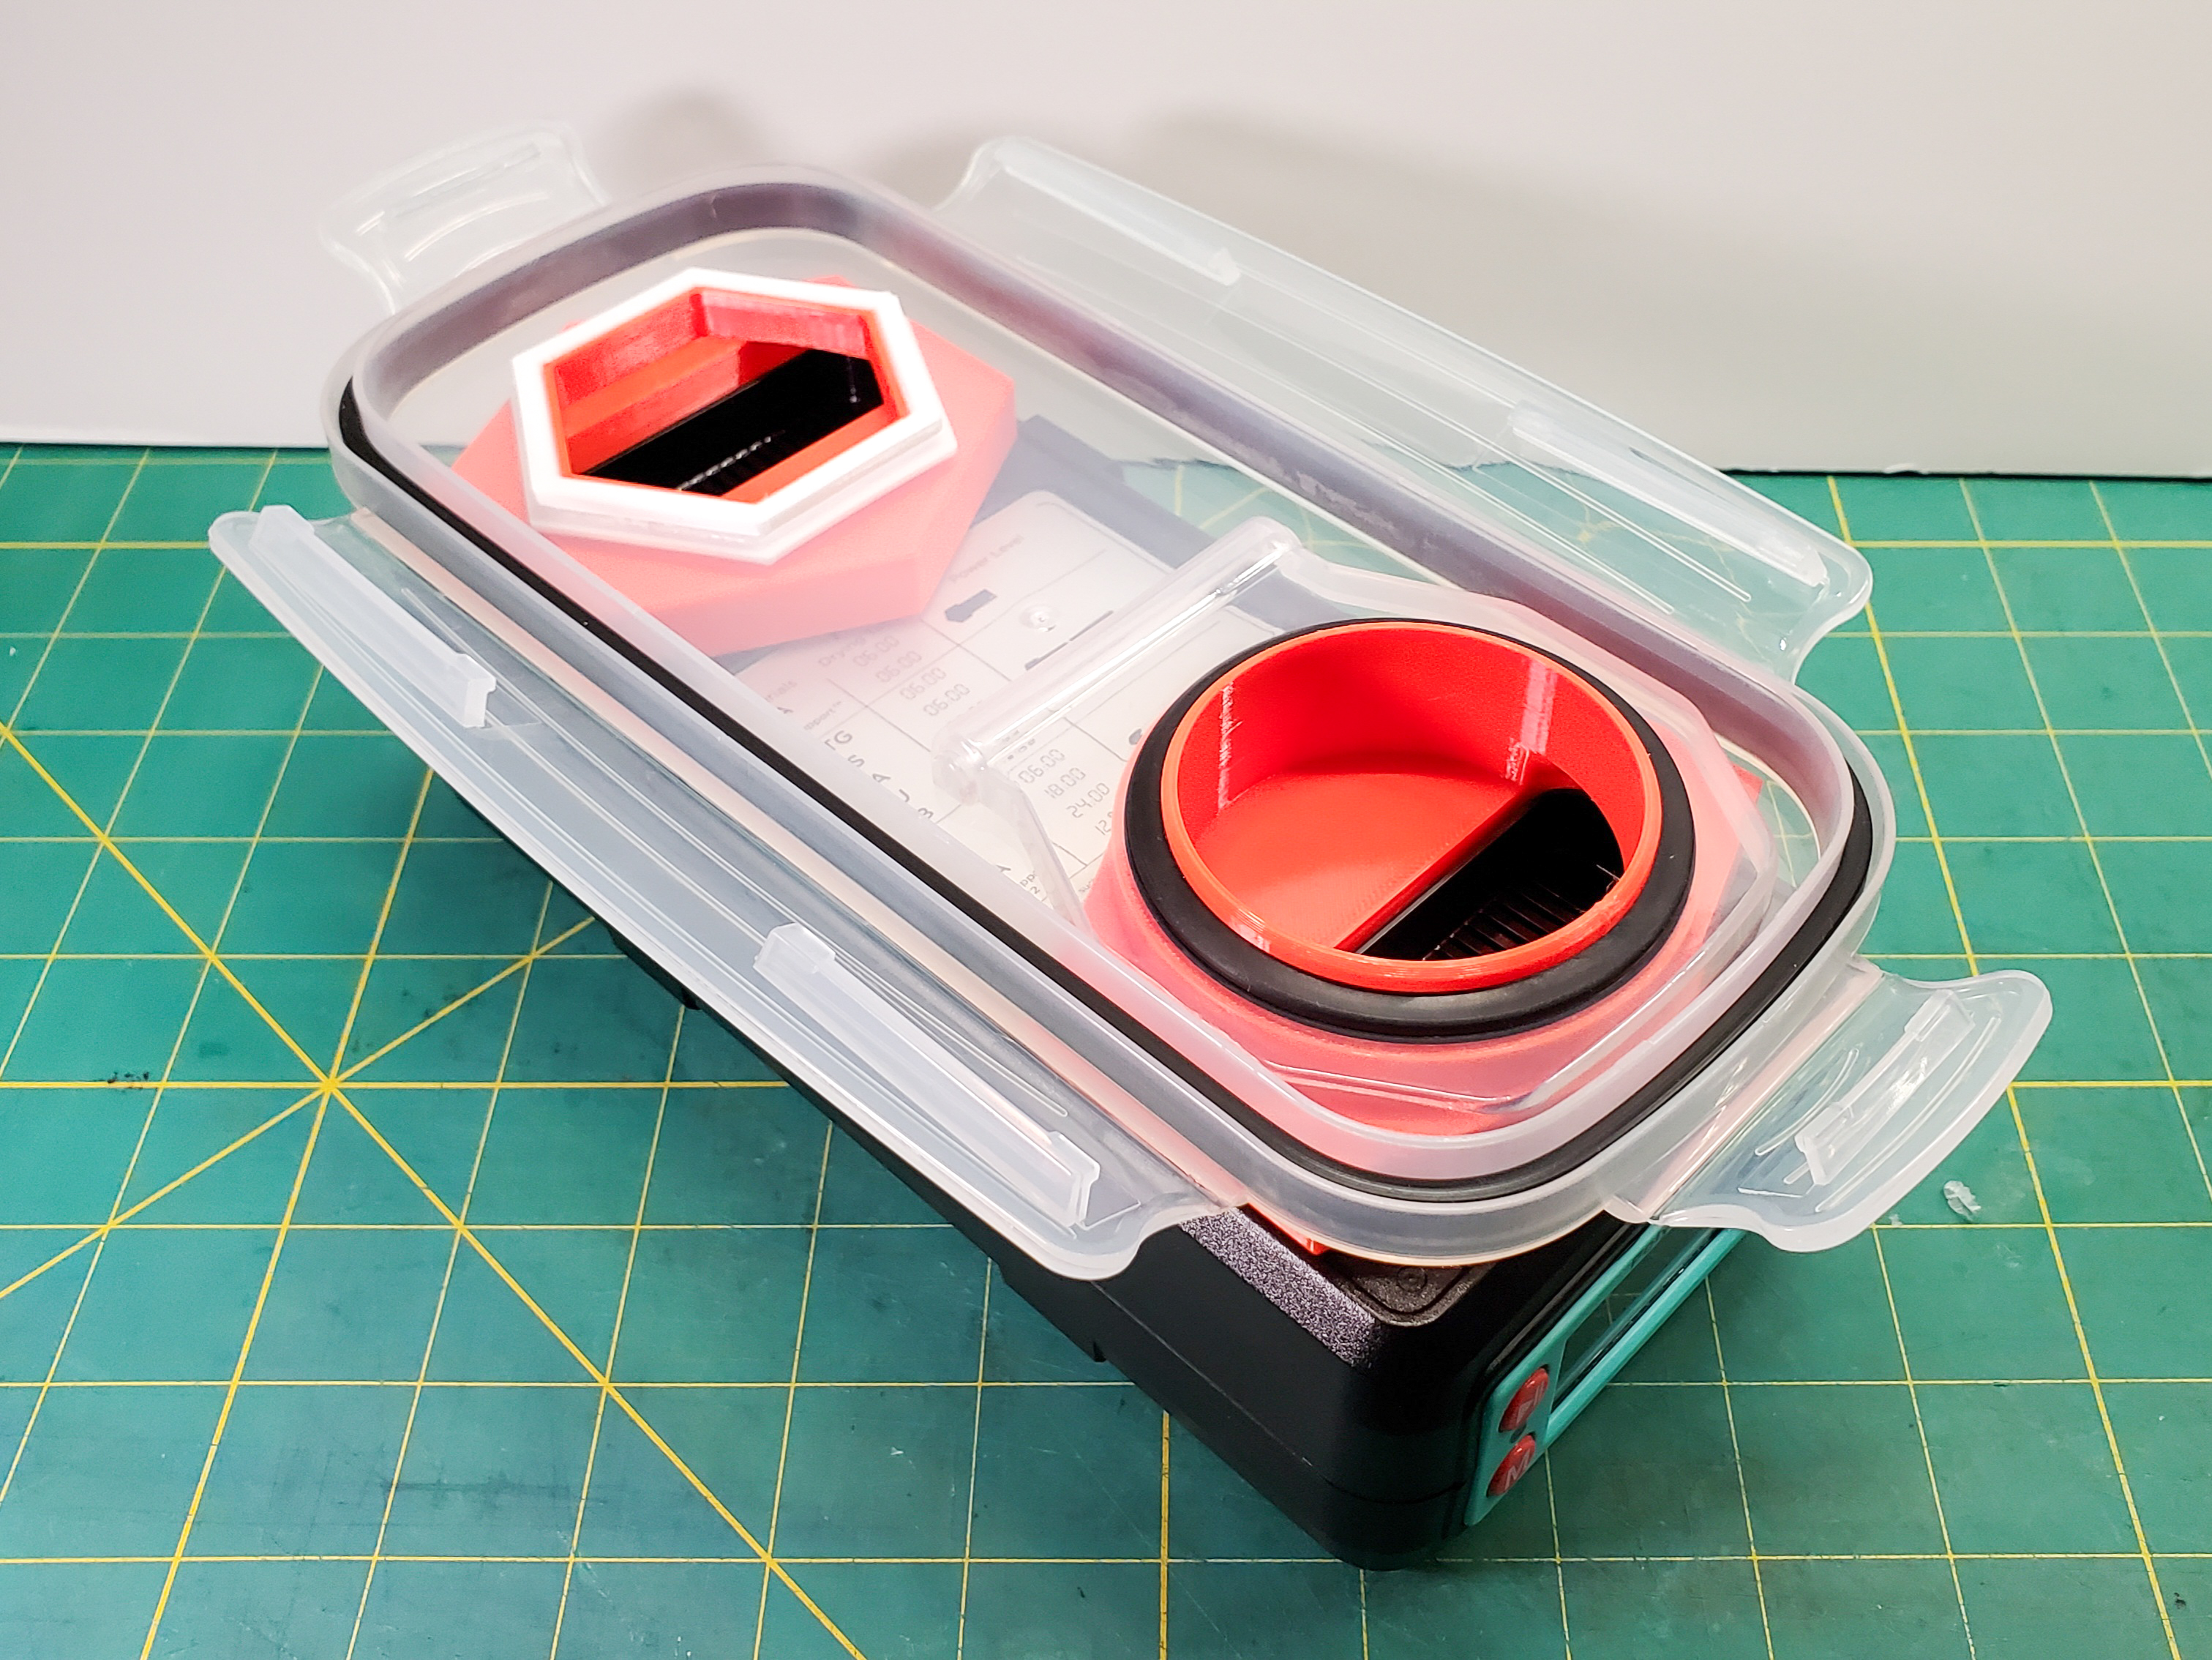
PRINT + INSTALL The Ultimate Cereal Container Filament Drybox - Official Remix System:

DRY FILAMENT AND SEAL WITH HEXAGON + CIRCULAR SEALS:

STEP files are included for modifications/remixing.
May your filament always be dry! 😄
Feedback always welcome.
~~~~~~~~~~~~~~~~~~~~~~~~~~~~~~~~~~~~~~~~~~~~~~~~~~~~~~~~~~~~~~~~~~~~~~~~~~~~~~~~~~~~
⚠ INSTRUCTIONS FOR OTHER STORAGE BOX BRANDS:
IMPORTANT! If you order a different brand of storage box container, this design will probably work, but you will need to locate the new hexagonal hole in the lid.
To align + cut new hexagonal opening:
- Storage box must have a circular, 60mm diameter opening, and be made of a transparent material.
- Print the “FRONT” and “REAR” ADAPTER PORTS, as well as the “ALIGNMENT HEXAGON" model.
- Place the FRONT adapter port it into the lid's existing circular hole (remove the existing cover first).
- Place the REAR ADAPTER PORT on the PolyDryer's back vent, with the “BACK” alignment text and arrow pointing towards the back of the PolyDryer.
- Place the ALIGNMENT HEXAGON print onto the REAR ADAPTER PORT.
- Place the lid + FRONT ADAPTER PORT assembly onto the PolyDryer base.
- Square up the lid assembly relative to the base, and temporarily secure in place with masking tape.
- Mark/trace around the outside edge of the ALIGNMENT HEXAGON, marking on the inside of the lid with a permanent marker, ideally a fine-point.
- Remove lid and cut new hexagonal hole CAREFULLY with a utility knife/x-acto knife.
- 📎PRO TIP 1: Never try to cut through thick materials in one go; rather, use multiple passes with moderate pressure.
- 📎PRO TIP 2: Cut on the INSIDE of your line, then test fit the TPU seal. We want a tight fit, and you can always cut more away, but there's no CTRL + Z for life!