
1 / 9
Easy Ender 3 V2 Display Mount (Tight fit)
Zamów wydruk tego modelu
Obliczymy ostateczną cenę na podstawie wybranego pliku. Sprawdzisz ją i zaakceptujesz przed płatnością.
Zapisane na tym urządzeniu.

Needed a tighter design for my printer enclosure while it doesn't interfere with the printer mechanics.
- Ocena
- 4,667 / 5
- Polubienia
- 24
- Pobrania
- 195
- Wydruki
- 4
- Wyświetlenia
- 1293
- Oceny
- 3
Aktualizacja u źródła:
Informacje o modelu
- Źródło
- Printables
- Kategoria
- Creality Parts & Upgrades
- Licencja
- Creative Commons — Attribution — Noncommercial
SzczegółyPliki (1)Wydruki i komentarze (Wydruki: 4) (Komentarze: 6)Remiksy (0)Kolekcje (27)Powiązane
Installation:

- Print parts
- Remove original display stand from display & printer
- Remove black cover from the bottom right aluminium frame
- Insert printed parts on the 2 pins behind the display (1. Photo: make sure to place parts in the right direction)
- Insert assembled parts slowly 1 by 1 into the top right extrusion hole of the frame
- If needed: Cut the right amount of material of the top right corner from your drawer to not interfere with the display (2. Photo)
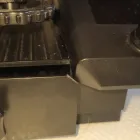
- Place cover back on frame and make sure nothing interferes with printer bed / display
There might be a little force needed to place the parts in place since I designed it to have a tight fit.
To test the stability of the design I did the mandatory wiggle test, applied some force at the corner of the screen but didn't note any problems and seems very stable.
Recommended printing parameters:
- 60% Infill
- 0.2mm Nozzle Diamenter
- No support