
1 / 1
Side Spool Mount for FlashForge Creator Pro 2
Zamów wydruk tego modelu
Obliczymy ostateczną cenę na podstawie wybranego pliku. Sprawdzisz ją i zaakceptujesz przed płatnością.
Zapisane na tym urządzeniu.

Relocates the spools from the back to the sides on the FlashForge Creator Pro 2.
- Ocena
- 0 / 5
- Polubienia
- 15
- Pobrania
- 94
- Wydruki
- 0
- Wyświetlenia
- 1302
- Oceny
- 0
Aktualizacja u źródła:
Informacje o modelu
- Źródło
- Printables
- Kategoria
- Other Printer Parts & Upgrades
- Licencja
- Creative Commons — Attribution — Noncommercial — Share Alike
SzczegółyPliki (4)Wydruki i komentarze (Wydruki: 0) (Komentarze: 1)Remiksy (0)Kolekcje (15)Powiązane
Relocates the spools from the back to the sides on the FlashForge Creator Pro 2. Uses the original PTFE tubes. Also compatible with the Creator Pro 1.
3D Printed Components
- Rod Holder (Print 2)
- Filament Holder (Print 2)
- Tube Holder (Print 2)
- Tube Clip (Print 2)
Additional Required Components
- 8 * M3x10mm Screws/Bolts
- 8 * M3 Nuts
- 16mm Diameter Rod (~70cm Length)
- 4 Zip Ties (Optional)
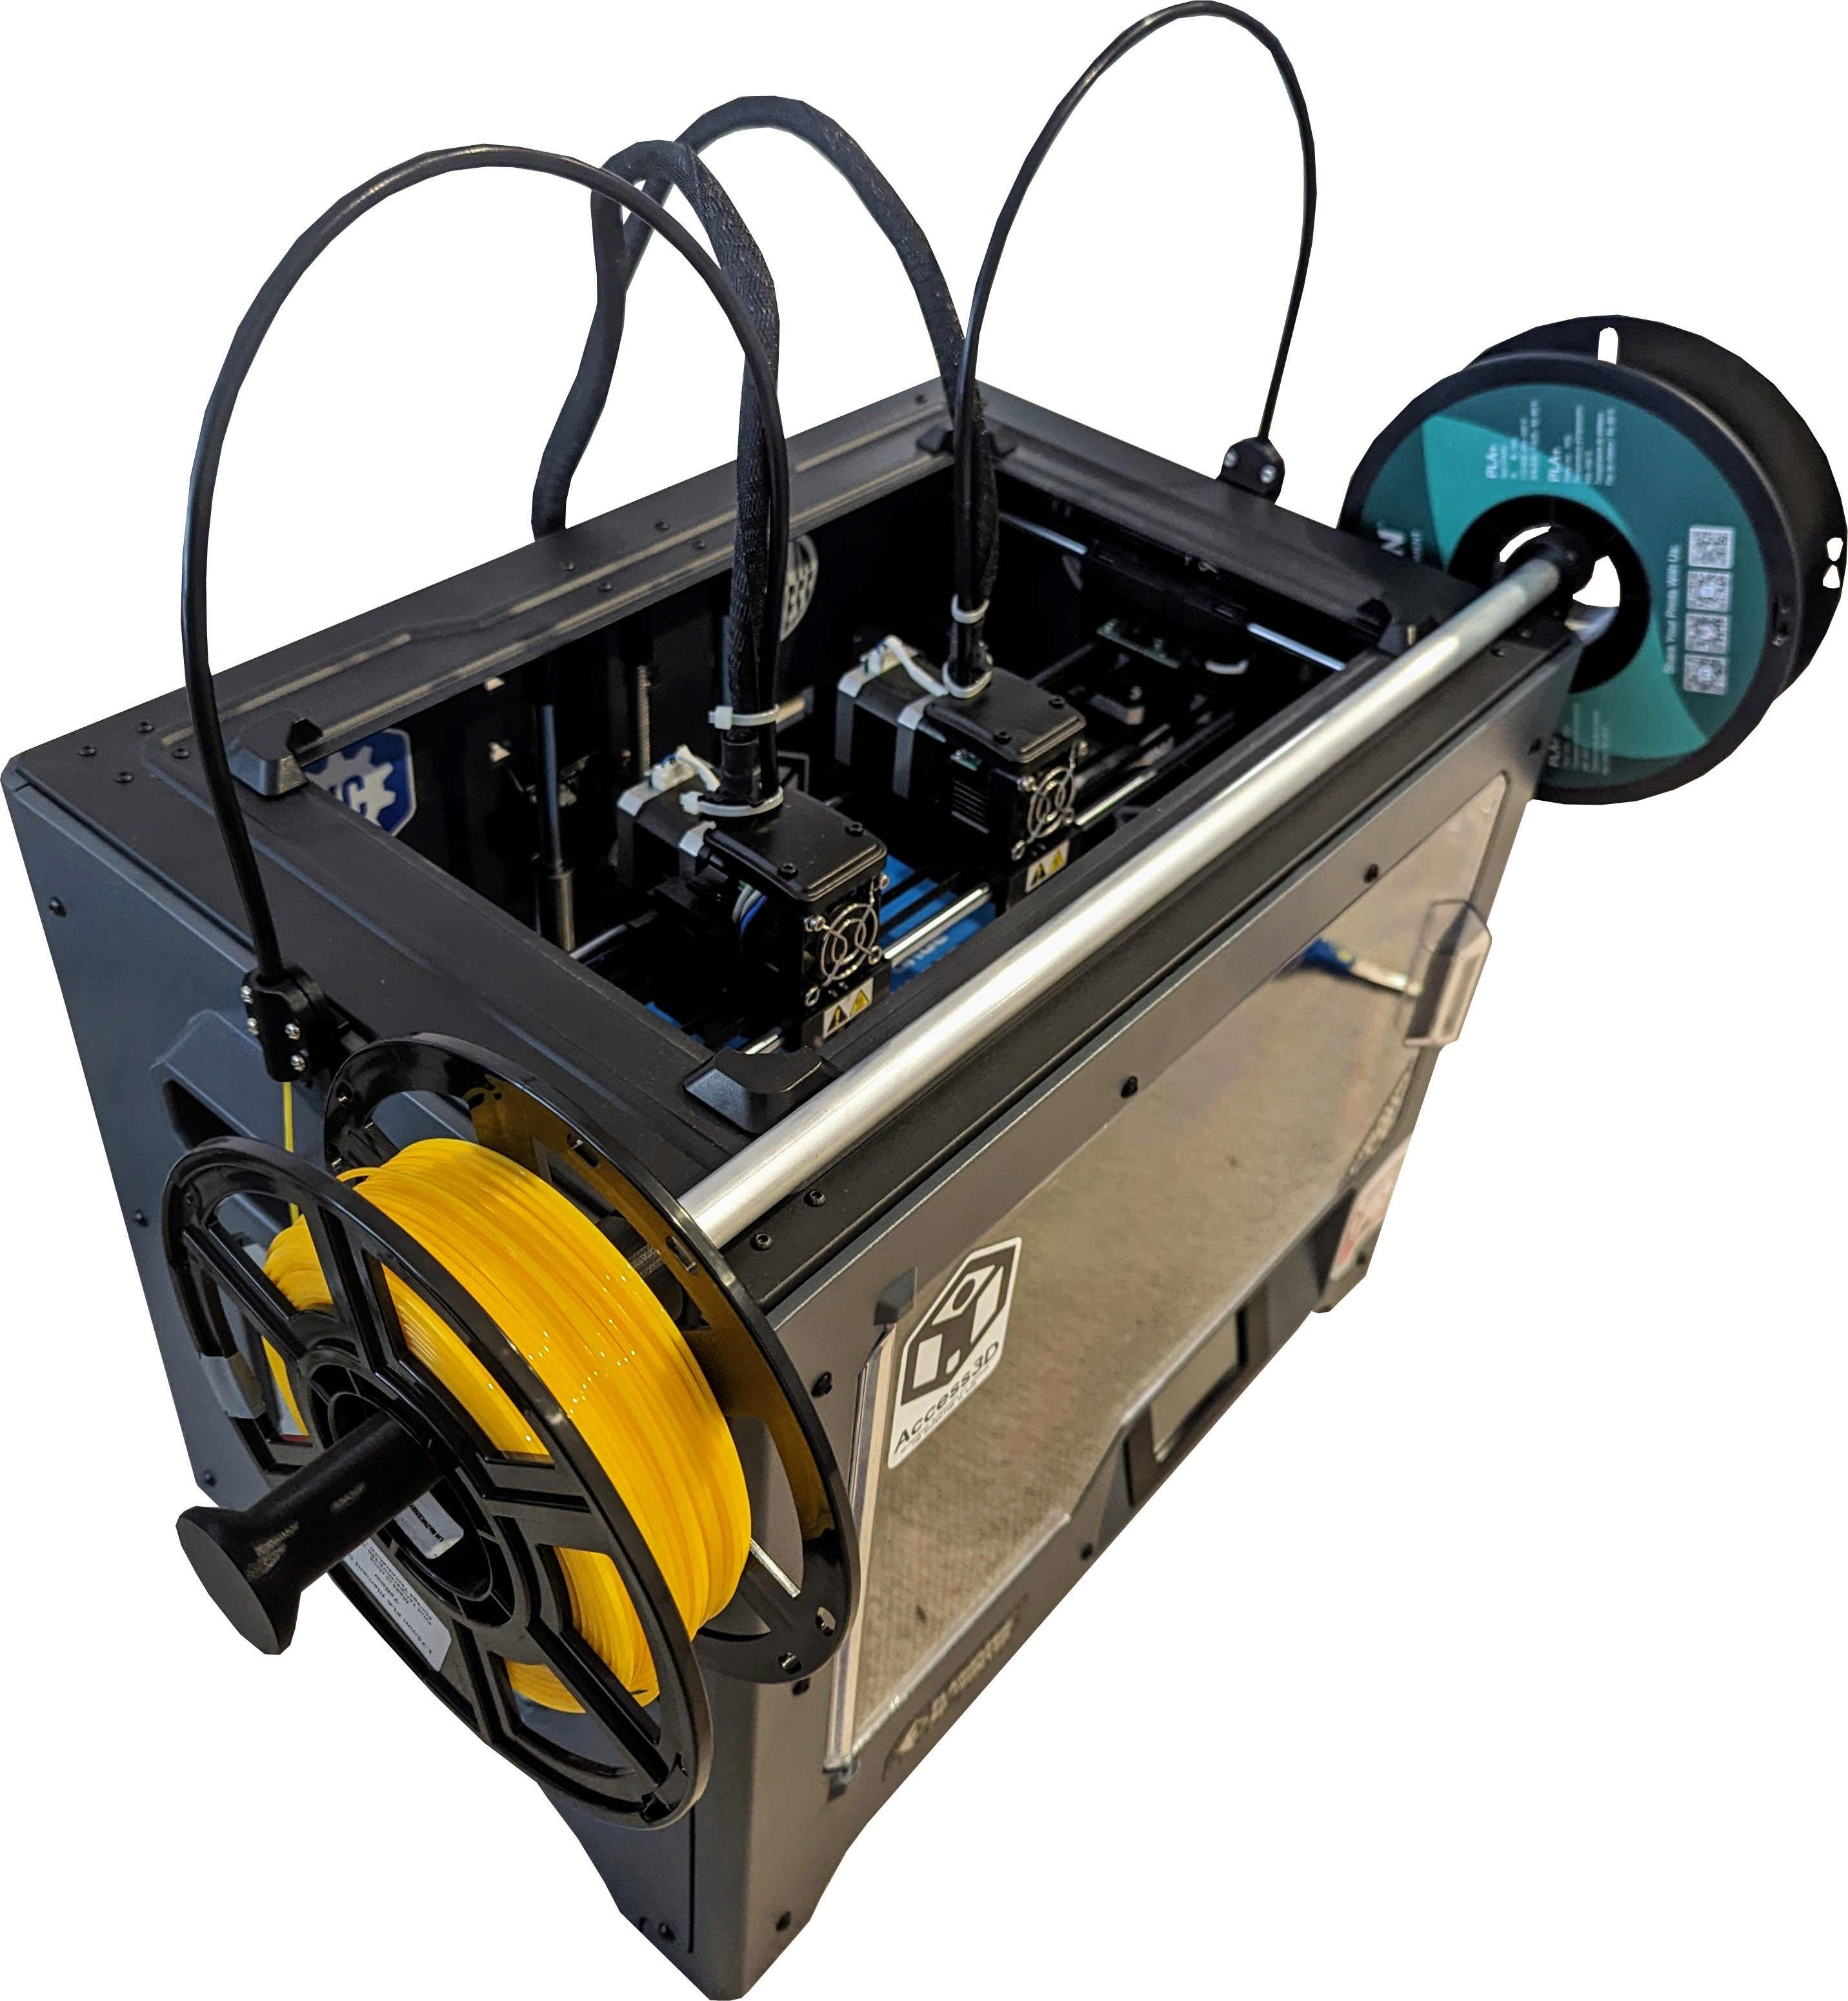
Assembly Guide
This upgrade is designed to utilise the existing screws on the body of the Creator Pro.
- Attach the 2 Rod Holders to the sides of the printer using the existing screws and mounting points.
- Insert the Rod into the Rod Holders.
- Slide the Filament Holders onto each side of the Rod.
- Remove the PTFE Tube from the back of the printer and insert it into the Tube Clip.
- Attach the Tube Clip to the Tube Holder using 4 Screws and 4 Nuts.
- Attach the Tube Holder to the side of the printer using the existing screw and mounting point.
- Repeat Steps 4 , 5, and 6 for the other side of the printer.
- Secure the PTFE Tubes to the extruder wiring using zip ties. (This will prevent the PTFE Tubes from flexing too much and possibly popping out of the extruders)
- You're done!