
Adapter: Bosch "Power4All" batteries to Einhell 18-V drill
Obliczymy ostateczną cenę na podstawie wybranego pliku. Sprawdzisz ją i zaakceptujesz przed płatnością.
Zapisane na tym urządzeniu.

Adapter that allows to power 18V Einhell drills and similar tools with Bosch "Power4All" accus (battery packs).
- Ocena
- 0 / 5
- Polubienia
- 8
- Pobrania
- 114
- Wydruki
- 0
- Wyświetlenia
- 1941
- Oceny
- 0
Aktualizacja u źródła:
Informacje o modelu
- Źródło
- Printables
- Kategoria
- Tools
- Licencja
- Creative Commons — Attribution — Share Alike
Adapter: Bosch "Power4All" batteries to Einhell 18-V drill
I have an old Einhell "LE-AS 18" drill that was, at the time, powered by NiCd accumulators. Similar drills were available from other suppliers such as Ferm, Workzone and others.
Looking for 18-V replacement packs, I noticed that we have some Bosch garden tool with an 18-V “Power4All” battery pack that was unused most of the year. I decided that this battery pack would now also power the Einhell drill 😎
The battery adapter presented here is a modified version of an adapter by Thingiverse user usedbytes (see links below). I removed the XT60 connector and modified the position of the spade connectors slightly.
Materials
- 1 defective Einhell accu pack
- 2x 6.3-mm spade connectors and crimping tool
- 2x approx. 20 cm of flexible wire (1 mm² or larger), preferably different colors
- Soldering tool (… for electronics, not for water pipes 🤪) and accessories
- Hot glue
- Your preferred 3D printer and filament
Printing
My final version was printed with 0.2 mm layer height.
I actually forgot to enable supports (these might be useful for the overhangs along the two slide slots on the sides) but the unit came out very nicely anyway.
I used black PLA and at the time of publishing, my unit is running for more than a year now 😁
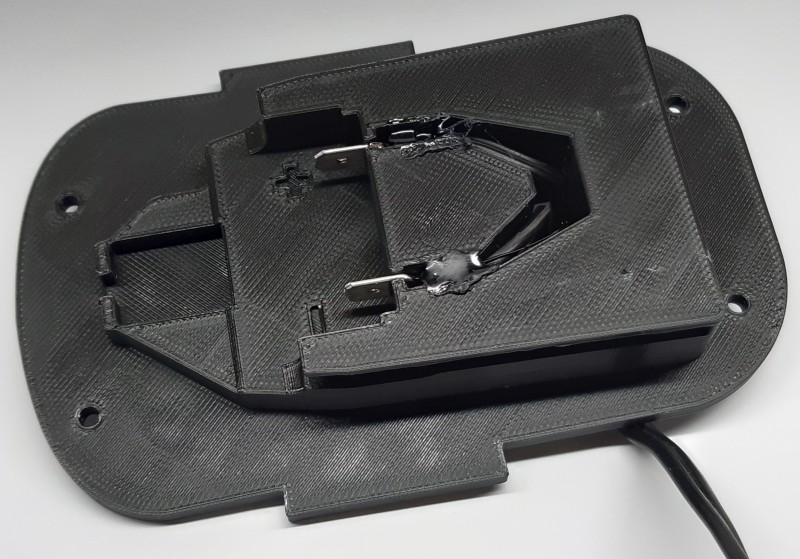
Assembly of the base plate
- Connect (crimp) a length of wire to each of the two 6.3-mm spade connectors.
- Insert the spade connectors into the base plate, then feed the wires through the hole on the back of the plate.
- Glue the connectors in place, e.g. using hotglue - see photo above.
- Test: insert the Bosch battery pack and see if it fits as intended.
- If not, adjust the position of the spade connectors.
- Also, avoid short-circuiting the open ends of the cables … 🔥
- When finished, remove the Bosch battery pack again.
Assembly of the battery pack
- Disassemble the original battery compartment (and make sure to recycle the "dead" batteries, these are neither landfill nor household waste!)
- Remove the contact plates from the upper part of the original battery compartment. Clean them.
- Solder the “open ends” of the two wires protruding from the base plate to the two contact plates.
- “Assembly is performed in reverse order” 😋 so insert these contact plates back into the upper part of the original battery compartment and attach them there … hotglue may be useful.
- Check that polarity matches the markings on the housing.
- Double-check polarity.
- Glue the printed adapter to the upper part of the original battery compartment - see photo below.
- Insert the Bosch battery pack.
- Enjoy 😁
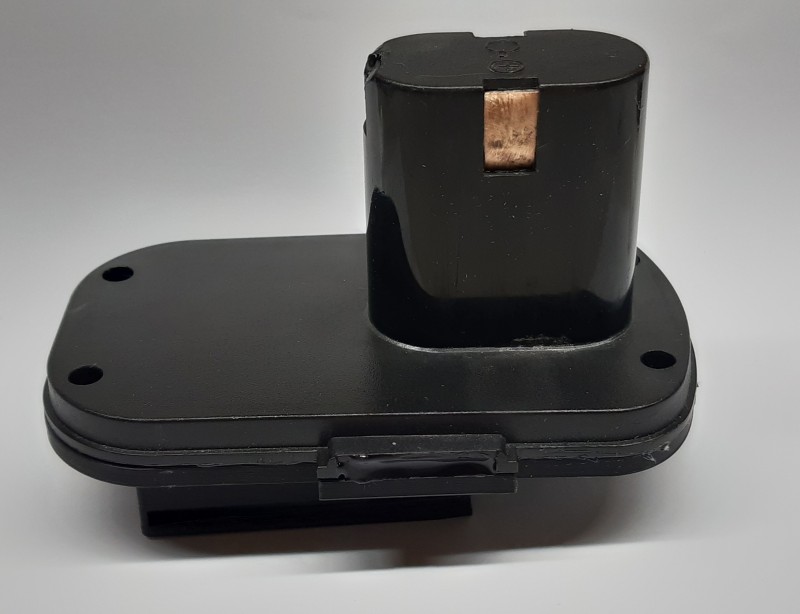
Note 1: The clips that held the original battery in place are not reproduced here. You will need to secure the battery e.g. with rubber straps - see photos.
Note 2: No, I did not use the screw holes. Black hot glue was faster 😇
A big “Thank You” to usedbytes for his model!