
1 / 3
SV01 PRO OMG Extruder Adapter
Zamów wydruk tego modelu
Obliczymy ostateczną cenę na podstawie wybranego pliku. Sprawdzisz ją i zaakceptujesz przed płatnością.
Zapisane na tym urządzeniu.

This bracket adapts the Sovol SV01 PRO hot end to the OMG extruder.
- Ocena
- 5 / 5
- Polubienia
- 7
- Pobrania
- 29
- Wydruki
- 0
- Wyświetlenia
- 1028
- Oceny
- 1
Aktualizacja u źródła:
Informacje o modelu
- Źródło
- Printables
- Kategoria
- Other Printer Parts & Upgrades
- Licencja
- Creative Commons — Attribution
SzczegółyPliki (2)Wydruki i komentarze (Wydruki: 0) (Komentarze: 1)Remiksy (0)Kolekcje (12)Powiązane
My SV01 PRO extruder gear wore down & started slipping very badly after the first couple of months of printing so I decided to upgrade to a new extruder. I picked the OMG extruder based on the data from this CNC Kitchen video.
I printed the bracket with 50% infill in ABS but PLA should be just fine.
Hardware needed:
- 4x M3 nuts
- 2x M3 x 16mm Screws
- OMG extruder F1 OMG V2S
Installation instructions:
- Fully disassemble extruder. Do this by removing the CR-Touch, hot end fan, head sink, extruder gear (my gear needed to be pried out of the cast extruder frame), extruder body.
- Once fully disassembled remove the three larger screws from the extruder assembly bracket. Thread the extruder stepper wires through the opening on the bracket.

- Re-attach extruder assembly bracket.
- Cut PTFE tube to 25.5mm. Attach PTFE tube & fitting.

- Assemble OMG extruder to stepper motor. Only use two of the included screws to attach. Confirm the orientation of the stepper connector matches the image below.

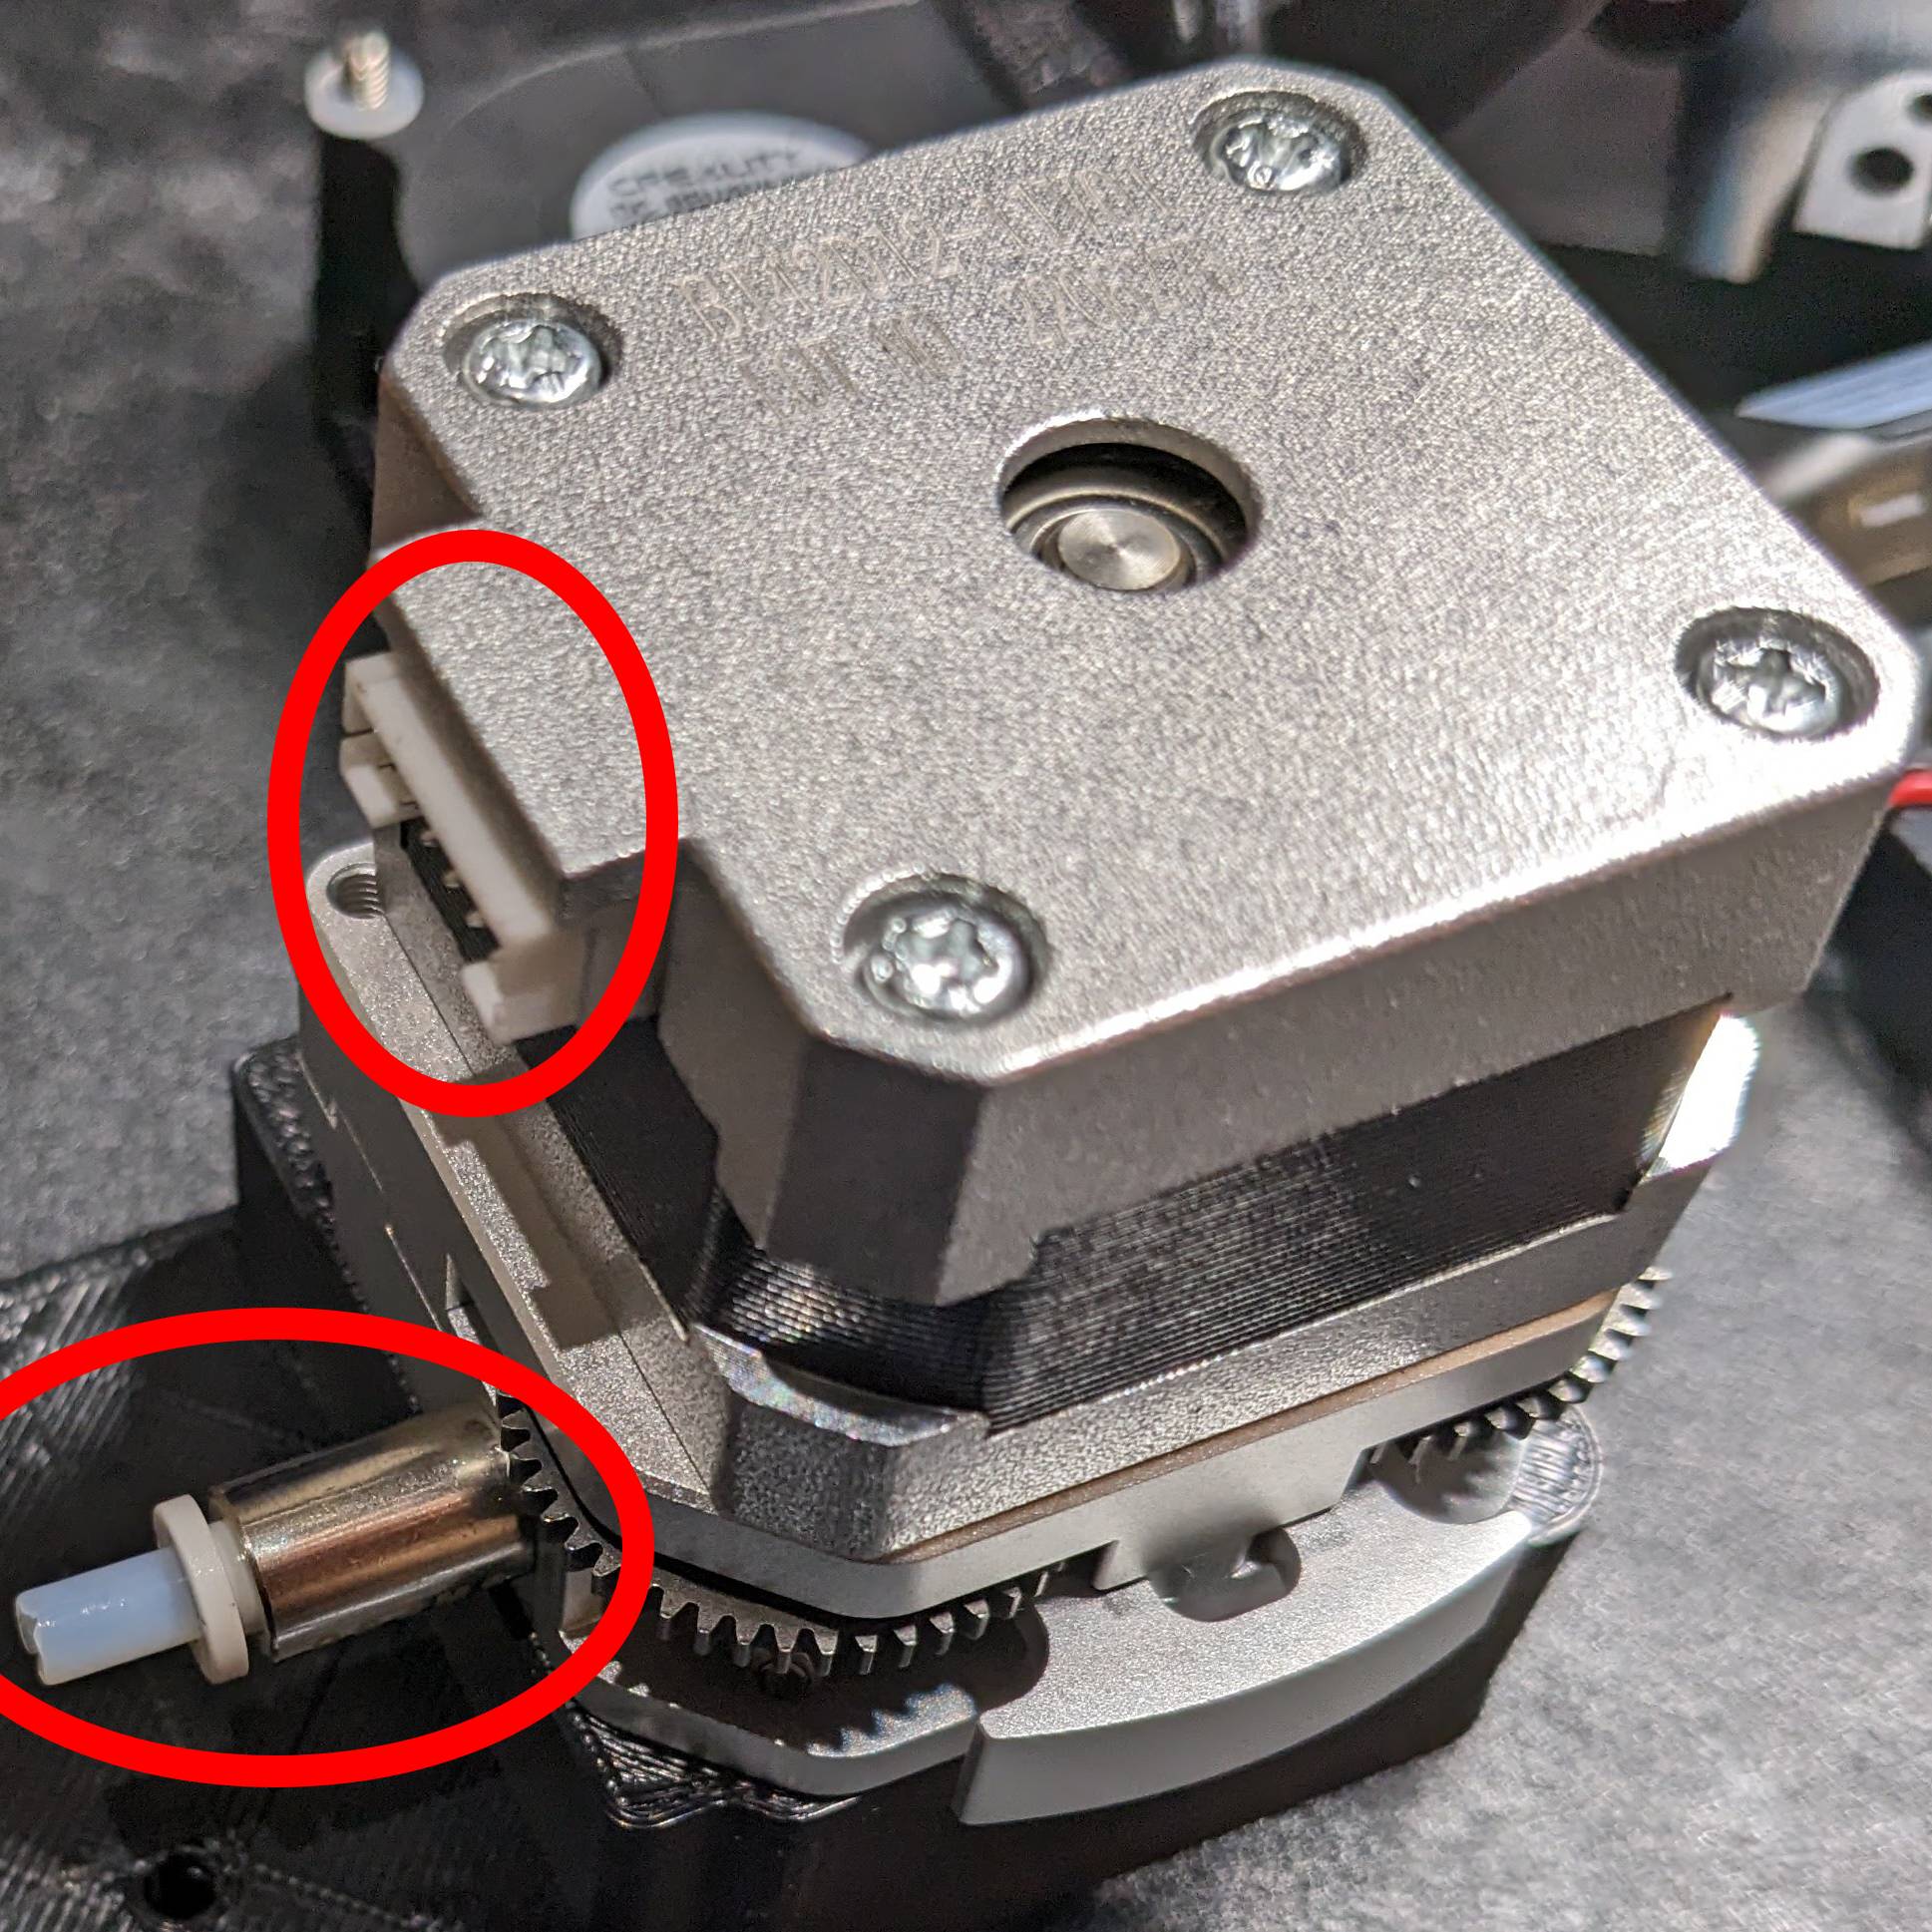
- Attach cast extruder frame & 3d printed extruder bracket to extruder assembly bracket. Use the two M3 x 10mm screws that come with the OMG extruder.
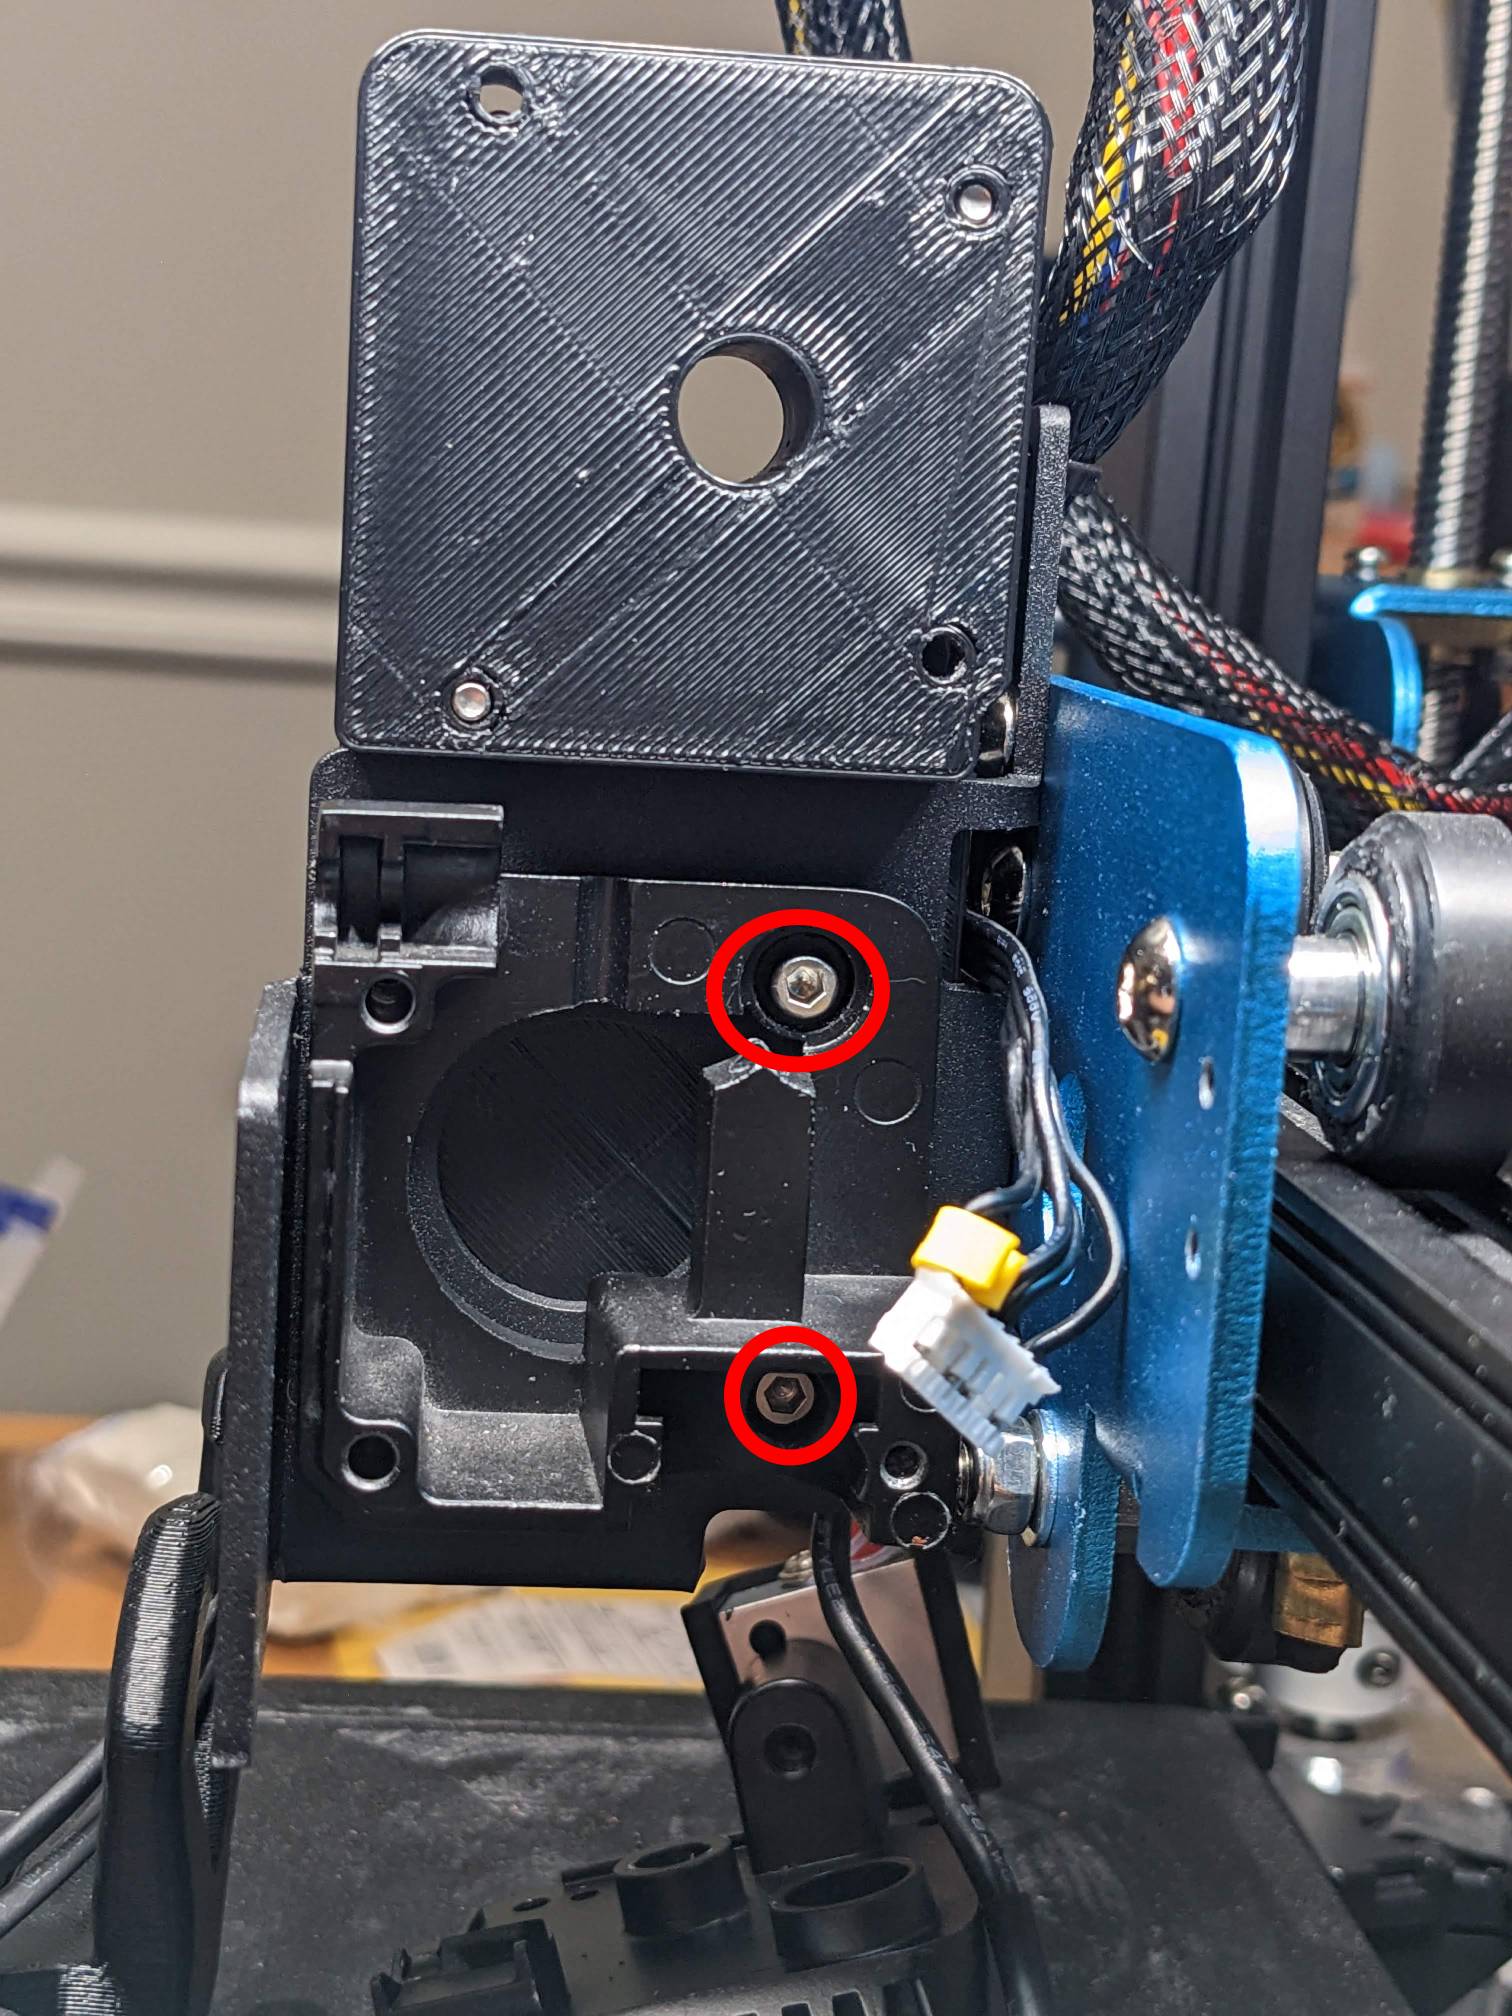
- Attach the stepper motor assembly to the 3d printed bracket. Use the two M3 x 16mm screws & the two M3 x 6mm screws. Make sure the PTFE tube is aligned with the filament guide in the cast extruder frame.
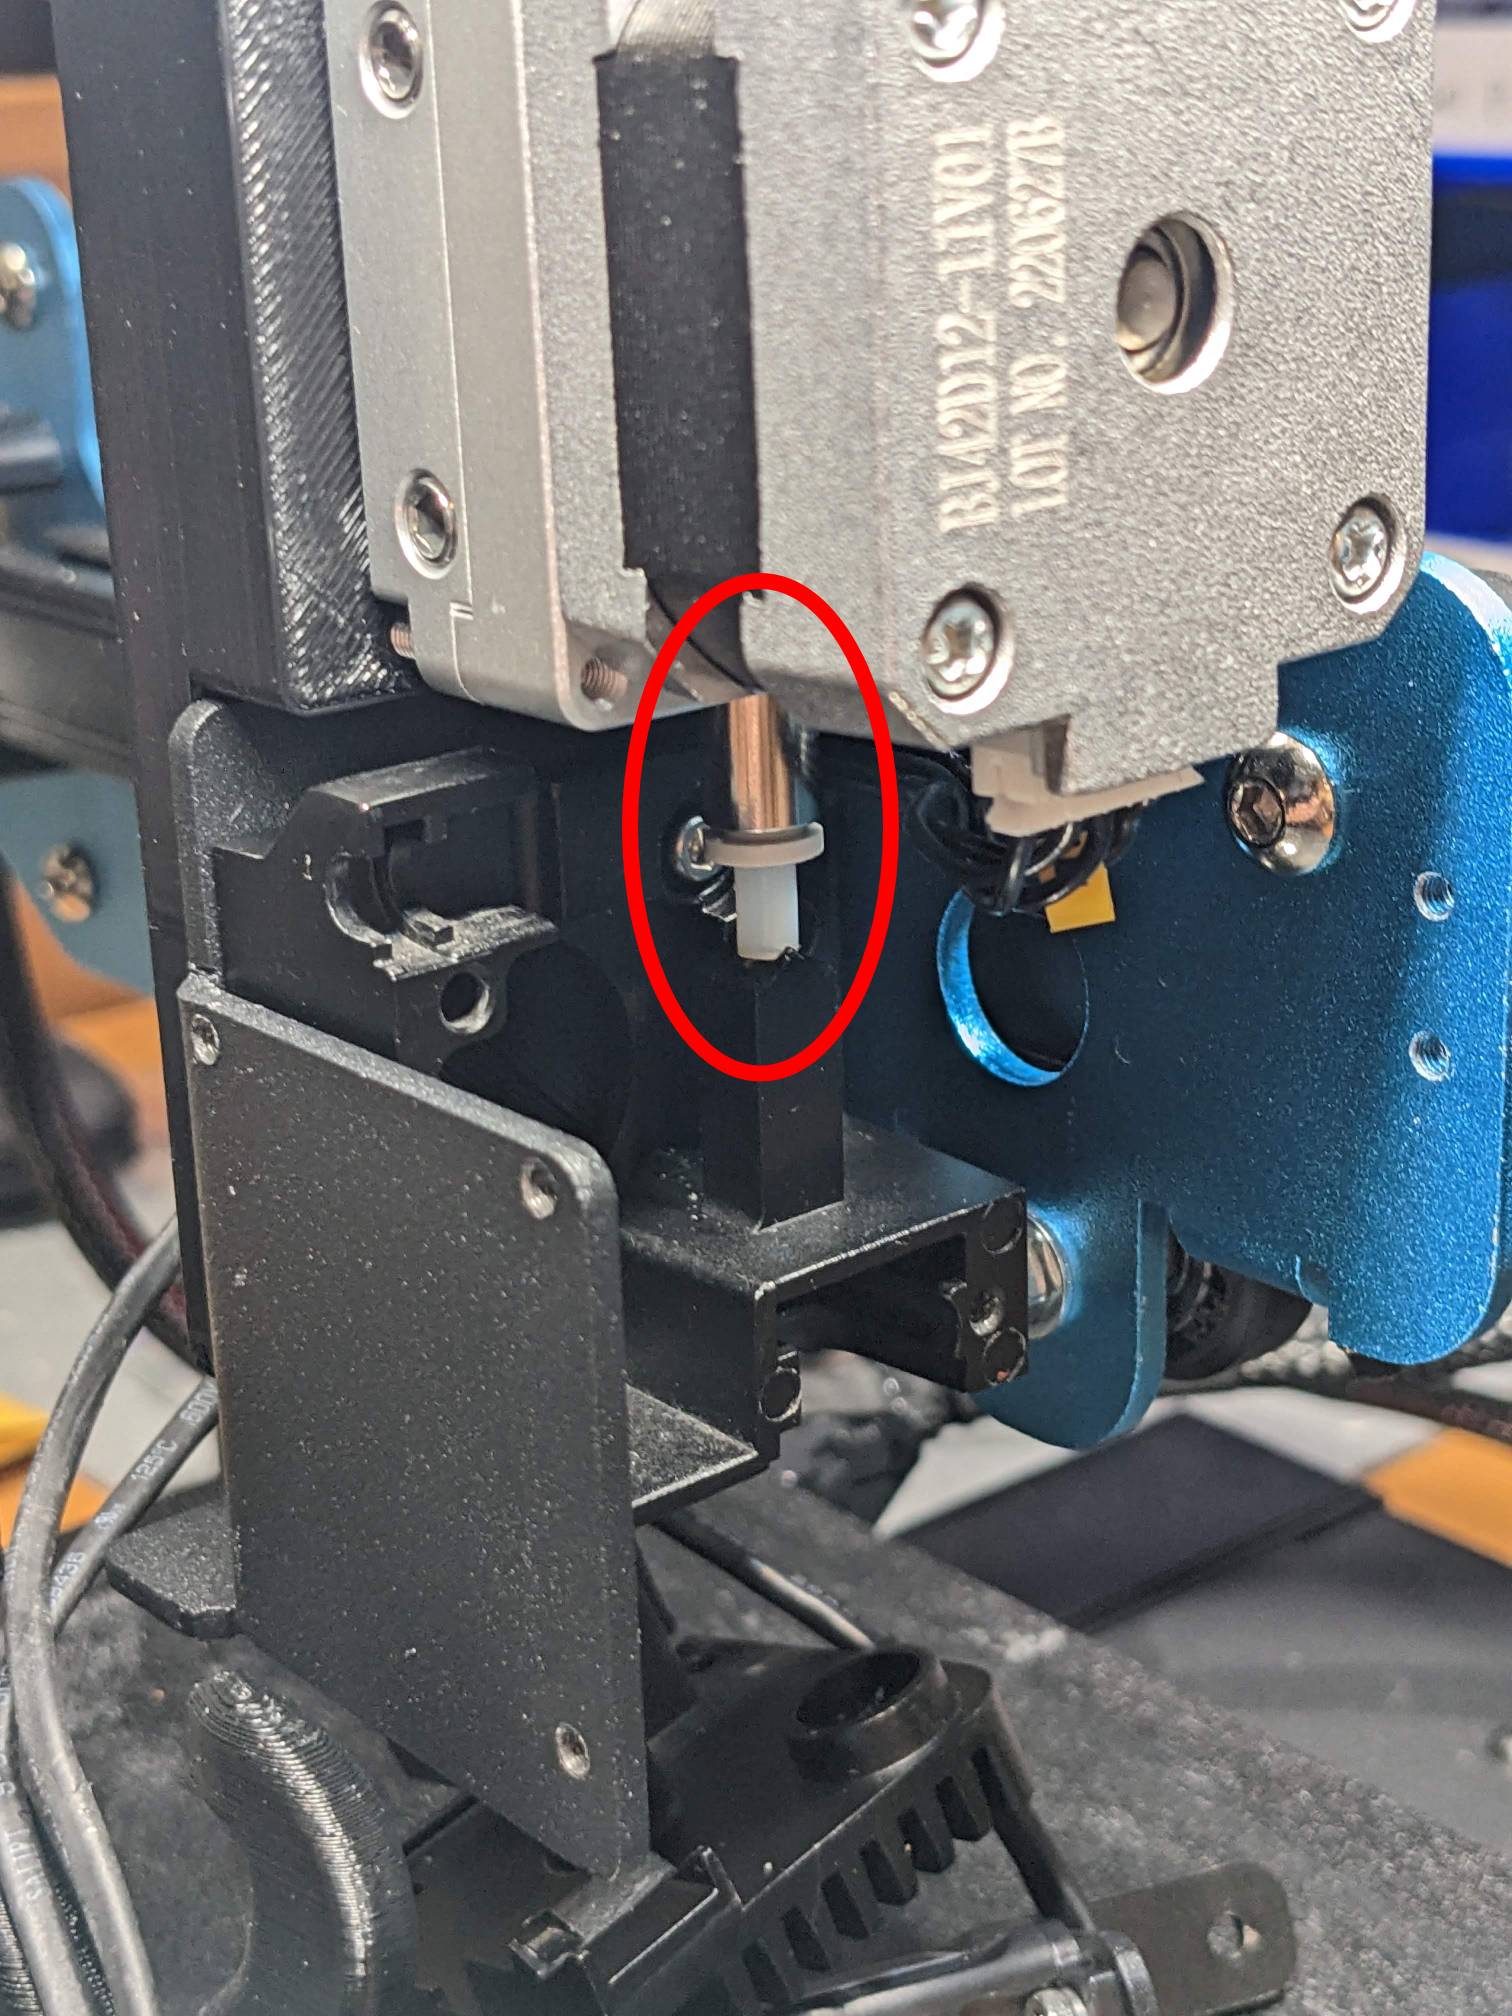
- Change the pin-out of the stepper motor connector to reverse direction. I switched the outside wires with each other & the inside wires with each other.
- This video shows how to change the connector:
- Remove the split washers from the two long black bolts (the bolts are just slightly too short with the washers)
- Re-attach extruder head sink, fan & CR-Touch.
- Tune e-steps & linear advance.