
RB67 Chimney ShowerCap
Obliczymy ostateczną cenę na podstawie wybranego pliku. Sprawdzisz ją i zaakceptujesz przed płatnością.
Zapisane na tym urządzeniu.
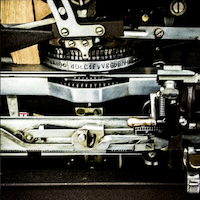
The Mamiya RB67 camera has an accessory chimney viewfinder that is pretty awesome!
- Ocena
- 0 / 5
- Polubienia
- 4
- Pobrania
- 49
- Wydruki
- 1
- Wyświetlenia
- 602
- Oceny
- 0
Aktualizacja u źródła:
Informacje o modelu
- Źródło
- Printables
- Kategoria
- Photo & Video
- Licencja
- Creative Commons — Attribution — Noncommercial — Share Alike
The Mamiya RB67 camera has an accessory chimney viewfinder that is pretty awesome! Problem is, I can't find any evidence that the viewfinder eyepiece glass came with any sort of cap for protection from dust, debris, or other damage, so I whipped up one really quickly. (Whether it turns out they did offer a cap for it is kind of pointless now, since I've designed one to fit).
Something worth noting is that my chimney (pictured), doesn't have an eye cup or anything like that, it is just the viewfinder glass and ring, so the ShowerCap is designed with that in mind. Theoretically, It wouldn't be any trouble to simply make this design taller for those chimneys that have an eyecup. I just don't have one to measure and test with, so I didn't bother.
If you are anything like me, you might be asking why the name "ShowerCap"... Well, I started working on another variant of this, where the cap is larger, and covers more but, while working on it, I thought of this variant, where the cap basically just covers to topmost part of the chimney and ring, just like a shower cap, just covers the topmost part of one's head when showering. Thus the RB67 Chimney "ShowerCap" was born and named.
To see actual prints of my design, check out the “Makes” tab (I print basically everything I design.)
Print instructions
Printer: MakerFarm Pegasus 10"
Rafts: No
Supports: Yes
Resolution: 0.2
Infill: 20%
Filament: AmazonBasics PLA+ Black/Red
Notes:
Note that the main body should be printed upside down so that the top of the cap is on the print bed. That way less supports are generated.
Note that the resolution and infill settings can be tweaked as you like, and for your needs. Those settings lists worked for me and were a good starting point (good finishing point too, really).
The supports are only for the main body (than nameplate part doesn't need them).
Remove the supports, but don't worry too much about making that surface look good, because, after removing the supports, you just glue the nameplate there and it will cover any support remnants/ugliness.